Lessons
Lesson Info
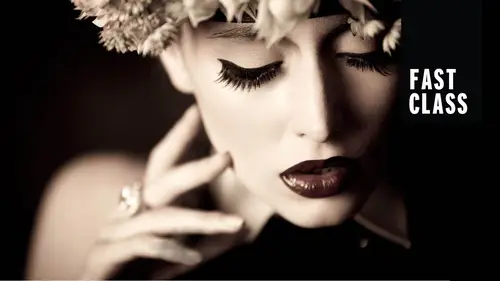
Portrait Lighting
What this segment is all about is rapid fire studio lighting setups. Ah, whole bunch of them really fast. And what I mean by that is I am going to cover if you shoot portrait beauty groups or you want something more dramatic for each one of those categories, I'm going to show you one go to lighting set up for if you have one light, two lights for three lights. And so this is going to be a lot less explanation and said, It's going to be Here's what we're doing. Watch this and it's going to be rapid fire for this section. And then we'll finish up the day with a really short segment just about how to save money on studio lighting, some considerations that would help you save and then the go to kits. So that will be kind of our last segment. So we're going to power through this, and we're going to start off with portrait. All right, so let me get this set up. I have my lovely model out here, and I'm going to put you in the stool, please. Great. And can I switch this lens and rough and let ...
us embark. Okay, so we are going to start with portrait lighting stuff. This is what I want you to take away from. This is however many lights you have. You're going to be able to have a lighting set up so you could pick and choose and then say, Oh, you know what I like what she did with two lights. I should probably get a second, or I like what she did with three. And to be able to use this as a reference, and then you'll be able to see roughly where to set the lights, all of that information. So let me get this just generally ready to go. We're gonna start with portrait, and I'm gonna pull you away from the background if you can pull that right up to the end of the seamless. And I'm going to shoot most of this on white when I need black or something darker will pull a black piece of foam core behind her or behind her behind him and then a V flat if we needed a full length. Because it's easier than changing whole background. All right, so I'll be switching between keynote and light room Let's look at the first one. Okay. Very first, go to portrait lighting set up would be a soft box in loop or Paramount or even Rembrandt with some fill. So let's get that. Yeah. Do you have the light meter? Okay, great. So I'm going to test it. My camera settings for this whole entire segment will always be I saw 101 200 of a second, and then what changes is going to my aperture. I'm going to shoot the whole thing with my Sigma 24 105 and my canon five d Mark three. And we're using the light meter to give me an approximation. Alright, Perfect. So let's start at 6.3. Looks great. And I'm going to show you later. Some considerations I might have if I were shooting a men's portrait that I would want to do more dramatic. So my drum, my dramatic section is drama and men because manner dramatic. I'm just kidding. No, it's for more dramatic lighting setups. Okay, So we had that and we can build in a reflector if you want to fill it in. That is a very, very basic portrait. Lighting set up. Okay, so the next one portrait lighting, set up number 11 light and opt the box or a soft box with or without fill. The further you put the reflector, the less fill it is. The closer you bring the reflector, the more fill it is and lighting set up. Number two is going to be the same soft box, but instead with a strip light on the backlight. And I am going to be torturing my dear John Cornyn shallow this whole time because we're going to be bouncing around. So I'm gonna let you know my thought process. The next thing is, since I want to use the strip box to help him stand out from the background. That's what I use a second light for the highlight to separate. What I want to do is I want that background to be just a bit darker. So we've talked about how to do that. I'm gonna angle the Octa box away from the background. It's called feathering, so less light will be on the background. If I wanted to, I could add a piece of reflector, our piece of black fill on that back side of the of the light so that no light would hit the background on Ben. I could decide. Do I want this to be Looper? Rembrandt? I don't want it to be flat lit because I won't really see the definition. It wouldn't be a reason tohave that definition there. So we're going to go toe about Loop and Rembrandts and we put the strip light opposite on the shadow side of the face. As far as ratios, I usually start with them at a similar power output. And then if I want more drama, I pump up that that strip light. If I want less, I turn it down. So let's take a look. We have to light so far. Great, perfect. And so what you will see. I think this looks really nice is you're going to see some shape to his face because we've added a little shadow, a little dimension, and then just a nice, subtle highlight that carves them out from the background. I can try to feather this light even more, and if I want that background to go a little darker, remember, I could bring this light in closer to him because as it comes in closer, he gets brighter. So I have to close down just a bit. And then I may need to pump up my strip light to compensate. Good. I'm going to go a little bit more dramatic. Kind of Move it more towards Rembrandt. Perfect. Great. In central street, Perfect and shit. Out and down a little. Great. So I'm able to make that background just ah little bit darker. If you didn't want to use a strip box for this definition instead, you could use barn doors. It depends on what you want, but it would give you the same general feel further, have the light in the front. The less dramatic it is, the further off to the side would be, Ah, little bit more shadow. And then you can add some. Fill someone. Just add a reflector to this. This would be perhaps, if I were photographing Ah, woman. I wanted a little bit more shadow to the face, but I didn't want to be so dark. Perfect reflector fills it in. Great. You could also shoot a guy like this, but it makes it a little bit less heavy in the shadows. So far, we've got one light for portrait, two lights for a portrait. And now we're going to add in our third light. The third light that I would use in this instance would just be, ah, grid on a backlight. So whatever late we have around here and what I'm going to use that for is I could create something called checkerboard lighting and what checkerboard lighting is, and I actually will probably find a way to put the black behind him. I'm gonna go darker in this instance. Yeah, if you wanna grab that. So what this is going to allow me to do is I'm gonna have more of a low key set up, but I'm shooting both low key and a high key set up. We're gonna put the black visa behind him. We're gonna have this in the exact same position I could put. The soft box could be in Rembrandt. I could put it in short, light position, but similar. So I'll have highlight side of his face against the black of the background, the shadow of side of his face with a little bit of separation. And I can pop a grid on the background for a little bit of a highlight. So let's take a look so far, what I have that looks nice. That doesn't need to move. So we're just adding one little change and let me test this out. And I told you I'd be putting them to work every brutal. Okay, so so far, what I'm looking at is highlight highlight side of the face against the background shadow side of the face of the rim, rim light. And then I've got that grid above his shoulder. Alright, so let's take a look. And also for the shape of his face. Since I have the light off to the side, Can I turn you a little bit to your right hand side? Yep. Exactly. I'm gonna turn him that way so the shadows fall towards me and this is short light. So it'll be like a short light loop or Rembrandts. Perfect. And I'm gonna have you pump up that great a little bit more just because of the surface it's on. It's not quite having the same impact as it would on the black background, so I'm just making a little bit stronger. Good. Nice. Here. Great. And in the next shot. Have you pumped up a little bit? Next shot. What you could dio is if you want it to be along like oval shape that goes across the background where it is is great. If you want it to be more of a circle, you have to bring it more to the front so that it doesn't stretch out over the background. So can I have you just bring it closer to him. Great. And if you point a tiny bit lower, I'm angling it. So it'll be over his shoulder. Great. Perfect. Right there is perfect. Great. So this would be checkerboard because shadow highlight shadow highlight. So that is the low key version of if I had three lights, all right, ready for me to stress you out even more. Okay, so now it's gonna be like this for this whole segment. Okay? So the next one would be a basic white portrait. I'm gonna I'm gonna basically have you out here the whole time, if that's okay. So I'm gonna have you grab that black V flat, bring back the white background, and we're going to strip off the, um, the strip lights. All right. So what I'm going to do is we're going to light the white background. If I am not shooting full length, I could just use silver dishes or bare bulbs if I need more. Even spread like we talked about to light a white background white. We would grab umbrellas and feather them across the background, but I'm going to keep it to be kind of a close shot. So to eliminate his face, I'm going to put this shot a little bit higher key because I am on white. So I'm gonna put it in a loop position. And what I wanna watch out for is when we have those lights pointed out, the white background I wanna watch out for spill from the back lights. That would be one of my main concerns, and I'm going to check with John. Once we get to sit up, we'll check the ratios. We want to see how bright that background is compared to the foreground. I can check it in my camera to see if it's flaring over and if it's blown out. But generally when you have a white background, you want it to be 1 to 2 stops brighter than your main light. So if your main light is that fate, your background light when metered, you'd want it to be F 11 or F 13 or 14 somewhere in that range to give you a pure white without it flaring out. So I'm going to have you point those back to the background and we just put the barn doors on because since we're doing a close up shot, I don't need to have the umbrellas to spread it out. It's close up. It's not like I need toe evenly light head to toe. Um, it's on with the barn doors. I'm going to use the barn door closest to him to block off light. But I'm gonna open up all the other ones, and I'm feathering it across the background like that, and I'm going to start off without my main light on just to check and see if I'm getting any spill from those back lights that I don't want. And so I'm looking at it, and you know what you'll notice is it's nearly a silhouette. But that little bit of light on the left hand side of his face is from the White Wall, and it's still a bit from him. But even just that white wall over there is what gives him that little tiny bit of film. All right, so that looks good. I'm gonna check my info. My hissed a gram, and it is just barely almost a pure white. So I could open up a little bit more to make it pure white. I could meter it. And if you wanted Thio, he's being lovely and he says, showing how I could make it pure black. Look at me if I block off and it's actually didn't get too much darker. So, you know, I'll tell you the other place could be I got a bit darker. The other place it could be I've had this happen for is it reflects off the front of the soft box. I was, like, forever trying to figure out what am I doing wrong. And I had this massive white reflector because it was a front of the soft box. So that looks pretty good, pretty even white background. So I'm gonna have you take a meter reading of the background for me, and then I'll be able to do my math if it's one or two stops brighter than the main light where I want my main light to be. So right now I'm guessing that it's it about guessing. It's a dough. We'll see. Seven. Okay, cool. That's pretty close. Great. So then can I test this light and figure out where we want it to be? Got it. So, ideally, if that background is 70 it should be like a stop brighter. So maybe I wanted, like this late at 50 or 4.5. I wanted at least ah, stop less at minimum to be nice. White light. 63 Okay. And you can change it from here. I just don't know which one channels I haven't said on. Everything's on one. Everything's on 15618 All right, do a little bit more. Okay, let's get more test. And now. All right. So we're gonna try this and notice how he told me to pop the light once I turned the power down. I've got to dump it all because it had all that water in the bucket. Have to empty the bucket before I refill it with a lesser amount? Uh huh. I did not focus correctly, so we're gonna do that again. Perfect. So what I'll be able to see when I look at this next shot is it's a nice white background. There's decent shadows on the side of his face and not too much spill from behind. If the hair starts to piece apart a little bit, that means that maybe the background a little bit too bright so I could turn down the power of the background. Or what I can do is if I turned up the power of my main like just a little bit. I have to close down everything so the background becomes darker. It looks darker because I had to close down my aperture in general. So let me just go toe 56 Perfect. That's great. So this would be just a nice, high key portrait on a white background with a soft box, right? So that is portrait lighting with one light, two lights and three lights, high key and low key
Class Materials
Bonus Materials with Purchase
Ratings and Reviews
Dennis Day
Awesome class. Lindsey Adler is an excellent teacher. She explained some basic concepts that I couldn't figure out on my own. The section showing 1, 2, and 3 light setups moves pretty fast. So I'll watch that again. This Fast Class was nice for me because I don't have time to do a full lengthy course.
Colin Cunningham
Great Course, Lots of great information through a variety of examples. Learned tons from this course, and loved the wide variety of lighting setups for Male and Female models as well as groups. Would recommend it to anyone new to portrait photography.
Student Work
Related Classes
Studio Lighting