Lessons
Lesson Info
Lighting Terminology
where I want to start is with that terminology stuff I talked about. So when we talk about these terms, it's so that we can use them to refer, um, toe lighting. So when you're getting educated by someone else's, well, there's kind of a common set off of lingo so that we're all on the same page. So I'm gonna get started with that terminology to get a set up. All right, so the very first word term that you need to know is broad light. I never use this word like I never talk about this, except for if I'm trying to explain what I'm doing alright, What broad light means is the shadow is going away from the camera. So in this instance, her head's turned to the side and the shadows being cast this way away from the camera. She's broadly lit. There's a lot of light towards camera, and technically, if you're trying to make someone's face look wider broader, you would light like this because more of their face is illuminated. I'm gonna assume that's where it came from. We use that, um, but then ...
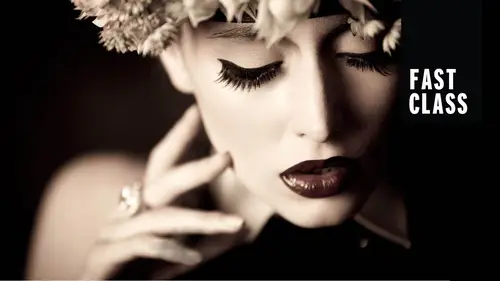
short light is the opposite. The shadows are coming towards the camera, and it makes someone's face look much more narrow. So this has to do with where the shadows are falling broadly. If I'm the subject, the shadows are falling this way. In short light. The shadows would be towards the camera, all right, so keep in mind something that you want to know is any time you want more dramatic light drama drama drama is shadows. Shadows create drama. Flat light, no shadows, not dramatic. It doesn't mean it's not beautiful. I use flat light all the time for beauty photography. But if I'm going for something dramatic, it's going to have shadows. And if I want insanely dramatic short light takes me there because you see that much more of the shadows because it's towards the camera. So in general, if you got your image, you've had shadows. You're looking at it saying, No, I want more drama. Probably try shortly. We'll see. We'll actually demo what short looks like when you set it up. All right, next one. I know forever. I was really confused about this, so I was excited to try to put it in my presentation. Flat light means minimal or no shadows in general. Usually the light is more centered in front of the subject. Usually it's a little bit lower, just not many shadows in general. But here's a misconception I had. I thought flat light had to be dull, and I thought that it had to be high key, which we'll talk about, which is why I put this photo in there because it's flat lit. But it's not dull, and it's not high key, like I thought it had to be kind of literally flat like like not many blacks. No, it can still be, Ah, picture like this. But if you look not many shadows underneath her chin, it's just kind of evenly lit with minimal shadows, so that would be flat like on the other side is dimensional. Like if you say okay that that that image, it's really sculptural. It has a lot of dimension to it. It means you're using shadow to make your photograph look more three D and often dimensional light tends to be a little bit more dramatic. It uses shadow to sculpt the face, and if you look in the flat lit example, I mean she is actually flat like she looks very two dimensional. It's all kind of on one plane. The shadows don't let you know kind of the depth of the photograph, but when you go to the next photo, you do see some depth. The light is coming from behind. It gives the direction so it doesn't look as flat. There's no right or wrong answer. It's just different effects. So if I talk about okay, right now, we're flat. Lighting means the light is going to be more centered more to the front, less shadows. If I say okay, let's create dimension. I'm going to use shadows to create depth. So those are the two main descriptions you should be aware of. So over and over again, I'll say shadows. What give you drama? If you want more drama, create more shadows. And if you want your picture toe, have more depth to Seymour. Three dimensional. You sculpt with shadows so over and over again, I'll say sculpt with shadows, and the other part is highlights. When I use highlights, it's usually to help someone stand out from the background so they don't blend in. I'm carefully placing those highlights, and this is all things you'll see over and over again. We'll get into it more. Alright. So direction of like here these words that maybe some of you have heard before Paramount Blue Rembrandt like, Well, we're gonna take a look at what that all means. All right, So I'm going to start by saying when I set up my lights, I don't really think about exactly if it matches one of these lighting patterns, but it's a shorthand for discussion. Okay, so a word you may have heard before a term is paramount lighting. And that means that the light is centered in front of the subject. And can you see the shadow from her nose and her chin? They're basically straight down. There isn't a shadow cast to either side. The light is pretty centered. Shadow goes directly beneath the chin and nose. Um, this tends to be used. Mawr on women doesn't have to be, but it tends to be more for lighting women. Um, it gives you less drama, but it is really good often for beauty shots. You'll see this when we do. On Day three, I'll do a little bit more beauty photography. Paramount lighting is used all the time. It is also sometimes called butterfly lighting and butterfly light is when you raise the light up high enough, the nose will create a little shadow directly underneath the nose That looks like a little butterfly. I don't use it that often, but we'll take a look at what that does look like. So Paramount is right in front least drama. Minimal shadows, if any. It's more flat lit doesn't have to be completely flat lit, but it's more flat lit next one. Next one is called Loop, and the reason it's called Loop is because the shadow of the nose makes a little loop. Makes a little shape. So looking at this photograph, there's a tiny little loop created from her nose, and Luke could be a tiny little shadow from the loop. Or it could be much longer, just a term. But the one that you might have heard off would be Rembrandt lighting, probably, and Rembrandt Lighting is distinctive because of the triangle of light it creates underneath the eye and the key for me trying to set up Rembrandt late, which what you'll see this is when I'm moving the light. I wait for that no shadow to stretch out, stretch out, stretch out, stretch out and eventually it meets the cheek shadow. And when you hit that, that's what gives you that triangle. So that's usually what I'm looking for is I'm like I'm moving the light watching that shadow get longer until I have Rembrandt. Rembrandt is more dramatic, and it is more It's a little bit more common in traditional portrait. Or if you're going for the dramatic look and then lastly, this lighting set up that I use like never. But I'm gonna put it there anyway, um, is split light. It just means you close up that triangle now. One side of the light faces illuminated the other side is not. So when I say that I don't ever use this, it's just because the type of photography that I dio I mean I see it in movie posters all the time. It's meant to represent the duality of this individual. They look a little bit sinister, too dramatic. One side of their faces. Let the other isn't I mean, there are places to use it. I just It's not as common in portrait photography. Okay, so all of these things, if you notice, are not exactly based on where the light is related to the camera. It's based on those shadows, more or less on the face, which means all of that you can rotate and make it short light. So there's short lightning shadows coming towards the camera there, short late, Paramount and they're short late loop and they're short, light Rembrandt. And so, just to show you what those look like when this is, this is the summary of them, by the way, just to put this because it's nice to see it all laid out. Paramount straight centered. Move the light a little bit off to the right. You get the little loop on the nose even further gets you remember even further to the right. Gives you split like all right, but let's look at the short light version. All those words still apply, but notice the shadow from her cheek towards the camera so it's short light that little shadow from her nose towards the camera. But it's still loop Now. You got the Rembrandt that triangles created, but the shadows towards the camera so it's short, like Rembrandt and then split light. One side of her face is lit. The other side isn't
Class Materials
Bonus Materials with Purchase
Ratings and Reviews
Dennis Day
Awesome class. Lindsey Adler is an excellent teacher. She explained some basic concepts that I couldn't figure out on my own. The section showing 1, 2, and 3 light setups moves pretty fast. So I'll watch that again. This Fast Class was nice for me because I don't have time to do a full lengthy course.
Colin Cunningham
Great Course, Lots of great information through a variety of examples. Learned tons from this course, and loved the wide variety of lighting setups for Male and Female models as well as groups. Would recommend it to anyone new to portrait photography.
Student Work
Related Classes
Studio Lighting