Lessons
Lesson Info
Shutter Speed
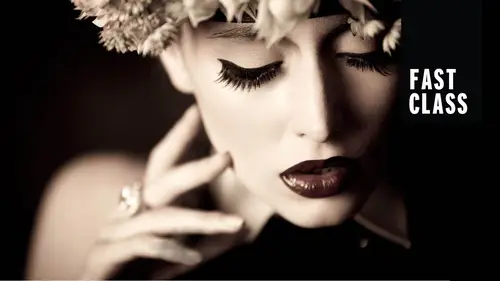
this is studio lighting 101 And so I am going to start from the nuts and bolts from the very basics and build up. We're going to start with everything from how to figure out what settings to put on your camera in the studio. We're gonna talk about all the different modifiers, which ones you might use for what purposes. We'll start off by just covering what exists, and then eventually I'm going to talk the very end. If you could only have one modifier, what should it be if you could only have to If you could only have three or if you could only have four, we're going to kind of build. So we'll start off with one light and one modifier. Go through that. I'm going to talk about where to place your light, Why it would make a difference, like all of these things so that once you have the foundations, it's just like kind of like cooking, except for I suck it cooking. So lighting is my cooking. Okay, I grabbed the bits of ingredients. My ingredients are the modifier choice and where I placed ...
the light and then the power of the light and I mix it all together and I have a million different lighting setups. So this is definitely a one on one class. And I did wanna kind of foreshadow a little bit the direction of where we're going. Um, for example, day to one of the questions that you might have is, uh, purchasing questions like, What's what's like a pack versus a head mono block constant Like there's all these things to consider. Well, day to I'm going to start off by talking about the most commonly asked questions when buying your studio lighting. So I'm gonna help educate you on that, um, on those types of things. And then on day three, I'm gonna answer the 10 most common problems in studio lighting and there are a whole bunch of different problems on. I'm thinking of the things that I struggled with. I've been a photographer for 15 years now, and I started off with the studio that was in my parents living room. Um was not too small of a space of pretty small space, and I had hot lights. I think they were like meant to, like incubate chickens. I'm not even kidding like, I think that that was their purpose. And I had a strip of these hot lights that I said on the floor, and I thought it looked great starting off. And I have since learned a little bit more about lighting, so I've been through all the struggles that you've probably been through. I started off with two umbrellas. I put one on equal either side. Equal power went for it. There's a little bit more finessed lighting than that. I have since learned so all of these things will talk about and I'll talk about lighting, white background, full length, how to light a group like so many of these things. So we'll start off basic and build up to those common questions. All right, so with that, I will get started. And I did want to let you know that I am a fashion photographer in New York. So if those of you don't know me, I have a studio in Chelsea and I shoot in the studio all the time, and it definitely appeals to my control freak sensibilities, because you can control anything and everything when you're working in the studio. So if you do want to see my work. I am starting with probably more essentials, more basics. But you can visit my Web sites. Lindsay Aldo photography dot com and get an idea of the type of a little bit more advanced things that I do as well. All right, so let's jump into this. I have found that many times simple is much better. And so all today will be working with just one light and nothing more. And that's fantastic and awesome. And I think you should be excited for those of you. Don't own a single piece of studio gear because then it's pretty inexpensive to start out. But you can still get the control so more complicated is not better. And in fact, it can be worse because you're trying to figure out where to put things and not interacting with your client. Like this whole lighting thing you shouldn't even have to think about. Once you've got it set up, you should be interacting with your clients should be almost secondary, so keep it simple, and what we'll talk about is where to put your light, what to put on your light and how many lights toe have like thes air, the essentials that will address today and then, of course, throughout the three days. But I did want to dispel some myths or some things that I thought about What does not make you a better photographer? What does not make you better at studio lighting? And here's one that really overwhelms me when I took my first studio lighting class terminology. Okay, so we're going to talk about some of these words that maybe you've heard before. Ready, short, light, broad, light, high key, low key, flat, light, dimensional, like loop. Rembrandt split like maybe you've heard of all these things. I used to be really overwhelmed because people were like, Oh, yes, we're going to put it at a split light position and I want tohave a lighting ratio of and it just kind of sounded like noise. It made it seem really difficult. I'm going to address these terms primarily because they help you learn and communicate. If you go watch another photographer's class, they might say something like, we're going to place the light in a loop position. Well, it would really help to know what that means, but you do not ever need to know that for your clients, they don't ask you. Yes, I would like to be lit in Paramount, please, like they don't know what that means. And so most of those terms are just to help you learn, so we will address them. And so when I mentioned where I'm putting the light, it's a quick reference, so just know terminology doesn't make you a better photographer, but it does help you learn. So I'll have many terms that go right up on the screen with the definitions there and for anybody that does purchase the class. You are going to get all of my slides so the definitions will be included along with reference photos. Next thing that doesn't make you a better photographer is fancy gear. Uh, the most complicated solution often is not the best. And just to give you a real life example for me, I shoot with a lot of high end model agencies. The favorite photos I ever produced for them ever are one light beauty dish, black and white model, looking at the camera like there's a very specific look that they want and so I could have all the lights in the world and doesn't do me any good. So most of the things we'll talk about today or things like an octave box of soft box, a beauty dish like some of the more essential for lighting setups and umbrellas as well. Um, I know that in lighting, it's all about problem solving. And that's why I have the whole section about the top 10. Uh, most common problems like Okay, so if there's a shadow on the background that you don't want there, can you switch your modifier the angle of light? And so it's It's all things like that that were problem solving all the time. And so I wanted to give you an idea of some of the work that I dio that is just one light. Both of these shots or just one light. Ah, beauty dish on the left and nothing else on the right will go through all of these on the right. It's a beauty dish with a white reflector. Below. These are some of the shots that are most popular in my portfolio or looking at thes right here, Bt dish on the left, Ah, parabolic umbrella on the right and so there are more complicated tools for the job. You don't need the most of the time, so don't stress out about that. So how we're going to get started is we're going to talk about how your camera should be set because you have ISO shutter speed aperture all of those things that you've probably played around with shooting with natural light. But they have a little bit different significance in the studio. So we're going to get your cameras set up right now. Where is a great starting point? No matter what studio you enter, where should your camera be set? So we're gonna start off with that. These are those core elements. So first, let's talk about one that is a little bit different in the studio, and that is going to be shutter speed. So I'm gonna go through and answer each one of these question marks. All right, so when you're in the studio, you can ignore shutter speeds. Kinda, I say, like, not really. What I mean by that is your shutter speed does not affect the exposure of your image. So if I'm shooting at 1/30 of a second with my flash maestro Bond or from shooting at 1 2/100 of a second, the light will look identical. It does not make any difference Everything that you're going to be controlling for the exposure of the strobe not related to shutter speed. Okay, here's why the well, almost part. Because it is. You do kind of got to pay attention to it a little bit. Eso we talked about that. Okay, so first of all, you cannot exceed your cameras. Sync speed. So everybody should go. Look up. What? Your camera sync speed. But I could tell you most cameras. Nowadays it's 1 2/100 of a second. All right, well, what the heck is sync? Speed Sync Speed is the fastest shutter speed you can set on your camera and not get those black bars if you guys ever seen that. So you're shooting in the studio and you take a look and like crap what I do. There's half of my photos black. What's happening is the way that your camera works the way that the shutter opens and closes. If your shutter speed is too fast, when the stroke fires, it catches a shutter halfway close, and it leaves a black bar. I have. I remember shooting in my first studio where I'd start freaking out because I just realized the last 20 photos that I took had this black bar, and I didn't know why. So what you need to do is you always need to shoot slower shutter speeds. Dan, you're sync speed. My camera is a Canon five D Mark three. That's what I'll be shooting. My sync speed is 1 2/100 of a second. Some cameras air 1 2/50. Some are a little slower. I do have a little side note that as well. Um, maybe some of you have experienced this. I've found even with my camera that they tell me the Sync speed is 1 2/100 of a second when I shoot on a white background, even at one 202nd, sometimes I see a little bit darker at the edges, like the shutter almost made it open, but not quite, and it gave it a little bit. This is when you might have toe check yourself. So my go to is usually 1 1/60 of a second because I've tested it so it makes a little more complicated for everybody. Figure out what you're saying. Speed is shoot right around that and it should work. Great. All right, so I just want to illustrate kind of what that whole sync speed thing looks like. Alright, so your camera, when you click it, lifts the first shutter, then it flashes while everything's open. Then the second shutter closes. What happens when you exceed your sync speed? Is those moves so fast that there was no time that the whole entire photo was open for you to have a flash would actually catch one of those shutters? So I'm going to start off by telling you generally somewhere around 1 2/100 of a second. Okay, Next part. Why can't you go slower? Why not shoot 11 31 30th of a second? 1/ of a second? This was the number one biggest mistake I made with My first studio is I would shoot. I knew someone told me shutter speeds don't matter. Just don't go over your your six speed. Okay? I learned that. So I just put it at wherever it happened to land. Like wherever it was when I turned on my camera. That will create a problem for you because if you shoot at a slower shutter speed, then your sync speed, you'll start to pick up ambient light. And what that means is if I'm shooting in a room with windows, if I shoot really slow shutter speed 1/30 of a second, even 1/60 some of that window light will start to show up on my subject. And let's say that I'm shooting in a space like this. We've got lots of bright lights here. If I'm shooting at the 30th of a second, some of that light will affect my subject, and that could do a couple things. One thing it might dio is it might give you a weird color cast. So let's say you're in a room and you've got tungsten lights and you're shooting in. These lights are daylight balance, and we'll talk about that so I start shooting and I'm looking at some reason. The shadows air really warm, like really red, and I don't know why. My personal experience with my first studio space, the first business I opened, we had fluorescent lights, green fluorescent lights, and I called the printer so many times the lab I was with asking them why they were printing my shadows green. And I blamed it on them until I realized Oh, wait. I'm shooting at 1/30 of a second. The fluorescent lights, the green is showing up in the shadows. And then the other thing that will be really difficult with a slow shutter speed is if you're trying to shoot something dramatic, like a silhouette, you want really dark shadows, Even if the color is not messed up, some of that light in the room is going to fill in those shadows and you lose control. So that's why you want to use ah, faster shutter speed. So I'm gonna actually illustrate this for you. Alright. So in my studio space, I decided to set up a scenario that would be an example of my first studio. I've got my beauty dish here. We'll talk about modifiers later, and then over here this is a constant light. My stroke is going to flash. Okay, It's that quick. Really, really fast. Flash of light. So the whole shutter speed doesn't affect the actual exposure of what that strobe looks like. Okay. However, this light over here that I have on her is tungsten. Okay? It's going to be very orange. My shutter speed will determine whether that shows up or not. So this again would be in the room with fluorescent lights, the room with window light, whatever it may be. So let's take a look at how that affects things, all right? This is no strobe. I'm not using the flash at all. So when I shoot at 1 2/100 of a second, I'm picking up a little bit of that tungsten light, but it's it's pretty minimal. When I go to 1/ I'm starting to see her, and at the thirties, I can see her completely. And I'm not using my strobe It all so ideally, a test that you want to make for yourself is you want to when you get a set up. When you get your lights all set up, turn off your strobe and whatever camera settings you have set. Take a shot without the strobe. If you can see your subject, you've got to make some changes in your shutter speed or in the light in the room where there's a few other things you can control. So that's one of the first things I dio. I do this still today just to make sure I go in. I set up my lights, I unplug my trigger, and I take a shot just to make sure I don't have, like, contamination. So put that on your to do list for studio lighting. Okay, so now much. Watch what happens when I add the strobe in. Okay, The strobe at 1 2/ of a second. Maybe a little bit of light, but it's not too bad 1/60 and 1/30. I mean, this entire side of her face is now filled in with warmish orange light because of the long shutter speed, so you can see pretty drastic difference again. Here's from 1/60. Watch that side of her face. 21 2/100. So this is one of the things that will give you messed up shadows and less control in your studio. So the first thing we talked about is where to put your shutter. Put it at or around your sink speed. All right,
Class Materials
Bonus Materials with Purchase
Ratings and Reviews
Dennis Day
Awesome class. Lindsey Adler is an excellent teacher. She explained some basic concepts that I couldn't figure out on my own. The section showing 1, 2, and 3 light setups moves pretty fast. So I'll watch that again. This Fast Class was nice for me because I don't have time to do a full lengthy course.
Colin Cunningham
Great Course, Lots of great information through a variety of examples. Learned tons from this course, and loved the wide variety of lighting setups for Male and Female models as well as groups. Would recommend it to anyone new to portrait photography.
Student Work
Related Classes
Studio Lighting