Lessons
Lesson Info
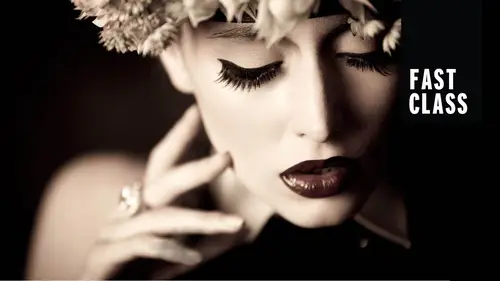
Light Principles: Inverse Square Law
you have three main things that affect light. Okay, first one or qualities to describe like, first one is your intensity. Meaning like how much light? How much light am I throwing at my subject? Is it a lot of power? Is it a little on DWI? Have numbers toe actually Describe that. The next one we have is direction of light on then The last one that you have is quality and this will be a huge like this is the rest of today s O like I'm going to go into it more in depth. So let's take a look at the description of them. So intensity, How much light? Um, there's also things called lighting ratios. Meaning I got one light here and one light here. How are they compared to one another? Which one? Stronger. Which ones? Dimmer. That's your intensity direction. Is it flat or directional? Is it with all these different lighting patterns? Is their shadows or no shadows on the last one? Is the light soft or is it hard or is it in between or what is it? So let's take a look at what this looks like ki...
nd of spreading this out. I'm gonna move this just a little bit out of the way. She's a camera, all right. Perfect. So strength of light intensity. How much light is there in the picture on the left? Over here, you could say that the intensity of the light like ratios that background light. I've got a light right here. Can you see it? That light is stronger than the main light, so intensity wise, it's brighter. Okay? And then you could say, Maybe this is dim lights. That's like the amount of it intensity would also be like, Is it F 2. is F 11 because that's saying how much light there is. Generally, if you're saying like the light is F 16, that means that in order to get your exposure correct, you had to close down that hole really, really small so that not much water could get in. Which means you were throwing a ton of water at it. So if you hear someone say Okay, the light is F 16. It's a pretty bright light. That's a lot of water. It's a lot of light you're throwing at it. If they say, however, the light is 2.8. Then it was pretty dim, and you had to open up really big in your aperture to let enough light in to get the correct exposure. So those air like intensity descriptions are the next one you have is direction of light. So the picture on the left, it's pretty flat. Not much directionality. There aren't many shadows. Where is the picture? On the right there is shadow. There is direction of light. There is drama. Okay, we'll go into all the different tools you have for all of this. But I want you to understand where I was going. And then, lastly, the quality of light and the two easiest descriptions are hard, light and soft light. Of course, there's everything in between from those two extremes. But how you can judge this is if you're judging by the shadow created by her nose. I put the light in the same position in both of these photos. So if you look at the picture on the left, you don't really see the edge of the shadow by her nose. It's like right here, just a little bit of shadow, because it iss soft light. So the shadows air soft, which means that they have a really subtle Grady int. They're not clearly defined. The light is softer. That has less contrast where, as picture over here on the right, that is a very, very crisp, harsh hard shadow. So when someone talks about soft light, it's usually talking about that blending between shadow and highlight. Is it really slow and gentle and subtle, or is it really abrupt and crisp? Hardly is abrupt and crisp, soft, slow and subtle. So these were the things when anyone's describing light to you, they'll be talking about the intensity of it, the direction of it in the quality of it. And that's pretty much all they talk about over and over and over again. And so that's where we're going with this is Well, all right, so we're going to talk about intensity. Did you know that you can make a white background white, gray and black without changing anything? What distances? I did not know this forever, okay? And I didn't quite get it, So we're going to see how this plays out. So the first thing we're starting with is intensity off light. And this thing that I used to get super freaked out about called inverse square law. Okay, But we don't I'm just gonna say it. So when you hear, you know Oh, that's what they were talking about. People make it way more complicated than it needs to be. So we're gonna keep it nice and simple and talk about in practice practicality. What does this whole thing mean? So a white background like we have here. I can make it white. I can make it great. And I can make it black, depending on where I place light and the subject. All right, so this is what it means to you. Alright, so in practice, in practicality letter A If you move the light closer, we're further from the subject. It varies its strength. Okay, so let's just take a look at that in practice. And I describe this just like the bucket of water because if I stand way back here and I throw a bucket of water, less water reaches her, it spreads out, and it doesn't hit her. But if I stand really super close and I was served with a bucket of water, a lot more of it will hit. Her light is exactly the same as that. So, for example, let's get a on. I'll take that from you. You don't need that. Oh, by the way, if you have one of these, don't, um, have your subjects put their fingers on it. They're actually pigments. And you're the oils and your fingers shift the pigments, which then make them useless, because then they're not the right color anymore. So which was to hold the sides gently? Oh, she's good. She's good. She's a pro. She already knows. Okay, so let's take a look. And like I said, if I wanted to not guess, for example, you'd use the light meter, and I know where to put the camera to start off with. So focus on perfect. Okay. All right. So I am not going to change anything except for where the light is. My camera's gonna say the same. The power is going to say the same on the strip like nothing at all is going to change. But I'm gonna back this up. Okay? Not too far. All right, let's take a look at the difference. All right. So can I see those two before and after. Okay, so nothing changed. But where I put my light as I moved it back, the water wasn't reaching as far. So it got darker. There are certain mathematical equations on trying to figure this stuff all out. I wouldn't bother unless you're shooting film. If you're shooting film, go ahead and learn this. At this point, you don't really need to know that. Just know that light falls off exponentially. It's not like if I double the distance, then it's just like half the power because you would think right. If I have a certain amount of bucket of water here that I back up twice the distance, you think it half them outreaches it's not. It's much more than that. It's actually a quarter of the amount that reaches, so just know it's not like a straight line. It gets less and less and less more drastically. And so by the time I get to the edge of this stage here, there's like no water reaching her at all. So it's a very drastic drop off, so that would be letter a. The closer I bring it, the brighter it gets, the further I bring it away the darker it gets, distance makes a difference. So let's say you're shooting in the studio space where it's, like, really small. It's really, really, really tight. It might be a problem if that light is really, really close. And you can't turn it down anymore. Like, But let's say you're in this space and oh, man, I've turned my light down all the way. I'm shooting at a small aperture, but I don't want to shoot at F 22. How do I make this dimmer? You come back, you're light up like distance, actually will make a difference. There are down sides of this which will get Thio. ITT's coming. Okay, so can I have the keynote back up? All right, let's talk about this. So, um, next one is bring the light closer or further away to very fall off and background. Okay, so we're gonna take a look at what this actually means. Can I have you just to demonstrate, to have you back up like, 2 ft? All right, so if I put the light very close to her, the background will look one way if I correctly exposed for her when I back that light far back and correctly exposed to her. The background is going to look totally different. Alright, so here's why when I bring this light really, really close, it got brighter, which means I have to shoot a smaller aperture. So maybe I'm shooting at F 11. So I darkened things down so that it was correct for her. Most of that bucket of water is hitting her. It is not reaching the background, so that background will be darker. So as a rule of thumb, basically how to think of it is if you're trying to get your background darker, bring that light closer to your subject and then move your subject further from the background because then the water can't reach and it's mostly hitting her. So, for example, take a look and again if you want to not have to guess like I would guess, you could actually figure out what Africa aperture to shoot at. Let's see, stress. Right. So take a look at the background here. Okay? Let me just turn. It's just a little bit there. Okay? All right. So one of the things if you take a look, it z not white notice that the background that we see here is actually white to our I But the light falls off, it gets darker. Okay, if I want this to be even more drastic. Ready? Can you help me with your chair? I'm gonna move us. Way, way, way, way, way back, way back. Like this way? Sure. Perfect. Zach. Right there. Perfect. Okay, that's great. So the same thing. I've moved her back far away from that background, and I'm gonna move this light nice and close. So she's going to be bright. No lights hitting that background or minimal light. So it's going to be much darker. So let's see before and after, it's gonna get a little darker. Tales. That light background got darker. Okay, I'm gonna do one even slightly, slightly more advanced thing just a little bit, which I see. If I get this in, we're going to talk about this in the modifier section. But this is something called a grid. And so if I add this grid Okay, I might need your hand on this. We always stick that in there. What a grid does is it focuses the light and it prevents. Fall off. I think that's in solidly. Okay, Perfect. Okay, we're gonna We're gonna attempt this here. Okay? So grids there are grids for soft boxes. There are grids for, um, silver dishes. Their grids for beauty dishes were we'll take a look at how these work, but right now what it did is it focused all the light in so that bucket of water cannot reach the background? Hardly at all. So we started off with something that was pretty light and then a little bit darker. And now if I take a shot of her and you'll see, but adding that grid, the background is completely black because I made it so the light couldn't spill onto the background. So this tool has less to do with inverse square law. But I wanted you to see how I made that background black. But what I did want you to know is if I bring the light or if I bring her closer to the background, the background is going to be lighter. So I got to pull her away. And if I want the background to be darker compared to her, I gotta bring that light closer. So let's take another example of what this looks like in reality. So we just saw all of this. We saw the changes that it made. Okay, how about the other extreme things that are closer together are more similarly lit. So I'm gonna have you go back just back this like a little more Three more feet. Yeah, right there. Okay. So for example, you saw what happened here. Everything got dark. Okay, so in red Square lot, it has that whole fancy thing. Things that are closer together and more similarly. Distance from the light will be lit more similarly. Alright. So here's what it means. If I have, I'm going to take this off. And in this makes sense if I'm another person posing with her, okay? And I back up, I will be darker, right? Because I'm further away from the light. But the closer I get to her, the more similarly lit I will be okay. So another example of that is relative distance taking a look at this space right here. If I take my example again and I bring this super duper close, the relative distance to the light is more dramatic. Which means that light is pretty darn close to her. Compared to me, it's two or three or three times distance, so I'm gonna be a lot darker. But when I move this all the way back, the relative distance, it's not really that much farther from me. That is her, since it's backed up so far, like, yeah, it's a little bit farther if you actually go by numbers, but relatively, now that it's far away, I'm not really that much further back. Which means by back in that light up, we're actually going to be a similar exposure. As soon as we bring it way up close to her, I'm gonna be a lot darker. So, like thes relative distances all make a difference. So in the example of the background, if I bring it super super close, that background is relatively far away from the light compared to her. So it'll be darker if I bring that light all the way back. It's a lot closer, and it'll be later, so we'll just take two quick shots of this one. Okay, Perfect. Lovely. Okay. So in this example of nice and close to her, you're good model don. Okay? And so her shadow is on him a little bit, but you'll get the idea like the light on his face. It's much, much dimmer, however. If I back this way up, maybe back up a little more like we'll say here, there's a couple things we've got to think about. Well, first of all, it got dimmer, so I'm gonna have to adjust. But distance wise, let's try. Are you out there? Try this. They'll be, ah, lot more similarly. Let No, I'll brighten up a little bit alone, fellas. Okay, so if you can put those two side by side, uh, in the dark 12 steps ago, So if you look, there's some like, you know, it's not the same light, but look how much darker he is in this one. So what you want to keep in mind is these kind of things. When you bring the light closer to your subject, it is relatively, ah, lot closer to your light, so the background gets a lot darker. But if you move that light back, the relative distances is not as dramatic. And so the background will be later. So notice, even just with that distance, the background here is pretty gray in the background here is pretty white and you can take this to extremes. So let me show you how that works. Practically with a couple things on keynote. Alright, so how it plays in your real world portrait. Move like closer Further to very strength. If you need Thio next one, bring the light closer further away to change the background closer it is to her, The dark of the background will get further away. It is there more similarly distance. It'll get lighter and then the last one is to bring subjects closer together. Their distance will make them more similarly lit. So this is what you like really care about. So how it would come into action would be talked about. The first one changes in the light changed exposure. So let's say my light was just a little bit too dark. I could bump it in a foot. You know, I could make it brighter. You could do that for practical purposes. The other one in reality, we talked about the background changing. This is the background one to make the background darker. Put the light closer, but the other one is to more evenly late groups. You need to pull the light further back. So let's say that John, in that example was the third row back in a group. Our shooting, like shooting like 15 20 people. He's in the third row back when my light is that close, the relative distance he's gonna be dark. So when you light a group, you've gotta pull your light back and make sure it's approximately the same distance from everyone. And that doesn't just apply to front to back that side to side two. Because if you think about it, if I've got someone over here, five steps can have you sent up real quick, do one. Uh, it's just easier than like waving OK, right there. Even if I'm shooting this way, she is, like four times further away because the lights exponential, it's She's going to be significantly darker. Even if she's not. She's only like a foot behind. It has nothing to do that it's that distance from the light. So if I'm light in a group, I've got a center it more and pull it back. So no, their relative distances are a lot more similar. So this is where it, like, really comes into play, and then the same thing. If you're in your studio and you're trying to get a background darker, move her away from the background, move the light. And so this is the realities of why you care, que?
Class Materials
Bonus Materials with Purchase
Ratings and Reviews
Dennis Day
Awesome class. Lindsey Adler is an excellent teacher. She explained some basic concepts that I couldn't figure out on my own. The section showing 1, 2, and 3 light setups moves pretty fast. So I'll watch that again. This Fast Class was nice for me because I don't have time to do a full lengthy course.
Colin Cunningham
Great Course, Lots of great information through a variety of examples. Learned tons from this course, and loved the wide variety of lighting setups for Male and Female models as well as groups. Would recommend it to anyone new to portrait photography.
Student Work
Related Classes
Studio Lighting