Lessons
Class Introduction
08:43 2Basic Controls
05:29 3Top Deck Mode Dial
21:52 4Camera Controls: Top Deck
28:03 5Camera Controls: Back Side Controls
30:53 6Back Side Controls: Super Control Panel
18:39 7Left SIde, Right Side, Bottom, and Front
12:42 8Menu Functions: Shooting Menu Part 1
11:27Lesson Info
Basic Controls
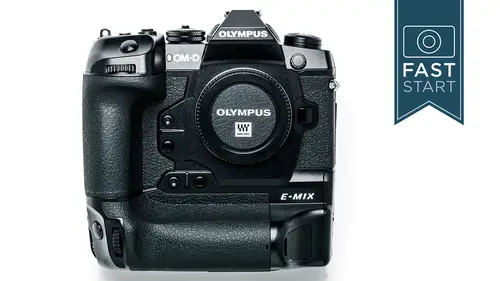
All right, this is one of the main sections of this class, the camera controls. What we're gonna do in here is take a tour of the camera, and just go around each side of the camera and talk about each of the buttons, each of the dials, and talk about what it does. So let's go ahead and get started. First up, some basic controls that we'll be using throughout the class. Obviously you want to have the camera turned on. When you do, the camera automatically activates a Super-Sonic Wave Filter, which knocks dust off the sensor. Dust on a sensor can cause problems cause it'll be little black specks in the sky that you might see in certain types of photographs. And so you wanna keep that sensor clean, so don't leave your lens off the camera for any lengthy period of time or in any dusty environments. But if dust or sand or some sort of grit gets in there, the camera will do its best to try to get that off. The shutter release is gonna be need to take the pictures obviously, but to wake the c...
amera up, we have a few major controls that are gonna be used for a lot of different features like the front dial and the back dial. They don't have a specific control, but they're often controlling shutter speeds, aperture, exposure compensation, but they can also be used for moving the focusing point, the magnification window, and so forth, so they'll be used in a variety of ways. Now there is two front dials and two back dials, one for horizontal holding of the camera and one for vertical holding of the camera. And we'll get more into that as we get into the camera here a bit. We have an arrow pad on the back of the camera. This is primarily used for navigating throughout the menu system, but it can be used for moving focusing points, as well as confirming and changing menu settings in the camera, so we'll be using that for a wide variety of situations. A multi-selector on this, a little joy-stick, a little fun joy-stick is a great way of using the focusing point. So moving the focusing point, it's an 8-way, so not only can you go up-down, left and right, you can go to the corners in either direction so that you can move from one point to another as fast as possible. Finally, we have a touch screen on this camera, so that if you want to move your focusing point, you want to poke at something on the menu, you can just use it as you want there. If you don't like using the touch pad, as far as the screen as a touch pad, perfectly fine, there's lots of other buttons and dials for navigating throughout the camera. One of the distinctive features of this camera is the fact that it is a little bit larger in size and has an integrated vertical grip. And the idea here is, for anyone who likes to shoot vertical subjects, you can adjust the camera and have all the important controls in exactly the same position for both horizontal and vertical shooting, and while some people might look at this camera who maybe aren't too familiar with it and go, oh my gosh, it's kind of a big camera. Well, no, it's not once you get it out there and you start using it, in my opinion. I've had this out for long, lengthy days of shooting, and it's really comfortable having that vertical group. It feels very good when you're out there shooting it. Yeah, it's bigger than other cameras, but when you're actually shooting, it feels really good in the hand. And so if you're looking for a really good shooting experience, this camera definitely delivers it. All right, we're gonna start on the top side of the camera. A lot of the most important controls are up here. The shutter release, obviously for taking photos, but when you press halfway down, it is gonna be used for waking the camera up if it happens to be asleep, activating the metering system, activating the auto focus system, so be aware of where that half press is on the shutter release because you'll need to be using that on a regular basis. That's not the only way of taking photos. You can also use the touch screen to take photos. Now you'll notice there are a couple of different symbols on there, whether you want to have the touch disabled, you want to do touch focusing, or touch shooting, so let's go ahead and do a little display on this. Let me go ahead and get my camera set up so that you can see what's going on. All right, so on the back of the camera over on the left hand side, we see a little green box, which means that we can choose to focus wherever we touch on the screen. If we touch that green box, we can now shoot photos on that screen, let's see. If we get it right, let's turn this off, why is it not shooting, make sure we're in the right mode. So we can, there we go. So we can switch back and forth over here from no touch where this does nothing, to where we can focus, to where we can shoot photos. And so now we can shoot photos wherever we want. If we go back to the box here, we touch an area. You'll notice over here on the right, we can zoom in on an area, we can move this box around and choose where to focus. Like right here we can say oh, there's a book here, who's the author of this book? And we can jump in, and dive in. Let's see, let's touch this again, make sure we activate it. We have our zoom over here, press that in, and we can see, oh hey, that's my book, right there. And so, we can then take a photo of it if we want. And we can use this dial to zoom back out. So, let's jump back out right there. So, play around with touch screen as much as you'd like. I'm gonna turn mine off right now, right there, so that I don't accidentally change it.
Class Materials
Bonus Materials with Purchase
Ratings and Reviews
elizabeth chambers
This fast start marathon by John Greengo was fantastic. It revealed a great many interesting features that reviewers of the E M1X ignored when the camera came on the market and of which I was unaware. Plus it offered useful advice on how to determine in what circumstances the camera's many options and capabilities are useful and how to decide whether they should be turned on or off. I would say though because of the in-depth nature of this feature tour that unless the viewer has a vested interest in this subject, this class could quickly become an info overload experience. It's l-o-n-g! But for anyone interested, it's a super intro to the manual. Greengo draws attention to many items that an individual alone with the manual might overlook. Beyond that, it piqued my interest in the E-M1X! Olympus should make John Greengo's class available to new owners of the camera, or at least direct them to this class.
Simon Worger
Just got the om-d e-m1 mark iii so came to Creative Live for a tutorial and although this is for the X the menu system is almost the same. Have followed John Greengo's A7iii guide on here as well and both courses have been a great help. I will be purchasing the course for the om-d e-m1 mark iii as soon as it's released. Highly recommend John's tutorials.
Student Work
Related Classes
Camera Guides