Lesson Info
12. Menu Functions: The Custom Menu Part 1
Lessons
Class Introduction
08:43 2Basic Controls
05:29 3Top Deck Mode Dial
21:52 4Camera Controls: Top Deck
28:03 5Camera Controls: Back Side Controls
30:53 6Back Side Controls: Super Control Panel
18:39 7Left SIde, Right Side, Bottom, and Front
12:42 8Menu Functions: Shooting Menu Part 1
11:27Lesson Info
Menu Functions: The Custom Menu Part 1
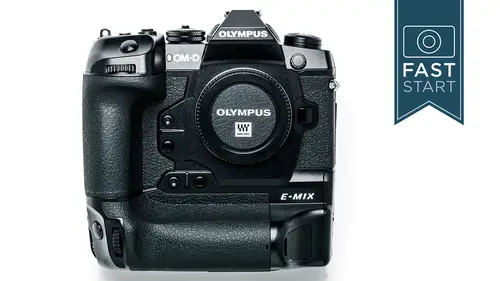
All right, we are on to the big menu tab in the menu here, and this is the custom menu. And this is broken up into sub-groupings, which at first seem overwhelming, but there is a method to the madness, if you will. And so the groupings are lettered, and for the most part, there's some sense to the letters. A is for autofocus, B is for buttons, C is for releases, I guess? D is for display, that one's good. E is for exposure. F is for flash. G as in gringo, as in for quality. Always think of that, of course. H, I have no idea why it's record and erase. I, what you look at with your eye is the EVF. And J, John, is a tool, camera utility. And so those are the secrets to remembering those different letters, and once you can remember those letters, you can help find things in this custom menu a little bit more easily. So let's go ahead and start working our way through these different custom menus. First grouping is autofocus topics. We're in A for autofocus. First up is the autofocus mode. ...
We've seen this before. Single, continuous, tracking modes, all well and good. There's a button on the top of the camera that gives you much quicker access, but it's also in here, as well. Next up is autofocus plus manual focus. What this means is that when you press halfway down to autofocus, if you have it turned on AF plus MF, it allows you to manually focus, do a little touch-up, do a little change after the camera has already done its autofocus. And so for some more experienced photographers, they may want to do that little touch-up themselves. For a more basic photographer, just let the camera do its job. It's probably doing a fine job. Now, when you do turn on this AF plus MF, the SAF and the CAF will have the MF come up after it to let you know that you can do this manual focus touch-up after the fact of pressing down on the shutter halfway. Next up is the AEL/AFL button. This button is used for a lot more than locking the exposure, and by coming into here, you're gonna be able to use this for back button focusing, which is one of the most common ways that a lotta people use for focusing on the camera. The problem is that when you use focusing on a shutter button, that's also where you take pictures, and sometimes you wanna separate those two. I might wanna focus on something, change my composition, think about things for a little bit, and then press down on the shutter again, and if the camera refocuses, I gotta go back and reset the composition. By having a separate button back here, I can separate the two tasks of focusing and shooting photos, and it can be very good for different type of compositional reasons. And this is gonna allow you, this feature in here is gonna allow you to customize it for very unique ways for use in single focus, continuous focus, and manual focus. So first up, in single autofocus, there's gonna be four different modes, and one and two basically do the same thing with a different attribute as to the way the camera locks the exposure. Mode three is the one that it gets interesting, 'cause this is where it becomes a back button autofocus. So when you put your camera in single autofocus, press down on the shutter release, all it does is the exposure. It doesn't do focusing. You have to press the AEL button on the back of the camera for focusing, which, as a more advanced user, I think is a great thing. Next up is basically the same type of option with continuous autofocus. Now, in continuous autofocus, there's a lotta sports photographers that like having that back button for focusing. Sometimes I don't like that. I have found that when I'm shooting sports and I have multiple cameras, I don't have time to find two buttons. I just wanna press one button and have focus and shooting done at the same time. Other times when I'm just shooting with one camera and I'm a little bit more discerning about how the focus is taking place and I have more control, then I want that two-button control. And so these are nice things to be able to switch back and forth. So modes three and four give you back button focusing, once again, with a tweak on the way the exposure is locked. With manual focus, I like to manually focus from time to time, but it's nice to have autofocus as an assistant to come in and help you out from time to time. And so I recommend putting this in mode three. That gives you back button focus, even though your camera is in manual focus. You can just manually focus like normal, but if you ever need a little bit of help, you can just press that button on the back of the camera to give you some manual, to give you some autofocus even when you're manually focusing. So one of the other options is you can choose to make the shutter release button inoperative or operative in autofocus doing this. And so back button focusing is really only good if the shutter button is not trying to also focus again. And so if you are really wanting back button focusing and you wanna turn off the focusing on the shutter release, then you need to turn this to inoperative. If you like both of them to be able to focus, then you can just leave it as operative. And so if you like back button, put this in inoperative. Next item is the AF scanner. And so if the camera has a difficult time seeing if there's focus, how much effort do you want the camera to scan back and forth looking for focus? And it kinda depends on what skill level and what your objective is in a particular situation, but it's generally good to have it scan back and forth at least once to see if it can find focus. In the continuous autofocus sensitivity, this is gonna be how quickly it's going to pick up on a subject. So let me give you a little visual example. If you have a subject and you're focusing on that subject, but then some other subject comes and interferes with your first subject, do you wanna go to that new subject or do you wanna stay on the old subject? Well, it really depends on what's most important to you. And so they have different options in there as to how quickly do you want it to change. Next up, AF, or C-AF center start. So when you select a group of boxes to focus like you are likely to do in the continuous focusing mode, would you like the camera to prioritize the center box? This'll enable you to pinpoint exactly where you want the camera to focus with a little greater precision, but then letting the camera have some leeway in looking for other places if that subject starts moving around. And so if you know very precisely where you want it to start, that's a good place to be. And then you can go in here and you can choose which modes that it's actually been applied to, which one of the group modes, all the five-point, the nine-point, the 25-point, or any of the custom modes that you may have created. The next is very similar to that C-AF Center Priority. In this case, it always prioritizes the center point over the other points. This would be good for subjects that are not moving too erratically. If you're able to keep that center focusing point on them, this might be a good mode so that it really stays with that particular subject. And so going in here, you will be able to check off all the patterns that you want it to apply to. And so if you wanna get really creative, you can have it apply to some but not other patterns, depending on how you use the camera. Next up is the mode settings. We dove in here earlier, and this is where I really encourage you to use those custom modes to create focusing modes that you find valuable that fit the type of subjects that you wanna shoot. And so I would encourage you to check all these off, but if you're not using them, then uncheck 'em so you don't have to bother going past them. The AF area pointer will basically have a little green box that shows you where you have focused, and this can be very handy to know what your camera is focusing on. And so some people find it distracting and wanna turn it off. Available there if you want to. Another feature that some people like, some people don't, is using the LCD screen on the back of the camera as a targeting pad. So you can hold the camera up to your eye and just use your thumb to move your focusing point around the frame. For some people who use their left eye, their nose might hit the back of the screen and cause the focusing point to move around, in which case you might wanna turn this off. So right-eyed people have a little bit easier time turning this on. Set home. So this is for the focusing points, and you can set a recalled home position and set that to one of the custom buttons so that the focusing point always goes back to this home position in here, and you can choose which mode this is applied to. You can also choose which targeting mode is chosen for recalling this focusing mode and target. And you can choose exactly which target is chosen, so if you had one off to the left or the right, up and down, you can choose a very specific point as to where it is. Next up is select screen settings. And so when you press the function button on the back of the camera, the front of the dial turns the different targeting modes. The back of the dial changes the face detect modes. But if you didn't like that, you could change the way that those dials turned and what they did. And the same thing with the arrow pad in the back of the camera. You can change which things that that did. Most of the time we just take this for granted, but this is one of the nitty-gritty ways that you can customize your camera. And so anytime you see an arrow, you can go over to the right and adjust that particular setting so that you can change those different settings with the different dials. You can have set one and set two, so you can have two different favorites on the way that these work. Next up is Target Mode Settings, and this is what I did a demo with earlier in the class. You can choose the size and step. And so I find this very handy, because Olympus has done a great job with one and five and three and five points, but if you wanna create your own custom modes that really fit the subject size. Perhaps you want a little bit taller bracket 'cause you're always photographing vertical people moving around the frame. Well, that doesn't exist in the camera right now, but you can very easily create that on your own in there by choosing one or three brackets across and then as many tall as you want. And so it's a very unique feature. Very few cameras have this, and I think it's a very useful feature. Orientation Linked allows you to have the right focusing point when you turn the camera vertically. Normally when you turn the camera vertically, the focusing point moves to a radically different part of the frame where you may not wanna focus. This allows you to have unique focusing points when you are focusing vertically and horizontally that can be in the same or different places on the screen. I found this very helpful when you're trying to have a unique composition and going back and forth between horizontal and vertical. AF target modes just simply allow you to choose which target modes are available for you to choose. If you don't use these, you can uncheck the box. AF target point just simply allows you to move the target point around. It's the same as moving the joystick on the back of the camera. Next up, group A3. Camera has an AF limiter, and it has three presets in here, so if you wanna have specific distance settings when you are shooting, you can set this up ahead of time. Now, most of the time for general photography, nobody's ever gonna need this, but this can be really handy in special types of situations, perhaps in video. Where you know that you wanna focus from one subject to another subject, you can force the video to only work within that particular range so that it's not going out of focus in a particular range. If you know that you're gonna be working in a particular range with still photographs, you can basically block off everything that's nearby so that the camera won't accidentally focus there. And with these, you can have three different settings saved in there so that you can quickly go back and forth between a couple of different common type scenarios. The release priority will allow you or not allow you to shoot photos when things are out of focus, and so you might wanna be very careful about choosing to turn this on, because most people don't wanna take out of focus pictures, but sometimes people need to release the shutter when the picture is out of focus. Next up is the AF illuminator, which, technically speaking, is kinda cool. It's like a little flashlight built into your camera. It illuminates your subject, gives it a little bit more brightness so that it can focus. The reality is, well, if it's on a person, it's really annoying. If it's around other photographers, it's kind of annoying. It's limited in its power and its range, and so it's only so helpful. And so this is something that I tend to turn off just 'cause I like to be more discreet in my shooting. It does have a limited range. It tends to only be good for maybe one or two meters at most, and so don't expect it to illuminate a building across the street. Face priority is something that we've talked about before. You can choose to focus on faces, particularly the eye, left or right eye. And then we hit a really interesting topic. This is the tracking subject. And so this is a new feature that is in no other camera on the market right now, at least, and that is the camera can particularly track certain types of vehicles not just as a moving subject, but as a very specific, particular type of track subject. So for instance, with motorsports, it's not just looking for the front of the vehicle. It's looking for the chassis or the driver of that vehicle. With airplanes, it's looking not at the propellers or the wing that might be closest. It's looking at the fuselage or cockpit. This is an intelligent system. It's not intelligent in that it's learning as you are shooting. This is something that Olympus has already programmed in at the factory. And it's hopeful, we're all crossing our fingers, that they're gonna add in more different types of subjects. For instance, maybe someday they'll have birds in there, where we're not focusing on the wings, but we're focusing on the eyes and the head of the birds. Or perhaps a runner, we're not focusing on arms that might be out in front of the runner, but focusing on the face of the runner. And so this is a way of more accurately tracking these type of subjects, and it's a very interesting feature, so if you do this type of photography, it's gonna help, and you're gonna wanna use the continuous tracking mode and then engage this with the appropriate type of subject that you are shooting. Next up is AF focus adjustment. You are probably never gonna need this mode. I hope you won't need it. I've never needed it. But if focusing was off, and this is mainly designed for lenses that are not focusing correctly, and this is mainly designed for the older Four Thirds system lenses from Olympus. The newer systems use contrast detection and negates the need for this at all, and so this is kinda designed for those older style Olympus lenses that use face detection. If for some reason they were focusing incorrectly in one part of the frame, you could adjust their focus to either focus a little bit more towards the foreground or towards the background in here. Most likely chance is that you will never come back into this feature again. All right, on to our next tab in the autofocus of the custom menu, present manual focus distance. And so there is a way of presetting a distance and recalling it with the touch of a button. If you wanna input that data with a particular distance, you can do that in here. Next up is the manual focus assistant. And so if you do like to manually focus, there are a couple of digital assistants that can help you get accurate focus. The first is focus magnification, which magnifies a portion of the frame so that you can see it more clearly. And this can be very helpful 'cause this is the best way to get sharp focus is just to magnify in, adjust focus until it looks sharp to your eye, and then zoom back out. Another type of system that works very well is focus peaking, and what this does is it shimmers highlights wherever the subject is sharp in focus. And you can see this moving back and forth, and it's the easiest way to see the entire image and the range of focusing at a particular time. So within this menu setting, you can turn the magnify on or off and you can turn the peaking on or off. Next up is the MF clutch. A lotta lenses will have an MF clutch, and maybe we can get a tight shot of this lens that I have on here right now, 'cause this has an MF clutch. And one of the most common mistakes, and I make this mistake myself every once in a while, is I take the camera outta the camera bag, I flip the switch back inadvertently to manual focus, I then go to autofocus, and it won't autofocus, and that is because this got flipped back into manual focus and I need to move it forward again. If you do this and you don't use autofocus very often, then you might wanna go in here to the MF clutch and make it inoperative so that this switch on the lens does not do anything at all. And so normally I leave it operative because I like to be able to go back and forth with this and I like to be able to use it as a manual focus ring on the lens. Next up is the focus ring. You can choose which direction you turn for infinity or close-up focusing, and it's kind of interesting 'cause most all cameras focus one way to get to infinity, but Nikon goes the reverse direction. So for all of you former Nikon users that learned how to focus with your manual focus Nikon cameras and now it's all backwards, you can switch it in this camera so that you're nice and comfortable using it. Next up is bulb/time focusing. When you have the camera in the bulb or time modes, do you want to be able to change the focus? Now, for the average user, no, you probably don't wanna change focus during the middle of an exposure. But if you're trying to do something really creative, maybe you're doing a long exposure and the last few seconds, you're throwing it out of focus to give it a soft little blur of a halo. So there could be some creative reasons why you might wanna do that. Reset lens. And so what happens in this case, when you turn the camera off, the lens resets to its standard position. If you turn this off, the lens stays in the same setting as before. And so if you manually focus, say, on infinity for doing astrophotography, you might wanna leave it turned off. That way you can turn your camera off, turn it back on, and the lens isn't resetting each time. I know sometimes when I'm set up on a particular subject and going back and forth turning the camera on and off, it's irritating to have the lens refocus on you. But for general purpose, it's kinda nice that it just resets into a new standard position. So onto the next section, which deals with buttons. So we are in the B section, and the first option in here is to customize all of those different buttons on the camera. And so we have a lot of horizontal, vertical grip buttons that we can go in and program. It's not infinite that you can program any individual button, but there are a large number of options, and it does change with various modes that you are in on the camera. Now, if this looks familiar, it's because we did kind of already do this when we were in the video mode. So when you switch from video to still, you can have distinct settings on your custom buttons because the cameras are often being used in a very different manner going between those two functions. The center button on the little focus joystick on the back of the camera is also a button that presses straight in, and so if you want that to be turned off, you can. Normally it's gonna take you back to the home center position for the focusing point, but normally it's gonna be used for area select, but if you wanna turn it off, you can. The directional key, which is more when you're pointing it from one side to the other, you can turn it off or have it adjust focusing points. The dial function. So when you have the camera in any of the different exposure modes, the dials on the camera work in a particular way. If you do not like the way they work, you wanna switch the front and the back dials, the way that they work in the one and two position with the focusing lever, you can adjust that, as well. And so you'll need to dive into all of your favorite shooting modes and figure out how you like to have the camera set up to get those just right. The dial direction. Now, this is one area that I think does deserve some customization, and that is because the standard dial direction is kind of less, it's reverse obvious, is what it is, because the exposure indicator goes to one side, and you wanna dial it the opposite way, and that's 'cause it kinda works in the opposite dial direction. So if you do a lot of manual exposure, I'm gonna recommend that you use dial two in order to get a more logical approach to the way that the dial turns. Next up is program and shift. So when you do the program shift, you can choose to do that with dial one or dial two. The function lever on the back of the camera I mentioned before can be reprogrammed into three different modes and turned off. And in the first mode, you're gonna be changing exposure with the front and the back dial, and then when you flip it to two, you can do ISO and white balance. If you wanna change it to function two, mode two, excuse me, you can switch back and forth autofocus areas. And so if you switch autofocus areas very quickly, let's say you go from single-point to 25-point, you just flip to switch two and you don't have to dive into the menus to change that particular focusing area. And so once again, another deep dive into changing the customization. Another cool function is that you can turn this lever into a power lever that turns the camera on and off. And so this allows you to turn the camera on and off with your right hand so you don't have to use your left hand going across to do that. All right, continuing on on these customizations. I know there's a lot, but there's still a lot more to get to. So B2, the electronic zoom speed. There's a couple of different lenses that Olympus makes that have a powered zoom lens, and this could be handy when shooting video. You can control the zoom and how fast it zooms back and forth. A lotta times you wanna slow this down so it's not too abrupt when you're shooting. On the back of the camera is the custom lock button. It allows you to lock and make certain buttons inoperative so that you don't accidentally bump them. And so if you are bumping them from time to time, you can go into this mode and you can check off all the buttons that you don't want to use when you flip it into the custom lock mode. The general lock mode locks off a specific set of buttons, and normally you would leave things unlocked so that you could get most of the operations. Moving on to letter C, things dealing with the release options on the camera. In the single autofocus mode, the camera is normally turned off in this release priority, which means the camera must be in focus before the camera will allow you to release the shutter. If you wanna turn that on, you can do that, but I warn you, look out, because you can end up with out of focus images 'cause it allows the camera to take pictures without them being in focus. The opposite is true with continuous autofocus. Here you want the camera to be able to shoot photos at any time because sometimes the camera's very fussy about focusing and you just need it to shoot photos because it's close enough to get the job done. And so I would leave this one on so it allows you to shoot pictures at any time that there might be action and it might be the right moment in time. The continuous low settings are gonna allow you to set the particular settings for the low speed motor drive as well as the anti-shock and silent versions of this along with the pro capture. And so this dives into a further menu and basically allows you to limit the maximum frames per second. A lotta times it's nice to shoot at 10 frames a second, but sometimes, frankly, it is just too much, too many photos. And so if you wanna kinda back it off a little bit, you can drop that frame rate down according to your needs. Same thing is, well, actually, the frame count limiter allows you to limit the number of images that you can shoot at any one time, and the fact of the matter is that this camera can shoot so fast, you can have your hands full with a lot of images that you may not wanna have to deal with in post-production, and if you know that you wanna limit that number, you can set that number in here. All right, so that's our basic motor drive settings with anti-shock, as well. Then we have a separate one for the silent motor drive, and in this particular case, we have a faster frame rate, so we're gonna have a different set of numbers that we're gonna work with, so if we wanna reset this, we can do that. We can also have another limit to the frame count here, 'cause you can run through a lotta frames very, very quickly with this. And then finally, in pro capture, here's where you get to set the details of that pro capture mode where it's shooting pictures before you press down the shutter release. It's when you press halfway down, it starts recording them. How many does it record? I think it starts off with eight or 18 or something, but you can adjust that as necessary according to how full the buffer gets when you are shooting. You can choose the pre-shutter number of frames in here, so this is the number that you're getting before you press all the way down on the shutter release. The previous setting, if I didn't get that correct, was the maximum frames per second. A lotta times you wanna have that at the maximum number, but sometimes it's just a little too high. You can also have a frame count limiter here, in this case, if you don't wanna go through too many shots. I've shot a number of specialized events where birds are taking off or arrows are being shot that you can go through a tremendous number of frames, and this can limit you so that you don't overshoot a particular situation. The settings that we just went through for the low settings also apply to the high settings, so we're not actually going to do it. We're just gonna copy and paste the last two minutes of my talking on here, and that is gonna be the exact same idea of what's going on. The numbers are slightly different 'cause the higher speed will be able to shoot at a higher number of frames per second, but it's the same idea of having particular control over how many frames you're shooting, how fast they're shooting, and so forth in the low setting and in the high setting. Next up is flicker reduction. There's a couple of things going on in here. This resolves poor LCD performance when you are under fluorescent lighting. And so sometimes under certain types of fluorescent lighting, the image that you get in the viewfinder and on the back screen does not look very good, and so this will be able to clear it for you. The next part of this is anti-flicker shooting, and what this does is this resolves problems with lights that actually flicker, all right? So let me give you a little visual understanding of what's going on is that when you are under certain types of fluorescent lighting, the fluorescent lighting actually flickers. It gets brighter and darker. And as you shoot at 10 frames per second, the brightness of your exact exposure may vary a little bit depending on where that exposure lands. When you turn on this particular anti-flicker shooting mode, it looks for the brightest part of the peak and just kinda waits a fraction of a second to time the photo with the brightest part of this peak. That way you're getting the maximum light and you're getting consistent results. An example of a flicker problem that I was encountering was this light here in this hallway was flickering, and you'll see that images one, two, three, and four are a little different in exposure, even though I had a manual exposure, same shutter speed, same aperture, same ISO. Turned on the flicker reduction and I took a series of photo, and there is a very, very slight difference between image, I think, three and two, but it's much, much closer and it makes editing images much, much easier to deal with. If you've ever shot in gymnasiums that have this fluorescent lighting, it can be very, very frustrating dealing with them in the edit without them consistent. So if you are shooting in that type of environment, you'd probably wanna turn this on, but if you're not shooting this environment, probably best just to leave it turned off. Next up, C2, image stabilizer. We have our different stabilizing modes. We've seen this before in the super control panel. My recommendation for general purpose is S-IS 1. This is gonna give you good stabilization up, down, left, and right. If you start wanting to do panning, that's when S-IS Auto or the number two or three option might be good for you. The image stabilizer also has an option for frames per second or image stabilization priority, and what's happening is that the camera needs to make some adjustments to the stabilization to maximize it, and that slows down the frames per second. And so it depends on what's most important to you, frames per second or stabilization. If you're into sports a lot, then you probably wanna have it on frames per second. For general photography, I would leave it in IS priority. Would you like the image stabilization to engage when you press halfway down on the shutter release? In general, this is a good thing to see how you're composing your image and how effective it is with that particular lens that you are using. With non-Olympus lenses that have their own stabilization, you can choose to have stabilization controlled by the lens. It doesn't happen a lot, but if you do have those lenses, it might be more effective if it's a particular lens to use the stabilization of the lens system rather than what's built into the camera. All right, continuing on to D, control settings here. And so this deals a lot with the display options. So the first option here is choosing whether you wanna have live control or the live super control panel, and check off these boxes if you wanna have the most options available. Next up is the info settings. Now, I'm not gonna go through all the different options on here, but within each of the playback mode, playback magnification, live view, and then thumbnails, you can choose which screens are available to you when you press the info button. We'll look at a few of 'em here. And so image only, of course you're probably gonna want so that you can see your images nice and clearly. Overall gives you some data about how it was shot, technical data. Histogram will give you histogram as well as other technical information about shutter speed and aperture. The highlight and shadow will give you information about the areas that might be exceeding the exposure range, those highlights and shadows that may be causing a problem in the exposure. The field data will give you that additional GPS, temperature, elevation information that can be handy, and the light box can be very handy for comparing one image to the next. Next up are the picture mode settings. These are all the Instagram filters, if you will. These are different picture modes, different colors, style, contrast, saturation to your images. If you know you aren't using these, you can uncheck all the boxes that don't really apply to you. The drive settings. There's a lotta different drive settings, and by default when you get the camera, a lot of these are deactivated, which I find a little frustrating because I wanna use a lotta these different modes. But I understand why they are deactivated. It's because there's just more than most people need at any one time. And so once again, customize the modes. Which ones are you gonna use? Put the check box by it, and then you can quickly go between all the ones that are your favorites. Multi function settings. And so there is a special feature in this camera that you can assign to one of the buttons that's called a multi function button, and it allows you to perform a lotta different functions with one button. And what functions it gets to control, well, that's what you get to decide here. And so it's probably best to have as few options as available checked here if you are gonna use this as one of your shortcut buttons. Next up is a live view boost. So one of the benefits or a mirrorless camera is that you get to look through the viewfinder and you get to see exactly the digital image that you are recording. Exposure, white balance, focus, and everything else. And that's really good for previewing what your final result is gonna be. But compared to an SLR, one of the advantages of an SLR is that you can set the settings any way you want, and anytime you look through the SLR, it looks like a nice, clean image, for the most part. And this is gonna allow you to mimic an SLR-style camera where it's not reflecting the final shooting conditions, it's reflecting the optimum viewing system in the viewfinder. And so it depends on what's most important to you. And so for general shooting, I like to have a live, realistic view, but if I'm working in the studio with flashes that are gonna fire, that can't be previewed in the viewfinder, and so that's the type of thing where you might wanna turn it off. So there are different options in here. You can turn this off. You can use it on for optimal viewing or On2, optimal viewing with a slow frame rate. So it goes into a slow frame rate. It may look a little funny if you are doing a lot of panning actions. The live view boost can be turned on and off basically in the bulb and timer mode. Some cases you wanna see really clearly. Some cases you wanna see exactly what the final image is going to look like. Next up with live composite. Once again, in that live composite mode, you can choose to have the viewfinder show you exactly what you're getting or what the best view through the viewfinder is. And then there are some other screens that may come on that will allow you to do this, as well, and so generally you need to be thinking about do you wanna see exactly what you're gonna get or what the best view of the subject is? There is also an option for frame rate priority and quality priority, depending on what is more important to you. If you are shooting action where you are panning the camera from side to side, frame rate priority will probably be more important. If you're more stationary, you probably wanna be in quality priority. The art live view mode will let you see the art effects in camera. If you like to see that, turn it on. If you don't wanna see it but just want it applied to the photos, you can do it in mode two. The frame rate in this camera, I don't know, but I believe it's around 60 frames per second. If you put it into the high frame rate, it goes into 120 frames per second, and if you're trying to track action from side to side, it's gonna give you a better feedback of where that subject is in front of the lens. So for sports photography, put it on high. For regular photography, leave it on normal. Live view close-up settings. When you are working with live view on the camera and you have zoomed in on a subject to check focus and so forth, there are some tweaks to the way that the viewing system can work in here. So first up in here is mode one. When you press down on the shutter, it ends the close-up mode. Mode two, the shutter activates autofocus in the close-up mode 'cause you might wanna get a more accurate way of focusing when you are magnified in nice and close. Live view boost, in this case, will leave the brightness on normal turned off or on. It will adjust the brightness, and so it's gonna look better to the eye, but it's gonna be different than the final exposure. And then the default settings when you are in the playback and zoom mode, and I prefer recently. So if you were normally recently zooming in really close, then it would do that again. If you wanna have the default zoom in at 10 times, you can set it as that. And so these are some nice options so that when you are in the playback mode checking focus, it's kinda doing the same thing on a regular basis. The depth of field preview settings, and that's with that little round symbol. It's an aperture indicating the depth of field preview settings. There's a couple different options on how it works in here. Normally this button is a press and hold button, but you can use it as a press and lock button so that you press it once to lock it in for depth of field and then press it again to turn it off. Do you want live view to be boosted? And this can be really helpful so that you can see the effective depth of field when you do that. And so I often would recommend leaving that turned on so that the image is a little bit easier to see when you go into the depth of field mode.
Class Materials
Bonus Materials with Purchase
Ratings and Reviews
elizabeth chambers
This fast start marathon by John Greengo was fantastic. It revealed a great many interesting features that reviewers of the E M1X ignored when the camera came on the market and of which I was unaware. Plus it offered useful advice on how to determine in what circumstances the camera's many options and capabilities are useful and how to decide whether they should be turned on or off. I would say though because of the in-depth nature of this feature tour that unless the viewer has a vested interest in this subject, this class could quickly become an info overload experience. It's l-o-n-g! But for anyone interested, it's a super intro to the manual. Greengo draws attention to many items that an individual alone with the manual might overlook. Beyond that, it piqued my interest in the E-M1X! Olympus should make John Greengo's class available to new owners of the camera, or at least direct them to this class.
Simon Worger
Just got the om-d e-m1 mark iii so came to Creative Live for a tutorial and although this is for the X the menu system is almost the same. Have followed John Greengo's A7iii guide on here as well and both courses have been a great help. I will be purchasing the course for the om-d e-m1 mark iii as soon as it's released. Highly recommend John's tutorials.
Student Work
Related Classes
Camera Guides