Lesson Info
19. Dramatic Light Using White Balance Shifts
Lessons
Course Introduction
03:20 2Understanding Lighting Diagrams
12:11 3High Contrast Portrait
12:43 4Finding The Light
12:02 5Subtle Beauty
06:10 6Soft Fine Art
10:46 7Color on White
08:33 8Catalog Shots
06:00Light From Below
07:38 10Fresnel Beauty
05:58 11Old-Time Fashion
11:31 12Superhero Light
09:11 13Simply Stunning Beauty
11:10 14Controlling Shadows
13:20 15Soft Fine Art
04:51 16Front Bokeh
08:28 17Large Soft Light, the Easy Way
06:51 18Creating Motion
07:28 19Dramatic Light Using White Balance Shifts
05:47 20Simple Soft Light
05:50 21Grinder Girl
10:28 22Large Soft Light
07:30 23Vertical Contrast
07:17 24Light Rays
10:57 25Wide Angle Texture
05:08 26Closing
06:08Lesson Info
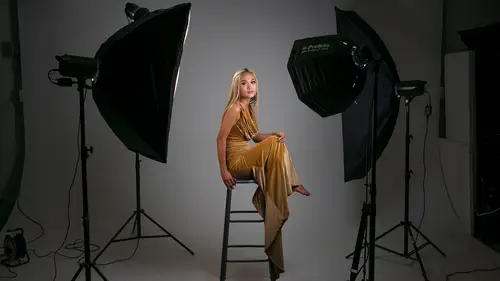
Dramatic Light Using White Balance Shifts
Now, we're gonna do one of my favorite lighting tricks and that is we're going to use different color temperatures to create colors that we can't even see with a naked eye. And so the way I have set this up is I have some lights in the background. These are Nanlite Forza 60Bs. They are LED always on lights. And by the way, we're gonna use no flashes in this setup. We're just using constant light. And so the other light we're using is this Elinchrom ONE. This Elinchrom ONE can be used for flash photography or it can be used as a video light as well. When you use it as a video light, you can change the color temperature. So that's what I've done. I've set this video light to to 2,700 Kelvin that is going to illuminate Theresa. So she's gonna look orange to us with our normal eyes, our naked eyes. And then we have these guys set to 5,200 Kelvin. And so when I look at those, they look white. In fact, what I'm going to do here is I'm gonna turn on this light really quickly. And then we're g...
onna turn off all of our video lights. And when we look at this, you can see that Theresa looks orange. She looks really orangey right here because our video cameras have been set to 5,200 Kelvin which is what these lights are. So in the video right now, these lights back here look white and Theresa looks orange. And so we're gonna turn back on the video lights. We're gonna do exactly the opposite of that in our camera here. So the camera is gonna be set to 2,700 Kelvin which means Theresa is gonna look normal. Her color is gonna be natural but these lights back here are going to be blue. So we're creating this blue look. Plus these lights are going into my camera's lens which is gonna create some lens flare and we should get some pretty interesting stuff. So what I'm gonna do is I'm just gonna take our first photo here and to do this, by the way we need to turn off all the video lights. So all the video lights are off. I'm looking right here at Theresa. I will take a shot. And when we look over here on the computer, it looks exactly as we described. So she looks normal. And those lights from behind are all blue. That looks a little drab to me. So what we're going to do is we are gonna smoke it up. So we have Seth over here or we have smoke machine behind Theresa. He's gonna do that. While that's happening, let me just go back to the computer and show you quickly how I've metered this. So I used the built-in light meter in my camera through the lens metering to set everything. So we are at 2,700 Kelvin custom white balance or ISO is 5,000 because this is really low light. The aperture value is wide open at F4 four on this lens. And the shutter speeds at and I have image stabilization turned on as well. So Seth has smoked it up quite a bit. So I am now gonna take a photo and you can see that now this background looks crazy. Seth, I want you to come in here and sort of gently walk through this like this. We have too much smoke. Just do that once or twice. I'm gonna look through the lens one more time. Now hop out. We got a bunch of people. It would look like a disco back there. And one more time. I think Theresa, I got you a mid blink. That's cool. I'm also gonna do this one more time. We have a little too much smoke. We'll do that. Just leave it there. I think we're gonna be good. And now once more, bam, we have this really cool look. So what we're gonna do is we have many different photos to choose from here. They have, I think this first one is my favorite before the smoke became really diffused. I can go into the developed module. I can then change my blacks. I can change my clarity or texture. I can make this look a little bit more punchy. I can take an out of vignette, Of course, my favorite little thing. I can do whatever I want to the its image. But what I've done here is I've created blue where I normally would have white and then Theresa looks great. I can also go in and play with my color temp even to change that even more. And I think that looks pretty good. And so I will make that our final shot. Now, one of the things I do normally when I'm playing with a shot like this is, is I will do this in an environment. That's not just clear. So we used smoke because we're in a studio that has really nothing but a white wall but I love to do this in places like diners and restaurants and like stuff that has some depth to it in different color. I'll throw that 5,200 Kelvin light all over the place set my camera and my key light to a low color temperature, like 2,700. And then that background will become all blue. Then maybe add some gels and spots and you can really play with this when you're doing constant light videos. So let's take one last look at what we have here. In fact, I think we're ready for last looks. So let's do that right now. (gentle upbeat music)
Class Materials
Bonus Materials with Purchase
Ratings and Reviews
LeCompte
The class is comprehensive without being too complex! An all around 'how-to' guide with examples in real time with real people doing it for real. Showing 'What If' structured classes and showing 'Here is Why' Does not drag along but quick and concise. AND brought the support staff for deserved bow at the end. Nice Guy & Nice class 4 Stars at least!
Student Work
Related Classes
Lighting