Lesson Info
6. Soft Fine Art
Lessons
Course Introduction
03:20 2Understanding Lighting Diagrams
12:11 3High Contrast Portrait
12:43 4Finding The Light
12:02 5Subtle Beauty
06:10 6Soft Fine Art
10:46 7Color on White
08:33 8Catalog Shots
06:00Light From Below
07:38 10Fresnel Beauty
05:58 11Old-Time Fashion
11:31 12Superhero Light
09:11 13Simply Stunning Beauty
11:10 14Controlling Shadows
13:20 15Soft Fine Art
04:51 16Front Bokeh
08:28 17Large Soft Light, the Easy Way
06:51 18Creating Motion
07:28 19Dramatic Light Using White Balance Shifts
05:47 20Simple Soft Light
05:50 21Grinder Girl
10:28 22Large Soft Light
07:30 23Vertical Contrast
07:17 24Light Rays
10:57 25Wide Angle Texture
05:08 26Closing
06:08Lesson Info
Soft Fine Art
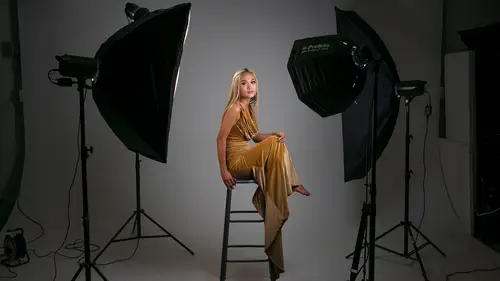
Now it's time for some silver screen magic. And so in this lighting setup we are going to be using a normal window screen. This is a 36 by 84 inch window screen rolled up. You can get it at any home supply store. You can see that this is the stuff that keeps the bugs out of your house, but we don't want to use a nice pristine window screen like this, what we want to use is this, this is a smashed up crumpled up window screen. It's the exact same window screen, but Krista took it and she smashed it and bent it and stomped on it and made it as crunkley as possible. Yes, crunkley is a word. And so what we're gonna do is use this to create the effect of sort of some fog, some smoke, some really cool stuff. So the key to this is really the lighting. And so what I have over here is I've got my Octabox. It's an Elinchrom Rotaluxe. And on the front of this, I have a grid. So this grid is really critical, because you want to make sure that the light is not falling on the background. Now, in thi...
s studio we have the advantage of having a really deep studio. So we are, this is about 14, 15 feet behind, so we're fine, there's no light that's gonna fall back here. If you're in a smaller studio, what I suggest you do is use a roll of black, seamless paper, or some kind of really dark background, just to make sure the background is completely black. That's key for this lighting setup. So if you have all the distance in the world, like we have here, that's gonna work fine, if you don't, use some black seamless. Okay, so I'm going to magically have my screen appear. Thank you so much. Krista is over there throwing this back and forth, if you haven't figured it out yet. But let me show you what this stuff does and how it behaves when it's illuminated from the side, we need sidelight for this to work. And so we're gonna turn off all of our video lights, and then what we're going to do is show you what happens when we illuminate this from the side. So notice I'm in front of my light as I come back, what happens? So if we get a front view here, you can see that this changes based on where we are in relationship to our light, if I make it toward the light, away from the light, just by moving this we get this really cool, smoky effect. In fact, I've done a bunch of portraits over the last 15 years with screens like this, and almost nobody knows it's just a window screen, they're like, "What kind of smoke machine do you have? How do you get it to do that?" It's a window screen. Okay, we're gonna turn the lights back on. The other thing to note by the way, is if you do this with a model, the edges of these screens are very abrasive, they really can poke the skin. So Shayla, make sure you don't poke yourself if possible. And so be careful of that. When you're scrunching this stuff up and bending it, you might wanna wear gloves and that will help you. Okay, so what we're gonna do is we have our light to the side, it's at a 90 degree angle. And so we have to have the light coming across the screen. So we're gonna play with that screen just a little bit, so going toward it and away from our light. The other thing we need to do is if we have Shayla looking straight ahead, well, she's gonna be sidled. So Shayla, you're gonna be looking this way and I will be moving my camera back and forth. And then we'll be moving the screen, and all the combinations of those, eventually we're gonna get something that looks cool. So you have to play with this a little bit to get something that works the way that you want. And so the first thing we need to do is meter the light. So I like this to meter somewhere around 10, 13, a smaller aperture value, because I want the background to be absolutely dark. So let me just meter very quickly. So we are at F10, we are exactly at F10, in fact, I'll show you on the meter cam over here we are at F10, which is pretty cool. And so if this isn't giving me the look I want, I might go to 13 or even something smaller than that. So what we're first going to do is let's have you put this up and we're still gonna play with it. You can just have fun with it. So we're trying to get Shayla to create some organic shapes. So we played with this a little bit earlier, so she could sort of practice. It takes a little while to figure out what looks good and what doesn't, and some of it is just dumb luck. And so hopefully we are gonna have that same dumb luck, and I'm going to make sure my computer can show the results. Okay, let's see what we get. Oh, that's good. Right there. Right there. Perfect. Perfect. I like that. I'm gonna do this. Excellent. Hold that right there. Okay. Oh, that's sort of cool. This second one. We'll let that show up. One of the things that you will notice is the focus can be difficult. So focusing the camera can be a little bit difficult. So what I do is I'll shut my auto focus off, I'll go to manual focus, so that way the camera's not trying to focus on the screen, but on the model's face. So I like where you're going with this. Let's keep playing with that a little bit. In fact, if we can try to wrap this around, this way, like this, there you go. And then, see this little tail here? Try to pull it out that way. I don't know if this is gonna work or not, but we'll try... Oh, there we go. Can you hold both of these with your hand? And then this hand, come down. There you go. Yeah, there we go. Yeah, we're looking sort of cool. I like that. And just so I can see the... Oh, oh, I like that. That's sort of cool. I can't really see what I'm shooting right now, 'cause of the video lights, so I'm gonna... I think this one is excellent. I like where we're going with that. I wanna gonna turn off the video lights, just so I can see what the heck is going on, because I... Oh, hold that. That is it. So I'm gonna try to scoosh this up, and then see if I can get in there. Look toward the light. Just don't move the screen, but move your face and look toward the light. Yeah, and look at the light, not at me. So with your eyes, look at the light. There you go. Perfect. Focusing that. Focusing this a little bit more. Excellent. Hold that. I like this. Okay. Cool. All right. I like these. I'm gonna get a little bit closer in. There you go. Just like that. Manual focus takes a little bit slower. Beautiful chin, down, way, way, way, way down. There you go. Hold that right there. Excellent. Excellent. Hold that. Yes. Don't move, don't move. These are really fun. Okay, let's turn on the video lights for a second. And then what I want to do is I could play with this for a long, long time. Have you seen these? These are sort of cool. Huh? These are sort of cool. I like that. I think this is the one we're gonna play with. So there's one of the things I like to do in post-production and it's using the Nik Software Collection. And so what I'll do here in Lightroom, I'm gonna right click here. I'm going to say edit in Photoshop 2022. So this is gonna take my photo and it's going to show up in Photoshop. And the thing in Photoshop is I could do all kinds of corrections or whatever, but really I I'm just putting it in Photoshop, so then I can select filter, Nik Collection, Analog Efex Pro 2. This is a software collection that's really inexpensive. And I really, really like it. And then I have created a preset, and it is called Shayla Screen. See if I can find it. It's alphabetical, I should be able find it. There it is, Shayla Screen. So I'll click on that. And then what that does is it adds a little bit of contrast, and then the other thing it does is it allows you to play with the bokeh. And so the bokeh, you can change where this is, it's artificial bokeh. You can rotate it, and then you can also change how much of a blur that is. So you can see sort of the edges here are blurring out the screen. And you can play with how this looks. And so I like to maybe make everything outside of that, just sort of blur out. It's up to you to make this whatever you want it to. So I'm gonna say okay, and then that's gonna apply that contrast, it's gonna apply the bokeh, it's gonna apply the blur, it's gonna apply a bunch of different things. So this takes about 30 or 40 seconds, depending on the speed of your computer. My laptop is pretty speedy, but it's not as speedy as a workstation would be. So once that's done, what I want to do is show you the final result. So let's go back to the computer really quickly. And so here's the before, and then here's the after, that really just adds some contrast and makes that a little bit softer. And then what I'll do is I will make this so it fits the screen. There we go. Then I'll just turn off all this stuff. There we go. Just like that. And that is our final image. I love that. Okay, so now that we have that, we're gonna have you sort of hold that up again as if we were shooting. And so you can sort of see how everything looks. This light, by the way, is only about two feet from Shayla. But now that you see that, we're going to give you our last looks. (uplifting music)
Class Materials
Bonus Materials with Purchase
Ratings and Reviews
LeCompte
The class is comprehensive without being too complex! An all around 'how-to' guide with examples in real time with real people doing it for real. Showing 'What If' structured classes and showing 'Here is Why' Does not drag along but quick and concise. AND brought the support staff for deserved bow at the end. Nice Guy & Nice class 4 Stars at least!
Student Work
Related Classes
Lighting