Lesson Info
18. Creating Motion
Lessons
Course Introduction
03:20 2Understanding Lighting Diagrams
12:11 3High Contrast Portrait
12:43 4Finding The Light
12:02 5Subtle Beauty
06:10 6Soft Fine Art
10:46 7Color on White
08:33 8Catalog Shots
06:00Light From Below
07:38 10Fresnel Beauty
05:58 11Old-Time Fashion
11:31 12Superhero Light
09:11 13Simply Stunning Beauty
11:10 14Controlling Shadows
13:20 15Soft Fine Art
04:51 16Front Bokeh
08:28 17Large Soft Light, the Easy Way
06:51 18Creating Motion
07:28 19Dramatic Light Using White Balance Shifts
05:47 20Simple Soft Light
05:50 21Grinder Girl
10:28 22Large Soft Light
07:30 23Vertical Contrast
07:17 24Light Rays
10:57 25Wide Angle Texture
05:08 26Closing
06:08Lesson Info
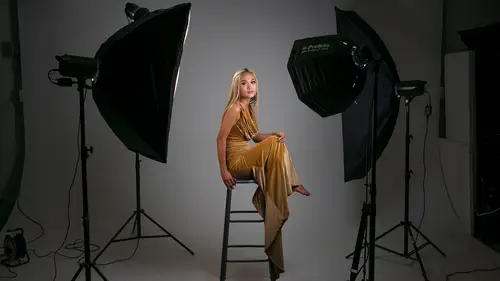
Creating Motion
This is a one light setup that is beautiful. And the secret sauce is actually not a light, but a fan. It's this guy right over here. You can see that we have this sort of industrial looking jet engine fan. This is a high powered fan. You don't really need one of these. This just happened to be the fan that was in the studio. And so we're gonna use it. So it will, if we put it full blast we might blow Theresa off the set. So we're gonna try not to do that. So let's talk about how this setup works and the things you need to do to make sure that you get the best results. So, because our fan is over there, we're matching that the a direction of the wind with the direction of the light. And the reason for that is because of the way Theresa's hair is gonna be blowing. So, if Theresa is this way, maybe our light was on this side. What would happen is that fan is gonna blow all of her hair into her face. And so the light is on the wrong side. So lights over there. The same thing is true. If Th...
eresa's looking this way not only is her hair gonna be blown in her face but the light is going to be on the wrong side and her face is gonna be in darkness. And so what Theresa is going to need to do is turn and face our key light. And so she is there. And so what's now happening is that the light is gonna be falling on her face in a really beautiful, soft way. And then also the fan is gonna be blowing her hair off of her face. And so it's all gonna work out. So the first thing we need to do here is we need to meter our light. And so we're gonna do that first. So I'm gonna meter this. And so that meter's right at F eight. That's perfect. I can show meter cam over here. We are at F eight. That's a great place to start. And so I'm gonna make sure that my camera is also set to F eight. And then I wanna show you something that I've done here on my computer. And so you can see on the here, I have a precept a developed setting here called Theresa blue. And so I did that in advance. So what that does is it adds some grain to the image. It gives us a nice blue color cast. It adds a vignette. It does some other things sharpening, etc. So basically we're gonna be doing our post-production on the fly. So I did that before we started recording this. And so you'll see that as the images come in they're not gonna exactly match the color here because I have adjusted them in advance with a developed precept. Okay, so we're F eight. We're gonna just shoot a couple of images before we turn on the fan. So the first thing I wanna do is shoot an image to sort of set where we want to be. And so Theresa, I want you to look just perfect. That is the shot that I want. We're checking our exposure, we're checking everything. And so I can show you on the screen. We have this, a little bit of grain there. We have this blue color cast, we have a vignette that looks great. I can even come in a little bit tighter on this shot if I want and get a little bit more traditional tight beauty headshot here. So this also will come in. The post-production is happening. You'll see the grain pop out and in just a second. So I like where this is headed. I could do something a little bit more retouching on that to make it good. The other thing I wanna do is take a full length shot. And so there stay right there. I'm gonna get it as far away as I can. So I don't have distortion in my shot. Okay, so now I have a full length shot and this looks pretty nice. Even with a small source of light, it looks pretty nice. So what we wanna do though is we wanna take this shot and we want to take it to the next level by adding some subtle motion. So it's not crazy motion, it's just a little bit to show that there's some movement in the dress. So Lexi's gonna come out here and help me out. And so we're gonna turn on the fan and this is gonna get really loud. So I'm gonna try, so Theresa, you sort of know where I want you to look. We did a little rehearsal before we started filming because we can't hear each other when the fan goes on. Are you ready? All right, here we go. Industrial strength, crazy fan. And go ahead and kick it on, yeah. (fan motor rumbling) There we go, excellent. Perfect. Excellent. Okay, let me show you these three shots side by side by side by side. So they're still processing. So they're gonna be coming in. Notice that now we have the dress moving instead of just being static and falling still we have some movement in the dress. And so a normal shoot like this. I would just shoot, I don't know, any of shots, maybe 10 or 15, 20 shots, and then choose the one that works best. And so that's what I'm gonna do. I'm gonna do just a few shots. Lexi's gonna help me out with the fan and then we are going to choose the one that is the best. And then we'll do our last look. So let's try this. I'm gonna do some horizontal. So go ahead and kick it up. (fan motor rumbling) Perfect. And turn more toward, there you go. That's it. I love that. Beautiful. Okay, I could shoot this all day long but we don't have all day long. So I'm going to try not to show eyes that are closed. So, I sometimes when I'm shooting fast, that happens. But let's take a look at these shots and then I'll choose one that I think is the best. And then we'll take our final last looks. Oh, that it's pretty cool. I really like that. So I would take that. Again, these are processing right now. So right now it looks grainy and then boom. This hair right here this might be a little too much wind. That is definitely too much wind. And then we have some eyes that are closed. Oh, there you go. I really like that. So I'm gonna take that. I am gonna go up. I'm gonna try to open my shadows just a little bit more. That's cool. I'll take my exposure down just a bit to protect what I did. I'm gonna crop this to 16 by nine. So it fills the screen totally, something like that. I like that full screen. There's our shot. And now we are ready for our last looks. (upbeat music)
Class Materials
Bonus Materials with Purchase
Ratings and Reviews
LeCompte
The class is comprehensive without being too complex! An all around 'how-to' guide with examples in real time with real people doing it for real. Showing 'What If' structured classes and showing 'Here is Why' Does not drag along but quick and concise. AND brought the support staff for deserved bow at the end. Nice Guy & Nice class 4 Stars at least!
Student Work
Related Classes
Lighting