Lessons
Prerequisite #1: Basic Metalsmithing Tools
18:08 2Prerequisite #2: Tools for Soldering
14:21 3Prerequisite #3: Soldering Basics
21:14 4Class Introduction
09:39 5Design Considerations for Bracelets
10:33 6Choosing Your Materials
16:12 7Sawing Bracelet Blanks
26:47 8Forming Cuff Bracelets in Wire and Sheet
21:41Determining the Length of a Riveted Bangle
08:11 10Creating a Standard Rivet
16:26 11Creating a Tube Rivet
09:25 12Making a Hinged Bracelet
21:02 13Drilling Holes Cutting Interior Shapes And Finishing Your Clasp
10:33 14Soldering A Basic Round Or Oval Wire Bangle
28:56 15Soldering Other Shaped Wire Bangles
35:17 16Soldering Wire to Sheet to Create Bangles
08:44 17Soldering a Basic Round or Oval Bangle from Sheet
14:09 18Soldering Other Shaped Sheet Bangles
05:59 19Pickling Metal After Soldering
05:42 20Filing, Sanding, and Basic Finishing of Bracelets
11:50 21Patinas: Achieving a Dark Finish with Liver of Sulfur
08:37 22Patinas: Creating a Heat Patina
05:21 23Patinas: Green and Blue Liquid Patinas
08:56 24Sealing and Finishing Patinas
08:35 25Taking Your Bracelet Designs to the Next Level
03:45Lesson Info
Class Introduction
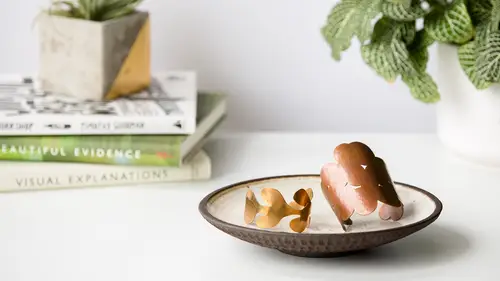
I am so excited to get started today. We have so much to cover, so let's actually just dive in and talk about what we're gonna be talking about today in this class. Obviously if you're thinking, "I want to make bracelets," you are here in the right place, but really if you want to learn a whole range of metalsmithing skills, you are definitely in the right place for this class because we're gonna be covering a lot of territory today and I'm really excited about that. So I want to start by just talking about why we're talking about bracelets today. Why did I make that the focus of this class? Because obviously there's lots of different types of jewelry that you can make. But I chose this as a way to talk about a lot of different techniques because first of all I think in bracelets, there's a little something for everyone. So we can go everything from these tiny little delicate bangles here all the way up to what I've been affectionately referring to as the Wonder Woman cuff. With bracel...
ets, regardless of your aesthetic, your style, your personality, you're gonna find something in this class that hopefully resonates with you, some techniques that you want to use and keep going forward. As far as techniques, we are gonna cover the whole range today. We're gonna do a lot of different things. First of all, if you are 100% brand new to metalsmithing or jewelry making, you're gonna be fine. We're gonna start you off nice, and slow, and easy. We won't send you into the deep end. We're not gonna get to the torch quite yet. We're gonna take our time. We're gonna build up to that, so we're gonna talk about a lot of really kind of basic beginner techniques, everything from just simply sawing out metal, to forming our cuff bracelets, to doing some really fun hammer textures. For those of who were asking in my last class about patinas, we're gonna do some patina stuff at the end of today. It's gonna be really exciting. We're not gonna just talk about Liver of Sulfur. We're talking about if you want to make your metal red, or blue, or green. We're gonna talk about that today, so that's gonna be fun. But then we are gonna build to a few more advanced techniques, so we're gonna do a few more things. If you don't have a torch, so if you are like, "I don't have a torch. "I can't buy a torch. "Megan, that's not an option for me," you're gonna find plenty of stuff in this class. I'm gonna show you guys how to do some rivets, which is a, not ribbit. We're not frogs, but a rivet, which is a fancy little way of joining metal without having to use a torch. So we'll get that and I will show you guys some basic soldering techniques that are going to hopefully make the torch a little less scary, and maybe get you thinking about using one in the future. We're also going to do some hinges without a torch, so again we're gonna come back to our Wonder Woman cuff 'cause I'm pretty excited about it. I'm gonna show you guys actually how to do a hinged bracelet without soldering, so that's gonna be a really fun little thing that we're gonna get to as well. We're gonna cover a ton of techniques today. So I also want to just talk about what tools you'll need to complete this class. Hopefully you guys watched our pre-req video that's on the class page. Those of you who are watching this class online, don't watch it now obviously. You're gonna watch us live, but during our next break if you missed those pre-req videos, you can go back and watch them. That does an overview of a lot of the tools. I am a huge fan of not having you guys buy more tools than you need. Even though I am definitely not what anyone would describe as a minimalist, I think in terms of jewelry tools I kind of am because I'm not one who's gonna say, "Go buy 18 expensive pieces "of equipment to get started." I want to keep things fairly simple for you guys. A lot of what we're doing today is just done with basic jewelry making tools, and again in our pre-req video, we talked about those, and if you guys haven't actually RSVP'd for the class, make sure that you RSVP for the class because you'll get a PDF with all the tools that we're talking about and links on where to buy them. So there's no guessing when I'm like, "Hey, you need a saw frame," and you're like, "I don't know where to get that." When you've RSVP'd for the class, you get the PDF. It's got the links. You can go, you can buy it, and that way you can know that you've bought the right thing. Speaking of saw frames, I just want to take a second to talk about a few things that you might want for this class that are in addition to what we talked about in the pre-req video where we went over all the amazing metalsmithing tools. I'll be showing those tools again as we work through the process. But the one thing that you may want to think about if you get really excited about bracelets, particularly if you get excited about the big chunky bracelets like I do, you may want to think about in addition to the three inch jeweler saw that we talk about in the video, you may want to think about getting a slightly deeper jeweler saw. The reason for that, and you'll see in a little bit when we get there, is that the size of things you can cut out is really restricted by the depth of this throat. I'm gonna show you guys some kind of creative cutting tricks so that if you only have this size saw frame, you can make do. But your life is gonna be easier if you also pick up a deeper saw frame for things like bracelets. It's just gonna save you some time, some hassle, and buying a deeper saw frame also means you can buy bigger sheets of metal to start with. What's nice is if you buy one big sheet of metal, it's less expensive than if you buy four little sheets of metal. This is something that you may want to think about picking up if you get really excited again about the big bracelets. Not necessary, but a nice to have. The other thing we're gonna be using a lot today are bracelet mandrels. A bracelet mandrel is really just anything that you can use to form bracelets around. I've got a couple different examples here. This is a wood one. It's fairly inexpensive and then we've also got some really nice metal mandrels here. These come in oval and round. You can see the different shapes. These are not necessary. The wood one works really well or in a pinch, my favorite trick is just a piece of PVC pipe. You can go to your hardware store and get it. That said, if you get really excited about hammer texture, it's a little bit hard to do hammer texture on the wood or the PVC pipe. You can see actually I've got some pretty deep grooves happening in my wood one because I was trying to hammer texture on here and it's just not quite right. So if you start to see as we demo these hammer textured ones and you're like, "Oh my gosh, I love this," it's worth spending a little bit more money to get the metal one 'cause that's gonna let you hammer texture. Makes sense? Awesome. All right, so before we dive in and start learning some stuff, if you've never been in a class with me before, you know that I like to we'll call it pick on my in-studio audience, and I also love to hear from our online audience. I would love for you guys just to share what you're most excited about learning in this class. We'll start with our in-studio group, but then those of you who are online, I'd love for you to chime in as well. So I'm gonna start right there. Don't forget you guys have to pick up those mics. What are you most excited about learning today? I'm just excited about the whole thing. I really like the bracelet right there that, yes. That, I'm excited about that. All right, awesome. I'm completely new to jewelry making in general, so I'm just excited to learn a new skill. Nice. Yeah, I'm new to jewelry making too. Perfect. Yeah, so I'm excited to learn. I love that we have like totally new beginners in this class. I'm looking forward to understanding all the cutouts and how you do that. Perfect, yeah. Like all the jewelry I've done is just straight and very much a beginner. Perfect. We'll go with our back row. It looks like there's a lot of things we can do without using a torch, so I'm excited about that part of it. Yeah, I know Tracy's all like, "No torch, no torch," so I made sure we built a lot of that in for today. I'm very interested in seeing how you patina metal, so that's what I'm really interested in. You'll notice we left that for the end of the class. I'm gonna make everybody stick around all day for that one. Fanny, she stole my thunder. (all laughing) So second on the patina. I'm so glad you're adding that in. Awesome. I'm also pretty new to metalsmithing, so I'm just excited for everything I can learn here. Perfect. The internet is chiming in just as our audience did. Torchless, torchless stuff they really are looking forward to that. Good. And also variations. Perfect. That's something we've been talking about. Yeah and so really hopefully my goal for this class is to show you guys a lot of techniques, and skills, and get you comfortable with the tools, but it's also to get your minds churning, right? I want you guys to come out of here with like so many ideas of things that you can do so that you're like, "Okay, well Megan showed me this, "but then what if I can do this or what if I can do that?" If you guys have those, "What if?" or, "Can I do?" These questions both online and in-studio, please ask throughout the day. I have a very try it and see motto. I used to teach hands-on metalsmithing at a university for a long time, and my students would come to me, and they'd say, "Well, can I do X, Y, Z?" I was like, "I don't know, let's go try it and see." I'm kind of a big fan of like, "Let's just hit some metal with "a hammer and see what happens." So I also want you guys to kind of feel like, "Okay, I've learned some basics. "I've learned some skills, but I don't "have to be scared of anything. "I don't have to be scared of the jeweler saw, "or the torch, or that I'm gonna ruin the metal." You might ruin the metal, but we're gonna work with fairly inexpensive metal, so if you ruin it, you're just gonna start over. It's fine. I want you guys to feel like you can experiment.
Class Materials
Bonus Materials
Bonus Materials with Purchase
Ratings and Reviews
user-d7f7ae
This is a great addition to Megan's metalsmithing series. She makes the topic really approachable. Bonus that metal patinas were added in to the class. I loved the class!
a Creativelive Student
I really enjoyed this class! It was very informative and gave me a lot of ideas for expanding a jewelry line to include a variety of bracelets and finishes.