Lessons
Prerequisite #1: Basic Metalsmithing Tools
18:08 2Prerequisite #2: Tools for Soldering
14:21 3Prerequisite #3: Soldering Basics
21:14 4Class Introduction
09:39 5Design Considerations for Bracelets
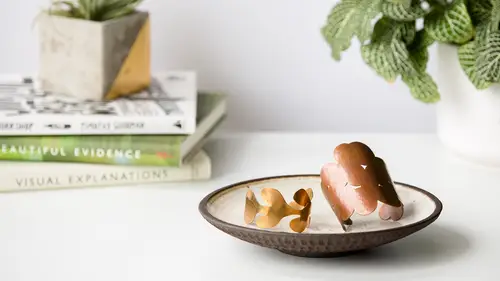
10:33 6Choosing Your Materials
16:12 7Sawing Bracelet Blanks
26:47 8Forming Cuff Bracelets in Wire and Sheet
21:41Determining the Length of a Riveted Bangle
08:11 10Creating a Standard Rivet
16:26 11Creating a Tube Rivet
09:25 12Making a Hinged Bracelet
21:02 13Drilling Holes Cutting Interior Shapes And Finishing Your Clasp
10:33 14Soldering A Basic Round Or Oval Wire Bangle
28:56 15Soldering Other Shaped Wire Bangles
35:17 16Soldering Wire to Sheet to Create Bangles
08:44 17Soldering a Basic Round or Oval Bangle from Sheet
14:09 18Soldering Other Shaped Sheet Bangles
05:59 19Pickling Metal After Soldering
05:42 20Filing, Sanding, and Basic Finishing of Bracelets
11:50 21Patinas: Achieving a Dark Finish with Liver of Sulfur
08:37 22Patinas: Creating a Heat Patina
05:21 23Patinas: Green and Blue Liquid Patinas
08:56 24Sealing and Finishing Patinas
08:35 25Taking Your Bracelet Designs to the Next Level
03:45Lesson Info
Choosing Your Materials
So, let's dive in and talk about choosing your materials. We have a lot of people here who are totally new to working with metal, which is awesome, so I want to make sure everyone is on the same page with what they can and can't work with in terms of metal. So, let's talk about what types of metal can you use to create your bracelets? So in this class we're basically going to be talking about non-ferrous metal. "Non-ferrous" is a fancy way of saying it does not contain iron. If you paid attention in chemistry class, the symbol for iron is Fe. I only know that because I'm a metalsmith. I did not pay attention in chemistry class, let's be honest. So non-ferrous means "doesn't contain iron." So really common non-ferrous metals for jewelry are brass, bronze, copper, sterling silver, you might hear a lot of people talk about Argentium silver. Argentium is a new alloy. "Alloy" is a fancy word for saying a mixture of different metals together. So Argentium is a new alloy that's got a little l...
ess copper in it. Sterling silver is actually fine silver, plus a little bit of copper, but that little bit of copper is what makes your silver tarnish. So if you've ever had sterling silver jewelry that turned gross after awhile, that's the little bit of copper in it. A lot of people are switching to Argentium, it has a little less copper in it so it tarnishes much more slowly, stays kind of whiter, brighter silver. So if you hear that term, I always like to throw that in because you might hear it thrown around on the internet. Jewelers, we like to use that word as if everyone in the world knows what Argentium is, but it's really a very new metal. And then of course you can also work with gold or gold-filled. Gold-filled is just actual gold with a layer of something else, usually brass, in between, so that you can get the look of gold on the surface without the price of gold. Now, when you're thinking about using these things for your bracelets, I'd recommend starting with brass, bronze or copper. They are by far the least expensive metals to work with. And they are a little bit different in terms of color, let's see here. So, if we look at some of our samples, I don't know if we can quite see what's happening here, but we'll pull out a couple. So you can see we've got brass, actually I think this is new gold. I'm really gonna confuse you guys here for a second. I think that guy's actually, technically bronze. So new gold is an alloy of brass, I know it's so hard to see, but if we look at this it's kind of, like, yellower, a little goldier, a little warmer yellow and then our pure copper. So, brass, new gold, bronze, copper. Really, for the most part, this is just an aesthetic decision, right? Which colors do you like, are you drawn more toward something that looks a little copperier, a little earthier, or, you know, do you want something that's a little bit more brass, that can kind of tend to look a little bit more modern, mechanical, shines up to be kind of really bright and yellow. So, just sort of thinking about aesthetically what you want, because they're all pretty comparable in terms of cost, and they're all pretty comparable in terms of workability. Copper is gonna be a little bit softer than the other three, but really it's mostly a matter of aesthetic. In terms of things to avoid, we want to avoid nickel. So, you may hear some people talk about nickel silver. When I taught a lot at the university, silver was very expensive then. Silver is actually much cheaper right now. Silver fluctuates a lot, so by the time you're watching this video, if you're watching in the future, silver could be expensive again. I don't know. But I had a lot of students who wanted to work with nickel. It is technically a non-ferrous metal. It is a pain in the butt to work with. It is so not worth any headache. It does not solder nicely, it's really hard to bend, it's hard to cut out, so in general I say avoid nickel. If you really want a silver color, a lot of places will now sell silver-filled, so silver over another base. But I think now also the nice thing is brass and bronze have really become very popular, so a lot of people are happy just to work with those metals. The other one we want to avoid is aluminum, and that's because aluminum, while it is technically very easy to work with, it's a contaminant for everything else in your studio. So what happens is aluminum actually melts at a much lower temperature than any other metal. So if you have even a tiny bit of aluminum dust on a tool and then you use that on another piece of metal and then you take a torch to it, you could actually melt a giant hole right in your other metal. I've seen it happen to people with silver, it's really awful. Like you just bought your $50 piece of silver, you're going to anneal it, and then poof, it disappears because it had aluminum dust on it. So, best bet, completely ignore aluminum. If you really want to work with it, you should have a different set of tools in a different area in your studio to work with. Alright, so, like I said, choosing your metal you really kind of have a lot of options, and most of them are really about color and aesthetics and what you are drawn towards. Again, cost: brass, bronze, copper, new gold, all about the same. Obviously, silver is more expensive. Gold is more expensive still. So, thinking about how much you want to spend, again, I recommend starting with those less expensive metals. Pretty much everything that we're using in this class today. Malleability is a fancy word for how soft and easy to form it is. Copper, a little bit easier to work with than the other metals in terms of how you can bend it and form it. But none of them are really so difficult that you should be scared of them. So, if you're like, "I don't really like copper, I like brass and bronze," go ahead and use that. I actually personally like my metals to have a little bit more fight to 'em, I think copper is, like, way too squishy. So I always use brass and bronze, personally, because I like that they're a little bit tougher. And then the other thing you want to think about is upkeep. So brass, bronze, copper, they're all gonna tarnish over time and they're all gonna oxidize or change color slightly, so we'll talk about some solutions for how to seal them a little bit later. But just know that if you make this copper bracelet, this is even kind of starting to get a little funky from when I made it in my studio a couple weeks ago, right? So just know that certain metals are gonna have some upkeep. Silver, particularly if you buy the Argentium, you don't have to worry about that. And obviously there's a reason people have been making jewelry out of gold for millennium, and it's because it doesn't tarnish. So there is something to think about there, but of course, it is very expensive. Alright, so the other thing is obviously, as you've seen, bracelets can be made from sheet or wire. And we're going to be talking about working with both of those here. So in terms of sheet and wire, they are both measured with something called gauge. So if you see "ga," that's an abbreviation for gauge, that's how metal thickness is measured. It's a little bit counterintuitive, because the lower the number, the thicker the metal. So 14-gauge is gonna be really thick, 26-gauge is gonna be really thin. And this applies to both sheet and wire, so they're actually the same. So I think, like, this little link bracelet here is made out of 12-gauge, and these little bangles here, I think they're, like, 18 or 20. They're something pretty thin. So you can see just the difference in gauges there. So if the number is smaller, it's thick gauge. If it's a higher number, it's thin gauge. So, yes, you can see that on our keynote there, as well. Gauge, again, just like a lot of the other things we're talking about, it's kind of a personal preference on some of these things. So you can see in our bangle and cuff bracelet examples, you can make cuff bracelets, bangles, you can make them pretty much out of any gauge wire, within reason. The thinner you get, obviously, the easier it is to bend, so the less practical it gets, but we're gonna talk about some techniques for work hardening. So you can see on our tiny little bangles here that I made I actually went ahead and hammered them, and so now they're actually pretty stiff and tough, you can kind of see it's not super soft and squishy. So there are ways, if you really like thin, delicate metal, you can absolutely make that work. But if you want to work with something a little bigger, a little chunkier, that's totally fine as well. So when you buy metal, you're always gonna specify gauge. Wire is usually gonna come on a spool or it's gonna come wrapped around, so it's generally pretty easy with wire to know what you're getting at. Sheet usually comes, let's just pull some sheet out here, when you buy a sheet of metal, it's gonna come usually totally unmarked as a sheet of metal. When you buy copper, brass, bronze, new gold, any of those, usually you're gonna order a standard sized sheet. So a lot of times you'll see a 6-inch by 6-inch, or a 6-inch by 12-inch, I don't know how they come standard for our metric friends, but generally you'll see some standard sizing in those. So you'll get a bigger sheet and you'll cut out your designs. For silver and gold, you have a little bit more control over what you want to order. So if you're like, "I need a 6-inch by 1-inch strip of silver to make this bracelet," you can order a 6-inch by 1-inch strip of silver. But it's important that when you get this, you can see I didn't do this on this, I actually like to take a Sharpie and write the gauge, sometimes I like to write the metal, and because I'm weird and I like to buy metal from all different places because I like to see what the alloys look like, sometimes I will also mark where I bought it. Not important for copper, copper alloys usually look like copper, look like copper, look like copper, but for something like bronze, I've ordered bronze from different places and it looks very different. Sometimes it looks really coppery, sometimes it looks a little closer to brass, so I like to label them. If, for some reason, you forget, there's a handy little tool called a sheet and wire gauge. So if you buy a lot of different gauges and you're bad about things like marking, and it's important for you to know, you can take this gauge and actually use it to measure. So I don't know if we can see that there. So, for everyone's reference, because I was confused about this for a long time, these circles do not correspond to wire. They literally mean nothing. Your wire is gonna slide into the side the same way that our sheet is, right? So I'm just sliding that in there, right into the side. Does that make sense? The holes mean nothing. I don't know why they're there, maybe because it was easier to manufacture, I don't know. But don't be like, "Oh, my wire is not..." Nope. Don't mean anything. Okay. So. Not an essential tool, but a nice tool to have. Do you guys have any other questions about metal types, how metal comes, different materials, gauges, anything like that? Can you speak briefly about potential allergies or whatever that people might have toward different metals? Yeah, so the biggest allergy that people are gonna have is to nickel, which is why just avoiding nickel as a metal to work with is really good. Otherwise, most allergies that you're gonna see are very, like, specific to people. Like some people just can't wear copper, which means that they also usually can't wear sterling silver, because sterling silver has a little bit of copper in it. You don't generally see a lot of allergies to gold, that's why, again, people wear it all the time. Really, the thing to know if you're working with brass, bronze, copper, anything that contains a lot of copper content, is that it's going to turn people's skin green. It is not an allergy, it is just the nature of the metal reacting to chemicals. And every person is gonna be a little bit different. Some people react very quickly to those materials, some people can wear them for a long time. If you're sweatier, it's gonna make it happen faster. So it's one of those where you can seal them, we're gonna talk about some sealing techniques, you can seal things to make it work a little bit better, but there's never a 100% perfect way to keep copper, bronze, brass from potentially changing someone's skin. But in terms of all the things that we're talking about, none of them contain nickel, and that is the biggest allergy that people have to metal. Alright, so, who's ready to dive in and start making bracelets? You guys are ready? Alright. So we are gonna start by talking about cuff bracelets. Like I said, it is kind of a really nice, simple place to start. It also is really great because cuff bracelets are perfect for torchless techniques, right? So we can make a lot of different kinds of cuff bracelets without ever touching a torch. So the first thing we wanna do is figure out how long a cuff bracelet needs to be. So general rule of thumb, and this is one of those where I'm just gonna be super honest, bracelet sizing is complicated and tricky, and part of that has to do with the fact that there are so many different types of bracelets, right? So a cuff bracelet is different than a bangle, and then on top of that everyone's wrists are very differently shaped. So when we're talking rings, ring sizing is very standard. You're a 7, you're an 8, you're a 7 1/2. Whatever it is, very clear. Bracelets, there's no numbered sizing system, so it gets a little bit more confusing. General rule of thumb with a cuff bracelet is the length around the wrist minus about an inch. So what's nice is that if you are making cuff bracelets for yourself, you're not at the mercy of anyone's sizing system. You can take a tape measure, I am a huge fan of keeping sewing tape measures in my studio, I use them all the time. I actually like to buy the retractable ones because I don't like a pile of tape measure sitting on my desk. But you can literally just measure around your wrist, at the spot where you want the cuff bracelet, like actually think about that. You know, I'm looking at, I don't want to pull it too tight, so probably, like, 6 1/2, subtract about an inch, so maybe about 5 1/2. I happen to know what I was making the samples out of and that feels a little small, probably because I was yanking the tape measure tight, not something I'm gonna do with the metal. So that's general rule of thumb, is about the wrist minus an inch. If you have pretty tiny wrists, I would say subtract about 3/4 of an inch. I'm trying to be good for all our metric friends, so an inch is about 2 1/2 centimeters, so for those of you who are working on the metric system. You'll also find that in jewelry, a lot of times people just sort of flop back and forth. So you may hear me talking about inches and then all of a sudden I may talk about measurements in metric. I tried to put both up for you guys, but if you're like, "Wait. I don't know what that is," just ask and we'll figure it out. I've got a calculator. We can do some math. Now, if you're thinking about making bracelets for other people, there are approximate consensus on different sizes. Another bonus that I put together for you guys, if you purchase this class, all of this information in a PDF so you don't have to sit here and try to scribble it down really fast. But generally these are sizes and these are based on if you're using a linked bracelet, something that goes tightly around the wrist. So you can use this measurement for a linked bracelet and you can use these measurements for a cuff bracelet, where you then just subtract an inch. So if you're thinking a small is a 7, and I subtract an inch, that's about 6 inches, right? Make sense?
Class Materials
Bonus Materials
Bonus Materials with Purchase
Ratings and Reviews
user-d7f7ae
This is a great addition to Megan's metalsmithing series. She makes the topic really approachable. Bonus that metal patinas were added in to the class. I loved the class!
a Creativelive Student
I really enjoyed this class! It was very informative and gave me a lot of ideas for expanding a jewelry line to include a variety of bracelets and finishes.