Design Considerations for Bracelets
Lesson 5 from: Foundations in Metalsmithing: BraceletsMegan Auman
Design Considerations for Bracelets
Lesson 5 from: Foundations in Metalsmithing: BraceletsMegan Auman
Lessons
Prerequisite #1: Basic Metalsmithing Tools
18:08 2Prerequisite #2: Tools for Soldering
14:21 3Prerequisite #3: Soldering Basics
21:14 4Class Introduction
09:39 5Design Considerations for Bracelets
10:33 6Choosing Your Materials
16:12 7Sawing Bracelet Blanks
26:47 8Forming Cuff Bracelets in Wire and Sheet
21:41Determining the Length of a Riveted Bangle
08:11 10Creating a Standard Rivet
16:26 11Creating a Tube Rivet
09:25 12Making a Hinged Bracelet
21:02 13Drilling Holes Cutting Interior Shapes And Finishing Your Clasp
10:33 14Soldering A Basic Round Or Oval Wire Bangle
28:56 15Soldering Other Shaped Wire Bangles
35:17 16Soldering Wire to Sheet to Create Bangles
08:44 17Soldering a Basic Round or Oval Bangle from Sheet
14:09 18Soldering Other Shaped Sheet Bangles
05:59 19Pickling Metal After Soldering
05:42 20Filing, Sanding, and Basic Finishing of Bracelets
11:50 21Patinas: Achieving a Dark Finish with Liver of Sulfur
08:37 22Patinas: Creating a Heat Patina
05:21 23Patinas: Green and Blue Liquid Patinas
08:56 24Sealing and Finishing Patinas
08:35 25Taking Your Bracelet Designs to the Next Level
03:45Lesson Info
Design Considerations for Bracelets
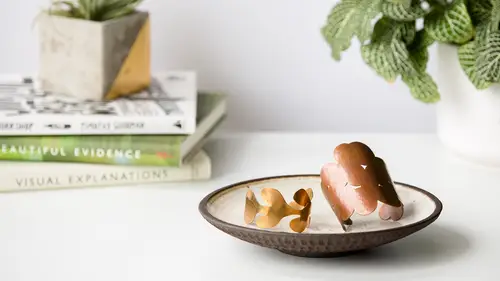
So let's talk a little bit about design considerations for bracelets. So, there are, there's probably way more types than this, but for our purposes, we're going to talk about four different types of bracelets. So the first type is a cuff bracelet, and that's any of these bracelets that you see here that actually have an opening. So it literally, haven't put this on in a long time. Oh look, it fits me perfectly. How convenient. So a cuff bracelet is really anything that you can just go ahead and slide on your wrist like that. We're going to talk about doing them in sheet metal. We're also going to talk about doing them out of wires, so if you want to make some simple, little cuffs, they're super fun. So we'll talk about cuff bracelets as an option. What's nice about a cuff bracelet is that it fits on someone's wrist, right. It's not something you have to slide over your hand, or kind of fight with. But at the same time, depending on the shape of your wrist, and who made the cuff bracel...
et, they can be a little uncomfortable. The nice thing is if you guys are making your own cuff bracelets, you can make them fit you perfectly. So our next type of bracelet is a bangle. That's any kind of bracelet that is perfectly round. This one's a little big on me, that just slides on over your hand. And we're gonna talk about those, both how to do those through rivets, which is a torchless technique, and a little bit later how to do some soldered bangles. The third type is a link bracelet, so basically any kind of bracelet made out of chain. Now, we are not gonna talk about linked bracelets in this class, because we already did an entire class on chain making. So if you're like, "Megan, how do I make chain?" We did that one last time, so you can go back later and watch that class. It's called "Explorations in Metalsmithing: Chainmaking." But I wanted to acknowledge that this is a very valid type of bracelet. We're just gonna talk about a few other different techniques in this class. And then the last one is the hinged bracelet. As I said, that's a bracelet that opens. It's a little bit of the best of both worlds, in that it fits you snugly like a cuff bracelet, but it's, so you don't have to slide it on like a bangle, but it's a little bit more comfortable. It can go all the way around your wrist. And as I mentioned, I really wanted to make sure we could do hinges in a way that felt super approachable to beginners. So we're gonna talk about two different hinged bracelet techniques that require zero soldering. So I think that'll be exciting for everyone. You can see, I'll just put this on cause it's fun. So we're gonna talk about how to make those, how to make clasps, how they work, I know, everyone's face is like, "That looks fun." So yeah, we're gonna get to this a little later too. And spoiler alert, if you purchase this class, I actually put the template to make this as a bonus for purchase. So if you guys are like "I wanna make this thing immediately" you should just buy the class, because the template's there and ready for you to go. Alright, so those are four types of bracelets. Now, when you're designing your bracelets, there are a couple other things to consider. I want you guys to start kinda thinking about some different design elements and how you can employ these for your bracelet. So, we're gonna talk about shape, a little bit about positive-negative space, about texture, about comfort, because for designing something that's gonna go on someone's wrist, right, comfort's important. And then a little bit about color, because we're gonna do some patinas. So, shape is really your first consideration when it comes to bracelets. And there are actually two different things to think about. The shape as it goes around the arm and then the shape as it lays on the arm. So, when we're thinking about the shape around the arm, of course there are kind of standard shapes, like if we think about is it round versus is it oval, and neither one of these are very perfectly that, but they're samples. So you can think about that, but you're not limited to that, particularly when we think about bangles. So, you can see here, we've got a few bangle samples that are like this little half round shape, this whatever six-sided. What's that, hexagon? Hexagon! A little diamond here. I don't know if we can see those under our little thing. So when you're thinking about shape, you're not limited to making a round bracelet, or an oval bracelet. You can start to think about, do I want to do some other shapes? And we'll talk about how to make those shapes in both sheet and wire a little bit later in the class. But then you can also think about the shape on the arm itself. So, you know, we have this bracelet here, which is pretty much just a rectangle sitting on the arm. But, we have this beauty of being able to cut out of metal, and literally create any shape we want. So, this is basically an abstracted organic shape, because that's pretty much my jam. So I've got this kind of abstracted organic shape. If you were in our Statement Earrings class, you will probably recognize this shape, it's kind of our Matisse inspired guy. So really, because we're talking about how to cut out of metal, the sky's the limit in terms of the shape on the wrist as well. So if you are a person I've kind of mentioned before, geometry, in terms of geometric shapes, not really my thing, but you guys might find that you want to do something really geometric, maybe you're a little more organic, so you can start to think about those shapes. The other thing that you can think about is positive and negative space. So do you want cutouts, do you want open space. So you know what happens if you cut pieces out of your metal to kind of break up a big flat plane, so you can see the arm through, or even when you think about actually a bracelet that's got a little bit of shape to it, but when you put it on, something like a bangle, now we're kind of creating these kind of positive, these kind of negative spaces, between the wrist and the bracelet itself. So those are things you can play around with as well. And so actually when I did this kind of, our Wonder Woman cuff, you know this is something where you could certainly leave this like this, but this is a whole surface that you can think about cutting out metal from to create your own designs and patterns, so I really hope that you guys take this template and really play with it, because there's a lot you can do here as well. So that's something to think about. And then the next thing is just thinking about texture. So we also don't have to leave our metal as kind of smooth, bare metal. So, basically in this case we're going to talk about adding texture through hammering. So you can see here I've got, you know, this is just the plain wire, but if I start to hammer on it with different shapes of hammer, I can start to add some texture. And what's nice when you do that with bracelets, is because you on, they're on someone's arm, and they're moving around a lot, now they start to catch the light, you start to see all that shadow. So thinking about things like do I want to add a hammer texture to it and really kind of playing with that. And we can do the same thing with our sheet metal. So this has got a nice all-over hammer texture on it. This definitely takes a lot longer to hammer texture than a little piece of wire. I made this bracelet a long time ago, so I can't tell you what. So you can start thinking about adding some texture to your sheet as well. Just a little kind of spoiler alert, obviously this has a little bit of a patina on it, it's a little bit, kind of orangeier than copper itself is. So we'll talk about how to make that happen a little later too. I know you guys are all about the color, I'm so... Look, I actually wore color today just for you guys. So then our other thing to think about is comfort. So where is the bracelet going to sit on the arm. Now it's important to know that everyone has a different tolerance for what they find comfortable in jewelry, right? So there are some people, where they could put on this little bangle bracelet and like it's going to bother them all day, like "Ugh, there's this thing on my wrist." Like, "What is happening?" Right? And there are other people who can wear the Wonder Woman cuff all day, and like it's not gonna bother them because they wear a lot of jewelry. So comfort is a little bit of a subjective thing, but you do want to think about things like where is the bracelet going to sit on the arm. Most of us have different levels of pronouncement of, I'm really bad at anatomy so whatever that little bump is there. Most of us have different levels of pronouncement of that. So thinking about things like if I have my cuff bracelet here, you know, cutting it, making sure it's not gonna hit things like that. Thinking about should it sit here or should it sit further down. So just starting to think about you know, is it comfortable. Bracelets are a little bit tricky because everyone's wrist is shaped differently. But starting to think about things like okay, if I have a cuff bracelet, it's probably more comfortable as an oval, than it is as a pure circle, because most of us have oval-shaped wrists. Whereas a bangle, you might want it round because you like kind of the look of the round. And since it's gonna float around, it doesn't matter as much. And I personally like to push my bangles up really high anyway. And then round actually works a little better. Of course we have color as a design consideration too. Everyone's like, "Yes, color, let's just go there now." So in terms of color, you can think about natural metal versus patinas. We're gonna talk about the different types of metals in a second, because right away, just between copper and bronze and brass and silver, you already have a lot of different options as far as color. But then we can start to add in patinas and that gives us more options. So you know one of the things we briefly mentioned in a previous class, but we'll do a little bit more of today is talking about liver of sulfur, which is our nice kind of dark finish on metal. And liver of sulfur is great because it works on copper, it works on silver, so you can start to think about getting some really nice dark colors. But then we'll also do things like taking our copper and making a little bit orangeier. And I don't actually have any out yet, I'm gonna leave you guys totally surprised when we do some blues and greens as well. So there's a lot of different colors that you can do just with our basic metals. So I think that hopefully gives you guys some thoughts on lots of different design considerations. Does anyone have any questions about that? You guys are ready to start learning some stuff. Alright.
Class Materials
Bonus Materials
Bonus Materials with Purchase
Ratings and Reviews
user-d7f7ae
This is a great addition to Megan's metalsmithing series. She makes the topic really approachable. Bonus that metal patinas were added in to the class. I loved the class!
a Creativelive Student
I really enjoyed this class! It was very informative and gave me a lot of ideas for expanding a jewelry line to include a variety of bracelets and finishes.