Demo: Equipment Overview
Lesson 20 from: Fine Art Conceptual Photography from Shoot through Post-ProcessingBella Kotak, Pratik Naik
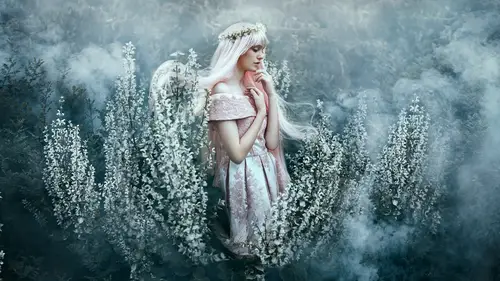
Demo: Equipment Overview
Lesson 20 from: Fine Art Conceptual Photography from Shoot through Post-ProcessingBella Kotak, Pratik Naik
Lessons
Class Introduction
04:47 2Artistic Vision and Inspiration
17:06 3Personal Projects
18:59 4Creative Motivation and Defining Your Story
15:15 5Organizing Your Inspiration
16:26 6Building A Character
03:19 7Creating Wardrobe and Props
33:59 8Location Scouting
12:55Resourcing a Team
17:52 10Working with Talent
06:39 11Building Community
05:06 12Scouting Location Pros and Cons
11:29 13Camera Gear and Modifiers
10:03 14Shoot Set Up and Styling
11:34 15Test Shots With Model
06:04 16Location Shoot: Model in Red Azaleas
26:04 17Location Shoot: Composite Pieces
16:35 18Plates Extending the Scene
07:11 19Set Concept and Design Overview
08:31 20Demo: Equipment Overview
04:39 21Shoot Set Up
08:12 22Shoot: Test Shots
15:08 23Shoot: Standing Against Flower Wall
06:47 24Composite Pieces: Hair
05:31 25Shoot: Overhead on Flower Wall
22:22 26Adjusting Images With Composite Shots
07:25 27Color Theory
11:40 28Capture One: Image Selection and Color Toning
19:42 29Moving from Capture One to Photoshop
17:01 30Compositing Hair
15:52 31Healing Brush Tool
06:42 32Dodge and Burn Tool
08:14 33Liquify Tool
12:01 34Adjustment Layers of Color Toning
35:05 35Blending Modes
10:44 36Channels and Channel Mixer
05:16 37Selects for In Studio Image
08:57 38Compositing Background
13:58 39Compositing Additional Elements
09:49 40Gradient Maps
15:51 41Color Toning with Controlled Light
21:32 42Adjust Skin Tones
17:27 43Retouching Skin
17:12 44Spot Healing Brush
06:11 45Clone Brush
03:47 46Dodge and Burn
18:49 47Sharpening
10:42 48Critique
15:40Lesson Info
Demo: Equipment Overview
This is a Phase One 100 mp camera, so that's 100 megapixels. Yes, massive, I know. I actually had to upgrade my computer to handle the files from this baby. We are using the 80 millimeter lens, and, yeah, we're gonna see how we go from there. Right, so it's basically, same thing, this camera has three dials up top so you can control your shutter speed, your aperture, and your ISO, as well as exposure compensation if needed. And we're going to be tethering today as opposed to just shooting with a card so that I can monitor the situation in case she's out of focus or if there's any highlight detail I'm gonna see if I can recover right away. That's the other benefit, is if you're shooting in studio, tether as much as possible because I have had that happen so much where I shoot in studios and I go home, if I'm not tethering, and I don't see the things that I miss, I might have missed the focus a little bit, might have realized that I couldn't rescue some details. I've had to retouch fas...
hion shoots for lookbooks where I couldn't actually rescue the shadows in particular photos and the stylists were really unhappy with the photographer, but there's nothing I can do at that point because no one was tethering ensuring the detail was there. With a system like this, you can get away with harder contrast lighting to make sure the details are all available to you in case you need to. Basically, tether whether or not you're shooting with a DSLR camera or a-- As much as possible. Yeah, so just use a tether. Plus, it also just makes sense when you're working with clients to tether, because they will want to see those files. And it looks more professional than showing them off the back of your camera. And also because we're tethering to Capture One, what Capture One has is an app called Capture Pilot. And what that is, have you guys used Capture Pilot before? It gets your clients away from the set, they can go in another room as long as they're in the same Wi-Fi network and have it on their iPads. So a lot of my clients, photographers will have a couple iPads and they'll tell the art directors to go away, get off set if they don't need to be there. And they can star and rate these files. Because sometimes they hover. Yeah, they hover. They're like, "Did you get the shot?" They really do. And you're like, "Go away, I'm trying to create." And you don't really want that. So, what's next? Light. We need to talk about the light that we're using. So we're gonna be using a Profoto D1. We're using a Profoto softbox. This is a five, it's five foot, isn't it? Yeah, five foot softbox. And we had an option between the five and the seven and we might be using the seven later. The seven is right behind you. Yeah, it's over there. We'll bring it out later, which is gonna be really interesting. But this is nearly as big as me. (laughter) You're only four foot nine, just kidding. Alright, calm down. So for the shot I wanted, or the shot I envisioned for this setup right here where she's standing is going to be again, a waist-up shot, a portrait shot. And that's what I envisioned. If we go for, if something else comes from it, great, but we'll start off from there. I do think that this will provide enough light for the whole picture, though, however. Yeah? Good, great. Let's do this. If you don't have a softbox there are many other options you can do. For example, you can have a light, or a head as we call it, and reflect off V-flats, you can shoot through scrims. You can have double diffused scrims and shoot through those as well. So there's many options, and it's all about the size of the diffusion panel and the distance, okay? Yeah, and I'd say speaking of diffusion this has a double diffuser. Do you want to show them the inside? Because it will definitely impact the quality of light that we're gonna be seeing. So, there's a double diffuser in this. The light is here, oh, take just one of those off. So there's the light, and it's gonna get diffused by this first layer, and then it's gonna get even softer by the second layer, and, yeah, you can put it back, thank you. And the reason why I want the softest light available is because I shoot a lot in natural light, and natural light, especially on cloudy days, is super diffused, and so I'm basically trying to recreate the same aesthetic of lighting that I would have on location and that means that when this piece is in my portfolio, it would hopefully sit very nicely along all my other photos. And the lighting style of all the photos in my portfolio is consistent. So that's pretty much the thinking behind the choice that we made today.
Class Materials
Bonus Materials with Purchase
Ratings and Reviews
Kathleen
Great class and great instructors. Genuine and informative. Practical tips to create stunning images. Seeing them work through the process from shoot to finished image was great and I loved that they shared the thought processes behind the creative decisions. Definitely recommended!
RoxSpiegel
Truly a remarkable duo. Bella is so down-to-earth and humble for a photographer with such a strong beautiful and ethereal voice. Her explanations of her process really inspired me--I was sketching concepts throughout the class. Pratik's process really opened my eyes to "smart" retouching--understanding what can be done in fewer brush strokes and slimmer PS files. All in all a really unique and inspiring class that makes me excited to realize my next conceptual shoot. They're also adorable together!
Mai Her
I've gained sooooo much from this I can't even contain my appreciation and excitement! So much inspiration and so much generous advice and tips to help me! Thank you so much Bella and Pratik and Creative Live!