Lesson Info
13. Remove Background from Trees
Lessons
Elliptical Marquee: Corners
04:17 2Transform Selection
06:13 3Straight lines with Lasso Tool
02:13 4Quick Selection Tool
03:25 5Inverse Selection
01:13 6Lasso plus Magic Wand Selections
06:20 7Quick Mask Mode
06:10 8Precise Selection on Handwritten Text
14:20Lesson Info
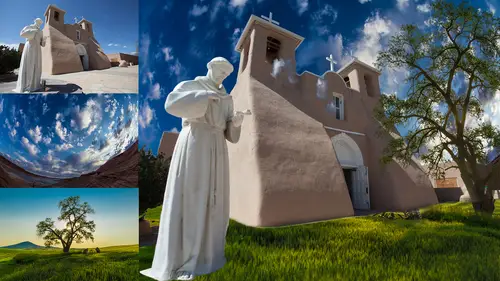
Remove Background from Trees
Let's talk about trees how could I remove the background on this tree? Because the skies pretty boring there I want a more exciting sky and there but look at the tree I want to select every single twig on that tree every little ah branch every leaf that's there you know I need to put a new background behind it and get it so it looks at least somewhat natural on that background that's not an easy task, is it? Well, first thing I would think about when it comes to things like that is before I even open the picture there's something we're going to do this is a raw file and when you double click on a raw file it brings you up camera wrong I'm not going to ignore camera first let me get this to default settings just choose camera defaults so you could see what it looked like before it had been adjusted and let's just say I wanted to adjust it overall it's a little bright so I bring down my exposure and all I'm doing is making the picture look the way I wanted tio meaning the adjustments I a...
pply here are specific to this image they wouldn't be the same adjustments that possibly a different image needs but I would do something to optimize my picture but then there are some things that can really help selections be more successful and this isn't just for trees it's true for most things and that is if this image needs any kind of color correction it's best to do it before you start making selections because let's just say it had a bad color caste let's say it looked like this if that's the case everything in the entire picture looks overly yellow in so photoshopped is gonna have real trouble trying to tell the difference between the yellowish tree and a yellow with sky because everything looks yellow that make sense so ideally we would perform color correction on the image and one thing I would dio is when I do color correction that's usually with temperature and tint these two sliders if you have something in your picture that looks like it should be a shade of gray you can grab an eyedropper that's up here called the white balance eyedropper click on it and then click on the white or gray object and it will see what color is that area contaminated with meaning if it's not whiter gray's or too much yellow in its or too much blue and it will adjust these two sliders to get rid of whatever's in that white or gray area but in this image I don't know that I know what should be white or gray so I don't know if I can do that and if that's the case here's how I think about these two sliders I want to move them around until I see the most distinct differences in the colors so sometimes what I'll do is I'll make the image more colorful by pumping up either vibrance or saturation so it's just easy to see what the colors look like then all adjust temperature intent and I know if I move temperature too far this way everything starts looking yellow in a time of it too far the opposite direction everything starts looking blue but somewhere in between you get the best separation between the colors where you can tell the greens are different than the blues and are different than the browns they don't seem to combine together so over here to yellow over here to blue but somewhere in the middle there's like a magic spot where I seem to be able to get the boast separation between the colors and then I do the same thing with ten looked for the most separation here everything started look magenta e over here lived but somewhere in between looking for the magic where the colors separate the most it's not always a precise area where you know exactly where to go try to get close to that and bringing up vibrance also helps to separate the colors if vibrance is down here's vibrant zero that's the original color can you see that much difference in the color of this area versus the color of that area not necessarily but if I bring up vibrance suddenly I can start seeing that there's some greens and yellows in here that are different so I might bring that up in one other thing that's important is if I presume upon my picture oftentimes there could be issues depending what lens you used to get really close on this image can you see a little of green blue halo here in a red one there that's called dramatic aberrations and when you're working on things like this image where you have extremely thin branches and everything those little color halos and there can end up causing big time problems I can show you what it looks like if you forget to adjust one of that to show you come on over here well all open this after but there are on this image there are halos around the edges distinct massive red halo on one side and green one on the other I'll have to open it once we're done hoping this other picture but to get rid of that you go in camera over here there is the lens tab and under the lens tab there's this check box right there to enable lens profile corrections and under the color tab this is the one that gets rid of those colored halos it's called removed dramatic aberration so if I turn it on now you see the red and green handlers were gone another thing that's useful to do is if your image is overly noisy, then go to the detail tab and deal with the noise now, otherwise you're gonna have noise and every one of your selections it's not going to be a clean one, since this class is about came a raw, I'm just going to do a little bit of noise reduction on it, and then we can open this image once I get my colors to be nice and colorful, ok? And then I'll open that other image to show you what it looked like if you forgot to do the chromatic aberrations, can you see a red line right there? Can you see a weird looking one here on the edge and the trees back here? You just see weird looking like scient edges and stuff that's, chromatic aberrations and it's that we didn't get rid of it before we started dealing with things. So now let's, try to learn how can we get rid of the background on this? To do that, we gotta learn about a new feature, not a new feature, but a new ah idea that we haven't talked about yet, and we just start with a simpler image, then we'll move. Back to the tree so I'm going to use the eraser tool to get rid of the background on the tree you might think it would take years to use the eraser tool in between each branch but there's actually more than one version of the eraser tool if you go to the race or tool and click and hold on it there three versions we're going to use the background eraser now the background race certainly make sure that default setting because I don't believe I am right now uh yeah I just wanted to reset the's to see if it will be the way it is for you when you get home the background of racer tool gives you a brush that has across here in the middle and when you click the mouse button watch what happens what is just too well what it did is it looked at the color that was underneath across here and deleted on lee that color from within the circle so if I'm start moving like here do you notice it's not deleting anything because what's underneath the cross hair that's in the center of my brush nothing checkerboard right but the second the cross here touches blue sky again it knows what color did leap but it only the leads from within the circle so it could go around things like this let go of the mouse button is a move over here click again try to remove the background is long is whatever surrounding it is distinctly different in color. Does that make sense? How is working it's just looking at color under the cross, their two leading it from within the circle? We ran into some issues with that, though let's say that I zoomed up on this image and I grabbed a huge brush and I clicked right here. Can you see where my mouse is? You see my little hand flashing that little of opening between the flowers? Well, if I click there, it was able to leave that area, but it didn't delete through the entire circle and that's, because with default settings, it could only delete one unbroken chunk of picture. It can't leap over and create two chunks and that's because of his setting right over here called limits and it's set to continuous contiguous means one unbroken chunk. If I said it two discontinuous, that means it can create individual pieces, so let's, set it to discontinuous, I'll choose undo to get that little part. We were deleting back again, and I'll try one more time clicking there, and you see how it was able to go all the way to the other areas didn't get enough of the this off to click once more, but with trees, there's one other problem, and that is it's too easy to get that cross hair to eventually touch a tree as you're dragging across your image trying to delete things so there are three icons right here you see these three and we want the middle one now the icons are very obvious what they do if there's ever an icon it's not obvious what it does just hover over it without clicking and I'll tell you that's a setting called sampling it sets up the once where's the setting we have been using has sampling said to continue it. What that means is when I click here it's continuously looking at the color that's underneath across here and therefore changing what color it's deleting as I dragged across the image if on the other hand I said it to that middle choice called once now it on ly pays attention to the color underneath the cross hair the moment I click and now it thinks about the exact same color the entire time I drag so it doesn't matter if I have the cross here hit things it's only if I let go now the moment I click it's going to say what colors under there that's the color we're going to be deleting and then I could go across this so having the choice of once can be useful and so now let's try it on this image I'm going to get the cross hair to touch the blue sky remember I haven't said too that choice called once and I have this set of discontinuous right song in a click right about here click and then I'm gonna drag across my entire sky now oftentimes the sky will vary in what shade of blue it is, and that means that when you're done doing this, we'll still be a hint of the sky showing up in certain areas you'll look where the checkerboard should be and you'll see just it doesn't look like a pure checkerboard and you can find out if that's the case by moving your mouse to another part of the sky and clicking. And if you do you see this, the checkerboard clear up, you know there was still a hint of something residue there, and so I might try that up here click and see if it cleaned up. If it does, I go cross it again all it means there's a different shade of blue there that you didn't quite get into enough on. I might try that in a few areas down here in the bottom. The other problem with this is that the color that was in the sky might have also been found in like the tree trunks, and if that's the case, you would go to a tool that's called the history brush the history brush is this guy, the history brush will paint with whatever your picture originally looked like, and so if you find a hole in the tree's trunk, you grab the history russian has painted back history brush paints with whatever your picture looked like when you first opened it question so the key to really being successful with this is to make sure that you have the perfect starting point on that you don't have a big variation, I guess, and, uh, somewhat in first off it's a matter of color, correct your image so that you don't have the colors looking the same, and second is there are certain images where this will not help, and that is when your sky is completely overcast, then you'll usually find the same colors there in the sky will be in the trunks of the trees and things, and there won't be enough separation. This primarily works when your sky has some him to blue in it, because you don't usually find blue in trees and therefore it's going to be able to separate. But if you have a completely overcast sky, there's usually graze in the trees and there's just not going be enough to separate um but let's zoom up, though, and take a look at our little branches and things you think of all in there. Let's put some behind it though because that's when you can really tell if it's good or not and I think there's a lot of things we might need to adjust to fine tune it and we're running out of time though so we're gonna have a limited amount of time in doing this we will if we need to we have another session after this on complex elections we can continue on there because a lot of the same issues also happens when you have furry fuzzy kerry selections and that kind of stuff so just know if there's something I don't have time to cover now we'll try to get into in the next section is going to drag this over to the other picture with the move tool I don't think it will be big enough but we'll scale it it's okay to scale clouds because they're very soft edged it's only crisp edge things that really don't look good when you scale them up so here I'm just going tio trance free transformed this scale it up so it could fill the area and then pick the area clouds I want maybe there will slide this underneath now we do have some issues but if you look at it overall considering the amount of work done that's pretty amazing that I think that we have this now here is a trick that I will often need to d'oh and that is I find that the edges of the branches will sometimes look to light and that's because the old sky was much brighter then the new sky and the edge on the branch slightly fades out. If that's the case duplicate the layer that contains the tree when you duplicated the edge will probably look even to likes it's going to double up how dense the edges, but I'll take command jay, then click on the layer underneath and set the little blending mode menu here at the top of my layers panel to a child's called multiply multiply means print like ink on the image that's underneath and that's going to darkening what's underneath. And if I turn that later often on can you see that causing the edges too dark and like that? And if you know about using later masks, add a layer mask and then paint with black where there's too much of this, so we're not talking about later mass here, so I'll just do that, but a layer mask, soft brush and I didn't need it right here, so I paint with black to say, get rid of it in those areas where I didn't need it didn't need it there, but I did need it down in here, so I leave it, and so without that, you'll see that some of the edges a little bright. But with that duplicate and multiply modi find oftentimes it will start looking better now the other thing I really want to do to this image is most likely dark in the foreground to make it feel more like it's nighttime or close to it because right now with this bright of uh grass it just doesn't look appropriate at all there are many different ways I could do that I might duplicate this put it in some weird mode like subtract mode thanks it look like nighttime and if it's too much nighttime lower the opacity so let's see you know look just feel a little bit more it's not exactly nighttime but this is the duplicate and subtract mode will often really darken up your image uh that kind of stuff but hopefully you got some idea of dealing with at least on a basic level trees all right so let's kind of wrap it up because we're close to the end timewise I wish we had another hour and a half you know keep going with this because I love talking about selections and isolating things like this so what I'd like to do you have any questions I'd love to answer them and also let you know that my next session is on complex elections you might think some of these were complex but we're going to talk about furry fuzzy harry maybe more on trees and other things that just are difficult and therefore we have to get into more tricks to make them look right in the end of oscar fashions comments? I think we're good we're getting a lot of my mind is blown kind of comments from the internet right now you make it look so easy then well, just you just need practice. Yeah, and so that's, why it's good to get the glass and play it over and over again in practice one technique, whichever the technique is you think would be most effective with your work practices and so you don't need to watch the video anymore and do that and do it wait to go over the rest of them until you got one of them down, then pick the next one you think would be most effective in track this practice practice until you don't need the video again and if you add one technique at a time, then they become second nature and then they are easy to do it's just when you try to do all of them all the time, you always seem to come back to the video and you can't you don't have him in your head so one of the time it's the best way to learn, I think, is it natural to apply one of the techniques bomb on it and then go back and try another one? Is that oh, sure, yeah, it's. Natural to say, in my head, the first thing I thought of is the background was one particular color is there for all. Use a technique that selects a particular color, and then that didn't work. So see, what else could I do, and you go for your next back up. That sounds the most logical, and you just keep doing that until you find one that successful here. You know, I happen to pre select some images so that we would have specific issues to talk about. But yeah, definitely.
Class Materials
bonus material with purchase
Ratings and Reviews
Steve61861
I love learning from Ben Willmore! He has such a friendly, casual style I just love watching him in action. But he never wastes my time, he attacks his topic forcefully, stays focused on his teaching, and I have learned so much watching his videos. Ben is terrific and I strongly recommend this and his other courses on CreativeLive.
Julie Coder
Excellent class! Ben has a very clear presentation style so it's easy to follow along. I appreciate seeing the diverse approaches to selections, and some creative uses as well. Thanks so much!
dinotaco
I am a beginner in PS. I had been struggling with it for about 6 months until I took Ben Willmore's Photoshop 101. I have had many "aha" moments, but still learning. I decided to get "Quick Selections" because I was looking for shortcuts and quicker ways to process my photography. I am only half way through the course and it has already paid for itself in time that it will save me. It has also opened my eyes to greater possibilities in editing. Ben Willmore is an excellent instructor. His style is laid back, but thorough.