Crappy Lighting Conditions: Low Light
Lesson 4 from: Conquering Crappy LightLindsay Adler, Erik Valind
Crappy Lighting Conditions: Low Light
Lesson 4 from: Conquering Crappy LightLindsay Adler, Erik Valind
Lesson Info
4. Crappy Lighting Conditions: Low Light
Lessons
Day 1
1Class Introduction
32:47 2Crappy Lighting Conditions: Direct Sunlight
27:47 3Crappy Lighting Conditions: Fluorescent and Mixed
21:00 4Crappy Lighting Conditions: Low Light
29:21 5Crappy Lighting: Dappled, Backlit, and Overcast
12:32 6Setting Your Camera Up for Crappy Light
27:43 7Shoot: Fixing Fluorescent Lighting
06:16Focusing and Shooting Modes
18:35 9Shoot: Mixing Daylight and Tungsten
23:16 10Getting Started with Flash
43:30 11Shoot: Low Light without Flash
19:43 12Shoot: Low Light with Flash
16:49 13Recap and Q&A
16:37 14Crappy Lighting Condition: Backlight
33:16 15Crappy Lighting Condition: Low Light Outdoors
24:10 16Shoot: Direct Sunlight
37:20 17Shoot: Direct Sunlight with Shade
05:47 18Shoot: Direct Sunlight with Flash and High Speed Sync
25:35 19Shoot: Dappled Light with and without Flash
28:57 20Shoot: Open and Covered Shade
11:29 21Shoot: Overcast without Flash
23:50 22Shoot: Overcast with Flash
30:04 23Recap of Shoot
1:40:16 24Scenario Kit: Event
27:44 25Scenario Kit: Wedding
20:56 26The Next Step Slideshow
24:52 27File Managment and DNGs
12:02 28Creating Color Profiles
27:56 29Noise Reduction in Lightroom
12:59 30Using a Color Checker
23:32 31Post Production: Basic Adjustments
25:19 32Post Production: Smart Objects and Color Processing
25:29Day 2
Day 3
Lesson Info
Crappy Lighting Conditions: Low Light
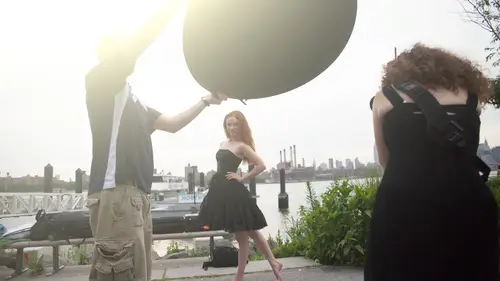
I think this is my jam let's see what's next alright problems difficulty focusing so good in low light or if you're shooting a cannon five do you have this every day? I was kidding this is like the jabbing back and forth thing totally okay, so I'm difficulty focusing focusing in the dark sucks but we're going to tell you a bunch of different ways to overcome that um also balancing the exposure with the ambient light can be rough because during the day we're dealing with something that is so bright we need to go ahead and crank up flashes or reflectors and stuff to match that and then you shoot it in low light a lot of times you do with the issue of having to dial everything away down, which is where small flash come in really handy because they've got limited power to him um and the other one is achieving that good quality of light because if you get everything balanced and you get an exposure and it's in focus most of time you still have a nasty streetlamp overhead with the poor quali...
ty and direction of light. So we're going to try to fix all of that here really quick in five minutes and then we're done um so the first thing is the autofocus assist beam so that guy basically is this it's the headlamp thatyou have right on your camera so what if I can trick this? They're ready I can actually trick it perfect see that guy's got a tight on that cool. Okay, so that's your little head lamp right there that is going to save you so that guy right there is basically seeking putting a lamp out there to allow me to get focused. This is wonderful. Sometimes the lens hood might block it a little bit so just kind of keep that in mind but this is great, you know, just to keep in mind if if you have this activated it's within a menu settings you've got to go in and actually turn it on. I'm not sure if it's on by default on your camera but we can actually come plug in here, right? Yeah, this is something that is exists in both cannon and icon and so you're looking for the word a f maciste beam or illuminator depends on what you have so that's the word you're looking for I believe by default it it's on in most cameras I know that mine is offering now. Okay, so do we have ah, we jacked in the eyes, you see my camera? Yeah, there it is awesome he's like look at the giant modern behind it all right, cool, so in nikon it is within your auto focus section right here okay, we're just gonna go in and it's eight on the night. Conti eight hundred guys, all of you should have your manuals. But we have limited space in our camera bags and no one really wants to drag around the stupid manual. So if you go to canon nikon, whatever your manufacturer's website is, they have a pdf version so there's no excuse not to have a pdf versions saved to your phone using a drop box account or wherever you have to do it so that you have this kind of information accessible. So go to canon nikon, get the pdf of your manual. Find out exactly what sub menu this is going to talk about. A lot of stuff that's kind of camera specific functions that you all have that might be a different number or name and your specific camera. So basically I'm just gonna go ahead and turn this on. And now the other key that we have to look at is how we have our cameras set up. So you're going to notice that I have my center point focus turned on here and you see a f s down on the bottom. Basically, I'm not bursting off motor drive mode or continuous focus areas servo I have my single center focus point selected, and I'm taking one frame at a time and with those settings and that turned on it's going to give me that little headlamp action when I'm shooting in low light and so if you were in continuous would that work no, it will not work because it's not going to be a lot unfortunately, this little headline is not gonna be able to keep up with you spray and pray in eleven frames a second, so this is really kind of more methodical solution. The next thing that we have is something that's actually built into your flash. I got that I'm gonna pop it and so people would come on. And just as he already said everything check your manual but and once this is turned on, you forget about it. So when you're in low light, it will turn on every time for you you keep talking like figure this out, all right? Cool. So well, she gets that set up to show you how to do it on the cannon. Same thing there's little head lamp on the front. Next thing we're going to talk about is the flash. If you guys want to get a tight shot of this there's going to be this little red compartment right there on the front that's got an infrared assist femur and a f assist team it's going to do the same thing, but when you have this on top of camera see if I can still trick it into happening could've fired batteries but we're gonna flip that guy on there and now when this is on here and turned on and you have it uh accessible in here there's a sub menu on your flashes again looking your flashman you're gonna have to turn on the auto focus assist beam so that was an illuminator the headlight I think most camera manufacturers call this a beam once you turned on in your flash from now on when you're a low life you could just go ahead and take the shot there and infrared cross hairs will admit from this that'll help you focus this rocks even if I'm not using my flash delight the scene alternate on its lowest power a lot of times flip the head around so it's not hitting my subject and just use the auto focus assist team to help me get focused in low white great so one of the questions that I also received on the facebook page a lot of people are asking they're saying I photograph concerts, I photograph events and really really low light and I don't want to use a flash because I don't want to get rid of the ambience and I want to get rid of the lighting that they provided so what he's just talking about their so what this flashes and then he said it's an auto focus assist beam you have to make sure it's turned on in your flash or not turned off, I think by default is on. So if you've ever seen when someone taking a picture and you see the red light glow on their face, that's what it iss s o for those people that wants to shoot the events and they don't want over part the ambience we're trying to focus, what he just said is I mean, he's basically turning his flash down so it doesn't die elin to the scene points it behind him so it's not hitting the subject, but it will still pulse that focused beam, and then you can focus it's a lifesaver there is put a little gaff tape or something on it. There you go if you're really, really, really worried about it, but the thing is it's amore, inconspicuous than that headlamp. So if you're photographing an event, you know, you maybe want to be a little more candid about it, you don't want to be popping them with the equivalent of a flashlight or spotlight every single time you're trying to focus, so the infrared assist beam is a little more little more not as not as overt and then at the same time, it's better for me personally, it does work a lot better. So it's the more efficient way to do it? Absolutely at the same time, it's not the same thing, using a spotlight on their face that that's what saved me at the receptions, it would be outdoors at night when they're means literally outdoors at night, lit by candles and things like that. If I didn't have that, I don't know what I would have done, so that was my go to and that's what saved me. And by the way, just while I do have this up, this is the auto focus assist beam firing on in my cannon. It depends on what can you have it's under the auto focus menu, which makes sense. So this is what it looks like on mine. The words are a little bit different on hiss, all right, question on that on that infrared thing, you know, is that specific to, like a nikon speed, like interacting with a nikon camera or if you had an off brand, is it is a part of the tt l's processes that what's creating the infrared good question, okay, so, you know, as far as I know works on my nightgown stuff, I haven't used a third party flash on a nikon camera an'd try to investigate it, I don't know off the top, and if anybody who do know no okay if anyone on the internet knows uh if anyone not on the internet knows if you could get this to work with an off brand s on you let us know we'd love to know and so what are you gonna do what you like it's going to send out the infrared but then it's the flash they're going to shoot yeah, the flash will fire because this has got the flash has to be on yeah so he hasn't turned down as low as it goes and pointed behind him which means it's probably gonna bounce off of anything if there was a white wall right behind you it might pick up but he shoots he shoots on manual is well so he could die in town too manual flash one over one twenty eighth which is bottom bottom bottom bottom power and gaffers ok and then just gaff tape it up and you don't by the way you don't want a gaff tape it if you have your flash at full power it will heal up and melt your flash so if you're going to do that and you just want to make sure not getting any light coming out you still need to turn all the way down but then the gaff tape won't hurt it um and something else that you might might try as well besides gaff tape that I use in the past is from my studio experiences like called senna foil it's like thick black tinfoil it's made for that situation it's made for blocking out light and you could just take it to the top but it's not heat resistant it's heat resistant use a larger five and it's not tape on the top clear thing you could tape around so that it's not like sticky on it, so basically yeah good questions so so basically top back in here so auto focus assist team it was one way to help with that pocket wizards and off camera flashes another, talking the front light modifiers and also dragging the shutters all of this we're definitely going toe we're going to explore a little deeper, but here's some examples here of that auto focus illuminator or the headland going off another really cool features when you're using different pocket wizards and triggers one of the benefits is they basically allow you to fire your flash off camera so you'll see we have it on camera here and that photo on the bottom you've gotten that off camera it makes your flash think that it's still attached to your camera that's how they communicate but it's through radio signals and there's a little hacker if you touch the depth of field preview button on your camera this on mine right that if you touch that it'll make your off camera flash pulse rapidly, so it'll appear like a constant light and allow you to one get focus to dilate the pupils on your shrink the pupils on your subject, but then also get a feel for how the lighting pattern's going to follow what the light's gonna look like before you even take the photograph. So that's something that I used all the time with off camera lights, just that depth of field preview button. And honestly, years ago, I found it by bumping the thing craft what happened? Like my strokes freaking thing. Yeah, so this is our happy accidents that we're sharing along with you guys so you don't freak out thinking you broke a string and for people, for people that want to know what depth of field preview button usually does, what it usually does and how I used to use it is it will stop down your lens to the aperture that you're actually going to be shooting at. So if I'm shooting at f twenty two, it would stop it down after me, too, so I wouldn't let me do it previewed the depth of field realty time, and so I did this back in the film days when I would be shooting with no side film so I could actually preview what it was. And so when you have a flash on, it just makes it go but a little and it pops now has a new purpose for you guys, so so the next thing is dragging our shutter, so this is how we get that ambient light. So you were talking about how this has come across where you're shooting outdoors and, you know, you've got a beautiful environment, and you actually want to see it, because if we just pop on her flashing the first image there on the top where they're properly exposed using t which we'll talk about, but everything else just goes dark, so if you drag your shutter or slow your shutter speed, way, way, way, way down that allows enough time for the rest of the light in the scene to build back up. So think of your flashes is instant, it has a speed of its own, but your flash is going to get there a lot a lot faster than anything else. So soon as you pull that trigger, your person is exposed by the flash, and then you just allow your shutter speed the linger long enough for everything else to build up and that's how you get the cool environment going on back there. They like trails. You can see the candle light, you can see the rest of the parties rather than just walking around from table to table to shoot the guests and everyone else falls black in the background. And she has a question here. And by the way, eric shot, eh? Uh, we pre filmed uh, low light at night that's one where he's photographing with me and so you will see that much more in depth with how you convey ari, not just shutter speed, but also esso and things like that. So question you're back to your last example with the shutter speed dragging the shutter speed. I have that problem when I do events and it's maybe people dancing, so if you drag the shutter, you're going to be yeah, well, there's, where the benefit of working your flash and your your drag shutter come in because the flash is so quick, whatever it hits will be frozen in your photograph and then that low shutter speed will allow all the rest of the stuff to build out so you can do some really need effects. Depending on how long your shutter is, you might have freeze your subjects, hear people dancing with the flash and then really quickly, you know, leave the shortest you get a little more light in the back or you could get creative and freeze them and have a really long exposure, and it looks like the world's kind of swirling around behind them. You really fun? Creative stuff with that. So this is what's important? The flash is going to freeze your subject, whatever it hits, it has the motion stop in power because it comes out so quick and then your shutter speed controls how much ambient light, how much movement you see in the background. So we'll definitely talk more about that, because that's, you could use a cool stuff of that. Do you prefer to have it tore your flashes at the beginning, as opposed to, like a rear sink, where he exposed good question bruising? My preference was and he said, most of the time, yes, because I'm clicking the shutter when I see that moment, so I'm looking for that moment, there are cases when you want to be rear curtain what's your opinion, so I'm the same way because a lot of times lifestyles that decisive, like, you know, the look our wedding? Is that glimpse or that kissing thing? So we want the instantaneous pop in the freezer. If you're doing stuff like this, where you have like trails and things you might have, what rear currents sink is, we didn't explain it is basically if I have my flat, my exposure be of one second you can tell your flash to fire at the beginning of that one second or at the end of that one second we wanted to fire the beginning because we want to freeze the moment most of time. If you're doing cool effects where you want a car and light trails that might put it at the end. That way your light trails aren't cutting through where you freeze your car so for creative effect used your curtain sink but for most of our applications and probably what most u will be doing just leave it on front curtain but great question so okay, so basically longer the shutter speed more ambient light ambient light is all that good stuff that's hiding in the darkness until you let it show up. So did you look at you guys? Look, you have a couple questions with a couple of questions before we move on and break it gets him on topic questions to some of these slides you just had, uh, phil birdie is wondering, does thie does that use a lot of battery power using the auto focus assist button? Good question. Yeah. So okay, this infrared, I imagine, is going to draw a lot less than your head lamp, but that being said, I've shot events in europe ports weddings she's had a ton of weddings where thousands of photos have been taken and it's fine it's very very, very minimal but that being said your depth of field preview but into flash it that's will kill your flash very very quickly and so one of the things as faras gear that I'd recommend if you're somebody that loves that depth of field preview but again the flash polls thinks you can see um you would want to have a battery pack at that point and so we've already touched on quantum um and quantum creates some amazing battery packs so I know that one of them the one that I had one of the turbo packs would give me over one thousand full power flashes before the battery was drained and so they usually from me that would make me through a reception um and so that would be great if you know they're gonna be doing a lot it's it's an actual pack they have to plug in and so what you have to have under hip or on the light stand or something like that and it's not cheap but if you need more battery life don't have to keep changing your batteries and at the re cycle time there isn't a cycle time and it also gives you more longevity and if you look at night kind of canada have external pack that allows you to stack double a batteries in so you can have an external pack with a double a batteries in it feeding power to your speed lights or you can go to a larger option like the turbo batteries that quantum manufacturers and they give you even more power but they're a little bit heavier and a little more expensive so you kind of scale up for your needs think of your shooting like you know an indian wedding three days of tons of people all night like you might need a little more juice than like a thirty minute ceremony reception kind of combo we have one more online great uh one with the camera quite an audacious love it er will be assisting light up even if you have a wireless trigger in between the flash and the camera wireless triggers so will this guy go off? Yes, perfect. Tio okay, um, so number six is the low light when you're not allowed to use the flash which this is probably the thing that most pushed frustrated me out of anything off my early career, the church where they say you can't use your flash and then everybody has the same cameras you all using flashes in your noon who's not supposed to use it okay, so I have good news and bad news so let's talk with the the problems you have it's hard to stabilize damaged you're trying keep it in focus if you can't use your flash and slow light um you don't want a lot of noise if you pump up your eyes so and then you want the correct exposure all right so these are the problems okay? So here's the good news and bad news the good news is there's nothing fancy to do to solve this problem the bad news is there's nothing fancy to do to solve this problem because it's probably what you're already thinking these were the tools that you have available to you so you do have hi I s so that is something you have available to you nowadays with better cameras this becomes amazing and this is one of those situations as well where I would say I don't say buy new gear but if you know you shoot a lot of low light with no flash than having a camera that has minimal noise and really, really good low light sensitivity would make a difference it's based on the type of photography that you d'oh so when you're in a low light situation, you do pump up the ice so and that's, why test your camera there's a lot of information online we're different nerds like him compare like noise and uh difference calling yes at three different I esos and so you figure what you're comfortable with like me, I'm pretty comfortable to thirty two hundred that brings up a good point because you mention that you shot on film. I started on film, a lot of people watching this probably started on film and were usedto buying one hundred s over four hundred eyes or a s I put it in our camera and that's it okay, and then early digital cameras if you went above an eight hundred got eight hundred was not usable in some cameras, like the first digital cameras, I don't, um nowadays, though thirty, two hundred sixty, four hundred eso those results are better grain than some films. Those results are better grain or lower grain, lower noise or more pleasing looking than all of the digital cameras that have come before that that used to cost us much is your house, so I mean realistically it's better to go up a little higher than we might be comfortable or like we learned originally in your s o, to be able to freeze the moment you have a blurry picture, if it's blurry, it's blurry. If you have a little green, sometimes you do a little bit to help yourself with that noise. If you're going to get the shot of like the first kiss of the dancer that look like your clients are going to see that, they're not going to see the grain. It's a city it's a sit in our computer at all on one to one ratios that one hundred percent like oh my goodness look at that noise your client doesn't have your raw file on a thirty inch I mac you know, zoomed all the way in so they don't see that and I would just say I mean, if you have a really old digital camera then yes, this is a concern given even the last couple of years almost three for years when he says up to five, I've got a g seven hundred that came out almost five years ago now and I still shoot that for some events and deliver files sixteen hundred thirty, two hundred not billboards but I mean, I'll be web and you know, small print eight by ten eleven by fourteen for seven hundred sixty four hundred kind of pushing sixteen hundred to thirty, two hundred I'm super comfortable shooting all night and delivering those files what about five years old? What about the oh my gosh this's really? So we're shooting the book and just for fun around st mark's street in manhattan and it's like pitch dark we're walking to another location I saw this cool light I'm like hang away I have them all to go over there was like I just want to get this shot really quick we wanted to teach how shooting at high esos at what point you start to see green falls is where you start to see like really intense noise sixty four hundred at like wide open on this lens there was like like way cranked it like high one too it was like hi three before it was like okay, maybe I wouldn't deliver this but still like the original d one hundred or do you two hundred or old habit of shooting the bad file with another camera because we couldn't get a good look at enough to use it? We needed a bad example of hi s o and were not able to do it on that camera it was incredible so seishi innards out on this stuff too if you like get her into it a little bit so don't be afraid of highest was what were saying your cameras khun do it your clients will appreciate a sharp and focused image more than they will have blurry one perfect well said fast last does make your job easier and I mentioned this before it's not just about having by fast glass I mean wide apertures will be on the shoot two point eight my magic one is what two point two I don't know two point two is my africa er I don't know I made this up this is the lindsay out there for sure and I look to point to um fast glass it's not just the fact that since it's wider apertures I can let more light in which gives me quicker shutter speeds and you know it's not just that it's also part of that focusing because when you're focusing it will have the aperture wide open toe let more light into allow you to focus so that's another um reason you would want fast glass okay, so beyond that tripod try but they're great and low light but usually not and well for example churches or events because people trip on them and they follow over so we're going to show you a model pod that we both own that we use all the time because it has a minimal footprint, a footprint and it's really easy to move and it gets your ah image stabilize show you a couple other tricks with stabilization and then finally when you're purchasing your lenses if you know you shoot a lot like this a lot of low light situations you would get in these all mean the same thing I asked his image stabilization cannon os is optical stabilization sigma and v r is vibration reduction I yeah I shoot my camera one day so yeah yeah um and so that will actually in the lens a kind of counterbalance your shake during long exposures and give you a more stable image so if you you know, like so many of my lenses that are really fast, like my fifty one point four wouldn't have that on it. It's more it's generally for longer lenses where you have a little bit of movement, what would you like to add to that? You're seventy two hundred? I mean that's the deal and you can almost hear it moving in there like it's moving stuff around to counter your shake and they have a path like a normal in active mode. Basically, if you're shooting, you know, normal portrait's and you just kind of want to get rid of the camera shake of your arm and your breathing versus active if you're panting following action sports because it knows this movement is good, so basically doesn't it takes away your up and down but doesn't try to stabilize for your vertical movement. So it's smart it's moving multiple pieces of fine tuned glass in there, you know, and trying to anticipate you so it's rather know that I'm cool with the crazy, crazy, expensive of some lenses, but that kind of makes sense you want that much in the new photo shop? See, see, like the latest version of photo shop is a camera shake filter in there that basically has the same kind of mentality is moving the glass to anticipate you. It kind of re does your photograph to read or anticipate where you were shaking crazy so you don't have the r on your lens for twenty bucks a month and you get a new photo shop or something that will save you so a couple zeros more stable shot? Absolutely um so this is just an example we were shooting in a church really low light this is if we just put our camera on auto and let it do its thing in the top left after a lot of coffee, ok, it was just like super super blunt with the shooting with seventy, two hundred auto, it just would let it do p mode and it didn't work over here we've got wide aperture um shooting at two point eight or wider in image stabilized lens and on a tripod you don't need all of those usually, but that's what you have available to you I wish there was something better. The only thing I can say for better is it's nice that you have that photo shop thing now I mean that's that's another way it's not, you know, sharpening your image, your counteracting your camera movement, which is not the same thing it's really interesting region knew things available to us um number seven would be low light with flash so it's the reception at night when you can use your flash or it's when the church says it's okay for me to use flash all right, so we've got improve the quality of light, and we also need to avoid bouncing off a colored walls so let's, just jump right in really quick because that on camera flashlight we don't really enjoy it's that snapshot kind of look with the flash on camera shooting straight ahead. So that's one of our main problems when we're talking about why did improve the quality is basically the direction of that life s so what we want to do here is we can use light modifiers too shape our light or a redirect our light, we could go off camera, take our flash off camera so we have a way off direction of light or we can then bounce the flash I'm gonna jump right in here to the slide because that's what I'm talking about the image on the left right there that's your on camera flash that's your snapshot that's a pretty broad bride waiting in the room right before her wedding. You've got to go in and get some photos after she's got hair and makeup and everything done. Preparation rooms and churches are low life yeah low light small they've got old bulbs in there I mean the really not designed for photo shoots and every wedding photographer knows we have to sit in there and take photos so you know it's kind of rough having to do that so to avoid the photo on the left we want to bounce our flash so there's a reason that these guys ratchet all around it because they want you to be bouncing them off things so the image on the left is taken like that taken shooting straight ahead okay without a lens cap on straight ahead and the image on the right is just doing this, turning it over to the side and there's a nice white wall here. So instead I had a kind of look over to the wall bouncing off of this so we go from a tiny direct light source light hits that comes off of it now of a sudden we have like a six by eight white soft box equivalent light source and that's that beautiful soft light that we get there on the side which is just the same as natural reflectors on location the light will take on the quality of whatever it's bouncing off of and so that's what you're looking for to try to be able to bounce it in a way like that so okay bouncing is great but um have you had the situation something perhaps like this where if you bounce it you ruin the picture like I've been in reception halls where the walls are green or wood paneled or mirrors yeah tough or you know you can't about something ceiling because they've got really high ceilings or old wood ceilings where they've got the weird off colored kind of foam tiles up there like I mean really not ideal if you're like in a white box sure bounce off of everything go to town but you really have to be careful because like you mentioned the grass the light takes on the quality of whatever it's bouncing off so green sunlight hits grass becomes green flash it's wall becomes red gets really really bad so what you can do here got to get your light going forward but that light going forward doesn't have really really good quality so what we have to do is modify that light kind of soften it up a little bit we can use some things like the pocket box with road flash bender and they basically take that light it's still on camera but now it's larger so it becomes softer so this s o people think of a bounce card um like this okay think of a bounce card and they will kick the light ford and soften it the problem is in a situation like this it will still bounce off the ceiling and two, because it bounces off the ceiling, you'll get the red from the ceiling so you can tuck it down for for something like this, this modifier uh, when you add this the top, it blocks off light from bouncing off the ceiling and it kicks it forward more like a soft box. So this one in particular, this is a rogue flash bender. Uh, and this is what both eric and I prefer when we're shooting something on location where we can't bounce flash, we'll show you a couple other versions of this modifier later, so we will get into this more in depth. But this is the one that we both like, that it's personal you can basically you can still use it on camera two do the ceiling balance if you want teo or you can not or you can turn it into a soft box. I mean, you'd really have a lot of versatility with that there's a lot of other modifiers, you might be able to do one or the other, but not both, and I've got an older one now that have used so much it's actually staying two blue here because I fold it up, put it in my back pocket when shooting events of my blue jeans. And I've been you hooks hangs around so much that it's now become a little bit stained blue on the inside so I'll have to ask for a new one or maybe we could keep that sample I think they might let us my hook us up so here's what we're talking about if you do decide to take your life in your own hands and bounce off a red wall that's what you're gonna get it yeah it's fashion they wouldn't go black and white crank the contrast in post and you're going to go I might let school very fashionable then the one on the left on the bottom there is that on camera flash with no modifiers it's very telltale hard shadows flat light not flatter him the one on the right is still on camera but it's a little bit softer so we've got more pleasing skin tones and that's what this one is shooting through, we're going to show you well I prefer and I think you do as well a larger version of this because the larger get it, the softer it will be so that didn't exist. We were shooting the book and we definitely preferred larger so we'll show you in a bit so also we could go off camera with us that's another option there so you see I've got the flash off camera now shooting from the side now, again, that's not bouncing off of anything, it's, the light directly hitting her. But rather than the light being straight on camera access, we've moved it off to the side for some more contrast, because the farther here's your subject, the farther you bring that flash off camera from here, if you want to get this flashing kind of rotate around for me, so the more you go off camera, the more shadow your camera sees to the more contrast you're creating. So that's. Why the big goal is to get off cameron. This afternoon, we'll talk about a flash primer. We'll discuss a little bit more about that.
Class Materials
bonus material with purchase
Ratings and Reviews
Victor van Dijk
Besides all the more or less 'technical, theoretical stuff', the greatest thing I'm taking away with this outstanding course is the plain joy and FUN of trying all sorts of (crappy) lighting solutions!! Speaking for myself, and I suppose also many others, as an 'advanced beginner', I strongly tend to end up to my eyeballs in all technical nitty-gritty, gear 'n' stuff, that I totally mis out on all the sheer FUN of trying out, and often 'muddling through' all kinds of lighting setups! Such a joy to see the fun exchange between Lindsay and Erik! Really catchy. There should be more classes and courses like this, redirecting students to what it's actually all about: sheer creativity and fun! Having said that, Lindsay and Erik demonstrate that there is hardly any crappy light situation that can't be overcome by creative thinking. And more often than not, it doesn't have to be high-tech or difficult! They really showed an exhaustive list of crappy light situations AND their solutions. And I highly commend Lindsay and Erik for their fun energy, and even more important, pragmatism and frankness. I recommend this course to ANY photographer AND videographer, no matter 'beginner' or 'highly advanced'! Lighting is the basis of it all, and most of the time, it isn't perfect...! I highly re
Julie Addison
I thought I understood about light before I took this course. How wrong could I be? I have re-watched this course over and over and I just love it. Quality of light, direction of light - so many crappy light situations. Learning how to actually set a white balance instead of purely relying on the camera presets and learning colour correction by the color checker was also invaluable to me. This course is so affordable. I would recommend it to anyone from beginner to advanced as you will get more out of it than you think. I love the way Lindsay and Erik work together. No right or wrong way - just showing the differences in their styles to accomplish the same end result. Well done guys. Now to have more courses by Erik would be great. Again, can't' thank creative live enough and Erik and Lindsay for this course. Love, Love, Love It!!!!
a Creativelive Student
I hope I can tune in tomorrow. Erik and Lindsay, you guys were awesome today. Some of the things I needed some refreshing on but you definitely had a way of educating. I thought the demos were great and really validating. Light is a difficult thing to keep on your good side, especially with me, someone who primarily uses ambient and available lighting scenarios. This course is great and I'm planning to tune in tomorrow because I really want to see what you have in store for outside. Best of luck guys!! -Sim
Student Work
Related Classes
Lighting