Lesson Info
7. Camera Controls: Back Side Controls
Lessons
Class Introduction
08:52 2Photo Basics
03:22 3Camera Controls: Basic Controls
05:56 4Camera Controls: Shooting Mode
25:22 5Camera Controls: Multi Function Button
12:07 6Camera Controls: Top Deck
03:14 7Camera Controls: Back Side Controls
25:06 8Camera Controls: Quick Control
12:32Camera Controls: Video and Playback Mode
09:50 10Camera Controls: Left Side, Right Side, Bottom, and Front
09:04 11Lenses
14:15 12Menu Functions: The Basics and Shooting Menu
43:29 13Menu Functions: Video Shooting Menu
18:31 14Menu Functions: Autofocus
14:17 15Menu Functions: Playback Menu
09:22 16Menu Functions: Set Up
31:59 17Menu Functions: Set Up Video and Custom Functions
13:41 18Menu Functions: My Menu
04:17 19Camera Operations
09:58Lesson Info
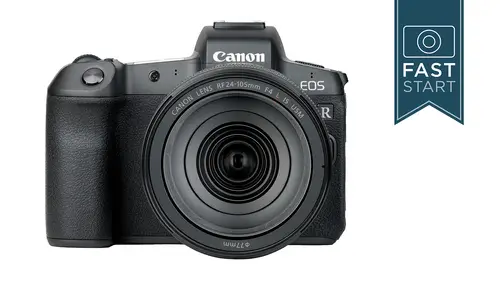
Camera Controls: Back Side Controls
All right, let's look over towards the back of the camera. Talk about our viewing options We have are Elektronik viewfinder, which has a very high resolution, easy to see viewfinder. It's a very good electronic viewfinder, comparing it with everything else that's out on the market. There is a dye Achter over on the left hand side, which controls the focusing of the viewfinder. And so if your eyes are a little bit off, if you wear glasses, you should be able to use this Diop ter toe. Adjust it so it's a nice clear view in the viewfinder. So if it's not a clear view, check that Diop ter and adjusted for your eyes. The LCD. We have a full flip out screen on this camera, which is really nice for video blogging and a variety of other reasons. Shooting at unique angles standard display. But it is also a touch screen. As I've said before, there is an eye sensor, and it will automatically sense when you are putting your eye up to the camera and it'll automatically switch back and forth from th...
e electronic viewfinder to the LCD. Depending on if something is blocking that I censor. If you want, you can go into the custom settings the set up menu, and you can have the cameras set up so that it is on Lee looking through the viewfinder or Onley projecting an image on the LCD on the back of the camera. And so that is gonna be in the set up men. You four. Let's take a look at what you see through the viewfinder and talk about some of the options that are available in the E V F. So we have a lot of little options to talk about. The frame that you see is pretty much 100% accurate. So what you're seeing is a very good representation of what the exact image is going to be. Obviously, one of the advantages of a muralist camera is you get to see exposure white balance, focusing information better than you have ever seen it on an SLR. Because it is the digital version of what your camera is pointed out, there are two different options. Display one and display to display to is for people with eyeglasses that have their eye a little bit further from the viewfinder, and they can't see the full image. You can reduce the image size a little bit, so if you're wearing sunglasses or you just can't get your eye as close to the viewfinder, this will make the entire image a little bit more easy to see when you have the camera in auto focus, you're going to see a number of different options for your focusing frame, depending on whether it's selected. Whether it's trying to focus, whether it's failed or achieved in focusing, it'll have different colors and a different look to it. The face tracking kind of has thes broken corners and two boxes where it is tracking the I within the face. And so we'll talk a little bit more about that when we get to the face tracking section. But just be aware that that changes colors according to its status. The important exposure information is all along the bottom of the camera, and so shutter speed aperture I s so those are the types of things that you want to keep your eye regularly on to make sure that they're set right for what you're doing as you're shooting the buffer size over on the right hand side in the brackets tells you how many images you have left to shoot and how maney in a particular burst that you might shoot in any one time. And so you can shoot 47 raws 78 compact raws compress draws will talk more about that in the menu section, or up to 100 J pegs in the buffer at any one time. And so it's got a pretty deep buffer for anyone who is shooting action and things very quickly. If you want to Seymour or less information in the viewfinder, just press the info button on the back of the camera. It'll cycle through and show you different levels and different options of items in there. And so if you want to clear up the clutter or you want to add a tool in there like it hissed, a gram toe look toe look at just cycle through that with the info button. If you want to control what the options are as you cycle through them, you can go into the set up men, you and you can turn on and off various features. So if you don't want to see the hissed a gram for instance, you can uncheck that box and it will not cycle through when you do hit the info button. One of my features, one of my favorite features features something I've been begging these manufacturers to do for years is to add better vertical integration so that when you shoot vertically and I think the Onley other company that's done this is Fujifilm on it. And so I'm so glad that they are switching this around so that when you turn the camera vertically, all the displays change so that you can see and read things a little bit more easily. Now this could be turned on and off. If you want to go into the set up men, you. This is really good, I think, for general people in most shooting situations, where it doesn't work out is if you are shooting straight down or straight up because in the camera as a little bit harder time detecting, if you're shooting a vertical or horizontal in those cases, if you do want to look at the history. Graham graphic display of the total information on the picture you are taking. You have a number of options whether you get it in color and what size it gets, and you can go in and customize that in the set up men you. And not to worry, we will be going through all of these set up options again when we go through the menu section, but this is where it will show up is in the viewfinder. There's a number of grid lines that you can turn on if you like these for composing reasons. Sometimes you want to know exactly where the center of the frame is or you want to know what the rule of thirds are. These could be really handy, as I say when doing landscape photography architecture, making sure you have vertical lines and you can turn these on and off as you wish. Another new cool feature that we haven't seen on a previous camera is a focusing guy, so the scale along the bottom is an electronic focusing scale, which is nice to have. We don't have too many of those out there in different cameras, but the guide on the top will tell you if you are focused to close to the middle spot on or focus too far away and This is a great tool for getting you very, very close to perfect focus, and I've tried it and it seems to be pretty much spot on with May on DSO. This is a great guide for anyone who likes to manually focus and have a little bit of help in getting that perfect focus. And so, rather than having the camera focus for you, it's just giving you some helpful guidance that works out quite well. Exposure Preview One of the great things about a muralist camera is that you get to see what the final image looks like before you even take the photo. And so that is with the exposure simulation enabled, which I think works very well in most situations, but not all. Sometimes if you're in the studio if you're using flash photography, the preview that you get is not accurate, cause it's not taking into account the flash that's going to be firing, and so that could be turned on and off if the colors don't look right to you. If they drift over time and you want to go in and adjust the brightness or the color tone of the E V F you can do so. It's probably not something that most people will need to dio the frames per second that you were looking at as you were looking through. The viewfinder can be adjusted by putting the camera into a power saving mode, where it goes down to 15 frames per second and this will be under display performance. If you have the camera in a very static position, 15 frames per second will be just fine. If you're moving the camera and panning it around, you're gonna want to be into the smooth 60 frames per second mode because it gets a little bit jumpy and is not as clear and easy to see. And so I would probably leave it in the smooth mode most of the time. On and on. Lee, switch it over if you were really desperate for saving battery power. All right, so these are some of your display options in the electronic viewfinder. Can I kick it over to you? See if we have any questions to address. All right, John. Well, first of all, that some of these features that I've never heard of before, you know that are new to this camera so so cool that combining manual exposure with the, you know, a all those think that's the one flexibly supercool. So there's a lot of conversations going on in the chat room, which has been really great. But I think that the questions that have come in are things that you're going to be covering. One question from a B. Goodpasture said, Um, focusing. It may have a bunch of focusing points, but it doesn't seem to translate into focusing on low contrast backgrounds. Any initial thoughts on that? Yeah, I think you really have to be careful about the focusing points and where they are. And one of the things that I've discovered is that if you have a relatively small focusing point, it tends to do better with vertical lines than horizontal lines. And so if you have that as an option, point more at the vertical lines or give the camera a little bit of a twist, and it might pick up on those horizontal lines a little bit more easily cool. Also, there's some conversation around some limitations. When you're in silent mode. Are you gonna maybe address to some of those somebody saying that they can't shoot and continuous drive potentially within. Yeah, So one of the options that will talk about it in upcoming section is the silent mode. Where the camera uses, uses an electronic shudder, does not use the physical setter. And this camera, like virtually every other camera on the market today, has a lot of limitations when you are in the silent mode. And so that's not uncommon in the industry at all. And so we'll get more into the specifics later on in the class. All right, folks, it is time to continue our tour around the camera. We are currently on the back side of the camera and gonna be looking at all the buttons and controls back here. So first up, we have our menu button, and this is going to give us access to pages and pages of options that we're gonna cover in the second half of this class. So that is good E stuff, all yet to come. All right, it is time to talk about the controversial new feature on this camera, the multi function bar. This can be customized by going into the custom functions and adjusting it, and so this Barra is something that has not been widely received by everybody. But I think in the right use with an understanding of how it works. It's a perfectly good tool that I'm very happy to have on the camera, so let's talk a little bit about what this does. It is a slider pad. It's a touch pad, touch sensitive pad, and you can slide things left and right for changing along the scale. You might say it is also a left button and a right button, and you'll notice that if you try to use it kind of right out of the box from the factory default settings, it doesn't do anything. It's not currently programmed to do anything. You have to go into the program, and so you can get into that pretty easily just by touching the bar. And here are some of the things that are gonna come up. There is gonna be an option for customizing it for use in still photography and then another one for playback, and most of it is going to be in the shooting mode that we'll see. You can also customize the options in play back as well. Now there is a safety lock because this is relatively easy to bump and change the setting on there is the option for enabling a temporary safety lock that it will not operate until you press. I think it's the left side of the bar for one second, and then it unlocks itself. So then you can then access those features. So it depends on how you hold the camera and how much you bump it as to what you would like. Now. One of the things is that you can set this up to do a variety of different things, and depending on what type of photography you're involved in, you might want to change the customization very quickly. So if you cover the entire bar with, like your whole thumb for one second, you can enter this customizing mode very quickly and easily. And so for people who want to change it back and forth, then that's kind of a nice thing to Dio. If you do want to enter into the user customization, you're gonna get to a second screen, and there's gonna be some different ways that you can set this up. One is you can choose a topic and idea, and the camera will set up the sliding portion in the left button right button. Or, if you want, you can go in and set individual features. For instance, you could do the sliding option, the swiping option for controlling I s O. But you could have a left tap or right tap to do something completely different than I Esso's. And so there are some interesting options here and the info down at the bottom. If you press that it will take you to the preset options. So let's take a look and play around in here and get this thing customized because currently it's not doing anything, and it's waste of good space, if you ask me. So let's ah, get this set up. All right, so on the back of the camera, if you touch the pad, it's going to give you this guide that it's basically telling you that nothing is programmed for it. And if you do want to program it, you're gonna go over here to the yes site. Now, if you just didn't want to use this, you just didn't like it. Don't ever want to see it. Don't want to see the screen, You come down here, hit the info button, and it would hide this screen and nothing would happen. And it's just a place to rest your thumb. But I would like to program it, so I'm gonna bring it over here, too. Yes, and I can hit the Cuba. And now we have the customized multi function bar in here. Actually, go back to let you see that again. And this is just in our menu system. So it's basically given us a shortcut to this place in the menu. We can come in here and see that the camera is not assigned. And so we're gonna press, okay, cause we do want to assign it and it's not assigned. And so we can choose a particular feature here to do this with Let's do an easy one. Let's do I s O speed. Okay, so with I s o swiping it back and forth or pressing left and right will change the I S O. And that looks like a good start. So let's go ahead and give this a try, and we'll go back into shooting mode here. And so if we notice are ISOS over on the right side of the frame. Currently at Actually, Do I have the multi? Do I even have the bar turned on right now? I don't think I do. So I need to go in here and make sure that it is turned on on dso I wanted to disable this to make it always available right now. And so now I could just slide over and move the settings left. And right now, if I want, I could just tap it to the right, and it will go up in my third stop increments or go down like that. Now let me go back and see if I can re program it so that it is on the safety lock. So I'm gonna enable the temporary lock here. So now if I hit this, nothing happens. But if I hold the left side of it for a second, it turns on. And now I can control the I S O. Now, after 10 seconds, it will turn off. And I hate waiting 10 seconds, but I'm gonna let it turn off here so that you can see what it does. So now it turned off. And when I hit the bar again, it does nothing. If I hold down on the left side, I turn it on. And now I can control the I Esso's. And so let's go back in and re program this again for something else. So another good one, I think, is auto focus. And so now you're gonna change the focus area. We haven't quite talked about this in the class, but this is, Ah, very popular way of changing the area that you're focusing and so you can choose larger or smaller brackets. Once again, you can either slide or you can tap it left and right. Once you get used to it and you understand what it's doing, I think it works quite well. If you're just trying toe punch at it and you're not sure what you're doing, then yes, it could be a very frustrating thing to use. All right, so let's go in here and try another one. Let's try use your customization. All right. Now, this is where you get to choose individual features for things. All right, so let's try. This is currently selecting eso speed, so I'm turning the top dial, and we can control all of these different options. Let's go with the I s o. All right, so that's with the swiping. But we're gonna go down here and choose what the left button does. And let's say the left button controls auto focus, and we'll just have it go to the left on that. Actually, no, that was choosing. I sl Excuse me. Let's change this left button to auto focus. I detection autofocus there, and we're gonna come down, and we're gonna change this one two white balance and it goes to switches back and forth between ambience and white on the balance here. And so if I just slide it, we still have it in the locked position. And so if I unlock it and slide it, it changes Theis So but if I just tap it to the left, let's see, we're not in the right mode for it right now. This turns the white balance on and off. So I would have to see if I can change the focusing for the I detect on and off. Turn it on. I detect on, I detect off. And so after 10 seconds, it would turn off. And so it takes a little bit of time and a little bit of customization to get it in there and learning how to take Make it work, as I say, just needs a little bit of experience. But I think if you give it some practice in some time, it's a really valuable tool. One of the nice things for anybody who shoots video is you can program that to control your audio levels, and so you can crank up the microphone or turn it down by just simply sliding back on for fourth on this and this. There isn't any clicking, and so it is nice to have some features on the camera that do not actually click. I do like the clicking dials because they have a very tactile feel to them, but it's good to have a variety of controls for controlling things in different ways on the camera. So get in there, customize it, set it up the way that you want it, Teoh and make use of it because I think it has a lot of potential if you're willing to give it a try. Next up is our F on button on the back of the camera. This will let you focus. And as I talked about towards the beginning of the camera, are beginning of the class. You can use this for back button focusing Now. If you don't like back button focusing, don't worry. You can go in and you can re program that button to do a multitude of other things. The little star is auto exposure lock, and what this does is it locks the exposure when your finger is pressed on the button. So let me show you on the back of the camera and do a little demo here. I'm going to change the cameras mode over to aperture value so that we're in an automated mode. Let's change. Our attitude is a little bit more reasonable, and you can see as we change this around, our shutter speed over here on the left is changing. That's because our scene is changing, so if we want to lock that in, we're gonna press the star button on the camera. Let's get it out of 15th and we lock it in, and now, everywhere we move it, it's going to be locked into that position and it's gonna last. They're actually after we leave our finger off the button. Once we press down and take a photo and come back, it is still locked in. We can turn it off. Yeah, actually, it staying locked on back and it stays locked on there. And so that is gonna be good. If you want to keep the exposure locked as you move from a subject, say standing by a bright window and you don't want the bright light affecting the exposure. It's a great way of controlling the exposure. Next up is R A f point. And what this does is it activates the F point selection and kind of opens up to making a lot of different changes from moving the focusing point around to selecting different points. So this is gonna be used in conjunction with the multi function on the but on the front of the camera, which you would then press to select through the different seven options that you have. So let's look at what each of these options are all right. The first option is face and tracking, and this uses the entire focusing area. There's focusing points that you can choose from in here, and this one just looks at everything, and it's primarily looking for faces to track those faces. And as you saw earlier, you can turn the face tracking on and off. If you just want to use the entire area, you can do that as well. Next up, one of my favorite is the one point A F, and this is just a single box that you get to choose from so that you could be very precise about where you are focusing. And you can choose either a small or a normal sized box on this, and you'll see this option in the Auto Focus menu section that we will talk about a little bit later on. We then have some expanded areas, which primarily are looking in a single area, but they're also looking towards their nearby neighbors for additional help in focusing. And so they have a five point and then a nine point area. And these were going to be a little bit better for moving subjects because it's a little kind of hard to keep a small focus point on a moving subject for very irregular movement. There is larger areas such as the zone, the vertical one, very good for people and then the horizontal one as well. So these are just larger areas that you can choose from, and it depends on what size your subject is is to how big a frame that you might want in there and so good choice of selections in here. I think one point is gonna be good for people who want very precise focusing. I think the face tracking is good. If you have a single face in there that you want to track and focus on, it's going to do a quick and easy job looking at that anywhere in the frame. And then some of the zone options are good for your more erratic sports and action photography. If you want to zoom in, you can zoom in with the info button when you are in this mode, so that you can see more closely what you are focusing on And if you if it any time you want to move these focusing point to the center of the frame, you can use the garbage can button to get it right back towards the middle of the frame. And if you want to exit this mode, you can just press the set button and that returns you back to the normal shooting mode. And for those of you who don't have a lot of experience with autofocus cameras in general, when you are setting up a focus area, it always wants to focus on whatever is closest to you. And that's the reason why you often want to choose a smaller area so that you can dictate exactly where it's going to be. If you want, you can go in and you can customize the button, and you can re program this button to do any number of other things. If you wanted to move the focusing option that you have here up to the multi function button on the top of the camera, you can certainly do that and then reposition this one on the back of the camera to do something else. Let's talk about the info button when you are just looking at the back of the camera or looking through the view view of the camera. You can change this screen that you see and how much information is being display, and so there are some preset settings that you can have. One of the interesting ones is the level system that you can turn on, which shows you if your horizon is set properly. The quick control screen is going to show you your basic settings, ones that we're gonna go in and control here in just a moment. It will also change what you see in the viewfinder. There's not as many options here, but you can pull up more or less information, depending on what's important to you. And you can change in the set up men. You how many of these you will toggle through? If there's one of these screens that you do not use at all, you can uncheck that box and you will not have to go by it at all. When you hit that info button
Class Materials
Bonus Materials with Purchase
Ratings and Reviews
Ranjit Vazhapilly
John Greengo is a very good teacher. I think it's the best investment you can make to get to know your camera well - especially something new like the EOS R. I love his feedback on what new features are worth trying and others that are simply not there yet. Awesome course!
David Torres Aguilar
This is the best course I have ever seen on how to use a camera, it guides you through the functions, settings, hidden configurations in a crystal clear way using very well designed visuals aids. I'm glad I was able to find this class, it's really a great quality course, thanks a lot John Greengo and CreativeLive Team!
user-83bb26
John Greengo is wonderful at making His classes easy to follow and understand. We have purchased the Canon R and found that the only books with directions are in German and Japanese with the US version out in August. We are very grateful that John has produced this class. Love the CanonR but with Johns' class; the camera is easier to understand. Thanks! Hope to see more on the CanonR!
Student Work
Related Classes
Camera Guides