Lesson Info
14. Menu Functions: Autofocus
Lessons
Class Introduction
08:52 2Photo Basics
03:22 3Camera Controls: Basic Controls
05:56 4Camera Controls: Shooting Mode
25:22 5Camera Controls: Multi Function Button
12:07 6Camera Controls: Top Deck
03:14 7Camera Controls: Back Side Controls
25:06 8Camera Controls: Quick Control
12:32Camera Controls: Video and Playback Mode
09:50 10Camera Controls: Left Side, Right Side, Bottom, and Front
09:04 11Lenses
14:15 12Menu Functions: The Basics and Shooting Menu
43:29 13Menu Functions: Video Shooting Menu
18:31 14Menu Functions: Autofocus
14:17 15Menu Functions: Playback Menu
09:22 16Menu Functions: Set Up
31:59 17Menu Functions: Set Up Video and Custom Functions
13:41 18Menu Functions: My Menu
04:17 19Camera Operations
09:58Lesson Info
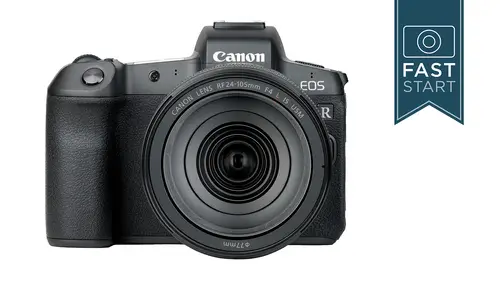
Menu Functions: Autofocus
all right, it is time to dive into a new menu, this one dedicated to auto focus. Our first page and first item in here is autofocus operation, and this is something that we have already talked about because it was part of the multi function options on the top of the camera. The button on the top of the camera and the two main ways that you can focus on how the camera focuses is one shot, which is great for stationary subjects and then the servo mode for subjects that are moving around. It depends on whether you want that focusing to be constantly tracking a particular subject. The A F method is where you are focusing and so you can choose from a single 0.2 different whiter group areas, depending on the size of your subject, that how erratic the movement, maybe the frame size for the basic one can be set to normal or small, depending on how precise you like to be. If you do a lot of portrait photography and you like using a preset single point for focusing on the eye, you'll probably wa...
nt to choose the small one, cause then you can get just a little bit more precise with the direction of where that's pointed out. I detection. A F can be turned on or off, and so the camera can detect faces and eyes. And if you want to do portrait photography, this is a great way for the camera to focus for you, and it will be very accurate. I tend I find that it tends to work best with a single subject, and when you have multiple subjects, it starts picking up on all of them and may or may not pick up on the right one if they're at different distances from the camera. Continuous a F is little different than what we were talking about before in a F operation. This is the camera focusing even when the shutter button is not pressed. The idea is, is that if you're just kind of holding your camera, it focuses on things, and then as you hold it up to your eye, it's gonna be a little bit faster picking up the focus. The problem is, is that it's constantly focusing on different things, even when you're not using the camera. But it's on, and so it tends to waste quite a bit of battery power, and so it doesn't make sense for most situations. Touch and drag A F settings. And so the camera has a touchscreen, as I've mentioned many times before. And you can use that to direct where the camera is focusing rather than using the cross keys on the back of the camera. So a little sub menu in here. First off, you can turn this on or off. If you like to be able to hold the camera up to your eye and maybe use your thumb to reach over onto the screen, you can move the focusing point around using this system. The positioning method, absolute and relative, is a little bit like the mouse that a lot of computers have the relative option. When you move up, it doesn't matter where you touch on the screen. It's just going to go up as you move your finger up. Absolute is going to be more of an indication of whether you're touching it on the left for the right side of the frame. So if you're not sure, play around. See which one of those two works for you. The active touch area can also be regulated because some people are left. I'd and right I'd in their faces obscuring part of the screen, and it's not available to be pressed. You can use one quadrant of the area, and so figure out how you hold the camera, how far your thumb reaches and where you would like to move your thumb in order to move that focusing point around. If you were going to be using this feature at all. Second page in Auto Focus is manual focus peaking settings. So Peking is a great way for determining the zone where focuses and it tends to be very. It's the easiest way to see looking at an entire image where the zona focuses. If you're trying to determine the exact point of focus, it's not that precise. It's a little bit better and just getting the general area. So let's take a look at what this looks like. And so, as you manually focus, you see the area in focus kind of shimmers with this halo of read around the subject, and as we focus back and forth, that subject starts to get illuminated in red. And so it's a good system, as I say for manual focusing and checking the zone where you're at normally, I would leave. This turned off unless you're gonna be manually focusing and find this system particularly helpful. There are some or options that we have in here. You can choose the level either low or high. It's nice to be able to see what's going on, but it can be kind of in the way for certain types of photography. And so see which one works for the types of scenario that you are in. And then you can also change the color. And this may be something you want to change, depending on the color of your subject or the color of the background getting the balance right. Nice to have some adjustments in here for that. Next up is focusing guide and I showed you this before, but I think it's really neat the way this works. We have a guide along the bottom, which tells us where our lens is focused at. But we also have our scale on the top, and this is kind of a new one. Haven't seen this one before, and it can help direct us to focus the lens exactly where it needs to be. For sharpest focus according to wear for our camera has our focus point set. So if you like to manually focus maybe landscape photographers out there, this could be a real handy way for determining proper focus. Under the third page in Auto Focus, we're gonna have the tracking sensitivity. So as you have your camera in a continuous autofocus and it's tracking subjects moving towards you and away from you, it's kind of set on this in between balance between ignoring obstructions and then going to new subjects, eggs as you get to them. And so, if you want to tweak as to how fast it'll track a new subject, you can send us a little bit more over to the plus side. Or, if you want it to stay on your current subject, you can move this a little over to the minus side with acceleration and deceleration Tracking. The camera can use information from you about how fast your subject is likely to accelerate or decelerate, and so it knows whether to speed up or slow down in the focusing following a subject. And so if you have subjects that are rapidly changing in speed, let's say field sports like football or basketball, where players are stopped and then they run real quick and then they stop again. You would want to go home or to sudden speed changes if it's more continuous. Same speed, like a marathon race where they're all kind of running at the same speed. For the most part, that is where you might want to go more to the minus settings. Auto Focus Point switching is going to deal with how much a subject moves left to right to a different part of the frame. How quickly should the camera follow something if it seems to be going to a new portion of the frame? And so it depends on what type of action you're shooting. For more erratic app action like gymnastics and dance, you're gonna want to send this to a higher number one or number two levels so that it tracks that erratic subject. Moving to the new areas onto our fourth page with Focus The Lens Elektronik Manual Focus. There are a number of older lenses from the E F line that have Elektronik, focus rings and with these. There's kind of a special operation on him that you can control. And so when you focus automatically, do you want to be able to grab the focus, ring and manually touch up focus. That's an option that you can turn on and off here. And so there's a couple of other ones in here. It's not gonna apply to most people. It's just these lenses that have the Elektronik manual focus rings. A facist beam firing is where the little light on the front of the camera shines, a bright light that enables you to focus under low light conditions. Now this is only powerful enough to reach a couple of meters, maybe 10 feet or so. It could be a little annoying on your subjects. It could be annoying if you're working with a group of photographers and there's a light going off on the subject. And so, generally I recommend turning this off because it just doesn't do that much good. But under low light conditions, close proximity, it can help the camera focus under those really low light conditions. One shot a F released priority. So when you have the camera in one shot auto focus. The cameras priority is making sure that the subject is in focus and it won't shoot a photo until it's in focus. Unless you turn this off, at which point you can take a photo any time, and it's not gonna care whether it's in focus or not. So for most people as a safety precaution, it's best to leave this in the focus setting Page five for Auto Focus Lens drive when impossible. So this is a little bit more designed for people with the really long lenses, so typically the 300 millimeter lenses on up. If the camera tries to focus and just can't focus, you can turn it off so that it stops searching. And in those cases, what you would do is it would search. It, would try to find it, doesn't find it, it stops and that you would have to manually help the lens focus or get near your subject for aiding the auto focus. And so it's only gonna apply when you have those bigger lenses. If you are not using some of the A F methods, you can uncheck the box and not have those as part of the options that you cycle through. Remember to get these different options. You're gonna press the focus button on the back of the camera, and then you'll press the multi function cycling through each of the different options. If you know you don't use one of these options, you can uncheck the box and save yourself a little bit of clicking and a little bit of time orientation linked. A F point is a favorite feature of mine. Sometimes when you're setting up for shots, you want to shoot verticals and horizontal, and you kind of want a similar composition. But with the different aspect ratios. And the problem is, is that normally your focus point changes dramatically when you switch the camera over two vertical. And so, by using this feature, you can have separate focus points for shooting with horizontal and vertical, and you can move them to different areas so that you could have a similar composition. And so this works for many different types of photography, and so you can either do this for the points. Same same for both vertical. And so I would say, separate a f points, and that allows you to keep different distinct points, depending on whether you're going vertical or horizontal. So the initial servo point for this face detection is a very subtle thing that's hardly gonna come up. It's only when you are switching in from one of the standard points into the face detection point. Do you want the point to be a unique space that you have selected for being in that serve a point. You wanted to be the same place that it was where you were just at? Or do you want there to be no point selected and the camera will just choose for you. And so choosing a unique point is a nice option so that you could have something slightly different as you switch back and forth from these. All right, there's a couple of special auto focus functions for those of you in video. And so if you move your camera into the video and then go into auto focus, you're going to find a few special, unique ones, and we're just going to talk about those unique ones for video in here. 1st 1 is movie servo a F, and so this is going to be continuous focusing while you are recording, and this is gonna be very different, depending on what type of video you're shooting and what level of cinematographer you're you're doing and your your at and so kind of for basic video. Yeah, it's kind of nice to have the focus change if you get closer or further away during the video. For a professional video, they usually have a focus focus puller and somebody who's gonna just focus or they're just gonna set focus, and it's gonna be in the same place for the entire shot. And so if you want the focus to move for you, you would put it on enable or to lock it in. You put it in disable, moving over to Page three for video. The movie servo a F tracking, is going to determine how fast the camera focuses or excuse me how responsive it is when a new subject comes into the frame. How quickly do you want the camera switching over and so do you like it locked on a subject on? And if there's a little bit of interference, the cameras not going to readjust, or do you want it to readjust very quickly and this just greatly depends on what type of action you are shooting. We have another option for the speed of the auto focus. We'll go into a little bit of a sub menu here, and so you can have the focusing a little bit faster or a little bit slower. Now. There are two parameters. There is when you are shooting and all the other times, and when you are shooting a lot of times in video, you don't want the focus to change too quickly becomes jarring and kind of throws the viewer out of whatever is taking place in there. And so a lot of times in video, you want that focused to be a little bit slower. It's OK if it's out of focus for a moment, as long as it's getting better. And so here you can select the speed when it is active, or you can select the overall speed all the time and so you can adjust these as necessary. And as I say, a lot of people like to slow this down a little bit so that it's a little bit smoother and not herky jerky in trying to get the focus
Class Materials
Bonus Materials with Purchase
Ratings and Reviews
Ranjit Vazhapilly
John Greengo is a very good teacher. I think it's the best investment you can make to get to know your camera well - especially something new like the EOS R. I love his feedback on what new features are worth trying and others that are simply not there yet. Awesome course!
David Torres Aguilar
This is the best course I have ever seen on how to use a camera, it guides you through the functions, settings, hidden configurations in a crystal clear way using very well designed visuals aids. I'm glad I was able to find this class, it's really a great quality course, thanks a lot John Greengo and CreativeLive Team!
user-83bb26
John Greengo is wonderful at making His classes easy to follow and understand. We have purchased the Canon R and found that the only books with directions are in German and Japanese with the US version out in August. We are very grateful that John has produced this class. Love the CanonR but with Johns' class; the camera is easier to understand. Thanks! Hope to see more on the CanonR!
Student Work
Related Classes
Camera Guides