Lessons
Day 1
1Introduction
32:46 2Evolution of Susan's Style
1:01:14 3Branding and Identity
30:27 4Mistakes Made and Lessons Learned
20:51Day 2
5Introduction to Gear & Equipment
10:58 6Lenses Part 1
1:06:53Lenses Part 2
27:48 8Lighting
42:59Day 3
9Seeing the Scene
29:12 10Seeing the Scene Q&A
25:16 11Rhythm and Repetition
24:08 12Leading Lines and Rule of Thirds
23:45 13Rule of Odds and Double Exposures
39:49Day 4
14Intro to Business
24:51Day 5
15Financing Your Business
30:49Day 6
16Q&A Days 1-4
1:25:43Day 7
17Pricing Calculator
32:48Day 8
18Package Pricing
20:57Day 9
19Marketing
23:07Day 10
20Vendor Relationships & Referrals
15:03Day 11
21Marketing w Social Media
52:06Day 12
22Booking the Client
1:00:42Day 13
23The Pricing Conversation
08:15Day 14
24Turn A Call Into a Meeting
12:24Day 15
25In Person Meeting
21:58Day 16
26Wedding Planning
28:41Day 17
27Actual Client Pre Wedding Sit Down
19:17Day 18
28Engagement Session Details
36:48Day 19
29Engagement Session On Location
35:48Day 20
30Wedding Details & Tips
25:49Day 21
31Detail Photos Reviewed
36:07Day 22
32Bridal Preparation
1:02:57Day 23
33Bridal Preparation Photo Review
33:14Day 24
34Bridal Prep - What If Scenarios
09:18Day 25
35Q&A Days 5-11
1:01:22Day 26
36First Look Demo
32:08Day 27
37First Look Examples
19:42Day 28
38Portraits of the Bride
37:45Day 29
39Portraits of the Bride and Groom
20:20 40Family Portraits Demo
25:29 41Family Formal Examples
27:43 42Wedding Ceremony Demo
12:24Day 30
43Wedding Ceremony Examples
39:01 44Different Traditions and Faiths
12:14 45Wedding Cocktail Hour and Reception Room Demo
13:34 46Wedding Cocktail Hour and Reception Room Examples
44:05 47Wedding Introductions
29:39 48First Dance
25:02 49Wedding Toasts
41:28 50Parent Dances
08:16 51Wedding Party
44:27 52Reception Events
12:57 53Nighttime Portraits
33:01 54Nighttime Portraits with Found Light
10:08 55Post Wedding Session Demo
27:51 56Post Wedding Session Critique
18:57 57Wedding Day Difficulties
53:54 58Post Workflow - Backing Up Folder Structure
16:46 59Post Workflow - Culling Shots
16:20 60Post Workflow - Outsourcing
20:55 61Q&A Days 12-23
1:22:10 62Post Workflow - Gear
30:34 63Post Workflow - Lightroom Editing
27:36 64Managing Your Studio
41:33 65Post Wedding Marketing
37:30 66Client Care
14:29 67Pricing for Add-Ons
18:03 68The Album Process
44:53 69Balancing Your Business with Life
47:36 70Post Wedding Problems
26:06 71Parent Complaints
42:54 72Unhappy Customers
16:10 73Working with an Assistant
27:33 74Assistant Q&A
16:08 75Lighting with an Assistant
23:47 76Q&A Days 24-30
38:29Lesson Info
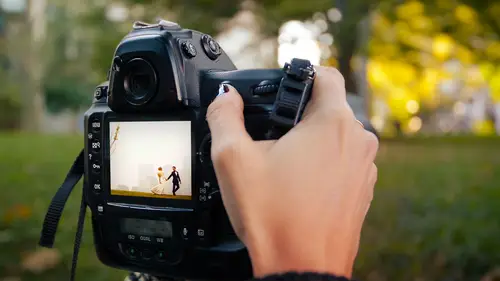
Detail Photos Reviewed
So let's talk through some of these details that I photographed that you just saw just now you saw me shooting them but I was shooting them on an actual wedding day so I didn't want to take two hours to sit out and explain every single thing that I was doing I wanted to get them done get out there and start giving her the respect that she deserves and not turn her wedding into a teaching opportunity so this is my favorite ring shot you can actually see it hanging up behind me here and you don't have to ask what are the blurry things or what are the pearls or what's going on here because you saw me do it the pearls over here to the bottom right are the pearls that were on the toes of her shoes and over here to the left all of the indistinct sparkles in the background are the sparkles on the purse that she had now I was very lucky I went into the room and she did have wonderful things that I could use to create these images and to make them visually interesting but if they had not been t...
here if she didn't have a sparkle person she didn't have shoes with the cool you know pearls on the toes I would've looked around in the rest of the room to see what else I could find whether I could find a mirror or one of her bridesmaids purses or maybe a bridesmaid's pair of shoes and if there really is nothing there whatsoever to show you many images towards the end of today's our that were shot in different conditions I'll simply look for other things and if there are no other things, I'm just looking for a nice clean background. So while I do like to make these visually interesting while I do like to make them ah little bit different, you don't have to go crazy to make a very nice clean detail photograph. I get asked a lot when people are looking at the blurry parts of the ring shots that I do give me a mathematical equation, how how far is the ring from the background and how far is the ring from your camera will you saw and I don't go into a wedding day when I'm setting these things up and think, okay, I need to have the purse four point five inches behind the ring and I need to be this far from it. It becomes a matter of field I can take a shot, I could take a look at it and then I could move on from there. Now at the point that I'm at now, I've been doing this for so long I've been putting so many years into this work, but I generally don't have to take a test shot and look at it, I can just visualize in my eye what it's going to look like, but if you're one year in business or two year in two years in business or your newer at this there's absolutely nothing wrong with setting it up, taking a test shot, looking to see it, you know, looking to see what you've got and see if you like it and making any changes that you might need there's also nothing stopping you from practicing this at home, take off your rings by a piece of costume jewelry, take anything that you want and practice you'll start finding where your comfort level is you'll start seeing the effects that you like, and I'm strongly encouraging you not to just copy what you're seeing me do, but to take the principles that I'm teaching you and go from here and find your own way of expression now. Well, you know, in in layman's terms that blurry background again, I've spoken about this before a lot of people have them misperception that if you have that beautiful out of focus, look in your background that it's because you're shooting at one point eight or it's because you're shooting at one point too, but that's, not it at all the reason for that is multi fold first of all, because I've physically separated my subject from the background second of all because I'm shooting with a longer lens so that does introduce some compression and third of all, even though I'm shooting at f tin for this image I'm shooting with a macro lens and a macro lens has a very, very, very narrow playing a field plane of focus because of the magnification of that lens it's not the same as a twenty four to seventy or eighty five you have a razor thin plane of focus even at f ten you can see this very clearly even though the ring isn't focused by the time you come forward to the bottom right foreground even though that might be half a centimeter away that's completely out of focus is even in f ten on that purse that's maybe five, six inches away from the ring is completely gone even at f ten so when you're shooting with a macro, you have to keep in mind that magnification and you can't shoot it at three point five you can't shoot it at four and expect the entire facet of the ring to be in focus. You can see here very clearly even it f ten it's really just the front of the ring and by the time you get back into the band that's completely gone, so I'm trying to work with several of my rules of composition that I've talked about here I'm going with the rule of thirds I have the ring all the way over to the right but I'm also creating visual interest in the rest of the frame so it isn't just a picture of a ring on the right and then nothing else going on on the left for all of these images you can see my settings on the bottom f ten one hundred sixtieth of a second I could actually go lower on my shutter speed cause I can hand hold really low but with one hundred five millimeter macro I don't want to go below an eightieth of the second or sixty of the second because I am hand holding these I'm not using a tripod and I don't want to get shake so I saw that my eyes so was four thousand I'm comfortable with that so I was comfortable staying with one hundred sixtieth of a second because I knew full well that I s o four thousand is going to be perfectly fine on my defore now if I were at maybe I s o ten thousand or twelve eight I would have reduced my shutter speed to an eightieth or a sixtieth of a second which would allow me to bring my I s o back down f ten so that the entire ring isn't focus on one hundred five millimeters because that is my macro now I've talked a bit about auto eso I do work with auto eso when I'm shooting aperture priority it's not because I can't set my own s o I am perfectly capable of setting it but it's because it's a it's a feature on my deformity that is incredibly reliable, it really doesn't fail me it's something I really liked to use. So what I've told the camera here is that if you have to go lower than one hundred sixtieth of a second, bump me up to the next eso so it would stay constant at one hundred sixty eighth of a second this is the s o that corresponds but if it were any darker in the room instead of changing my shutter speed, my camera would automatically take the issue up to five thousand or sixty four hundred if that's not a feature that you dont that you like, you don't have to use it it just is one that I happened to greatly enjoy but only when I'm working on aperture priority never when I'm working on manual so this is the exact same setup just a vertical instead of a horizontal we've spoken about working the scene I like to shoot them vertically I like to shoot them horizontally it gives it a slightly different look to the image the ring itself becomes a little bit more of a focus and it's just takes two seconds to flip my camera vertical and shoot something else that shows the same scene in a different way so from here, you actually cannot see the ex if data at the bottom because it's a way to bright, but I'm still a f ten, I'm still at s o four thousand, I'm still in one hundred sixtieth of a second, and all I've done is simply layer her ring on the top of his ring, and the macro was so incredibly amazing that you can actually see not only the sequence of the purse that I have laid it on, but you can see every single fiber of fabric between all of the sequins and these tiny little sequence now look like rocks that the ring is laying on. Now. I have to be very, very careful when I'm focusing with a macro, because even though it is an incredibly powerful, wonderful piece of glass, it's hard to focus macros air just in general, hard to focus, especially when you're putting a shiny thing on top of another shiny thing. It doesn't know which shiny thing that you want in focus, so I will give it a good college trial at it attempt to focus on its own, but because it generally tends to ping pong around with all of the sparkles that are going on ah lot of times I do end up switching over to manual focus, I can work a lot faster, I can get what I want in focus ah lot quicker and then I can move on so then we come over to the ring that has the engraving in it and you do not see the map for the exit information here but I can tell you that this was shot at f twenty two the sow went up to about ten thousand because I went up to f twenty two it needed to compensate on still one hundred sixtieth of a second and what I did was I turned the ring being very very very conscious of how the light and how the shadow we're falling inside the ring the fact that the tin in the thirteen or in a bright spot and the eleven is in a dark spot is not an accident nothing that I do is an accident it's very very very deliberate and I'm focusing on the eleven knowing that at f twenty two with a macro the ten and the thirteen will still be in focus and if this isn't something that you're comfortable with it, this isn't something that you do on a regular basis you need to practice with it and the more that you practice with it the more that you shoot your macro the more you'll be able to tell what f twenty two looks like what f sixteen looks like what f eleven looks like and you'll be able to choose your settings accordingly I don't even think about it anymore and I'm not saying that to brag and I'm not trying to say well, I could do this but you can't that's not where I'm going with this I've just been doing this for a really long time now and it's becoming more comfortable with my gear becoming more comfortable with my settings you have to start thinking less about what you're doing and it starts to become instinct and as I've mentioned before there is no fast track to being able to do this tomorrow this does take practice getting to know your gear inside and out takes a lot of work but if you stick with it it is very, very, very rewarding to be ableto walk into a situation and to be able to assess it quicker than you did six months ago or a year ago or ten years ago so please don't get discouraged and please please keep going so I have actually moved over here to f twenty nine and you can see that all of my settings have chain changed I'm a f twenty nine because I want the ever and the after both in focus and again it is not an accident that one is in the light and one is in the dark I don't want that line between the brightness and the shadow to cut a word in half so I've moved the ring and I have moved myself so that it is deliberately placed I had to drop down to if a fiftieth of a second because I was already at I s o ten thousand because I'm shooting it f twenty nine had to take it down to a fiftieth of a second you saw me take a breath in and shoot three times that's a trick that I picked up from job using at a workshop that I saw him give many many years ago he said if you take a breath in and start to let it out slowly and fire three times the one in the middle will be in focus and I thought that's the most ridiculous thing I've ever heard that doesn't work and that totally works so a little tidbit of something that I picked up at a w p p ay seminar ten years ago has stuck with me and continues to remain true to this day so you can see that adjusting to f twenty nine pushed my eyes so up to ten thousand which then meant that my shutter speed automatically brought itself down with auto so once you hit your threshold once I hit my ten thousand then the only place to go is down it can't change my associate starts bringing my shutter speed down I had to be very conscious of it I had to be very careful because I don't use a tripod I just had to make sure that I was a steady as I possibly could if I couldn't be steady at a fiftieth of a second, I would have gotten my eye slight to fill in a little light onto the image and again just moving through very, very simply included this image because I wanted to show I don't shoot everything at f twenty two r f twenty nine this is it five and the reason being is I just want one of the pearls and focus and I want the other one to melt away into the distance so talking about shooting it f nine f eleven f sixteen sometimes I want to do the exact opposite of that and have on ly one small thing and focus and I know that at f five I'm going to lose everything else other than what is precisely under the focal point of the camera coming down even further f four this is four this is at one point to this isn't one point eight this is f four on a macro and you can see when I went to f or my I s so adjusted itself back down to two thousand five hundred I was able to shoot a one hundred sixtieth of a second so I got no shake you can also see that the only thing that's in focus is one pearl in the very center of the very front and everything else melts away like liquid that was a very, very, very deliberate affect just like this was also a deliberate effect when I laid the pearls on top of the kleenex box so that I could get the slight reflection in it so that the corrugated tin of the box would look like water and instead of being up and shooting down so that you could see it melting away I wanted you to see the rest of the pearl necklace on the same plane so again none of this is an accident I've thought through everything from the background to the surface that it's laying on to what height I'm at two how much of the rest of the detail is there and this is thirteen years of doing this over and over and over again so if you do stick with it you will find your own voice even in something as as minuscule as shooting the details of the day so we hot back over here we go two three point five the reason being I only want a little point of the proof on the tip of the shoe in focus this is the exact same shot justus a horizontal instead of vertical I went to three point five here I wasn't I wasn't really loving this set up all that much I was trying too hard and sometimes in your desire to make something really interesting you khun try way too hard and overcomplicate things which is what I was doing here but I went to three point five because all I wanted was the very tiny a pearl on the tip of the shoe in focus but then I found a much better place to put the shoes with a better light source with a better quality of light with a more interesting background yet I still stayed at three point five partly because the shoes were so close to the background itself the shelf was very short I wasn't able to pull it out much further than that and really I wanted the focus to be on the rushing at the tip of the shoe and on the pearls on the tip of the shoes, not the back of the shoe or the background, said that's why I went to three point five and again just working through these details that she had provided for us choosing the aperture that is correct to produce the effect that I'm looking for. I shot these at three point five because I didn't want the whole thing and focus just a very, very, very little snippet so we're going to move on from here and I'm going to show you some before and afters from some ring shots that I took it different weddings so these are not from blair and jeremy's wedding you are not going crazy you did not just close your eyes and miss this part of the video this is something completely different all of the before shots were actually shot with my iphone or my assistant's iphone because I knew that I was going to make a slightly cool shot and I wanted to be able to show it to people. So this is just a ring sitting on some rocks with some pearls, and when I readjusted and I got down, I put some pearls in the foreground as well, still propped up on the rocks, shooting straight into it. Now, instead of being visible obvious pearls, they look like bubbles. This is outdoors at a mountain house in the hudson valley, and I am literally on a lounge chair outside, piling up grass that I pulled out of the ground and some flowers that I yang out of the ground as well. But it looks like that I phone on the left professional photo on the right and you can see the relationship of where the ring is toe where I'm placing the yellow flowers behind them. Even at f thirteen, you can clearly see you start losing the focus in the front as the leaves go down towards the bottom of the frame on the right and up in the back it looks like it's so far away it almost looks like a watercolor portrait that's f thirteen on a macro I s so eleven hundred I was outside, but I was shooting it f thirteen and by the time I got my exposure correct on the ring, which was maurin the son because I was outdoors, the correct exposure on the ring brought the rest of the kind of the rest of the frame darker because the area on the chaise lounge that I was seating the ring was brighter than where I put the flowers. I deliberately put them in a slightly more shadow section of the frame. This is at sweetwater farms in glen mills, pennsylvania. It's a wonderful, fantastic location. I am in the room that the bride is getting ready in. You can see to the upper left over there there's like the chairs there doing makeup out there there's a window over here and this is a shoe box that it's sitting on just a glossy top of a shoebox. And I went outside and I found a flower that had fallen on the ground and I came inside and started tearing the petals off is that I did not rip this out of a bouquet. I do not, you know, do any vandalism to make my room ring shots, but it took me two seconds. I went to the room, I saw the shiny shoe box, I went outside, I grabbed a flower and within two minutes I was setting this up this didn't take me an hour of wandering around so again as I've talked about before what comes with experience is the ability to think faster and to think on your feet and make snap decisions and something that would have taken me fifteen minutes to set up three or four years ago took me only two minutes to set up now and the final shot looks like this is in the same set up as the picture that you saw from my iphone earlier even at death eleven look at how out of focus the background is we're s o nine thousand and it's still a beautiful beautiful photograph at a little noise reduction in post processing and it looks extraordinary what we've got going on here I am in the bride's getting ready room you can see the bed in the background you can see my coffee off to the left what this is right here is a picture that we tour out of a magazine the bride had a bridal magazine in the room asked her if she minded if I pull the picture out of it and used it to create a shot for her the bride and groom were going to the beach on their honeymoon so what you're seeing here is a tor now picture of a picture from a magazine and two sugar packets dumped on a bedside table and it looks like that and there you go what's happening over here on the left is a picture that I tried at which worked, which I really, really liked from another picture that I tore out of a magazine and over here on the right is the end result of this setup that you saw in the frame prior the sugar on the table looks like sand, and then the picture in the background looks like the sky, so I was trying to create that beach effect for them. This is at a place called yazz. Nope, alana it's, a golf club in princeton, new jersey. This is just a chair by the window in the room that the bride is getting ready in, and I do have a lot of photographers asked me, how do you do ring shots at venues that are maybe less fancy and my responses? If you think that I'm working at a fancy venue every single weekend, you're crazy because I'm not sometimes I am a the four seasons, sometimes I am the plaza, but sometimes I'm at the holiday inn, sometimes amid the hilton garden inn sometimes I met a catering hall. I'm in different places every single week, and it doesn't have to be a grand dramatic location that you're shooting in to get really beautiful photographs of the details that you're working with, what I did here was I kind of walked around in the room, took a look around and grab these two weird kind of copper cups that we're sitting on one of the shelves if we do borrow something to put it into one of our ring or detail shots, we take it. We always put it back afterwards, usually by the time I'm photographing the rings. If I've moved on to the shoes or the earrings or whatever, I'll hand the ring back to my assistant all handed the cups that I've used back to my assistant, I'll ask her kindly to put them away for me, her putting them away means that I can keep working. I'm not trying to be a slave driver or make her do all of these stupid errands for me, but if she takes two seconds and puts them away, that's two seconds that I can be continuing toe work and using my time to the best advantage. So I took sarah's ring. I put it in one of the cups, I got down and I shot through the arm of the other cup and it looks like this f eleven. This is actually with my sixty millimeter macro, so you don't even have a whole lot of compression going on. But the sixty millimeter at f eleven I have eight hundred or one hundred sixtieth of a second shooting through one cup into another cop. Very easy, so we're done with the before and afters, I don't pull out my iphone and take a picture of every single set up that ideo, although it's really fun, and I really enjoy it, I just wanted to share with you several other detail shots that were taken in other weddings at other locations and talk to you briefly about how they're set up the wonderful thing about the thirty days it is. I do get to spend a lot of time talking to you about every single segment of the day and showing you lots of examples, so if you're new, hopefully this will help you get going, and if you've been established and you've been doing this for a while, maybe something that I show you today will spark something in you the next time that you go shoot, so a lot of times I'm just simply trying to do a very nice, very easy photographs with my macro, you'll see that the ones you're about to see switch back and forth between sixty millimeters and one hundred five millimeters. Just because I got my one o five doesn't mean that I suddenly hate everything that I shot with a sixty, it doesn't really work that way, but you'll be able to see the settings at the bottom, you'll be able to see that my aperture is consistently f nine eleven f sixteen as you've seen already f twenty nine that I try to keep my shutter speed is low as I can without getting camera shake and then I'm always very conscious of what my s o is this is very, very, very simple it's just rings that sitting on a shiny bedside table with a several orchids laying behind it very simple ring on a picture that I tour out of a magazine I always ask before I shred a client's magazine I always ask before I move anybody's property if I want to borrow a purse if I want to borrow a pair of shoes if I want to touch something that's, not mine or from the hotel I'll always you know hold up the shiny person I'll be like hey, whose purse is this on one of the bridesmaids is like that's mine, I'll say, do you mind me borrowing this for just a second one time several years ago, probably back in eight or nine the groom had gifted the bride a very, very, very expensive watch on the watch was stolen from the bride's hotel room and I got a call the day after the wedding from the groom's security teams he was a radio host of the groom's security team wanting to see my photographs and wanting to talk to me about the theft of the watch I've never said I hadn't seen the watch, I didn't photograph it, it had never kind of crossed my plane division throughout the day, but I do ever since then, I try to be very, very careful when I'm touching someone's personal possessions that I make sure that I put it back in the hands of the person that I borrowed it from, and if I have the ring like let's say I'm shooting the ring or the shoes or whatever, and the videographer wants it or somebody else needs it for something, I always go back to the brighter I have sandra, my assistant go back to the bride and say, you know, hey, blair, we have your ring, and adam wants to video it a little bit. Do you mind if we give it to him? And then she says, sure that way is adam who? Adam, hi. I know you've never lost anything if he drops it down a great or loses it or something happens, she knows full well that it past the chain of command, and it wasn't mine. So maybe it's a little anal retentive, maybe it's a little paranoid, but if I'm working with somebody's valuables, I do want them to know that I'm taking care of them, and I want them to know where they've gone so not only I know we've spoken very heavily in this set this section so far about shooting the rings, but I do try to make interesting images of other details throughout the getting ready process as well, such as the shoes, and I used to think that it was goofy to take a picture of the shoes. Why would anybody take a picture of shoes? But then I would notice that, you know, for some brides that they buy a thousand dollars jimmy choos, and this is the first time they've ever really bought a luxury item for them and it's easy to laugh and say, oh, gosh, is the same jimmy shoes again, I've seen these things like a million times, but this might be a really precious purchase to your client, and this might really mean something to them. I know that it's, goofy, and I don't expect anybody toe understand if you don't feel this way, I'm not trying to convince you, but a lot of times these details do you have a really important meaning to the people who've purchased them the every time she wears those jimmy choo's out on date night or to the movies or to her best friend's wedding two years down the road, those will be the shoes that she got married in and it's a nice memory. So I'm always trying to make something a little bit more interesting than just laying the shoes on the bed and taking a photograph of them. What we have going on over here on the right is we took a gold j crew belt that had been laying on the bed, and we asked whose belt is this? Do you mind if we use it? Stuff the heels of the shoes through the buckle of the belt and what you don't see is my assistant standing up over the window, recording herself to hang those shoes in the window for me. Now, while I do always shoot my reins with one hundred five or in years past the sixty millimeter macro, I don't necessarily have to shoot shoes or flowers or things like that with a macro unless that's the effect that I'm going for. So I was shooting with my eighty five it's an eighty five one eight, but I shot these two eight because I wanted a little bit more of the ring a little bit more of the shoes and focus, and I wanted to bring in a little bit more of the background. I didn't want it to just be an indistinct mess. What it actually is is it's the window of a new york city hotel, and you're seeing the building across the street. The eighty five one four at one four shot at one point four for deliberate effect focal point directly on top of the shoes over here on the left and everything that's going on in the foreground and sides are it's like wire long wires with little beads stuff on them kind of like a christmas tree garland of sorts on I just wrapped it into a wreath and set it in front of the shoes I found it in a corner of the bride's room in like a craft box asked if I could borrow it and and off I went back over to the ring like I said before it doesn't always have to be a gimmick it doesn't always have to be what clever thing can I put in front or what clever thing can I put behind sometimes it's unjust simply a beautifully perfectly exposed photograph and nothing more very simple very clean you don't always have to try so hard, but when you do have the opportunity to make something really interesting it's kind of fun you know these air kate's shoes and catering sitting in her shoes knowing full well that it f nine their entire ring was going to be in focus, you'd get a little bit of the bow that encircled it and then everything else would become a very lovely indistinct background and back to the lesson that I gave on composition rule of thirds the ring is all the way over there in your first third, but everything else is visually interesting and leading right back. What I want to be the focus of attention in the frame this is a tor now picture from martha stewart's wedding magazine it's actually a picture of a bunch of jewels all piled up on top of each other. It is a teeny tiny piece of bubble gum stuck to the back of the ring and stuck right down there on the magazine. I'm sitting at the bride's, getting ready location right next to a window. It doesn't have to be a fancy place, it doesn't have to be the waldorf historia all you need is some good light and something interesting visually and about one foot of ground space to work on, and you can make beautiful things torn out picture from a magazine um, this is a table kind of ah fabric table with a purse sitting behind it, and this is a great example that even at sixty millimeters, even it f nine look at the focus of where the ring is sitting traveled down from the ring onto the surface that it's sitting on and look left to right look how little of it is actually a folk in focus at f nine and look how quickly it falls out of focus behind it. So I'm not joking when I talk about that your plane, a field off focus is actually very, very, very narrow with a macro because of the magnification of that type of lanterns, the ring is sitting on a very weird pair like from a craft shop that was sitting on the bride's mother's table like a sparkly pair and then there's another sparkly pair in the background. This is sitting on an ottoman with some candles in the background back over to some shoes I'm practically standing on the kitchen table shooting into the chandelier that's hanging down above the table. The bride had really extraordinary shoes with sparkly souls and before she put them on and she wore them which would have destroyed the sparkle in the soul, she asked me if I could take a photograph with them. Not only did I photograph the shoes, which I did, but the ring and the groom's cartier band we're so incredibly sparkly themselves that I was able to use the soul of the shoes one flipped up one like this put the ring in the middle, the shoes were being held by my assistant so that nothing fell or spilled sixty millimeters right in there, nice and clean and again, as I've mentioned before, it doesn't always have to be the hundred five millimeter macro it could be the eighty five and this is the eighty five one point four at one point six I found a shaft of light coming in from a window. I put the shoes on a chair I wanted the crisscross of the shoes I wanted something criss crossing an ornate with the chair so I found one that really kind of match what I was going for but the shoes right in the shaft of light and by the time I exposed correctly for the shoes it brought back down every single other thing in the frame. F thirteen again f thirteen I was all the way up. It s o eight hundred so I brought my shutter speed down to a fiftieth of a second. This is in the bellevue hotel in philadelphia. It has these kind of orbs sitting on the tables in the room it's it's a little bit like those like hurricane glass candleholders that you'll see a lot of times it like pure one or west home or somewhere like that, I put one in the background in the light I put one in the foreground still in the light but not as strong of a light as the background exposed for the ring. Everything else dark and down in the rest of the frame f eleven and again, too is simply looking for something visually interesting. You can see her that that she was sitting on two water glasses the reason for that, as I was trying to raise it up to the height of the window and if I just had it sitting down the window sill cut midway through the shoes, so I needed something to raise them up. I thought the water glasses were a really interesting visual and what's going on in the foreground is my assistant simply holding the other shoe, and I'm shooting through it back to that wonderful brand of shoes with the sparkly soul. It is sparkle on top of sparkle on top of sparkle, but again, if you follow the ring down to the soul that it's sitting on even it f thirteen, you can see you're very, very, very narrow in focus area because of the magnification and I, this is just a bedside table, nothing more, nothing less ah lot of the furniture in hotels will have that kind of glass topper on it so that it's shiny, grab a bedside table and drag it over by the window. Now this is using the eye flight. I told you when I would use told him I'd tell you, when I was using some artificial light and I am, this is a candle holder in the front left of the frame. This is one of those round high tops at a cocktail hour. It is completely dark in the room. There is no additional light, but my assistant is holding the ice light from the other side of the candle holder aiming directly at the rings as if it were a window and the same thing here. They had done a champagne toast where they poured the champagne and it cascaded down all of these glasses. And when it was done, there were like four or five of them that were half drunk. People who kind of abandoned them on the table. So I got a fresh one. Ask the bartender to pour just a finger of champagne at the bottom. This is sitting on one of the cocktail tables at the marion, which is a catering hall and sentiments in new jersey. My assistant is holding the ice light toe light, the rings and the bands that are sitting in the very middle there and there you go. I did wash them off before I gave them back. And yes, everyone did look at me like I was completely insane when I started putting my fingers and all of these champagne glasses. But the bride and groom knew exactly what I was going for. They knew exactly what I was doing, and they were comfortable with me putting putting their rings in alcohol same thing here the bride's mother had requested that I photograph the rings in a champagne glass and now the first thought that I had was oh my gosh the rings in a champagne glass are you kidding me? How nineteen eighties is that and then I thought you know what? Maybe I should instead of complaining maybe I should rise to the challenge and maybe give her ah more modern take on the image that she's asking for so I went outside this's that the er I am in upstate new york at a catering hall in upstate new york and I went outside onto the balcony this is just a wooden table out on the deck behind the venue I had a circle of tea lights that I took from the other cop tell our tables because cocktail hour was over I put the tea lights in a ring underneath the champagne glass there is no artificial light there's no isolate there's no other video light there's no flash it's just the light from the candles coming up into the champagne glass and I stood over it and I shot down into it and that's all there is to it so as you can tell shooting the rings is something that I do feel passionate about it is something that I enjoy very, very much but it's about managing the expectations with the clients finding out if he's aaron important to them or not finding out if they're important to you or not, making sure that you have time in the timeline to accomplish these images, making sure that you have a strong handle on what you're doing technically. And then just having fun. Thank you so much for sitting with us today, and we'll see you all tomorrow.
Class Materials
bonus material
Ratings and Reviews
Misty Angel
oh Susan, you are AWESOME!! I am not a wedding photographer (despite dipping my toe in this intimidating pool for one of my dearest friends), I shoot all forms of portraits and love sports too! Your '30-Days' has been the single most influential and educational moments since I started my venture into photography in 2009! THANK YOU! Your honesty, directness, bluntness, humor and vulnerability makes these 30-Days the most worthwhile time spent away from actual shooting; while simultaneously is the most inspirational motivator to push you out there to practice these ideas/techniques! #SShostestwiththemostest You raise the bar in this industry, not just with wedding photographers, but with all genres of photography! I wanted this course to learn about shooting and thought, great... I'll get a little bit of the business side too... OMG! I got it ALL! I'm dying! What an awesome investment in myself, my business and in YOU! PLEASE keep doing what you are doing! I love your new Dynamic Range, I feel that it is a wonderful extension of the work you do with Creative Live! I watch you EVERY DAY, every morning... I know that I continue absorbing your wisdom through repetition! I don't want to be you, I want to rise to your level! So thank you for the inspiration, motivation and aspiration! Keep on being REAL, its what we love about you! We embrace your Chanel meets Alexander McQueen-ness! :) Thank you for stepping into this educational space and providing us with your lessons learned so we can avoid the negative-time investment making mistakes... we are drinking your virtual lemonade!! HA! Like the others, whatever wisdom you offer in this medium, I will be jumping at the opportunity to learn from you! THANK YOU!
user-59abe9
All the positive reviews say it all. When Susan took on the challenge of teaching this course it must of looked like attempting to climb Mount Everest...and she accomplished just that. Susan is a detailed, well-organized photographer and this clearly comes out in her teaching. Using repetition, clear instructions, a logical and well laid out presentation, she answers most any question you might have when it comes to wedding photography. I felt like I was having a private consultation when watching the course. She is real, honest, tactful, funny, and a gift to the photography community. Finally, her photography is professional and inspiring. Thank you Susan for the tremendous amount of work that you put into making this an outstanding Creative Live course for us all.
Sean
Wow. What a super, comprehensive, entertaining, informative course. Well done. I've taking a lot of photography classes and this one is definitely top of the list. Susan Stripling was very well prepared (and great job by the CreativeLive Team too). Terrific course. Susan shared so much. Thank you! P.S. Love the CL boot camp courses.
Student Work
Related Classes
Wedding Photography