Lessons
Day 1
1Introduction
32:46 2Evolution of Susan's Style
1:01:14 3Branding and Identity
30:27 4Mistakes Made and Lessons Learned
20:51Day 2
5Introduction to Gear & Equipment
10:58 6Lenses Part 1
1:06:53Lenses Part 2
27:48 8Lighting
42:59Day 3
9Seeing the Scene
29:12 10Seeing the Scene Q&A
25:16 11Rhythm and Repetition
24:08 12Leading Lines and Rule of Thirds
23:45 13Rule of Odds and Double Exposures
39:49Day 4
14Intro to Business
24:51Day 5
15Financing Your Business
30:49Day 6
16Q&A Days 1-4
1:25:43Day 7
17Pricing Calculator
32:48Day 8
18Package Pricing
20:57Day 9
19Marketing
23:07Day 10
20Vendor Relationships & Referrals
15:03Day 11
21Marketing w Social Media
52:06Day 12
22Booking the Client
1:00:42Day 13
23The Pricing Conversation
08:15Day 14
24Turn A Call Into a Meeting
12:24Day 15
25In Person Meeting
21:58Day 16
26Wedding Planning
28:41Day 17
27Actual Client Pre Wedding Sit Down
19:17Day 18
28Engagement Session Details
36:48Day 19
29Engagement Session On Location
35:48Day 20
30Wedding Details & Tips
25:49Day 21
31Detail Photos Reviewed
36:07Day 22
32Bridal Preparation
1:02:57Day 23
33Bridal Preparation Photo Review
33:14Day 24
34Bridal Prep - What If Scenarios
09:18Day 25
35Q&A Days 5-11
1:01:22Day 26
36First Look Demo
32:08Day 27
37First Look Examples
19:42Day 28
38Portraits of the Bride
37:45Day 29
39Portraits of the Bride and Groom
20:20 40Family Portraits Demo
25:29 41Family Formal Examples
27:43 42Wedding Ceremony Demo
12:24Day 30
43Wedding Ceremony Examples
39:01 44Different Traditions and Faiths
12:14 45Wedding Cocktail Hour and Reception Room Demo
13:34 46Wedding Cocktail Hour and Reception Room Examples
44:05 47Wedding Introductions
29:39 48First Dance
25:02 49Wedding Toasts
41:28 50Parent Dances
08:16 51Wedding Party
44:27 52Reception Events
12:57 53Nighttime Portraits
33:01 54Nighttime Portraits with Found Light
10:08 55Post Wedding Session Demo
27:51 56Post Wedding Session Critique
18:57 57Wedding Day Difficulties
53:54 58Post Workflow - Backing Up Folder Structure
16:46 59Post Workflow - Culling Shots
16:20 60Post Workflow - Outsourcing
20:55 61Q&A Days 12-23
1:22:10 62Post Workflow - Gear
30:34 63Post Workflow - Lightroom Editing
27:36 64Managing Your Studio
41:33 65Post Wedding Marketing
37:30 66Client Care
14:29 67Pricing for Add-Ons
18:03 68The Album Process
44:53 69Balancing Your Business with Life
47:36 70Post Wedding Problems
26:06 71Parent Complaints
42:54 72Unhappy Customers
16:10 73Working with an Assistant
27:33 74Assistant Q&A
16:08 75Lighting with an Assistant
23:47 76Q&A Days 24-30
38:29Lesson Info
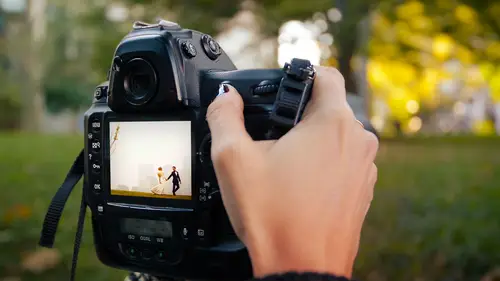
Portraits of the Bride and Groom
So now that we've completely abused photographing the poor bride by herself, let's move on and talk about photographing the bride and groom together, and you're going to get to see this when we do the post session with Blair and Jeremy. But I want to talk to a little bit about posing. Imposing is not something normally that I like to teach because I'm not a huge posed her in all senses of the word. But I definitely don't like to overdo an over stage and over posed the pictures of the bridegroom together because I feel that the second that I start doing that, it becomes disingenuous and far be it from me to tell them how to interact with each other, whether they are full of emotion or whether they are stoic and kind to each other. It's my job to represent that in their photographs, however, that said, there are a couple of different principles that I kind of tried to live by. When we talk about photographing the bride and groom together, the first thing is, don't shoot up their noses. I...
mean, listen, that's it's an inevitability sometimes to get the angle that you want, but a little trick that I have. If you are going to have to shoot up onto your clients, have them lean in to you, says Caroline's Wedding Day, Caroline and Spencer at the Deriving Club in Piedmont, right in Atlanta. Incredibly, incredibly lovely kind people. And what's going on over here? This cottage that you see in the background is the place where they were parking the cars. What you can't see right behind the bridegroom's rear ends are a bunch of incredibly nice Southern gentleman parking cars and people getting in and out of the valet area. What I've done here because I knew that I was going to have to drop down, I knew that I was going to have to shoot up in order to frame the scene the way I wanted. I told Caroline and Spencer that when they leaned into each other instead of leaning back toe lean forward a little bit. Now I know that's ridiculous. You have your bride and groom instead of standing like this. They're kind of standing like that. They're leaning toward you, and I say, Listen, I know this is going to feel completely ridiculous, but it's going to look much more natural when you actually see the image, you're not gonna be able to tell that you're leaning forward, so just lean forward a little bit and find this whole situation incredibly amusing. And we'll have a great picture. And we did. I keep it light. I keep it easy, and I keep it moving. No arms through next. If you're looking for phenomenal, phenomenal photography critique, sit in on a live print competition sometime. Print. Judging a WPP I was one of the things that really picked my work up and shoved it in a new direction because I was able to sit there for two days and listen to judges talk about what we're good points and what we're bad points about photographs and what made some of them effective and what made some of them less so. So, in this instance, right here, these two people are gorgeous there in a beautiful setting. They look great together and what I've effectively done by having her put her arms around his neck as I shoved a big distracting line right through an important part of the photograph. So if they put their arms around each other's necks, and I want to improve upon it. I will simply say, Hey, go your arms around his neck. Can you just slide your elbows down his chest just a little bit? And it usually turns out looking just like that or like that. The last thing I want is a big impediment shoving through an important part of my photograph. So sometimes she'll take his space. Sometimes she'll put her hands on his chest. But all I have to do seriously, all I have to do is say, just for your elbows down a little bit. And usually that will settle into a much more flattering photograph, like so she had her arms around his neck. I said, Can you just bring your arms down a little bit? And he took her hands in hiss, and it made for a really beautiful moment. Same thing here. She slid her arms down his kind of down his chest and ended up clutching his arms so it turns into a lovely moment on its own. Kind of a nice default is to photograph the bridegroom walking. This is also a really good one. If the bride and groom or maybe slightly uncomfortable in front of the camera if I don't know what to do with them, which clearly was not the case with Christie and Andrew. And it's very fortuitous and fun to see their faces today because just yesterday morning I got the contract for her sister's wedding this August. So it's really wonderful, and it really, truly is an honor and a privilege to be able to meet new people and to be able to get to know their families. And from Christie, I photographed a wedding in January from a girl that she took a Pilates class with, showed her a picture of my ring because that client was considering getting a yellow diamond, and that client ended up looking at my work and sorry, ended up hiring me from there. So it's really funny to see where the relationship between you and really one really good client can possibly lead you. So if you're working with someone who may or may not be as visibly phenomenally emotional as Christie here, having them walk is a really good way to get started. So I'll say, just hold hands and take a walk out towards me. I'm you can't see the exit data. It's buried in the whiteness of Alison's beautiful skirt here, but I am it 200 millimeters. I am it a four. And I understand that I am kind of a far away, away from my bride and groom, understanding that if I'm shooting a bride and groom at 200 millimeters, I'm maybe not going to be able to say, Hey, guys, do you mind coming this way? And there's only so much I want to shout at them on a wedding day. So often station my assistant midway between myself in them, so I can say, Hey, Sandra, can you ask? You know, Alison and her husband walked towards me a little bit slower, and then Sandra will convey it to the two of them so that Alison and Andrew, new kind of at what speed I wanted them coming at. But it's a really great thing to do, gets the clients moving, gets them loosened up in front of you, get some nice natural interaction because the second they start walking towards you, they're gonna want to look at you. So when they start walking, I'll say, No, no, don't talk to me talk to each other. I'm not interesting. He's interesting. So then you have moments of interaction where they're actually chatting with each other, another go to. If I'm not necessarily certain, you know, if there may be a little uncomfortable, they don't know what to do with their hands. I'll say you know what? Grab her face. If you're kissing and you've got your hands down low or everything's weird, you don't know what to do. You know, I'll say, Hey, just grab her face or grab his face, you know, make you know, get nice and close in together, and then you get this and then you get that. And sometimes you get a really great laugh because they hold each other's faces and they feel a little silly. And then you get a really nice moment. So sometimes a little staging, sometimes a little posing, really sets the stage for an actual natural moment to occur. Make her laugh. Seems like such a little thing elicits such a funny reaction. I mean, Ryan was ridiculous. He's the funniest person ever. He made all of us laugh all day long, so he might be a slightly unfair example to show here but say, you know what? I am really far away from you guys and not be able to hear a word that you say. Say whatever you have to say, but make her laugh or make him laugh or make each other laugh. And then you get these wonderful natural reactions. Get close like you're about to kiss. But don't and then you make him hold it there for a while. Kind of make him suffer a little bit, but I don't like kissing pictures. I don't think there's a lot going on in a kissing picture. What I'm looking for is the moment before they kiss are the moment after they kiss. So if I set up that moment right before their lips touch and I make them hold it until it's just a little bit uncomfortable, then I'm going to get a beautiful natural reaction from them. Now let's talk about the part of the day that nobody really likes to do, which is when they look at you directly. I can't think of a single photographer whose favorite thing ever is. Oh my gosh, I can't wait to do camera where Portrait's we all want to do the artistic things. We all want to do the interesting things. But the camera where portrait are the ones that your grandchildren are going to dig out of the attic. They're the ones that your mom is going to put on the piano. Ignoring these entirely is really doing your clients and yourself a disservice. So let's talk about how I used to do them versus how I do them now. God bless. There's that 50 millimeter lens again, that 50 millimeter lens. I don't know why I just kept on keeping on with that 50 millimeter as long as I did. I dont get a real foreground background relationship. I don't get much of anything going on with a 50. I don't really get much of a sense of time in place. I don't really get much of anything. And listen. If the 50 millimeter is your favorite lens and you are making it work for you, I'm not knocking it. I can't make it work for me. It's not a focal length that I believe in. It's not a focal length that makes me comfortable or happy. I think I have one, but I don't know where it is. So needless to say, it's not exactly a focal link that I spend a lot of time hanging around out on the wedding day. I would rather shoot something at Ah 125 millimeters and get some beautiful compression. Not only two separate my subject from the background, but also the compression on my subjects themselves. 160 even 95 millimeters, I feel like is much more flattering all the way out at 200 beautiful compression off of the background. Beautiful, beautiful lens compression. Now, a lot of times, if I have the opportunity, I'm going to be photographing these at the point in time of the day when I'm shooting, shooting the bridegroom together. So a lot of times these were going to happen with natural light. We're going to talk about family formals in the days to come, and most of the time when I'm finished with the family formals, I will pull the bride and groom back together. I will put them up on that altar or by the Hupa or wherever they're getting married, and I will use my off camera flash to light up a nice classical portrait of them, But were that not not there yet. So let me talk Teoh about this dead horse that I'm not near done. Beating up here is Lin's compression, and I want to revisit something that we talked about way back at the very beginning, when we were talking about vision and creativity for some of you that might be joining us for the first time and to reinforce it for those of you that have been with us the entire time. What I did here at Jessica's wedding at Congress Hall in Cape May, New Jersey, is I shot the scene that I was shooting wide open with my 24 millimeter lens. Took two seconds, and then I lifted up my 200 shot what I really wanted to be shooting. So you get a very clear since here of where they're standing, what their surroundings air like and what their background is like without even moving at all. I shot the same scene with my 72 200 millimeters at 200 millimeters, one standing up and one crouching down and looking up, and you can see them again the same principles of the light where you draw the line from your son to you and put your clients directly in the middle. The image on the left of the light is less obvious because I filled most of the frame with the bright whiteness of Congress Hall in the background with the image on the left. The light is more prominent because I've dropped down and shot through the flowers and used the foliage as the dark background to contrast that light behind their heads again. 70 millimeters 200 millimeters. All I did was stand up and switch from 70 to to 200. Same scene 24 millimeters. Get a very clear sense of where they are, what their foreground is like and what their background is like moved over. Grab that 72 200 composed it in a more elegant and interesting way. Same principles of light. Same exposing for just the faces. And there you go. Standing smooshed in a bush on the side of the road can look like that with the right Linds and the right composition 24 millimeters walking through the gardens to get back over to Congress Hall to start their reception and shooting closer at 200 millimeters. I have not changed the way I'm lighting. Still, same principles of lighting principles, exposure. Same thing. Different focal length. 24 millimeters. 200 close to 201 16 Split the difference. 70 millimeters. 200. They haven't moved. Roger and Kerry did not move the same to stay in the same spot. The only thing that changed was my focal length. Now let's talk about the bridegroom in the sun giving you a little bit of a sneak peek of what you're going to see during blaring Jeremy's post session. This is one of the frames from their post session. It is one of my favorite images that I've actually made in the entire year, and it illustrates every single thing that I like about working with Sun. It gives me my beautiful lens compression because I'm all the way out at 200 millimeters. The Curtis Center in the background looks like it's right up on them, even though it's not beautiful. Focal length for the bodies. Exposure for the side of Blair and Jeremy's faces there. The sun. We have talked about this. Where is it? It is in the direct path between the sun and me. My client's air right there. I've shielded my light are my limbs from the light that's coming in it. Therefore, I am able to get the correct exposure. The correct contrast. No problems whatsoever. And again, here are many more examples of the exact same principles of working with sun. Whether you are outdoors and it is extraordinary and you're out at the perfect time of day, or you're on the side of the road in Wisconsin and it's summer and it's 105 degrees and the Nats are eating your face. It's the exact same principle of light Lynn selection and exposure, whether it is winter, whether the sun is about to set, whether it's three o'clock in the summer or five oclock in the winter, you can see the difference in the light on the left versus the light on the right, different time of day, different time of year, same principles of exposure. 10 in the morning in the fall, two in the afternoon in the fall. Very tricky time of day to be outside, but I'm approaching it the same way. I've talked about every single other image that I've talked about so far. Two o'clock in the winter. I'll take two in the winter over to in the fall any day. But as you can see in the image before, I clearly made to in the fall work just fine. Five oclock in the winter, seconds before the sun is completely gone. I could aim my lends directly into the sun at this point, and it is so weak and meek and gentle that is going to be stunning. Same thing. The light around Facia and Leonard's face here is so prominent because the background is so dark, same principles over and over again. And then we talk about breaking rules for a reason. We talked about it a little bit before. Let's reiterate it one more time. I have no problems with putting my clients directly in the sun. If the sun is coming down lower in the sky, if I know that I'm not going to blind them, I have no problems putting the sun directly on their face. Working with dappled light. I'm normally super duper. Careful about keeping the dappled light out of my client's photographs. However, I use the dappled light in this instance as a graphic element as a piece of visual interest to push your eyes back up to my subjects. Faces putting them right, dead on in a patch of sunlight when I expose for their faces that will automatically bring down the rest of the image, thus pushing your eye directly towards your subject. Same scene. Going from 24 millimeters to 200 millimeters and slightly changing my angle of attack. Now we've talked about silhouettes a little bit before. I want to reiterate them one more time. Hit them one more time, make them very, very, very clear. How do you do a silhouette? You have to have an exposure difference between your subject in your background that is so vast. But by the time you bring your exposure down so that your subject becomes the absolute blackness of the silhouette, that your background is still bright enough to juxtapose them against. Because I am an aperture priority shooter, I do have a five stop latitude Aiken roll way, way, way down in my exposure compensation But even so, sometimes when it's super bright, I even have to switch over to manual to change my settings enough to get it strong enough. Same principles over and over and over again. Now, if I had put Marissa and her husband against these trees in the background, that wouldn't be a silhouette. There isn't enough of an exposure difference, so that when they became darker that the subject stayed light or the background state light enough, same as here with already in a mirror. If I had put them all the way over in the left side of the frame, they would have been too dark and their background would have been too dark. So I had to be very careful to keep them against a very bright part of the background, so that by the time I darkened them down, the background was still bright enough so that they stood out very, very sharply. And it's the same principles over and over and over again. Now, however, sometimes I set my clients up in a silhouette situation, and I choose to expose for them with Alison and her husband here. I could have darkened down. I could have made them a silhouette. But I wanted to keep the exposure bright and added an element of lightness into the image. But not all the time. Ah, lot of times what I'm looking for is really bringing the light down. And I wanted to show you here, this is Ashley and Zack. We saw them having their first look the other day, bringing the exposure down so that they become a silhouette. I've crouched down and I'm shooting up into the scene. But when I stood up in the exact same scene, I exposed for their faces correctly and used the light in a different way. So if you take a look at a scene, sometimes you can make a silhouette. But you can also make something incredibly beautiful in exactly the same scene here. And it doesn't have to be the sky. Sometimes the exposure difference between your subjects and the trees behind them is so vast that you're able to make something really interesting. So we have covered an awful lot of things today. We've talked about photographing the bride, both in the hotel room, sitting down. We've talked about the different angles at which you could use the window light. We've talked about taking the bride outside and photographing her in the sunlight. We've talked about photographing the bride and groom when they're camera, wear different ways to make them more comfortable in front of the camera. Some of my go to tips and tricks for posing, posing as naturally as I possibly can. We've talked about light, keeping them right in the path between you and the sun. We've talked about how to handle that at different times of day. And once again I've talked to you about my beloved Linds compression. I really want to thank you for taking the hour out of your day to sit with me and to be with us on this 30 days journey. I hope you come back tomorrow and we'll see you soon.
Class Materials
bonus material
Ratings and Reviews
Misty Angel
oh Susan, you are AWESOME!! I am not a wedding photographer (despite dipping my toe in this intimidating pool for one of my dearest friends), I shoot all forms of portraits and love sports too! Your '30-Days' has been the single most influential and educational moments since I started my venture into photography in 2009! THANK YOU! Your honesty, directness, bluntness, humor and vulnerability makes these 30-Days the most worthwhile time spent away from actual shooting; while simultaneously is the most inspirational motivator to push you out there to practice these ideas/techniques! #SShostestwiththemostest You raise the bar in this industry, not just with wedding photographers, but with all genres of photography! I wanted this course to learn about shooting and thought, great... I'll get a little bit of the business side too... OMG! I got it ALL! I'm dying! What an awesome investment in myself, my business and in YOU! PLEASE keep doing what you are doing! I love your new Dynamic Range, I feel that it is a wonderful extension of the work you do with Creative Live! I watch you EVERY DAY, every morning... I know that I continue absorbing your wisdom through repetition! I don't want to be you, I want to rise to your level! So thank you for the inspiration, motivation and aspiration! Keep on being REAL, its what we love about you! We embrace your Chanel meets Alexander McQueen-ness! :) Thank you for stepping into this educational space and providing us with your lessons learned so we can avoid the negative-time investment making mistakes... we are drinking your virtual lemonade!! HA! Like the others, whatever wisdom you offer in this medium, I will be jumping at the opportunity to learn from you! THANK YOU!
user-59abe9
All the positive reviews say it all. When Susan took on the challenge of teaching this course it must of looked like attempting to climb Mount Everest...and she accomplished just that. Susan is a detailed, well-organized photographer and this clearly comes out in her teaching. Using repetition, clear instructions, a logical and well laid out presentation, she answers most any question you might have when it comes to wedding photography. I felt like I was having a private consultation when watching the course. She is real, honest, tactful, funny, and a gift to the photography community. Finally, her photography is professional and inspiring. Thank you Susan for the tremendous amount of work that you put into making this an outstanding Creative Live course for us all.
Sean
Wow. What a super, comprehensive, entertaining, informative course. Well done. I've taking a lot of photography classes and this one is definitely top of the list. Susan Stripling was very well prepared (and great job by the CreativeLive Team too). Terrific course. Susan shared so much. Thank you! P.S. Love the CL boot camp courses.
Student Work
Related Classes
Wedding Photography