More Examples of Fixing Color
Lesson 10 from: How to Color Correct in Adobe Premiere Pro For BeginnersAbba Shapiro
More Examples of Fixing Color
Lesson 10 from: How to Color Correct in Adobe Premiere Pro For BeginnersAbba Shapiro
Lessons
Class Introduction
01:53 2Attention Deficit Color Correction
06:13 3Understanding Color
12:55 4Basic Color Terms
04:35 5Shooting for Easier Color Correction
09:53 6Color Calibration Gear
24:41 7Understanding Scopes
19:28 8Introduction to the Lumetri Color Panel
07:02Lesson Info
More Examples of Fixing Color
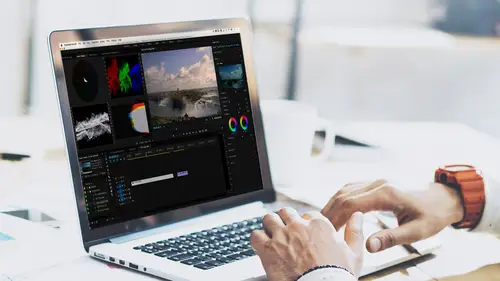
Let's take a look at fixing some other images. So this was pretty horrible, we got it better, but it still is not great. Here's another example of me shooting out a window, and obviously I stay in hotels that have blue windows, and if I tried to manually color correct this shot, again, I would have the same problem. The luminance values are okay, they're not great, but I want to show you, you know, if try to color balance this, I'm trying to pick something that should be white. I mean look at that, it's just going crazy, it doesn't know, it's giving me all this red stuff, and it's like, if I try the auto on, I may say, I will never get this thing balanced, okay, but we're not gonna believe that. I'm gonna go ahead, reset these by double-clicking. If I wanted to, I could go to my Effects panel and you can reset here. So I'm gonna go to this image, and I know already that it's way too blue. So I'm gonna go ahead and again, bring down, bring out some of the blue. Bring out some of that re...
d. Now I can start playing with exposure. I want to bring up the shadows. My blacks are pretty much close to where they want to hit. I could even bring the blacks up a little bit, but if I bring up my shadows, I can start seeing more detail in these buildings, okay. So before, I wasn't seeing any detail at all. I'm bringing up the shadows. My sky's getting blown out a little bit, so I'm gonna bring that down, and my whites, they're pretty good. I'm peaking, but I could go ahead and open that up, and again, want to take a little more blue out of the sky, and I want to be careful not to add too much red to try to clean that up. So there we go, open up the exposure, and I still have some dark buildings, but again, that was our before, that was our after, and it looks like it still is a little bit washed out. It looks to my eye like it's a little washed out. Looks here that my dynamic range is not so great, so I might go ahead and play with my contrast slider. Open that up a little bit, bring up the exposure, and what happens is you'll start playing with a lot of these until you get the exposure where you want, and then I could go down here under creative, and if I wanted to, I'm gonna try to remove the pink from the clouds. There's a lot of different ways I could do that. I could go and use my highlight tint and as you can see I'm pulling it away from the red. So now I got that pink out of the clouds and you see I'm really dealing with just the red part of my image, and I'll probably bring down some of my highlights, still getting, it's better for me to correct on that camera, yeah. So again, you may say not perfect, but that's where we came from, okay. So that's the whole idea. I might want a little more punch, and a way I would get a little more punch in this image, is if you notice my blacks are hitting at about 15, so my blacks are really kinda gray. Go back to my basic correction, grab the black slider, which I haven't used, bring that down to zero, and you should see, it should punch a little bit more, and then, if I want, I could bring in a little sharpening, and so it looks there, and if I want I could try vibrance. Sometimes the solution is to actually pull a little saturation out, just so your eye isn't confused by some of the hidden colors. Yes? If you were to add more clips from that same scene, can you save those settings and apply them automatically or will you have to go in and do that all again? That's a great question. So the question was, if I've done this color correction and I have a lot more shots from the same scene with very similar lighting, can I save this? And it is very easy to do, there's two ways that I could attack this. There's three ways that I can attack this, so it's a great question. This will fill up the rest of the hour and we will learn nothing else. No I'm kidding. You can copy and paste. So if I have, and I'm gonna go ahead and so that's my, is that my fixed one? So let's say that's my fixed one, I'm gonna go ahead, throw this over here, delete any correction I have, so I can remove that, I'll just go to my Effects tab, and I'll just delete the lumetri color. So, this one's good, this one's not. I could go ahead, select it, copy, select this, I want to paste attributes. Okay, so normally a paste, Cmd + C, copy, Ctrl + C, copy, Cmd + V, is paste, but I'm gonna do a Cmd + Opt, or a Cmd + Alt, and what that is, is that is for pasting attributes. So I copied the color correction, I go here, Cmd + Opt + V, on a Mac, it gives me this box, there's no other attributes on there, no other effects, but I can isolate individual ones. I say okay, and it's done. So anything that was shot in that same location, so, I could do it that way. Additionally, there's two other workflows that could be very beneficial. If I know I have a lot of footage like this, okay, I could go ahead and go to my Effects Control tab, and I could save any effect as a preset, and I could say this is the color correction fix for New York City Hotel window, and then in my Effects tab, and let me go ahead and actually do it, so I'd go that, Lumetri, hotel Color Preset. By the way, if you are animating something over time, you can actually animate your color correction, so if the light's changing, you'll just notice in the Effects tab, there's a little stop watch. So if it's getting darker, or you're walking from inside to outside, and the color temperature is changing, you can't animate it, so when you create any kind of a preset, it does give you the option if you want to scale it longer or shorter. In this case it doesn't really matter, there are no key frames and I'll say hotel fix, I'll say okay, and now under my Effects presets, which we would normally find down here, and bring that full screen. Hopefully we'll find that, click off of Crop, which we used before, and let's see, hotel, right there, under my custom presets, hotel Color Preset, and I can go ahead and drag it, and that's, you can also make looks. So, those are pretty cool. Seems to be really useful, right? As the saying goes, you ain't seen nothing yet. This is what I could do. I fix this shot, but I have like, the master shot is like 20 minutes long, you know, this is just one sub clip from it. So, you know, the term I used was master shot. So if I color correct something, and maybe, what I'm gonna do is I'm gonna go ahead and I'm gonna match frame to this, I use the whole shot, but let's say I use bits and pieces of this throughout my show, and imagine this was dramatically different from an exciting standpoint. Okay, so that's the fixed one. That's now fixed, that's not. So I'm using it in other parts of my show, and instead of copying and pasting, or creating a preset, I go, you know what, I want to put a color correction on the master clip, okay, so that every time I use it, it's already balanced, or it's already neutral. So, I'm gonna select the clip and I want you to look, I'm gonna make this actually a little bit bigger so it's easier to see. Matter of fact, I'm gonna cheat and I'm gonna close that Lumetri color panel, close panel, boom. So we just have our Effects Control panel. Whenever you look at a clip, you may not notice this but when the clip is in the sequence. This is highlighted, and that's what you're effecting. That's what we're used to doing, but there's also a tab to the next of all the clips, to the next of, next to all of the clips, okay timed, it's every time I mess up you're allowed to take a shot at home of whatever you want. There's also a Master tab, and if I apply a correction or an Effect in the Master tab, anytime I use that clip in my show, it will have it applied. So all I have to do is say that lumetri color effect is perfect. I'm not gonna copy it, I'm gonna cut it. Okay, Cmd + X, and then I'm gonna step over to the Master side, and paste that effect into the Master, okay. So because it's on the Master clip, every instance of that clip in my sequence, now is perfectly color corrected, pretty cool huh? Master clips are a great thing. We'll talk about them a little bit more in the advanced tricks, but I love that, that is great for color correction. This is the one thing you have to be aware of so you don't freak out. You just put a Lumetri color effect on here. If I go ahead and I double-click on this, and I look at it in my Effects Control panel, and I'm gonna look at it under the regular editing layout, because that's what you're used to. I go to my Effects Controls, and I go, where's my color correction? The color correction is not on the clip in the timeline. The color correction is on the Master side. So I can still go in and make changes, but you're not gonna see it here because it actually put it globally to every instance that you use on that clip, and this can be really powerful. If I have a clip in my timeline, and I know I need to do something with it, I may not use it for color correction, I may put a black and white filter on a Master clip, so every time I see it in my timeline, it's a reminder that I had to do something. Maybe, I need to get permission to use that shot, or it may be some sort of stock footage. So I can just put it on the Master and look through my show, and anytime I see black and white, I go, oh yeah, I need to go do something there. So the Master clip is actually really great and it's wonderful when it comes into play with the color correction. Does that answer your question? Definitely. Three times over. Definitely, thank you. Yes. Okay, so there we have that idea. Let's take a look at some other, I'm doing really good, I had all these sequences open, then I go and I close them all.
Ratings and Reviews
Jason Acuna
I've been filming/editing language learning videos recently and thought "The free tutorials on YouTube are cool, but I wish I could pay an expert to just clearly explain white balance/color correction to me. How to confidently read the scopes, etc". Lo and behold, a few days later this course appears out of nowhere! It delivered all the basic stuff I wanted, clearly explained. I particularly liked the encouraging advice - if you get 95% there (regarding getting the 'perfect' balance), be happy with that 95% and keep moving forward! Thank you!
Bradley Jadir
Nice succinct class. Would be good to have a follow up more advanced class or more examples but this is certainly good for beginner, and more experienced editors that want to deepen their knowledge. (I don't consider myself a beginner as have been color editing for a few years but still learnt a bit here - having previous experience with the lumetri panel will be useful)
OLIVAfilms
It is a very very good class for beginners. It gives you a very good overview of the color correcting tools available and empower you. If you are advanced in color corrections and/or grading this may not be for you. Thanks Abba.