Lessons
Lesson Info
Release
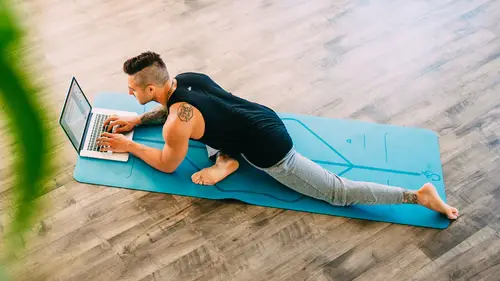
welcome to death therapy. We build up a lot of tension throughout the day. This video is really about releasing that tension, the tension that we create in our neck, in our back, our shoulders, and even into our nervous system as the nerves get compressed. So we're gonna work through a lot of different techniques, including neuro flossing that helps toe open up and alleviate. These problem areas come into a nice, comfortable see if you have a block handy or a pillow or something that you could sit up on to grab it, take it and place it underneath your seat. It's always nice to have the knees below the hips. This is allows us to tilt the pelvis ford and keep the low back. Our church we we tend to lose. When we're sitting in a chair or in our car driving. We tend around to the back. So it's It's almost difficult for us to keep that lower back Lord doses of this lower back arch. So sit up nice and tall, even let the belly start to fall forward and keep the nice natural curve in the low ba...
ck. We're working to a little bit of neuro flossing. This is to alleviate the compression in the nerves, especially if you have any kind of numbness in the hands from typing all day or risk pain, elbow pain, shoulder pain. This really could help with it. Who start Take the hand out to the side. They're gonna press out through the palm. Try to straighten the arm as much as you can. If you're tight, you might already feel little bit of tension through the inside of the arm. Lean the head away as you look, and you could play with different, different angles of the neck, and we're just looking to stretch the nerve out a little bit. So move it over this about five times. So three more times coming out to the side, Really pull back on the fingers. Last two last one. Bring the hand down, press out to the back of the wrist. Same thing working out. You should feel this in a different place, and you can work even with moving the arm back a little bit. Mawr like this toe to change it up. The nerves are really, really delicate, so try to be gentle cause that's what we're doing? We're actually creating a little bit of stress as we slide the nerve back and forth again. Flex a hand, bring the fingers towards the shoulders, lift the elbow up and you could kind of side bend over to the other side as you work back through, the neck will go for five, four, three. Think of pulling the elbow back so you feel this. This is works into our older nerve to last one. Come back to center, lease the arm out, give it a little bit of a shake. Bring the left hand out to the side, press out through the palm drawback on the fingers. Take the right ear towards right shoulder, come back to center, press out through the palm, and we're looking to feel the tension to the nerve. If you don't feel anything, you know, work on adjusting the hand, pulling it back. Maybe a little bit mawr or the angle the neck. Last one. Take the fingers down towards the ground, press out to the back of the head, the hand maybe move the arm so you feel the pull little attention for two three. Nice and slow, nice and gentle. One reflects the fingers. Pull the hand towards the shoulder, lift the elbow up, lean over to the side, five for three to feeling to the stretch. Feel free to move around till you feel it. One. Release the hands down will roll out through the neck. It's nice, gentle circles around to the left. Switch sides rolled ahead around to the right. If you feel in the areas of tightness, you could feel free to, like stop and explore those a little bit. Good. Look up for the shoulders and a few shoulder rolls. Front and back. Take your block off to the side of the mat. Don't bring the elbows down to the mat. Would start out with a little bit of dolphin. Pose on. This is a great post for open up the shoulders as well as strengthening them. Bend the knees as much as you need to or straight in the legs. Try to send the heart towards the thighs a little bit more impressive with hands. A big tendencies for the elbows really come out like this, so try to keep the elbows in as much as you can as much as the shoulders allow. But if they don't, you know, no worries. You just you could always do the best that you can. Percent, we're just going to start this whole this for about, you know, 20 or 30 seconds or so to start to stretch in the shoulders and building to the strength of the shoulders. Fell off the feet, too. If that feels nice, the hamstrings might be feeling a little tight. So, actually, if we use them, we're going to stretch him out a little bit here in a second. So don't worry about it too much. If you're feeling really tight, look forward to enlist the right elbow up, followed by the left lower the right elbow down, followed by the left office working into the shoulders as well as the strength. It's a little like half dolphin push ups for two. Right elbow up left, double up, right elbow down left, double down. Three. Right elbow up left. Double up, rideable down. Left, Double down. Four. Try to keep the down dog shape, right elbow up. Left. Double up, right up, down. Left a little down. Five will switch it out. Left elbow up, right elbow up, left elbow down right elbow down one lift the left. Left the right, Lower the left lower. The right to is nicer. Open their shoulders. Left down. Write down. Three left up, right up, left down, right down for last time. Left, right, left, right, five straight in both elbows up. Lifted up than inhale. Reach the right leg up to this guy. Press out through the hell. Draw the writing. The nose round the spine placed the foot down between the thumbs. We're gonna come onto the fingers, open the knee up to the outers outside. It's kind of sink the hips, Ford and down. Keep the right foot flex. Move the hips. Sounds really light onto the fingertips and fire up into the outer edge of the right hip. No, Hold it here just for a few seconds. Send the right big toe down across the left ankle behind the right. Bend the knees. So we're working it almost like into a little chair pose. Keep both feet flexed then, and he's a little bit more. Try to keep the butt up as you're lifting the tailbone, but still sinking it down. You can even add on by reaching the arms for to find a little bit of balances helps just really fire up into the outer glutes. The outer hip sinking but down just a little bit more. Find your balance. Keep the feet nice and flexed. Plant the hands, fold floored. You want to ground down into the inter. Feed as much you can. If you're really tight in the hamstrings. Bend the knees as much as you need to. You could even put a block underneath the hands or two blocks, or grab a chair or something that helps to alleviate the stress is your coming in and around down to the head. Press down to the inter feet. Reach the arms behind the back in relates of fingers. If you could bring the palms together, bring the palms together. If you're at this point, start to work the hands up in the shoulders overhead. A little bit of balance here, too. With the ankles crossed. Release the hands down to the mat. Inhale, Lengthen up halfway exhale. Fold it back in. Lift the inside of the feet so we're just on the outer edge of the feet. Bend the knees, lift the butt up seventies nice and wide. If you can reach the arms Ford wrapped the triceps under, sink it down a little bit lower, really firing up into the glutes. This helps to strengthen the outer ankles, and the outer ankles tend to be really weak. And this is really important to keep these strong as well as strengthen into the outer knees so that we prevent a little knee injury or possible future knee injury. Sinking down a little bit, lower reaching arms up. Bring the hands down to the mat straight in the legs to stand on the left leg. Rise up with the right. Reset. If you need to cross the right ankle over the top of left fly, Sink the butt down eagle into the arms. Take the butt down a little bit lower. The right arm should be underneath the left, left arm on top. Take it down a little bit lower. Lift the elbows up a little higher. This is really nice. Is stretching to the outer right, glute the outer right hip, sinking down. Keep the right foot flexed. Lift the chest up a little higher, inhale. Stand up. Reach the right foot to the back of Matt come into a crescent lunch so high up on the back, right toes and the heels up, lift the arms up. We'll add a little shoulder stretch into this. Send both arms over to the right, so we're stretching out across the left shoulder. You could lift the elbows up a little higher, use the right arm to pull a little bit more, and then send as you pull the right arm over toward the right or the left arm over to the right. Pull back on the left shoulder. This is going to intensify the stretch a little bit more. At least the arms inhale. Sweep the arms up. Exhale. Bring the hands down to the mat. Step back to plank post. Shift forward. Bend the arms lower halfway down. Shot Aronda untucked. The toes will taken up the upward facing dog. Pull the shoulders back. Lift the harder. Lift the hips, often back downward facing dog inhale. Reach the left leg up to this guy. Press out through the heel. Draw the left means the nose round the spine. Place the foot in the center of your mat, come onto the outer edge of the left foot and onto the fingertips. Flex the left foot, sink the hips down, really activate into the outer left hip. Fire up into the glue a little bit more. You could sink down and lift up into. If that feels nice, back to center. Cross the right ankle behind the left full down into the middle. Tuck the chin. Relax down. If you need something underneath the hands or bend the knees, bend the knees. We're just looking for a nice stretch along the backside of the right lake. Add the arms and reaching arms behind the back in relates of fingers. If you could bring the palms together, that's great. If you're really tight in the shoulders, you can't even get here. You always grab onto a strap to or a tower. Put something between the hands just so you start to work into those mobility. This is great for really tight to the shoulders. Just keep the fingers in the lace, reaching arms up. Try dived, head down a little bit more, a little deeper, really just going to the depth that your body is allowing you to go least the arms down to the mat. Inhale, lengthen up halfway flex. Both feet come onto the outer edge of bend. The needs the left legs in front this time, right legs behind. Sink the butt down a little bit lower. Maybe reach the armed Ford. If you have to balance their fire up into the outer glutes, lift the butt. Maybe create a little bit of arch through the back, Sinking down it's a little deeper. Inhale if the chest exhales, think it down just a little deeper, a little bit more, A little more. Plant the hands, Straighten the legs folded in inhale. Lengthen up halfway. Exhale full down. Stand up on the right leg. Draw the left knee, the chest reset. If you need to flex left foot, cross it over the top of the thigh. Sink the butt down. Coming to our gal. Vasana will add the arms and so eagle right over left. Under eagle the arms here. Lift the chest up. Sink the butt down a little bit lower. Keep the left foot flexed, really. Working into the outer left hip. Lift the elbows up a little higher, sink it down just a little bit lower with the elbows up a little higher sick. It down a little lower inhale stand up. Send the left foot to the back of the mountain. Come into our crescent lunch. Reach the arms up, sing it down a little deeper. Centre left heel forward back on the left toes will stretch out the right shoulder. Move the right arm over to left. Pull back on the left. You want to add a little bit more intensity to it As you pull the the right arm across the front of body, draw the right shoulder back and keep pulling. This is going to really help to stretch out the interior. Dealt off the right shoulder even more thinking down a little lower and the lakes. Keep the legs and ice and active. It's a few more breath here, at least the arms inhale. Sweep him up overhead. Exhale. Bring the hands down to the mat. Step back to plank post. Shift forward. Bend the arms lower halfway down. Shot Arana. Untucked toes. Inhale crater upward. Facing dog. Lift up. Keep the thighs lifted. Activate through the legs. Lift the hips often back downward facing dog. Walk the hands to the back of the map. Take a soft bend in the knees. If you need it, relax the head down. Shake the head. Yes and no. We're going to a little bit of neuro flossing through the back of the neck, the back of the spine so we could start here most gentle ways. Just interlaced fingers behind the head. Tuck the chin in towards the chest. You should feel some some lengthening and some tension across the whole back side of the body. And if you want a little bit more, start straight in the legs up a little bit more. Is he round through this slide? And here, come up, Exhale. Pull it in. You're not really feel anything. You want to go deeper, bend the knees a little bit more. You're going to reach your arms behind the lake. So the backs of the risk of back the forms come to the back of the cafs. Tuck your head in. Keep them. These Nicene meant crawl the fingers to the back of the head and pulled the head of the chin into the chest. Maybe even start to straighten the legs a little bit. This is really nice. We could do this for three more times if you can grab onto the head will keep the first option that we're doing. Two more Last one. It will hold this one for five for three to one. Release the head, Walk the arms, Ford, lift the right leg up. Step the right foot forward and we're gonna take, like, a little bit of a shorter stance. Stand up once you Teoh have the left foot over to the left a little bit. These alignment, that's a really nice because it gives us a line, but you want to have your right foot on the right. So they Matt left foot on left side, left foot at a 45 drove back on the right hip. Use a block. If you need to bring your hands to the top of the thigh, keep a small micro bend in the right leg until melt the chest. Four. This is pyramid pose or or it's Ah, partial to Nossa. It's intense side stretch in Sanskrit, really looking to feel a stretch to the back later, even more into the I T band. If you can walk the fingers over to the side and drape yourself over the top of the right leg. We're here for a full minute. So take the time to, like, really settle into it, even reach back and grab a hold of the left late with the right and left arm. Draw back a little bit more on the right hip. Lengthen the chin down towards the shin, really Just looking to find the intensity here, but not taking it too deep. I want to stretch the body. We don't want to stress the body cause we start stressing the body. We start to stress the line. The idea is to release the mind, release the body. This could be a really intense pose if you take it to deep, so back off a little bit. Just so you're getting the benefits, the restorative benefits as well as as the more physical benefits, at least the hands down step. The left foot back step. The right foot forward stand up will reset with the hips and make sure the right foot's on the right side. The mat left. It's on the left side of Matt. Your right foot is that kind of about a 45 left toes are facing for drawback on the left hip, lean over the leg. If you're really tight keeping Mike abandoned, bring the hands to the top of the left eye or take it even deeper in the hands down to the mat are even reach back and grab for the right lake again. We're here for about a minute to settle into it. Keep pulling back on the left hip and you kind of explore how this feels by moving and a tilting. The pelvis are moving up and down, trying to intensify the pose or take it to that level where you're feeling a stretch. But you're not stressing the mind, And that might just be like hanging out like this. You know, as long as you're feeling that you're getting the benefits, even that the head and a little bit. If you want to work through the next some or two, that's always really nice. Come up halfway, plant the hands. Step back. There are downward facing dog. Set the right shin across the front of that, bring the left knee behind it and sit back onto the onto the but really work on stacking these. If you're really tight, pulled a feed in a little bit more like this, You know, best you can do this tends to be a tight area for a lot of people. Um, even if you need to put the butt up onto a block toe, kind of make it a little bit easier for yourself. Stack. The knee is the best you can. Bring the feet forward. Reached the right arm. Ford, inhale, reach the left arm up. We're going to Seidman over towards the right side. Open up through the chest. Really nice to create the length of the right side of body as well as this adds a little bit of stretch into the your tfl, which is this little muscle on the right, around the left side on the hip. You could see it, right? Right here. It's called You're tense or fashion a lot. And when you reach over, you should feel the stretch all the way from there through the side body, through the fingertips through, um, the ribs, opening the chest a little bit more inhale. Come up to center, bring the hands Ford walk for and round in. We're here for these stretches are all about a minute long stretches, so you know it gives us a little bit of time to slow down and work into it. The Ford fold is too much for you Could always take the Ford foldout and his concentrate on the hips. Inhale. Come up, take the legs out. Extent of crossing the other way across the left. Me on top, right leg under stack the needs of the best you can if you need to set up on a block, of course it up on a block. Flex through the feet. Lift the chest if you can, and the butts down try to ground through. The left hip is much that you can bring the left hand off the left side. Inhale. Reach the right arm up overhead followed. The gays reach over towards the left side body again. You're looking to feel the stretch. The entire right side should feel really nice. Open the chest up even more and extend out. Feel a little bit attention pulling all through these side oblique muscles and through your intercostal muscles. Everything involved on the right side body just looking and toe stretch into that and even moving a little bit more to feel into it. Inhale, come back up to center. Bring the hands out in front, crawl the arms. Ford As much as you can, try to keep the hips grounded as much as you can again. This is a just a nice outer hip stretch. We're here for about another minute. Inhale. Come up. Keep the right shin across the front of Matt. Sweep the left leg around to the back. If you if you need your block to put it anything hip. If you're really tight here, do that. Take the block center neath here. Um, I actually think like a blanket or a role. That blanket towel or something works better than a block so you could use that. We need a positive idiot ago. Grab it. Go ahead and pause. A video sinking down. Walk the arms. Four. A lot of little shoulder stretch into this. Take the left arm across the front, crawl the right arm forward. If this is too intense for you, back off or even take it out. Try to square the right shoulder down, so we're not looking underneath or right armpit. But we're looking forward and this is going to intensify the shoulder stretch on the left arm and we're here for a little bit of time, about about two minutes or so. So settle into it. Mostly stretches here a little bit longer, okay, softened into the breath. Even use your breath is a tool to open up and release into the body so you could send the breath released the, you know, the releasing feeling into the right hip. And just think about relaxing everything around the right hip morning like it's easy in style. Ah, method of opening up into the joint rather than just into the muscle. This is nice to release any tension there. We tend to hold a lot attention in the hips. So pigeon poses one these great poses for that as well as if we sit a lot. We get a lot of you know, compression onto the psychotic nerve and pigeon pose is probably the best poses to relieve cyanotic nerve pain because the static nerve goes through the pier for miss muscle, which is this right here. And if that muscles tight, it puts pressure on that nerve, and this is the pose that opens up muscle up. So just a little few more breaths in this been here about a minute and 1/2. So? So just another about 20 seconds. Bring the right hand underneath the right shoulder. Lift yourself up. Um, wouldn't reach back and grab the strap here had the quad stretch into the pigeon pose. If you can't grab the foot, you could take the strap and hook it around the foot and use a strap to pull the quad in like this. If you could grab the foot, take ahold of foot. You're just gonna pull the quad? Pulled a hell towards the hip. It's a nice little stretch here with the chest up. It's about 30 seconds here, and it's always nice to have the props around and useful. We will use them for all of these videos. Um, it just allows us to move in the areas that maybe we can't get into on so that we could move into him a little bit more safe. Release the leg down. We're going to roll onto the hip and then reach over and extent out through the side bodies. In this nice little twist, come back to center back to our pigeon pose. Roll on to the hip, take the right knee over around. Reach the arms around towards the left, stretch out to the fingers. So nice little stretch of this side body. Come back to our pigeon. Reach over towards the right. Two more these over around toe left reach and extend each over Last one from this pose A when she reached out to the right arms and come down onto the forms if you can. So this is a nice little kind of like a hurdler stretch here. So this leg is still out on wide in the pigeon and we're working through a lot of extension through the right side body on a little twist all the way through the thoracic and lumbar spine. Give intensify this by gazing over the left shoulder and adding a little bit of that narrow flossing attention through the right side of the neck. Really nice and soften into it. Breathe into it as much as you can. It's a few more breaths here, inhale back to center. Come around. I'm just going to spin around here like this. Take the feet out wide. So why Leggett? Fourfold. I want you to pull the toes back and then move the toes. Ford, pull the toes back, Move the toes forward. This 1st 1 we're actually going to start with the toes facing Ford. So working a little bit different. We're gonna come into the stretch with both ways, toes forward and toes back. And this changes the orientation or hips. Come on to the hands if you need to. If you have. Ah, if you have a block or a pill or something, you put that underneath your chest and it starts to work. The arms. Ford, We're here for a full two minutes, so settle into it. Try not to rush into it too much, then maybe even tuck the head. This is kind of nice. Look up. Talk the chin. Look up! Two more of these. Tuck the chin. Look up! Last time, tuck the chin. We'll settle into. Goes deep as you like. It's deep. Has feels good for you. Don't feel like you need to go all the way 100% of your flexibility. Just take it to where you start to feel that tension on the muscles and stop there and hang out with that a little bit. Come back up. Walk the hands. Ford plays a little shake. Take it around to the side, come back into a downward facing dog, press the right heel down towards the mat and heat light on the left toes. I want you to press your weight back so that we're sending the right heels close to the matters we can all the way down. If you can and really stretch out through the right calf, he melt in the chest towards it. If you want to add on or if it, if you're not really feeling, you could even start to bend the right knee. If the heels grounded and stretch out to the Achilles and the calf, just a little bit more inhale Reto left leg up. Gays Ford on the left shin across the front of the math. You need to put the blockers strap underneath the left hip. Do so sink the hips back. Try to square off through the hips. So much you can foot forward is mawr. Intense. Foot back is less intense, said the knee out to the outside of the left ribs. Walk the arms. Ford, keep the right arm. Ford are sorry left on Ford. Take the right arm across underneath the shoulder and bring it down. If you're looking underneath the left shoulder, that's not really what we're going for. So look forward and start to square off through the shoulders a little bit more. This could be really intense, so just take it as much as you can or even skip it altogether. We're here for two minutes. So settle in working in the two major joints right now at the same time, into the left hip and into the right shoulder. And these air these air larges joints or largest muscle group areas in the bodies, is around these two areas, Um, so, as we sink into it a little bit deeper, really think about relaxing into the whole body is much you can and notice any areas that were holding. Tension tends to be something that we do a lot as we hold tension in our stretches and really the idea of the stretches to release the tension you want. Intensify the shoulder stretchy he gave to the right Call the left arm Ford even more. It was a few more rest here. Lock the arms back. Come back up. Use a strap If you need to reach back with the right hand, grab ahold of the foot. Pull the hell towards the glute. It's a nice little quad stretch, and it's okay if the if the legs out here. All we're looking to do is to find a stretch through the quad. It doesn't have to be all the way in like this. You know, it's never about what the stretch looks like. It's always just about what the stretch feels like, so feel into it as much as you can. A few more breasts. Release the lake out to the side, come up around, keep the right leg straight. Let the left knee lied in. Reach around towards right. Stretch out through the left fingers. Come back to center, reach around. Come back into our pigeon. Move around to the right, left knee into center, Crawl out through the left fingers back to pigeon Ford three more times, back to the front, around to the right. So the left last time to the right. This time we're hold the stretch. In this half hurdlers crawl out through the left fingertips, Maybe bring the left elbow down, keeping the twist stand out to the right fingers. You know, this could be really intense post, so just take it as deep as you can. You don't even have to come down on your elbows or anything. We're just in here, and you should be feeling all kinds of stretch to the side, body and rotation through the hips, as well as a nice, intense stretch to the outer right side of the right leg. If there's too much tension on the knee on the outside of the knee, this is just cause of of Ah, your hamstrings, you know, back off a little bit, but you're looking to find the sensation and gaze up pass right shoulder. It is a really nice, nice twist that you take yourself really deep into a few more breaths. Inhale. Come back to center, straighten legs out. We'll roll the toes in, rolling out problem, man out in on this one. We're going to keep the legs externally, rotated. They're so so point the toes back, lift the chest up nice and high. Walk the arms. Ford come down onto the forms or onto pulsar block or even the fingertips is wherever you have it, and it mentioned. That's this, this on the other side. But if you're really, really tight and you can't even get your chest forward, elevate yourself up onto a pillow on. That's really nice because it allows some padding for the hamstrings attachments to be a little bit more free, and it elevates you up so that you could get the feeling of floor folding for for some of us were like this. It's It's so tight, and this is really an uncomfortable position, and the idea is not to be uncomfortable but to make it work for you. So elevate the but and at least get to a place where you could come forward took me a long time to get to the place where I could lay my chest down. I mean, I wasn't super on flexible in this when I started, but I was somewhere about here. Was was my farthest point forward, and this was when I was in my twenties, you know, it was like I think I was like, 33 or so when I was able to get my chest down, so just cause you're a little bit older doesn't mean that you're not still able to get more flexible, and some of people that I have worked with that are super, super flexible, and they still get more flex board in their late fifties early sixties. And it's, you know the body will still do what it needs to do. So just a few more breaths in this pose in the hands back, come back into our downward facing dog. Stretch out the left calf here, a little bit planned down to the left heel. Sink the chest back if you need to bend anymore, just kind of stretching and working into the calf muscle and into the Heelys on reflection of the left ankle. Come on, format turned sideways so that the knees are on the mat. Or even come Fords, the knees and the toes or on the mat. If you need to double up the mat to get a little bit more cushion underneath the knees. And that's that's great to Dio coming into a frog pose. And this poses really, really intense and the father the feeder out, the more intense that it's going to be. And the more that we move the hips back towards the heels of more intense that it's gonna be Take this really slow, but this is just one of those great poses that most of us don't like to do because it's so intense. Um, but it really has a lot of benefits in the opening up the hips and releasing all the tension that we carry in the hips, and we're here for two minutes. So settle in into the breath, give you a little bit time with me not talking. While you just allow yourself to come into the intensity of the post, may be able to sink in a little bit deeper, go a little bit deeper, push the hips back towards the heels. Just a little more trying to cross that edge, though, even give yourself a little little distance away from the edge, feeling to the intensity of it, but not so much that it starts to cost stress. We're in the feet together. It's like the knees together come down onto the belly with the feet up and just windshield wiper, the legs so left on the right. It's to counter the the opening lot. A little internal rotation, external rotation to the legs, work your way onto your back, the last pose that we're gonna do reclined, bounding, oppose or souped Obata con asana. This is too much on the hips, especially after that frog. Feel free to put in a couple pillows underneath the thighs. Or, if it's not enough, he could rest the hands here like gravity. Do its work. Close the eyes, try to soften the shoulders in the jaw and everything. The last pose, what we're here for. We're here for another two minutes or so before we move into Shiva Sena. This is a great pose to only to finish opening up the hips and a really nice, restorative way, letting gravity kind of take over, but also to allowing the spine to rest comfortably in a neutral position. Make sure we keep those arches in the back. So important to have a nice, healthy lower back arch and a in the upper back arch, you know, just keeps our spine supported. And the worst thing that we have some straight spine. So we wanna make sure that we always keep these natural curves in the spine. Hopefully, is the hips start to release, so does the mind, so there's any attention that you might be carrying in the face the jaw as we work our way. Industry Bassem, I want you to start thinking about releasing all these tension points is starting, you know first, starting with the focus on the mind of allowing the mind to soften. This is usually by closing the eyes, letting the eyelids rest softly and soften the jaw. Ruv the tongue from the top of the mouth softened, the the tongue in the throat. At least the shoulders knows you're holding any tension there. The arms all the way down to the hands, the hands on the thighs or move them turned the palms up. It is nice to open up into the chest, creating little external rotation to the arms. The with the fingers, a little release. Blacks the lower back, the belly hips. Take a deep inhale. Keep inhaling nice and slow, filling up entirely into the belly and into the chest into the back. When you get to the top of the breath of one should just hold it for a few seconds without wanting to hold on to anything. Open the mouth and release. Let it all go do two more breaths like that. Slow, deep, inhale into the belly, into the chest, into the back, all the way to the top of the breath. When you get to the top, hold it just for a few. This intention of letting go open the mouth and exhaled out last one in hill, super deep into the belly, into the chest, into the back, into the top of the breath. Hold at least the legs of the corner of the corners of the mat so that your straightening the legs out give a little shake through the feet. Still holding the breath here, open the mouth and release. Exhale everything out. Finish out releasing the body by wiggling the toes and soften the feet. Check back through just to see if you're holding any intention anywhere. If you are release it, take a much time, as you need in Shiva's knows, really the attention of not holding on to anything just being completely free. Open. Thank you so much for allowing me to share my practice with you. I hope this practice left you feeling free and open and relaxed. No must a
Ratings and Reviews
Goran
This class was the gateway to yoga for me. I was surpriced to find something sport related in creative live - thanks for that! Because of the name "Desk Therapy" I gave the course a try and loved it. The first course was a tad fast and challenging at the beginning but that motivated me and showed me an other side of yoga which deleted all my prejudice. The obvious benefit of "Desk Therapy" was the stress relief after a work day sitting in front of the computer. Dylan is an excellent teacher with very good instructions and tips. Thank you!
Student Work
Related Classes
Wellness