Lessons
Lesson Info
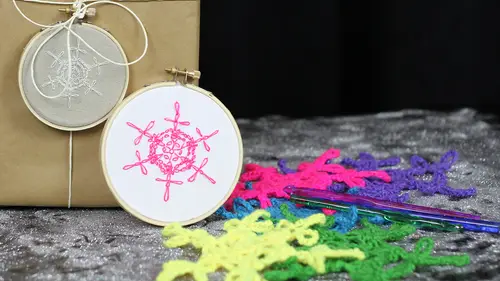
Embroider a Snowflake Doily
Welcome back, tio holiday crafts and cocktails on creative alive we are in day one of two days of d I y craft ganda on we just with lisa solomon here you were just teaching us how to do crow shade snowflakes and we're about to jump into snowflake embroidery, right? Okay, so I am going to be your, uh, subject tio to stay up here and then of course, we have all of you can jump in and do it with this. I'm gonna try. I'm going to try, I'm at your mercy way. We're gonna just so once you get the package for the show, you're going to get a semblance that this is basically the drawing it's the exact same stuff like that wages christine and I thought I'd keep it simple, stupid so it's the exact same shape and we're just going to translate it into an important so it's going to look like this instead of a three dimensional really appreciate. So one thing I wanted to talk about is this's kind of the scale that I drew with that, but you have an immense number of options in terms of what size you wa...
nt to embroider, so you guys embroidered before okay, we see a lot of nods to nods one e one e think you'll find this a little bit easier to pick up quicker okay, but one thing I wanted to talk about is just being able to change the size of the joy that you want to temper writer so if you're beginning you might want to think about doing it at different like at a larger size because then you get to make larger stitches and it is a little bit tricky to make tiny stitches if you're just learning how to do and brody so you noticed this was that I marched the's so I wouldn't forget one hundred percent and this is at one hundred thirty five percent of the size that I drew it at so this one's bigger maybe you should even take this one instead of the template that you have to make it easier for you my going advanced level here even ok hee I have you as my god so I think and then you know you get really fancy and you want to do teeny tiny ones like this one I'll take the needle out you can see it this is an example of a teeny tiny guy, so I think actually this is a little bit bigger but this is at fifty percent so you can get a small is you feel like you can handle in terms of stitching so the next thing I want to talk about is fabric options. So I, of course, I kind of wanted the crusader elise to match that. And because I'm on that. So I went out and got some fluorescent embroidery that there's a blue to teo match the fluorescent yarn that I found. But you can use any embroidery thread color that you want. You can even use this's silver metallic thread that you can use. Tio baby, hold it on that. Yeah. There you can see it s so there's all different kinds of embroidery thread at that. And I brought just my own sort of many personal stash. You can see it kind of comes in like a rainbow of colors. And this is a really cool tip. This was some a friend of mine who runs a company, actually called the frosted stitch. Henry, I think it is, and they sell cross stitch patterns. She introduced me to these little bobbins, which is like a life save her. I love thes so that you don't end up with messi thread. You just wind it around these bobbins and they all fit really nicely in there that that there's nothing more frustrating than giving a tingle are not, you know, pain. Yeah, it's a pain and you have to get a cute box. Tio yeah, this was that it was supposed to be, I think, a picnic box I turned it into my important I love it. Okay, so pick the thread color that you want to use and then you want to pick fabric, so for today we're basically just going to use playing wait fabric because I think it's easier to see and it's easier to transfer into, and I really that called the fluorescent colors pop on the weight, but traditionally that go out of embroidery is done on linens, so I just brought in a couple samples of linen so this is like, you know what we all know as linen? And then it comes in my coat whiter, breached, then into and people like linen because you can see the fabric and especially for things like cross stitch allows you to kind of count threads to know what your spacing is like, but since we're going to draw the pattern, it doesn't really matter to us today if we have that to follow, so we're just going use plain white cotton on before we put it in the hoop, we're going to transfer the pattern onto the cotton, and the easiest way that I have found to do it is to trace um, so if you don't have a light table and not everybody has one although it's pretty easy now to get when they have in the art stores the ones that you guys got I think you could get on amazon and they're just battery operated it's super easy this one's plug it in but if you don't have a late tipple you can just use a window so it doesn't even to be super sending outside you just tape your pattern to a window and then you put the cloth on top and then you drive right on top in the window will suit you just fine um ok nice yes delay the pattern down on the night table okay? And we'll take a little bit of fabric and you'll do do this when you went into a larger pieces that you can cut it first in fact, here we can just cut this a lot of times especially with fabric like cotton I like toe actually take I was I was hoping you would do that because that would have taken forever because the tearing actually makes us straighter line then cutting it you can't do that with every kind of fabric but cotton based fabric that's not a problem so we're just going way don't even care if it's perfectly centered but if you want to be really nit picky you khun fold and find the center and then full didn't find the center and you can place that kind of in the senate of the okay, I'm not to nit picky today, okay, go! You might be another day's other days, I might want to do the folding think so? This's a quilt panel it's a quilt transfer pen these are particularly fine tip ones. Those are my favorite to do this with you find it's really hard to do some fabric pens or kind of thicker and it's really hard to get the fine lines if the pen is too thick. So I like to use thes and live in the what you're going to do is just trace, so I'll just do like the first mark and then, well, you can have at it, so you just follow the lines that you see and again, it doesn't have to be super perfect depends on how well you are about the perfection of your bravery. I'm feeling kind of laid back today, so and then I start from the center and go out, just go out and trace that you see you're doing great to my like, that's, what you see would be different, maybe every time you see it, even if it's the same powder, you might see something a little sure I mean, part of the beauty is that they're not I mean, I'm somebody who really like a lot of times people say oh, that looks so perfect but really it's not perfect at all um it's not it's not something that you you know have to be that worried about that I will if you want to use scissors instead of tearing your fabric you definitely can um it's pretty much just easy like if I was going to cut this into maybe in half I would kind of fold it first so I have an idea how to keep it straight and then I would just insert the scissors in here and cut along that line and this marker disappear yes, that is the beauty of these markers. Thank you for saying that because I completely forgot these air water soluble markers so even if you make a mistake and the mark making don't worry about it it's all going to get erased in the end so it's nothing to be worried about so we do the magic of tv yes tv oh my gosh look at what a beautiful job I did. Thank you t v thank you that's great. You actually let me see what a good end result looks like in the sistine oh, if I would have taken time I'm sure that I could have gotten him you are you were feeling the pressure of oh my god, I have to get this done well, then also, there's lights here too. So it's canceling out this late a little bit definitely is okay, so if you take your time, you could end up with something nice to meet like this. We're confident I could do that. So now I want to talk to you about hoop sizes. I think you guys have you have a six in two and you guys have four inch plastic oops, so hoops come in all different shapes and sizes, too. These air again available across stores, michaels has them, joanne test and you can get them online. Amazon has them, everybody has them, the plasticky ones are nice and really durable. The one ones do tend to break after a time. I am a fan of the wooden ones, though, because they make really nice frames. So for this project I was using the wooden ones because in the end we're just going to glue them into the frame and then this gets to live on its own and you don't have to worry about how to frame it, and I feel like the wood is a really pretty frame, maybe a little bit more pretty than this blue plastic guy with this big thing on the top are we going to see an end result with the frame, you said this is it this is it what they claim you mean you could just hang that yeah you can use this look I hear toe hang it um through a nail or you can run a ribbon through and hang it up and if you want to you can get really fancy and spray paint comes which I have definitely done so you khun scraping the's gold or any other color that you want and then you have more control over the frame and I feel like the paint is easier to do on a woodland than a plastic one but anyways so they get even teeny tiny like these guys so this is a four inch this is a three inch maybe or two inch frame so you get them in all different sizes once you have figured out what size it isthe you're going toe put the fabric into the frame so the first thing you want to do is make sure that your frame is loose so there's these little spinney guys so you want to spin it so it's easy for you to take it apart so unspent take it apart pull in a simple etta okay then you want to lay the part without the spin on your surface and you want to place your design in the middle of your hoop that this one's already been sitting in here so it has a little edge to it but then you're gonna put the top frame on top the hut and then you're going to tighten now what you need to tug afterwards ending okay got shot right first tide later there you go tightened then tug remember that j k ok so now that I've tightened it I'm going to tug so that it's really nice and taught you definitely don't want to over tag like you can see if I pulled that kind of too much it stretches out the design you don't want that to happen um you want the fabric to be taught in the hoop but not over tight okay, how we doing? Hey, christine has got it often ok ok, so the next step is to pick the color that you want to use let's see? So if we're going to do this simultaneously use your ears actually I need to show the stitches so munitions just on a blank okay, color color yellow all right, that was close in the dark it does? Yeah, just getting on their wedding day. That is like a bonus thing to know for sure. Yeah, I didn't know did it all okay, does that mean that I could m border in the dark uh maybe you could try I could try, okay, so when you're starting out I really suggests not using too long of a plus to begin with it means they're gonna have to change your threat fairly often in your needle but it will prevent you from getting tangles and it's really not fun to have tangles and it's frustrating onda longer the thread the more likely you're going to tangle so I think that's one of the first tips that they give to beginners when you get really good in a brother you can do like this seventy five foot long flash that's when you know when you need a friend can you come into the country and in other country can you hold this for me? Ok, so the really cool thing about traditional embroidery flus unlike this kind of crash a thread which is single strand and you can't pull it apart it just is what it is you don't have any choice you have a choice with embroidery to decide how thick you want your designed to be um I think one I think is a double strand yes, this is a double strand this is a single strand of remember that forty weight crush a threat that I showed you in the last segment? This is a single strand of that forty weight on dh if you remember the silver guy that was really hard to seeing he's super super skinny and thin I didn't like my embroider to look kind of delicate so I don't usually use more than two strands but I've seen in burglary that I like very much with all six strands so you can go for all six that's it's a total aesthetic choice now in terms of work flow is it going to be tougher to pull? The thicker is a little bit harder to so with the thicker threat but again with the cotton that we're working with it when it shouldn't be that much of a problem but if you're working with a really delicate fabric, you don't want to use his critics I'm just going to pull too because I like that number so to pull it apart, this florescent bright stuff is actually some of the easiest threat I've ever had to pull apart it's really, really easy I think that for your leisure so you take the number that you want in one hand and the left over in the other hand and you really just literally slowly pull them apart. Andi if you do too fast, it might end up getting tangled it's all kind of a timing thing so you have tio don't don't be in a rush to pull it yeah ok in a super ready to yank it or pull it you're probably going to end up with the knot you know, betty that which is again frustrating, okay um, so if you're new to embroidery, you'll actually might want to know that uh, you could buy embroidery needles and they are specifically made for embroidery and they have bigger eyes, then regular sewing needles. You don't have to use those. You can use any sewing needles that you happen to have, but it might be a little bit easier, especially if you want to use all six strands. Tohave an embroidery needle. Some people really love to use needles. Betters there's no way you're going to be able to see that it's, this teeny little guy that has a little metal v e on the end of it. And to use a needle threat, er magic of television. See if you can see this, you stick the little v gonna hold it up against a darker why don't you stick the little bee through the eye of the needle? You don't have to look your threat, but for some reason I always do that's the habit I'm into a swell although I so nothing it's weird, right? It's like automatic. I just like the threat even. Ok, so then I pull the thread through the so that it's living in there and to make sure it doesn't fall through. I'm going to hold it and then you tug. The v back through the eye and then you threaded the needle you can thread it the old fashioned way where you squint indeed that that works that is usually the way I do it but I thought it would be nice for people to know that those threat er's exist and how to use that it's great because you know, I've seen those in the little kids that they give you never know what therefore yeah right e thought it was like a smashed dime or something you know doesn't like a dime, huh? I think this person's roman so traditionally and murder you don't not but I think that's crazy I think it's really frustrating when you're learning how to do embroidery not so not so I always try and not at the end of my threat so you can do that any way you see fit you can you know, just turn it, run it through your finger and use the needle to tie a knot. I like to use the famous quilters not trick because anybody done a quilter's not before so you litter the you dropped the threat around her finger and you roll it so it's kind of like a little ball and then you take that and you pull down and you end up with this kind of big not it's, not pretty um but it works and it keeps the thread from coming undone so again you can if your friends are really institutional embroider and they're like oh my god you're not your stuff too telling you there is there there it seems like that you know some people have their preference though yes well traditionally you're supposed to just leave the threads really long in the back like a tail like we did this so cliche and then get to the end and then not but I find that if you're beginning you pulled them out and again this is frustrating ok so for this guy we pretty much only needs two and a half stitches on a half because there's these little x is in there and those are really just single stitches but if you look at the exes you'll think it's a cross stitch but across just really just two singles everyone have their needles shredded by the way a good so I'm just going to demo this ditches to so you can see them outside of the design just in case you're curious so the first thing we're going to d'oh I like to use a bathroom stitch but it's also like if you just this is a single scratch people often call it the seeds ditch you can run them together and then it becomes a running stanch see how comments and names are there's no magic to it um you can move them all over the place to like fill in stuff okay, you can make them longer because you'll see in our design there's a couple spots where there longer now if you go somewhere that you didn't want to go can you feed it back through our yes I tend to find the easiest way herald a string is to take the needle out and pull it out oh that's easy yeah and then you can just go back if you need to pull out more oh ok and then you'll see sometimes there's a little whole and if you just kind of rubbed the fabric together the whole will start to disappear okay, good because when you're beginning it's good to know yes that you can backtrack it's the same thing you can fix almost anything that's called the rewind stitch right there you go I'm going to steal that it's yours three the chat room is asking if you do tire not doesn't that show underneath that particular threat is light can yes and that's one of the reasons why traditionally don't like to make not most of the time like I can't really see the not in here um and most times it's often against a wall or something like that too, so if it is something you're concerned about, just leave a long tail on the back side and don't tie or not, but I just I always like to show they go ahead and try and not if you need to do is ask you just to clarify again what size illegally using right now this you know really have needles and sizes they come in a pack so this is the one in the center of the needle I mean they're not numbered this is one of a slightly thicker needle and I'm using it because I think you can see it on camera if I was doing this at home I would probably actually choose one of the thinner needles because of the weight of the stab rick but in the end it doesn't really matter I've seen a lot of people mostly probably on television using symbols and things like that do you recommend that I wouldn't use a symbol for this weight fabric but if you're using a thick fabric or if you're using that really I think all of the yeah they're having trouble pushing the needle through then definitely a thimble will help because it will help you push it'll give you leverage on a needle because only some to consider okay so there was the long stitch that you had me rewind so what I like to use especially in the middle here like we're going to make a tiny little circle of tiny little stitches I used the back stitch for that so the baxter is where you go in front and then meet up with your last the last part of the stitch so I'll do that again so there's my stitch I'm going to pull the needle in front of the stitch whatever length you want you could make really tiny back stitches you could make medium length back stitches you could make really long lens um and then you just go back into the whole of the last stitch and I like that because it makes a really pretty continuous line so that's really nice it's very different from if you remember when I was doing the running stitch it has a little space between now is there a reason why you and for instance instead of maybe going up on that and going like you were sort of running that way? I noticed that you went up and then backward that's the back stitch so that's how I make sure that they're connected it connected yeah like here's the difference if I just skip ahead, you end up with a little space here and if I do a back stitch where I jump up ahead first and kind of reverse, I don't have a space right? My question though was why wouldn't you just start from there and go there and go there? Do you know what I'm saying like, don't you want to show you sure here you go my novice demonstration instead of going in front and going back oh starting from here running from there yeah yeah you could go that way so it doesn't matter it doesn't really matter but I find you make straighter lines okay if you work from the site okay you know why that is and it's called the backstretch okay the way I always claimed it well that's great it's good to know yeah definitely so the other stitch that we need for this is called a chain stitch so all the little loops that you see are going to end up being a chain stitch and the chain stitches one of my favorites because it's super easy but it's really, really pretty um so too do change did you pull the thread through and you make a little loop like a little chain you insert the needle back into the hole or actually kind of right next to the hole that you originally pulled out from and you are going to put up the needle whatever distance you want your chain size to be so I'll do kind of a medium sized one first so you'll see the needles pulling up here I still have the loop I'm going to pull the needle above the loop so I just made horrible chain and you can do a single chain so in order to end this chain I'm just going to tuck the needle right outside the move so it gets tacked down and stays in place so I'll do that again but I'll do a slightly larger one because you'll see on the stuff like we have some pretty large chains so I pulled the needle through I make a loop I kind of hold the loop off to the side with my thumb I answered the needle back into our next to the first hole and then to make a bigger when I make the distance between the hole and where the needle comes up larger so now it's a larger loop and then do you want to just get a couple you can get to watch you do this part again yeah the magic of pulling sampling fast yeah this's one a friend close by helps right and so if it starts to get tangled if you pull on the bottom so sometimes actually put the end in my mouth and I pull it apart perfect it's a very hands on kind of the thing it's very hands on maybe I do need the needle better there we go okay do you want me to move this stuff to the side or do you have enough room here have enough room ok ok so let's dio chain stitch again okay, so up okay so I make a little loop and I hold it to the side with my thumb and then you figure out the distance how big you want your chain to be and you pull the needle up through the loop that um and if I were to continue when we get to the end here of the snowflake you can kind of put several chains together I don't have to take the tail down toe end it I can just make another change so I'm going to hold this off to the side and make another chain so now I have to it's great and I'll do it again so it's just hold the threat off to the side into next too close to the first toll pick the distance how big you want your chain to be pull it through and then when you're done you just tuck it down is this making sense of the left hander's too they're just going to go the other way you can flip it on the other side I kind of just need to see it up close like in years yeah ok I'll do one more just tow maybe a fellow okay so we're ending up with is a chain right so if you want a picture it before we put the neil in it's like there's the loop right there's the lope okay so the needle goes right into our next to the first hole that you made you pick the distance how big you want your chain to be and you keep the loop so the threat comes out sort of at the end at the peak of the loop right? So the loot the threat is coming out of that little circle that you were kind of holding down and then you pull it like that and make it my flat better again practice right practice yeah yeah actually maybe you gonna train I would love to practice you practice here we go. Okay the needles under there you go yes ok do we have anyone on online is looking very intent with our students very way. How are we doing online? J kale what we got people joining in I think people are really pausing right now to actually get the stitches right? Yeah focus on them holly since this was the first time for you or that you were nervous about this how you feeling this slightly better than kirsch a guy like that and then all right, yeah, you're pretty close so you if you have a horse show actually, the only difference is that you came out a little bit higher into the right of the original hall. Ok other than okay, so get closer really nailed it should I pop down there? Yeah. Ok, yeah, I'll be working on e don't know what that's not because we haven't started on this yet it's actually work off to the side because I was just demory mr just right so let me just show you super quick like just practice just you got those totally right those air just straits tutu's you nailed that I want to see if you can do the steps and maybe if I don't know in front of you yeah ok script he's wanted in the dark I just going to be okay so pull your needle out there live a little needle goes right in or next to you got first hole figure out the length of your debt keeping okay, okay, my bold grab it is that going to be that's going to be this guy? Yes. Ok, so I was doubling on a scrap this's time but you can totally do it that way too. And maybe I should talk about that have you going back? Well, the key for me really is when I'm jumping from one to the next is putting the next sort of the needle and closest possible to the to the end yeah, so you don't get the horseshoe? Yeah, exactly. You could describe what you what the problem is here and how you're helping with that. That might be great for our audience. Horseshoe affect that, you know, I mean what what you're helping heather with here? Maybe you could just talk us through it as you are actually helping through the station on just demo ing the I'm making a mess is what I'm doing over here showing as the city that she had done up but closer because I think part of it I can see her on that screen everything's upside down true true they're looking at me backwards which if you're left handed and that you know it's here pressure the pressure can she thread the needle? Sort of, you know? Okay, okay. I'm just gonna make a mess of your work station. You can have willy nilly the rent's everywhere. Okay, so the chain stitch pull up and you're basically just making a little so you go into our next to the hole that you were in and you figure out how long you want your loop to be so a shortly I come up here along the bed, come up here and then I pull it through and you're basically just keeping the loop down there while you pull this thread through. Yeah, now make sense, right? But I do want to show what you did, christine, I think that this is really great. If you don't want to do the chain stitch, you could just do a back stitch or running stitch all the way around the entire pattern and that will totally work and it looks really pretty too. So this is completely another option version. If you only want to learn one stitch, you can learn this ditch and that's it e your needle back thank you I'm having a moment up here where I felt like I wrote was running short on threat and I wanted to switch out yes is that something that you when you're in the middle of it and you're like this is a little bit short yes if you're feeling like you're thread is short just get more thread and re thread your needle and certain look at that eye thread the needle I think you should do that every time you do something that works you think I could do that okay, so what this was actually and moved from over them yeah, but then I felt like I got it better the second yeah about much better that's better than perfect is a practice thing for sure. Okay, so now let's actually start on the pattern itself um do you want to do about do you want a pound to the pattern and you want me to demagogue on do you want to do it together? Maybe you do it and then you go you try a stitch that way it will look good. What you don't have faith in your britta is no ideo I do, but I think I think I'm I'm also one who likes to watch and learn okay and do a blend of both will tag team cool thank you and I might practise stitches a little bit okay, all right so you've transferred the pattern you put it in the hoop perfectly taught and ready to go um that's where that needle ids are okay, so I like to start from the center and work out um I don't think that that's absolutely necessary but for me it helps me keep track so I know where I am you could very easily start from the outside and work in whatever floats your boat, eh? So I'm just going to do a little back stitches around the center part and this is really kind of the only tricky part of this pattern so you can imagine if you're working really teeny tiny this is where you're going to want to make it's a very, very small stitches this one isn't too tiny so I'm just going to follow around the circle with um smallish sisters is impossible not to and I didn't do back stitch so that there's no gap between institute thank you thank you for being my my team member thank you might you're welcome I don't have a christmas sweater on though oh but you have a wonderful sweater on now there's no counting here right there is no county I have to keep track of the cat because no math so we can chat law this happened that's nice this actually would be a really fun thing to dio at a gathering I know that um our studio audience members this is almost like a girl's party right? We're hanging out for making stuff I do know a few men that embroider oh and men excuse me I don't mean tio okay to say this is just a girl thing but in this instance and a group of friends guys girls mixed we don'thave jacares up here I know j k o I'll be honest with the election I'm going probably you call me up here maybe prove it off very cross but I can actually so you can I can because I'm a single guy who lives alone and you basically have no choice but you want to walk around with no buttons or you learn to sew well I now that I know that they're going to bring him all year but now I have some buttons that need to be soon thank you I I went to I guess it sounds like a fairly progressive school where we did all the boys had to do knew the work all the girls have to do away with a girl that's too shocked the boys had to do cooking and needlework and we got the basics down from that that sounds good to me I have made it all the way around the circle and not interrupt too but I know that you actually do mix media are so this doesn't just stand alone right? You can actually if you're an artist and you're making, you know, whatever you're making yes, tell us some of the ways that you well, three this skill into that actually wrote a book on embroidery and mixed media. Ha ha, not red stitch and I used to drink it inks and I used paper and I used all different other materials toe work with embroidery in my own work. I use it as a form of drawing, so I see it as I'm bravery, but it actually I'm drawing things out with thread. So, yeah, I think it's, really, if you can punch holes in something, you can run thread through it, you know, right through it. So you could even, you know, take a wooden bowl and drill holes in it and then run embroidery thread around it, like if it was going to be decorative and not used that's. Great. So a lot of these skills can sort of translate. Translate. Yes. So once you get the center going, then you've got this next part, and we're going to do some longer running such a story, you'll see. In the pattern it kind of ends up at that v that was where we did the double cochet when we were crushing and my line is not perfectly straight and drawn so I can actually just kind of correct my drawing if you want tio again because you're going to erase or you can just follow your drawing and it will be a little bit willy nilly and that's fine. So I mean, have you do the rest of these long guys? Ok, does that make sense? I'm gonna try, okay? And how's it going down there waken anxious good I'm finding to that because of the back stitch you can't quite tell where the needle's going yeah, I just pressed it up a little bit and then you can see kind of like a little yes yeah, obviously you're using this as a decoration but you could embroider directly onto any clothes. Good. Yeah, your garment. Yes, you could transfer this pattern onto a t shirt you could transfer it onto athoc good effort you blend into but it eyes when I finished my crushing my sock that I'm doing a summary for christmas I mean then you use waiting with don't don't talk about christmas twenty thirty four oh, and could you actually embroider perhaps directly onto wrapping paper, maybe for a for a gift? Yes you could if you feel comfortable working on paper the one thing to know about working on papers you don't get to put it in a hoop so it's a little bit different than when you are working with fabric and some people find it a little bit tricky city again with s o I can actually give you a couple tips to work on paper if you want yes was here there must be good um so I usually like to use thinner needles when I worked on paper because papers a little bit more fragile on dh sometimes third does tend to slip on itself I think what's happened here it oh, there we go to get it. Yes, I ok another beginner note because of the looping through of the you know, here I have to keep it a little shorter yes and you want to be careful you don't make it too short because the new needles going to come out of it really is a balance you have what feels comfortable like not too long not too short at least have you're going to start working papers should you use not only a narrow needle but maybe just a single used thinner fred you can use thicker threat it's it's fine, but it takes a little bit of practice and the other thing to consider when you're working on paper is you don't I want to make your stitches super short because then the likelihood of the paper tearing is bigger because it's basically like, you know, when you have perforated paper it's a bunch of little holes together and then you pull it apart so you would be making preparations if you bring your needle polls too close together so I just kind of gently rest the paper in my hand um when I've been bordering on paper and you want to be a little bit more careful because it much less forgiving, you can't fix a mistake coal in paper like you can in fabric so sometimes what I do when I'm doing something really, really delicate on paper, if I've drawn something out and I want to embroider it, I actually punched pilot bulls first, so if I've got a mme a dorky daisy, I'll go in with another needle and I'll punch a series of holes first so that I know the line that I'm supposed to follow and then I'm not trying to punch the paper and then you just have to kind of go back and forth so you hold the paper in your hand and you punched through and you find the hole that's already there waiting for you and the other thing with papers you don't want to tug too hard because if you talk really hard here, I'll do it tear through the paper on dh. Then you're stitch, work disappears. So you just have to be a lot more gentle with paper than you do with fabric. Now, if you're making your pattern on fabric, I noticed how you made the pilot holes there. Would you ever use the fabric? Penn tio make little dots, you know, starting with a very sort of point. Yeah, you want to? Because it all comes off so that you can use this to draw anything you want on fabric. So you just wanted to free him from thing you can freehand to drawing and then embroider that? Yeah. That's. Cool. Yeah. It's really great that's. Why? This is one of my favorite. How did ideo great holiday cards as well? Sure, no, definitely again, I would probably do pilot holes on def. The paper is really thick. Then you might want to put it on one of those cutting mats and use like a pushpin so that you have some leverage to push the hole into the card stock. Great! That would totally work. You can now sign your holiday card with jay.
Class Materials
bonus material with purchase
Ratings and Reviews
Dell Martinez
When she taught how to make a single crochet she was actually making a half-double crochet stitch. No confidence in this instructor. Goodbye.
Student Work
Related Classes
Holiday & Party Crafts