Lessons
Class Introduction
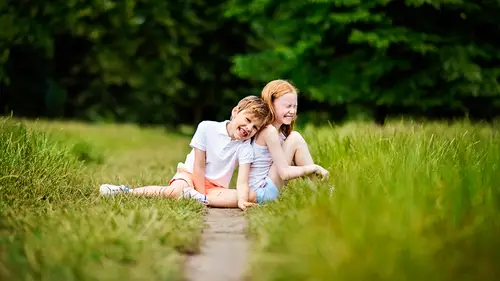
02:42 2Overcoming Common Challenges Of Photographing Children
05:12 3Recognizing Specific Challenges Quickly To Get The Best Out of All Subjects
14:55 4Warming Up Your Subject
06:22 5Drawing Out The Shy Child
11:31 6Working With The "Feels Everything More" Child
05:30 7Photographing The One Who Doesn't Want To Be There
03:40 8Working With Sibling Groups
03:12In-Studio Shoot: Rapid Child Portraits
31:23 10Gear And Accessory Considerations
14:28 11Portrait Lenses
36:41 12Deconstructing A Shoot In Process
14:53 13Simple, Effective Lighting Techniques For Authentic Portraits
21:59 14Live Shoot: Photographing Siblings
52:49 15Review Of Earlier Shoot Images
02:13 16Post-Processing With On1
17:56 17Real Time Edit From Live Shoot
25:10 18Presenting Your Images
08:59 19Portrait Critiques
19:20 206 Tips To Capture Children's Portraits
15:31Lesson Info
Real Time Edit From Live Shoot
Let's look at a CreativeLive shoot. I'm gonna do this one in Photoshop but let me do, I'm just gonna randomly open the first one. I just pulled a couple from what we just did. Oh my goodness, they're so cute. That is one image, I like that one. Let me grab anothher one. I think there's another jumping one I grabbed too. Gosh, I'm gonna pull three up. Just 'cause they're awesome. Alright. (laughs) So we've got this. We've got this and we got this. Oh my goodness, I love them all. I'm gonna go with this one to do some work on. You guys good with that one? Alright, so just like you just saw me do in ON1, I'm gonna work with these sliders. One of the first things I always in Photoshop is hit auto and it almost always blasts it out for me, I don't know why but I found that auto as far exposure goes, hardly ever works well for me. I'm gonna try to edit towards, okay. First thing I'm gonna thinK about is just making sure that Photoshop is dialed in. It automatically did some contrast. I'll pr...
obably open up the shadows a little bit. I like the black stipend, great and I'm gonna open it up but basically what I'm doing here in camera raw is just as I'm opening the file, what are little things I can do to get me further along the path of quickly editing this? Because you're gonna hear me say that again and again and again. I want to quickly edit this. I do not want to be a mass producer. I do not want to be a Photoshop expert. It's just not what I want to do but I can educate on how I can use it quickly. So I open it up and right away, where'd she go? There you go. Right away I see a couple things that I'm just gonna knock out that I don't wanna have to bother with and I'll just do a crop. I shot with the 850, this is a 50 meg file. I don't have to care about cropping 'cause I'll still have everything I need and I'm gonna start right there. That's just the crop tool. As soon as you move the crop tool which is right here. As soon as I move my cursor a little bit away from that, it kind of comes into this turny thing and I just straighten the horizon line with the couch. See how I'm doing that? I'm kinda taking something that I see and then just because I wanna get it out of there, I'm just gonna get out that side that's clips. No actually, I'mma take a step back to show you what I would do here. So when I'm looking at this untouched image that I haven't really been able to actually dig in and process yet, I'm seeing a couple things right in front of me. One, I love their expressions. I love their togetherness. I love that I got this in the beginning when they were still all like great let's go. That's part of why I immediately clump people together and start shooting, so I love that. I think the lighting is pretty good. There's a few things I want to adjust. The cropping I cropped in but this whole side over here, I'm noticing this vignette here 'cause it's simply where the light dropped off so I can do one of two things. I can simply just crop it out, not like that. Got stuck. I can simply just crop it out, right? And not worry about it. Or I can say, you know what? I kinda want a little bit more room around them. I like that there's this room around them compositionally and I do so instead I'm gonna do something pretty simple which is I'm gonna grab my marquee toy, tool. (chuckles) Kind of a toy and I'm gonna go ahead and just make that selection and I'm gonna use content aware tool. Have you guys worked with the content aware tool? I love it, I use it very, very often. I have it setup where I can just hit edit and it'll pop up the fill button but you can also go into the menu and pull in the fill button. Right here, edit, fill. And to me it's automatically sent to content aware but when you first go in for the first time I think it's set ON1of these options and you just, for the first time, have to select content aware and every time you open it up after that, you're gonna automatically get the content aware tool when you hit the delete button on a MAC. SO I'm just gonna say okay and I know before I hit okay on this, it could go either way. Most of the time, the content aware tool works perfectly. It pulls out whatever you're trying to pull out and it replaces it very intelligently with what you might want. Like if I wanna remove a telephone pole or a person in the background or whatever else, the content aware will say alright, I'll pull that out but I'm gonna retain what the rest of the scene is on the point you pulled out. So here what I'm looking forward to do specifically in this shot, let me go and close so I can show you. Right here, what I wanna do is remove this vignette. Remove this edging over here but still have the entirety of this frame to work with so one of the ways I could do that is to take the marquee tool, I keep saying toy. Hit delete and then hit okay on content aware and see what it gets me. Not bad, this looks pretty good. I like how this filled in over here. I would just take my loose lasso, lasso that again to the exact same thing. Yeah that's nice and clean, I like that. So I basically went from this, which bugged me with the heavy vignette off the edge and then I just cleaned it up. Now you see how this changed a little bit down here? The actual shape of it? The coach actually shaped a little bit differently? I have to think do I care or not? If I care, I can go in here and I can redo it and go over it a few times or I can just take a clone tool. Say I'm gonna keep the opacity at a hundred. Keep the opacity and flow at a hundred. Move it up here and I can work on cloning something back in. Just like that. Alright, so again I'm gonna do this quick and easy. We're not gonna go into crazy detail but the other thing I wanna do is just simply look at the shot In front of me and think what could I do ideally to make things a little differently? Well I'm gonna go in close and look at them. Okay, I like that they're sharp, I like that they're sharp, great, that part's good. The way they're laughing, let me get out of the clone mode. The way that they're laughing. This one is turned towards the light. This one's turned a little bit farther away from the light 'cause of the way it's facing and she's turned into the light but she's still a little dark and the simplest way to do that is just go over and go to the dogde tool. I used to fill light with those flex lights I had but I kinda of wanna make sure that it's just (smacks teeth) a little bit here. A little bit here, actually not that one. I like that better with the pattern, a little bit here. Good and then I'm gonna say let's hit an auto contrast, boom! That gives me a lot. I'm gonna edit, fade it back. So what you saw me do is image auto contrast. I never, never, never, never used to use any of the auto buttons for the longest time 'cause I thought they all were pretty crappy. The auto buttons have come a long way in Photoshop. They're a lot cooler now and I like that. So then I'mma take that and then I'mma think about what I wanna do with toning. I can also simply use the auto tone, see what I think. I can use the auto color, they're all under the image bar. See what I think and I'm getting two very different looks. If I feel like I'm getting a little something from the auto tone, I'll do the same thing. I'll fade and go back. So let's look at a few things that I might wanna do closer up. Let's go into this little face here. I've got some good catch light. I'm probably pretty quickly gonna just, from here, go in and give myself this Imagenomic filter I have. Imagenomic, I think that's how you say it. It's just a Noiseware I'm just gonna put a little bit of a Noiseware stamp on it. That's too much for my tastes. It overly smooths it so I go into edit and I fade back, by the way, this fade tool in Photoshop I use so often and I often think about in my own life. I wish I could to a party and then fade things back. I'm like that's great, can we just tone it down a little bit? Can I just fade you or myself? This is fun, I'm having so much, maybe too much fun. Can I just fade this back? And then I'm gonna take the brush over here. This is the brush on the left hand tool set. It actually says brush tool. I make sure I size it to what I want. I'm gonna zoom her in a little bit, yep. I'm gonna size it to what I want. I'll have an opacity of about 30%, a flow of about 30% and I'm gonna just do a little selection from the skin that's nearby this under. It's just a little bit of texture here. I'm just gonna soften that under eye shadow just a a bit. If I want to, while I'm in here. I can go ahead and take some of this rose that is in her cheek and spread it around a little bit. By simply selecting the part of the image that just has a little bit of the pink tones that are naturally hers in it. That's and it's pretty subtle, alright. Until I zoom out a little bit, that's really sharp. Edit, fade, again, edit, fade is my best friend. Okay, so then just what I did on her face doesn't necessarily look like much. I'm gonna just kind of calm this down a little bit. She obviously is gorgeous and she's young and she's just glowing. She doesn't really need anything in the way of retouching but there's little ways that you can, hey, if you're running up and down and you feel flushed or you just bit your lip or your hint out of the shadow. What little changes can we make and it's a difference between this on her face and this. It's just a little soft clean pop. I can do that in a couple seconds all the way across the board. Alright, so those were just a couple little things that I would of shown you on that. I'm not gonna worry too much about going into a lot of detail 'cause I'm gonna show you some more things on other images. I would spend a few more minutes on this. Just kind of putting some more dodge in the background, evening the tones of the shadows, all that sort of thing, but for right now let's move on to another photo. So here's a fun one, this is when she laid down on the couch and she looked at me and I shot pretty close and I used that hairline going in. The thing I was thinking when I was taking this photograph, other than I love her expression. We got to calm her down, get a different look. I was also thinking I'm going to love this in black and white and even though I shoot everything in color while I'm shooting. I'm also realizing when I'm taking certain shots that this will be deifinitely delivered in black and white. So, I come in here and I'm not even bother with the auto. I'm just gonna take the exposure down just a little bit. I am going to actually deepen the blacks just a little bit and pull up just a hint of shadowing and then open it up, pretty subtle. So I'm in here and I'm looking from a composition perspective at what I see so what I like to do is before I go into a black and white image, I look at a few things that I would adjust right away because if I'm in a black and white image and I'm retouching everything and I'm all the way done and they're like I love it, can I get it in color? Oh my God, I gotta go back and do it again. So I do all these little things first so then if that is the case, it's already saved as an option. So I'm kinda thinking where is she in the frame? How can I just kinda pull that in just a little bit more? I'm going to crop that. This part here, maybe to the average eye they don't care. It drives me crazy, I hate that there's a little fold there when everything's smooth and your eye's going everywhere and there's just this little thing over there that annoys me so I'm gonna take exactly the same tool I showed you earlier, the lasso tool with the content aware. I hit that key and then it's gone. It's gone and now it doesn't bug me and can you see from your perspective why that might annoying, once you see it? Let's go over here. Once you see it, can you see how it'd bug you? And when it's gone, it just feels smoother, it feels better. That little attention to detail is something that our clients might not get but when things are zoomed and go bigger 'cause I print a lot of work, I print a whole lot of work. I do a lot of canvases, I do a lot of good chore boards or as the nations calls them galler blocks. Yeah, they call 'em galler blocks but we brand them as chore boards in our studio. I use metal pieces, large metal pieces. I have a lot of framed prints and collections like that and what I'm mostly seeing when I do that, when I print my work, I see all the little things I would never see in a small digital file. Even right here, I can make this full screen and I will not see some of the things because your eye is not trained to me but suddenly when a print goes really big and you see every aspect of that print right there in front of you, you start better seeing the files as you work with them down here. One of the biggest reasons I advocate for printing your work, print your work because you get better at seeing the things that you might not see otherwise. Yes? Since you print to canvases and prints how do you know which ratio you're gonna crop to at this stage? What ratio, like how am I gonna size it? 'Cause when you blow it up like 11 by 14, isn't it just a little bit of a crop difference than the four by six? Oh okay, I see what you're saying. How do you know like you just cropped quickly. How do you know what ratio you're gonna use since you don't know what they're gonna buy? I never, never think about the ratio. I cropped what I think looks best for the image and if they order this as a 11 by 14, I will pull in the full res image that's never been cropped for a size, it's a raw crop and then at that point when I'm taking that jpeg in where I just randomly, haphazardly crop to what I thought looked best for the image, I will do one of two things. I will either take that and make my crops 11 by 14 there when I'm actually in the ordering software and make sure it looks good or if I don't think it does look good and I'll know that when I'm in the client sales meeting. I'll say to the client you know we can make that 11 by 14, but if you love how this looks right now, you're gonna lose it. It's gonna change the image dramatically. Are you sure that that's what you wanna do? Let me show you what 11 by 14` crop would look like 'cause if you like the way that, that went where it was like at a long shot and you could really see a lot and it didn't seem she was like too head heavy. Do you like that just as much? As you maybe liked this, where am I, there? And she might look at that and she'll go oh yeah, I do like the flow of that. I like how that's going down. Alright, let's look at those panoramic shot. Alright, how about a 12 by 18? Pretty close to 11 by 14. So, let's go back to this. I have a million different ways that I can make a black and white image. I mean probably, literally there's a million different ways out there now to make an image black and white. When I showed you in ON1, it's really simple. There's a lot of presets loaded in and they're extremely customizable, very quick to customize. But if I'm gonna just say I'm in Photoshop and I wanna just a do couple edits, what would I do? I'd go into image< I'd go into adjustments. There's actually an option to go right into black and white here. I could just click that without even thinking about anything else and start there. I could also go image adjustments and then pull down all the hue and saturation and color or whatever, yeah. And make it black and white. I kinda start from whatever angle I wanna start with. So just to make this very easy for this broadcast, let's just pop into black and white 'cause the other one takes me a little bit more time to show you a build. But if we're here then I'm gonna zoom in a little bit and I'm gonna do a couple quick things. One, I Will tell you right now, as I' m looking at this image, I'm kinda cringing a little bit because I like the shot, I love the way she looks, I like the framing of it but this kinda gray scale look, you just lose so much life and vibrancy and it's not 'cause you lost the color, it's 'cause you just went flat, you just went flat. You took out all that dimension. So I'm gonna think about building it in real quick. So I'm go to image, I'm gonna put in a little bit of contrast. I'm gonna down to color balance, image, adjustments, color balance, and I'm gonna build in some golden tones and some red shadowing and right away, I've got toning built back in. Probably edit a little back there. I'm gonna do something where I'm gonna vary and what I'm showing you right here is just in Photoshop. You don't have to add any filters, any actions, any extra things. It's with the software itself. I can go in and actually go into ON1 right from here. I'll pop it in, make a plug in decision, come back in and I'll keep going but from here I'm gonna say I'm just using Photoshop so the next thing I wanna do is image and I'm gonna duplicate the layer so I'm gonna go into layers, I'm gonna click duplicate layer. It's automatically gonna make another layer for me. I'm gonna go into my layers pallet and you'll see what I've just done is I had the regular image and then I have a double layer of it and so I can take this blending mode up here that's normally set to normal and I'm gonna say actually I want you to use one of these other effects. For me, I like to use soft light and it gives it a dramatic, quick pop. Too much for my tastes but it puts it in there and then I'm gonna take the opacity and I'm gonna just slide it back to something that I still have some depth to the image. It's got a good pOp but it's not too much and then I'll just go ahead and flatten that image as is. Now I'm looking at the image and I'm thinking a couple things. One, I love her eyes, I want them to pop a little bit more. Let me zoom In here. Again, a million ways to brighten up eyes but I'm just gonna say give her just a little bit of brightness here. It's really soft exposure, I'm not gonna overdo it. Just a little bit of that brightness. Not a big deal but you see how it popped a little bit more? You see the difference? So it pops right there and then I'm gonna think let me just do a little smoothing on this ridiculously perfect skin. That just kinda even things out a little bit. Those little shadows that can build when you're having kids jump around. That was a little too much. (chuckles) It's funny, I'm actually turning my head even though I kind of don't have to and, again, this is really common with kids. You see this a lot. Kids are always biting their mouth and face and all sorts of stuff. So just kinda bringing that back and then the last thing I'm gonna do before, I'll probably spend some more time on this, is I'm gonna manage this. This whole section here, when I made it a black and white and I increased the contrast, the other thing I did was I also increased the contrast of the bright part of the image and your eye goes to the point of most contrast. I want you to go to her face, not to that top so I'm gonna make a point of saying again there's a lot of ways to do this too but I'm gonna go into select, modify, feather. I'm gonna make the feather be up and what I mean by that when I say feather is I'm increasing the way the effects will come across. The effects are not gonna be a hard line then I'm gonna send. It's gonna spread across this line that I'm using with my lasso and I'm just gonna go to image, adjustments, levels and I'm gonna deepen it a little bit. I'm gonna bring it down. I just don't want it to be so in the shot and so much. I'm gonna do it one more here without her skin in it. 'Cause at first I wanna make sure that the skin, the balance on the skin was being managed, the balance of light. Hit okay and then image, same thing, image adjustments. Levels, bring it down and for my perspective, I'mma do a little pop of dogde across the eyes real quick. That's just that dodge over there. For my perspective, that is a whole different shot than that. Am I right, you guys see that? And then you know I'm gonna keep playing with this but I'm gonna close it out right now. I'm gonna take it down but just again making sure that I have it really heavy, really deeply focus in on her and you almost wouldn't know that this shot was being shot in all the midst of the chaos we were in. Alright so, that's another option. Let me show one more and then we gotta get out of here and jump into building a slide show. This one I'll move through a bit more briskly. CreativeLive shoot, let's see, ah, this is so funny. Wait, I gotta show you this real quick. I don't know, you probably did see it already. Let me cancel this out I'm gonna work on that one but let me show you this one. I'll pull both of them up side by side. I love how made she was. Wasn't that awesome? I love when I have an opportunity for that. We can edit either one of those. This one I'll just show you right now. This image, I'm going to make it a black and white so that we don't have all the different colors going on and she'll pop more because of it. This one I'm gonna keep in colors because the tones are working together. We've got the gray and we've got the brown and it's all going up and down like that and I just love that she was so mad that her sister came up and I can't remember exactly what happened. I asked her to move her hand or something and she was really annoyed 'cause she was super into that hand being there. (laughs) So I was like should we get this look and I was just thrilled when this happens because I'm not gonna her so mad that she storms away but I'm gonna take an opportunity to quickly show that. 'Cause it's not unusual on a shoot to be like, oh no, that's not what I wanted, come on, cheer up. I mean, I want to have this, I want to show this spectrum of expression so as soon as I see it, I'm gonna quickly get it before she comes back around. So I'm just gonna deepen the blacks on this. Maybe bring the exposure down just a hint. I could either go sharper or softer. I'll do a little bit of a pOp of sharpness and I open it up and there's not a ton I'm going to do to this image but there are somethings I'm going to do to this image. Start here with, oh, I still that 11 by 14 crop. Start here with the crop. And think about kinda where she is in the frame. Where I was doing this, she's like dead center in the middle because of how I'M shooting and how I'm responding. From a composition perspective, that's not that interesting to me to have my subject in the middle of the frame unless it's very visually compelling. Unless it's really sharp and focused. So I'm gonna go in here. I'm gonna basically just bring it in where I have that in, I have the background. And I'll move it over a little bit. This is gonna go off the screen a little bit but I'm not worried about that yet. So now I have to straighten out that front, I'm straightening out the bottom. I'm feeling pretty good about this. I've got this part over here that I added into my frame, it's not normally there but since I've added it, let me try something like this. I'm gonna take this whole section, I'm gonna go edit, free transform. And I'm gonna just pull it out a little bit. So I basically added part of my image in. Use this, just content aware, delete and right away from my perspective this shot and this shot have already shifted. I already feel like this and this is way different balance. It feels a lot nicer to me. I can simply do a little bit of an auto contrast, faded back, something I love to do is just deepen the entire shot through just image levels. Go in to see her face, she is awesome. I love that. Go ahead and work a little bit. I like some shadows 'cause you want shadows 'cause that adds dimension, you can't flatten all the shadows out but I'm gonna make sure some of that's there. I can very, very quickly put in some of the dimension I lost. I can go into the burn tool and actually burn in a little bit of the edge I would of liked with dimensionality and light that I couldn't do here, do you see what I did there? Right? And then, she was getting a little red. Calm it down a little bit and there was like 86 more things that I would do to this image 'cause I love this image. I will finish this image, you will see this image on my Facebook page. There's a lot that I wanna do to it but it's a difference between opening it up like this and finishing it like this and I'm on my way just with, that took me 46 seconds, really. If I weren't speaking you. That is just a way I start and then I'm gonna get into kind of the coolers stuff but very quick. Little quick hits.
Class Materials
Bonus Materials with Purchase
Ratings and Reviews
JennMercille
Tamara Lackey brings amazing energy to her teaching and shooting style. She shared a ton of tips and tricks for capturing the true character and personality of each child in both individual and group portraits. I have always found it to be particularly difficult to capture portraits of multiple children that are composed to be both visually interesting and true to their unique story. I learned so much about directing and communicating effectively with child subjects, and how to use my gear and other tools to streamline the process and keep it all fun for the family. No matter how much you think you know about photographing children, this class is an asset that you will not regret! Thank you Tamara Lackey!
Heidi Mikulecky
I love Tamara's tips for working with common personality types found in children. I also love that class allows you to be "fly on the wall" during her photo shoots. It's so helpful for me to see how other photographers engage their subjects (especially children). Tamara brings a ton of energy, excitement and playfulness to her shoots. It opened my eyes to how fun (and how exhausting) a photo shoot can be when you give it your all. Great class!
Sara NAomi
This was an amazing class. Photoshop has been a huge learning curve for me during the past year and it was so helpful to see the quick and easy way you used levels to bring down brightness/hotspots. I will definitely be using it to improve the "ear" on the portrait that you critiqued. Thank you soooooooooo very much Tamara and CL for providing such great content!