Lessons
Class Introduction
03:04 2Brush Management
12:17 3Brush Options
19:33 4Brush Tools
03:45 5Stamp Brushes
16:31 6Concept Brushes
27:59 7Impressionist Brush
30:03 8Impressionist Brush Settings
03:03Paper Choices, Patterns & Textures
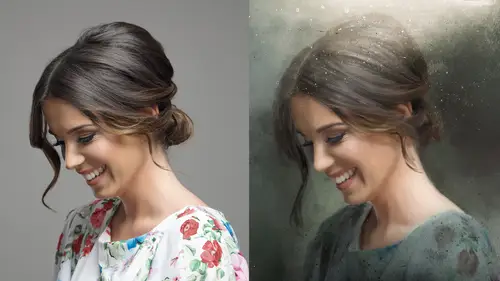
07:11 10Hair & Fur
14:09 11Small Details with Brushes
03:26 12Create Your Own Brush
29:12 13Smudge Vs Mixer Brushes
16:00 14Blender Brushes
08:08 15Mixer with Layer Styles
08:21 16Brush as Mask
10:06 17Leaf & Grass Brushes
23:05 18Lisa's Favorite Brushes
07:25 19Oil Painting Brushes
07:47 20Water Color Brushes
16:42 21Brush on a Path
11:49 22Brush Settings
12:53Lesson Info
Leaf & Grass Brushes
Alright, so we're gonna take a moment here and we're gonna check out some of Kyle's preloaded concept brushes. Now when I say preloaded concept brushes, I am saying that they actually have some stuff loaded into them that you can use, and they're fantastic. This is in the brush section when you go online and you add new brushes. It'll be at the very bottom of the section. It's called concept brushes, and they're from Kyle. Now, we talked about this before. Stamp brushes versus concept brushes. He's kind of a little more in line with how I think about it. So for him, his concept brushes are they're objects, they're kinda pictures, they're elements, they're grass, and they're something you drag along when you move along. As opposed to a stamp brush, okay. So, his is, he's actually got, if you can imagine, so all the concept brushes that we have talked about so far have been paint brushes. The chain, the birds, the clouds, that kind of thing. Those are stamp brushes, so they're paint brus...
hes. He's got some stuff which is brand new for me to realize, concept brushes but they're actually mixer brushes. 'Cause do you remember how I said that a paint brush can add paint, right? It can add color in, but in Photoshop you can't do a four-color brush. But what you can do, is if you have a mixer brush, what is a mixer brush do? A mixer brush will lay down paint. It will also put down from something from below. Do you remember we option-clicked and we did the solid color on the little boy's shirt? Well, you can actually store that. So when Kyle made this brush, he actually picked up some kind of fall coloring voodoo that he does, and he stored it with the brush. Now you cannot get at, you can't get at that. That's a buried item, but when he made the brush, he stored that and I'm gonna show you how you can store colors with your brushes. And so, you now have for the first time, something that is representational of a four-color brush that you can use right out the hatch. So let's take a look at it, and we can dissect it okay? I know it's a little dry of a conversation, but this is where you guys can actually really start saving something akin to a four-color brush for yourself. Alright, so here's the brush, it's just that floating. Go to your brush template, brush settings. Now I have my, I have a whole section, I saved this out once again, I'm sure you're tired of hearing it. It's like me telling you to clean your room or brush your teeth. But you want to clean your palettes out so there's no half-tones here. I've cleaned it out and I saved out my favorite Kyle brush, concept brushes. Now, you're gonna, I think, find that eventually you're gonna have to keep cleaning house and make new files. But do you remember you can grab these and pull 'em into something else? You can pull 'em outside, they're malleable, mobile, whatever. You can also select... Brushes, I'm just gonna hold the shift key. And it just selected these brushes across, and you can make a new folder inside and go, the really good ones. Or water, or rain, or whatever it is. Now that is now inside this. Oh crap, I just nested brushes inside brushes. This is like smart object abuse, when you can nest inside nesting. Please be really careful about this. And I only speak from personal experience from being up at three in the morning and trying to find my brushes. What I'd accidentally done, you know it's gonna happen to you, you can feel it coming. I accidentally made all these segments of brushes for jobs, and I stuck 'em in something and they were stuck inside a whole different job. Right? Crap, that's the only... Is crap a swear word? I hope it's not a swear word. I said crap in a few other things. So, learn from my mistake, click and grab 'em. (class laughs) And, just make sure you're controlling where you're at. Keep in mind this is entirely fluid, you can move these as much as you want. You can duplicate 'em as much as you want to. You can make really specialty areas for yourself. And, when you want to delete a brush or a section, I'm gonna save for the millionth time. Do not, do not hit the delete button. Hit that little trash can. Do you remember when Macs came out and, well, you're all too young to remember when Macs came out. When Macs came out and people were first using it, and they kept trying to throw their layers away, and they kept trying to throw it in the trash can that was at the bottom of the Mac window. I know some people out there did. This is kinda the same thing, when you're throwing away your brushes, make sure you throw them away up here. Do not hit the delete key, or you will delete an image. It's because whatever is on your layer file, because when you are in the brushes, you're still on your layers, okay? So I'm gonna hit delete, just so I can clean that up. So this is the one I want to share with you, and it's Kyle's concept brushes and it's fall color save. And do you see now the icon? What's different now, brand new, you have not seen this. It's all new and exciting. Oh my lord, look at that, there's a new icon in the brush panel and that's because he has saved a color with that. It's gonna be good, you're going to be really thrilled about this. Alright, in addition to that, there's a few others of his personal, his favorites that I like that have colors set in it. You have always been able to save a brush color with these new tips. It's that button on the box that I have not been checking. But, with his brush, with all the brushes, you have been able to do it. We've just haven't up until right now. Alright, so let's go to the concept brush. I'm gonna put this, I'm gonna dock to the right. Thank you very much for that. And I'm gonna click and drag and there's the brush. So what it has done, is it has simply picking up the color that's saved right here, right? And let's go to the brush settings. I'm gonna pull this out 'cause I want y'all to see it. What do we have here? We have a brush tip shape, and in your handouts on the keynote, I believe I have saved out the tip for you. You guys can do this yourself. Why I do this, once again, is I want you to be able to make this for yourself. So if you dig this brush, which 100% you are gonna dig this brush. And you wanna make a brush with different leaves. You wanna use ficus leaves, or you wanna use pine. You can now illustrate a tree, all by yourself, using this brush or a couple variations by doing a pine and picking different colors. I mean the possibilities are endless. So let's take a look. Let's go back to Photoshop. So, here I am in Photoshop. It's got a brush tip shape, the spacing doesn't really matter, that's just distance right. Shape dynamics, it you know, kinda matters. You know, your roundness, do you see this, your diameter? He just made it the way he likes it to look. Both axis, oh he didn't do both axis. You know why, I think he wanted it to look a little more normal. Both axis would make it do like that. Maybe if you guys were doing a picture and you want it to look like fall leaves were falling down, you might wanna change your axis. I'm gonna go back and get that brush zeroed out. And then he's got some smoothing on, and that is all. So, the juicy bits on this brush... the juicy bits on this brush are all in this color. You wanna slide over. Alright, you don't wanna slide over. The application, we have not become friends yet. Alright, so, here's what I'm gonna do. I'm just gonna brush this all over the place here. I'm just making a little bit of a mess. I wanna remind you on a blender brush, what did we do before? You can option-click in an area, and select a new area. Do you remember the boy's shirt? We selected a new area and did a color. Now in this one, I'm gonna turn off the... Pre-little buttons here, I'm gonna option-click. And now I'm picking the same area. Well, that's not very exciting right? So let's do a command-U. I'm gonna change the hue on this, just for this demo. Now, I'm gonna option-click. Before I do that, I just wanna call attention to something. That was the one I made, that's not the little icon he made. That's my, I picked that up. It's spring, the birds are singing, they've come out. I can also, I know you guys know this stuff. I can also change the style in the settings. What is not available to you here, what is not available to you, color dynamics. Do you remember we did on the Cezanne brush, she changed the hue? You can't do it here. You can't do it here this way. Alright, isn't this complicated? There's so much you can do, but you're gonna get there because you're gonna watch this 700 times and you're gonna totally understand this. So, what you can do instead is just save different brushes if you wanna save these out, or color-correct your layer. Do you understand? So what's complicated to me is it would be nice if you could do all of this in one brush style. If you just had a paint brush and you could do everything. But apparently, with computers and logistics and algorithms, you can't do it, so you're gonna have to figure out some workarounds. So another possible workaround is, let's say you wanted to make some color choices. I'm gonna make a new layer, and I'm gonna call it test color. I'm just gonna make a box up on top and I'm gonna go to the gradient tool and I'm gonna go to the gradient map. And I'm gonna pick a gradient. It kinda doesn't matter what I pick. I'm gonna pick a rainbow 'cause it's that kinda day. And then maybe, I'll make another box down here. It's all in a separate layer. And I'm gonna make another gradient. That looks nice, well, no I'm not gonna do white 'cause it's on a white background. Ah, copper, what the heck. Alright, so let's say I put some gradients up here. If I use this same tool and I go back to the brush tool. I'm gonna always pick it from here from now on. Down here, fall color, dock to the right. Oh whatever, I'm gonna let it be. Alright, I just picked up Kyle's brushes again. So what does that mean? That means I picked him up, look I always want you guys to take your hands off the computer for one second, always. I'm back down to original. I'm gonna do a brush. I'm gonna clear that setting, I'm gonna option-click. Oh, it's not reading it. Option-click, there I had to be on the layer called test color. Now I've just selected a radial color. And now I've just picked his radial color. Not his, a radial color. I painted on the wrong layer too, 'cause I'm good at that. I'm gonna option-click in a different area on that tester file. Oh, what did I do, gotta be on that layer. It's gotta, you gotta be either on sample all layers or you have to be on the layer you wanna test color. I'm gonna move that down below. Option-click, now... Uber-important, uber-important to have that on. Now, here's the thing with Kyle's brushes. And I'm changing a lot of things here. I know this is a little crazy making. I just changed the color. Chances are I wanna take that off now. Right, I wanna take that off because what does a mixer brush do? A mixer brush can load color but it also can pick up color from beneath. So I don't want to jack up this paint brush. I just picked its color, so I want to make sure it's not gonna pick up everything. So this is really, for me, I'm not sure the analogy's good, but what the heck, I'm gonna do it. You know when you get into a car and you set all your mirrors and you set everything? And then someone else gets in it and they reset something? Effectively what you've just done is you've reset the mirror and you're driving along and you think it's fine and then all of the sudden you look up and you're like, oh something's wrong, and you don't realize your mirror is off. That's what that's gonna be. You're just not gonna realize 'til the car's creeping up on your heinie that you didn't set your mirror right. So if you change something for a second, turn it back off. Do you understand, like if you make a change 'cause you just wanna select something, try to remember to turn it back off, okay? And then now we have a different color. So for me, this is crackers exciting because it's a way of actually getting a four-color brush, which is phenomenal-isimo. Alright, so just a little reminder. I didn't actually talk about changing the color here, but the settings are here and you know this brush is up here in the corner. What I want the takeaway is I want you to see that it comes preloaded and in the other classes we already talked about this. This is your achilles' heel, right here. You gotta make sure you turn those off, so that you can re-sample, okay? And it's in the other section and then watch out for that one. I'm gonna move onto a couple other of his favorite brushes. My favorite brushes. Let's look at another one. It's called fast grass. And, on this one, the color dynamics is really what I want you to pay attention to. It's very important and how do you know I want you to pay attention to it? Because I put a red box on it. And that's here to help you, and in addition, the thing that makes this brush in particular for me, super-uber cool is the directional setting on the shape dynamics 'cause it allows you to do this. So, let's go talk about it. So I've already loaded my fast grass, I know I did. Concept color, these names, do you understand the drudgery of the names. We love Kyle, we've said it 100 times. Just, can we just not have the name be that all the time. Alright, on the fast grass brush, I want you to pay attention to something that just happened here. I am back on a regular brush. We are no longer in mixing land, so we are in concept brushes. In Kyle's concept brushes, I happen to show you a mixer brush that is uber-cool, and now I'm showing you a paint brush that's uber-cool. So to be a concept brush, you don't have to be a paint brush, you don't have to be a mixer brush. You can be either of those. Could this get any more complicated? No it can't. Just for giggles sake, I'm gonna keep it purple. And the fast grass brush, look at that. Now in another class, I mentioned a product called Particle Shop, which is a plug-in that allows you to do sparkles and cool things on your own. Oh, that's getting a little close. That's getting a little close to that. Doesn't that look kinda four-color. That almost looks four-color, well how can it be, and I know, I know, my babies have been paying attention. You know what that means. Color dynamics, only other way to get color shifting in a paint brush like the Cezanne brush is your hue jitter. I know you know this, I know you were listening. So let's go ahead and jack that up a little bit. Okay, I still give a dollar to someone who can figure out complementary color brush. There's got to be a way. Somebody out there save me. You know what we haven't really talked about is saturation jitter, and in fact, I have some notes I'm gonna pull out for myself. You guys have notes on your companion guide for the class and you'll definitely want to refer to that as well. So there is saturation jitter, which this color I'm gonna tell you right now, where are you gonna go with that purple? You're not gonna go very far. The reason being is that it's already saturated. I'm gonna double-click on this. So when we're looking at saturation, I mean, it's not gonna get much more saturated that, but just for a second I'll go ahead and pick a color down below... so you can see a bigger move. So right now, our saturation jitter is on zero. It's a little dull. Getting brighter... And getting even brighter. Can you guys see that? Now, the other control that I really wanna show you I'm gonna zero that out, in fact, you know what I'd like to do, I'm just gonna go back to the original brush on this. One more time, there you are sweetheart. Do you guys notice I haven't saved it. I haven't saved any of these changes and I don't know about you, but for me there are so many different settings in all of those 17 windows, I get a little freaked out and then rather than trying to remember what my numbers were, I just go (makes exasperated noises), I'm back at original. There you go, I just click back. So do that for yourself, make it easy. Let's pick a fairly decent color and then let's just do a straight line. So because it's directional, you can draw straight down. And we're gonna talk about a new window that we haven't really talked about, or a new section of the colors. And what that is is purity. So color purity, now on this brush as it comes to default is the hue jitter is at 8% and the rest of them are at zero. But I wanted to talk to you about where color purity and what it does. So what you can do is it's pureness of the hue of the color. So, if we move that to zero, and then I'm gonna move it up. Just to give you an idea, because you know there weren't quite enough options here. There were quite enough variables. You needed to have a few more. So what am I talking about, I'm talking about purity. So it defaults to zero, so just for giggles I'm gonna take it all the way to minus 100. No color at all. That's at 50 roughly, a little more color. Let's go back to zero. Zero should be back where we started. 75, do I hear 75? No I don't. I'll do it this way, 72 and then 100. So hopefully you're understanding, I don't know if you guys have noticed, but what we've been doing the course of this class. We're inching up on each one of these 17 windows, just touching them in different ways on different brushes. You 100% could do all of this on one brush, and take a look at it. I think you'll be bored out of your head. And you'll lose interest at about panel three. So for that reason, I've gone through each one of these, so you can kinda take a look and go, oh, okay, purity here it is. And then you're gonna find some brushes where it's not gonna suit, you wouldn't wanna do it anyway on those brushes. So does that make sense about the fast grass? And the coolest thing about this brush is the direction. Not the coolest, it's many things. So, check out, I just wanna... Again, I had not been the master brush maker that I would dream of being one day when I grow up, play with your controls, play with your directional controls and have some fun. We're gonna talk later about some settings. I have a whole bunch for you to look at because you just didn't have enough. You needed more, alright. I'm gonna show you a few of my concept brushes that I 100% dig. I believe at the beginning of the course we talked about this, 169 concept brushes, right? Ha, sweet Jesus, alright, so I just wanna give you kind of an idea of some of the concept brushes he's already has in there for you. And some of them are the foliage mix, which is right here. It's a nice green brush. We have oil and vinegar, I love the oil and vinegar. I'm gonna tell you, you're not suppose to have a favorite child. Right now, I 100% have a favorite child, and it's the oil and vinegar control 'cause I think it's the coolest brush. I'm gonna show it to you in just one second. Perhaps the best second is Sir Hair Long number two. Sir Hair Long number two. Number one, eh, number three, not so much, I'm in the middle. And then these cracks. So I'm gonna take a look at some of these brushes real quick with you, because they're fun and I'm hoping each one of these kind of are inspiring you to perhaps create your own brushes. I think maybe just for your eyes, I'm gonna keep it on black. Look at this oil and vinegar. Now, what I would super love at this point in the day, 'cause we've been doing this for so many hours, or maybe you just started 'cause you took a break and you're re-watching it. Might have been smarter. I'd like you to be able to look at this and go, I think I have an idea how this is made. You have an idea of how big it is because of the pixel count. You can see it's not a mixer because of that icon right there. It looks like oil and vinegar too, doesn't it? It's really good name. Alright, what's going on? Oh, there's some scattering going on. I got that, oh it must be that dual brush thing. So, with Kyle, and we're gonna talk about this in the handout a little bit. With Kyle he did this his half-tones. He uses a dual brush, so he's using this brush here, which is 1,053, I don't know exactly what it is. It kinda looks like a splatter. And he's using that in a combination with the brush tip shape on this brush. I'm gonna go back on it in just a second so you can take a look at it. He's got color dynamics going on. And it's on pen pressure, it's just a slight hue jitter. I've got black color, so it's not really switching. What that will tell you, is if it's a hue jitter, let's pick a color. It means the color is, can you see it going from purple to blue a little bit? I'm not sure if this is showing in the monitor? Let me jack it up a bit. Can you see that? (breathe out air heavily) Isn't that cool? So, I like it a little more than he does. It's a very gentle, it's a respectable, let's just say, seven percent. I put it up at 40%. Can you imagine, you could do like space and sky stuff with this? It's so awesome, I love this brush. Alright, and then there's the transfer. I'm gonna turn the pen pressure off. It's gonna be, it's not gonna fade off, and then I'm going to put it back on. What I'd like to really encourage you guys to understand or look at is this, alright, what's going on. The transfer, it's not really a big deal, it's just making it fade off, but it's pur-dy. It's really pur-dy, alright, cool. And then this one has build-up. So, the build-up's gonna allow it to keep on building up onto itself. So it's gonna get denser and denser. And Leon is getting larger. Okay, I'm sorry, a little airplane reference there, for the one person in the audience whose seen it, and the play. The other thing about Kyle because you don't have enough to think about or look at. Jesus God, now you have to remember to go back to the modes. He changes his modes all the time. Now, what you might know about, what you're going to find out in the water color section is most of his water colors are on multiply so they build up and that's why you want to have multiply mode. So that's the other thing that's gonna keep changing on his brushes. So you're not going to panic, you're only gonna have 17 windows to look at, plus an options bar. It ain't no big thing. But you can dissect the window, I mean dissect the brushes and take a look. The hairy, I think I wanna do one more thing. I really love that oil and vinegar. You can see why, who wouldn't love it?
Class Materials
Bonus Materials with Purchase
Ratings and Reviews
Sean
Knowledgeable Lisa is the best teacher. She makes learning Photoshop fun. Great course. Lisa has a great teaching style. She mixes in a great speech cadence, great voice up and down and pausing, jokes, and is extremely knowledgeable and fun to watch. Awesome course. Really helpful course for getting my feet wet with brushes.
Fotomaker
This is a comprehensive overview of Ps CC Brushes, what they do, how they work and how to control, manage & modify them. I found it extremely useful to learn about the functionality/features that Ps CC brushes can provide even though I'm a photographer and not an illustrator or painter. I will never ever be able to employ everything Lisa explained & demo'd in the class - she covered a wide gamut of info. But she served the purpose, in this class, of being essentially what I'd call an 'idea sparker'. Once you see how she works with brushes and you find out how you can adapt (or create) brush tools to suit your personal artistic style the options for creativity are unlimited. I might re-title this class "Oh the Places Brushes Can Go" (apologies to Dr Seuss and his classic graduation gift book 'Oh, the Places You'll Go...'). Keep in mind a few things about this class (& back away from it and your credit card if you don't note a few key facts...): (1) It is called 'Advanced Techniques' - it is for intermediate to advanced Ps users, not newbies unless you're a child prodigy who picks things up really fast, (2) This is not a 'Paint with Lisa' class - we don't all paint a butterfly like a color by numbers together. Rather we learn about Ps brushes, how they work, what they look like and how to modify them and change their dynamics for different types of artistic/retouching/post-processing uses. Each person will have to experiment - there's no one 'this is it' formula that can be provided, (3) Lisa talks and thinks fast and has a pretty amusing patter too (she's clearly very intelligent!) - so be prepared to hit the Pause button. She repeatedly advises during the class, don't overload your brain with all there is to absorb with regard to Ps Brushes. Take breaks to try the info she shares & see what works for you before going on to a different section of the class. Don't buy this class thinking you'll whizz through it in 15 minutes & figure out how to complete a job you've committed to deliver in 2 hours, (4) There's a large packet of material that comes with a purchase of the class (descriptions, definitions, brush settings, drawing examples, etc.). Item #4 is the only thing I'd ding this class on. While the handout material contains lots of really really useful info it is - sadly - microscopic print. The text is exceedingly difficult for my poor old eyes to read. I value that there's plenty of white space on the pages to write notes as Lisa talks - I've done so prodigiously. But the print in that accompanying brushes class guide needs to be larger. I honestly wish I could enlarge the print in some way (unless it is a PDF that I can alter & I haven't figured it out). If there is a way to re-print with larger type font sizes someone please let me know! Bottom line: I highly recommend this class to more advanced Ps users who want a comprehensive overview of Brushes and working with them. It's definitely not a class for someone who wants a linear, step x step, "do this then do that" type of recipe class. As I've noted above, it's best as a way to learn about richly varied Ps tools you may have only had superficial exposure to previously; and get enough new knowledge to make you dangerous (and, dare I say it, boldly creative!).
Skye Taten
Lisa is the BEST teacher!!!!! Everyone should take this class!!!!!!! This class is utterly phenomenal!!!! Lisa is so knowledgable and so very talented. She is incredibly smart, super funny and so very helpful. This class contains so much valuable information, and at this price it's a complete steal. This class has forever changed my life!!! I'm so happy to have a new skill set. Thank you Lisa from the bottom of all of our hearts you are completely incredible and have touched all of our editing in photoshop lives forever!!!!! You are so very talented thank you so much for sharing your incredible skills and knowledge with us, you are a true beautiful talented soul. xoxo, Skye