Lessons
Day 1
1Course Explanation and Inspiration
39:43 2Emotional Engagement
35:30 3Finding the Light and Exposure
1:06:15 4The Engagement Session
31:24 5Engagement Session Part 2
18:47 6The Bride Alone Posing
1:02:01 7Bride Alone Outside
18:50Day 2
8Introduction of the Wedding Day
14:27 9Brides House Pre-Wedding Prep and Family Posing
40:28 10Mother and Bride
38:40 11Groom and Groom's Family
49:46 12Groom and His Daughter
20:55 13The Ceremony
35:38 14Vows
28:36 15Post Wedding Photos
46:35 16Extended Family Photos, Wedding Party
12:02Day 3
17Bride and Groom Flow Posing
57:43 18Bride and Groom Flow Posing Part 2
21:54 19The Reception
37:49 20Reception Attendees
23:57 21Editing the Wedding
51:44 22Editing Part 2
19:42 23The After Sale
49:17Lesson Info
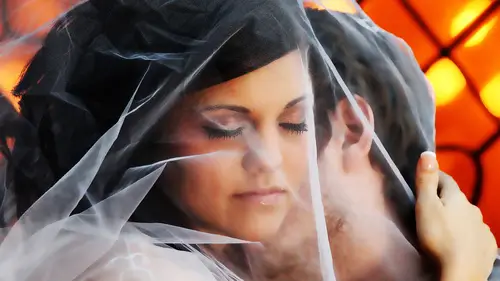
The Engagement Session
We're going to want to welcome you into the world of the engagement session, but the big thing to understand is how we pose and manipulate the body and set the client up to get the most out of the experience. As I told you earlier, one of the big things I want to do is let them know that I'm not here to create a picasso, I'm here to find out the good points and the not so good points that we will have. I'm looking for different things, like one eye smaller than the other, I'm looking to see if there's a bend in the nose, a crooked smile, ah, part and a hair, something that maybe I want to hide was something that I really want to jump on is a positive and really make it stand out so that's, one of the biggest things I'm looking for in this sequence, so we have to start by following our basic principles and know where the light was. As we said this morning, we obviously have identified the light we know that is a day like one of the things we have to look for is the direction of light. T...
his is one of the tougher times, so if we look up, we know that the son at the time right now so you're looking at roughly one p m uh in the pacific northwest I know the sun's almost directly over me was slightly behind me so the directions becoming important if I look at all of you behind main camera over here I start to see the deep dark shadows in the ice so I'm gonna fill them one of three ways I'm either going to use my torch right? I'm going to use my reflector or I'm going to use fill flash now the fact is I'm not looking for extreme detail in this fighting condition I'm looking for slight phil so whatever I use I'm gonna put in slightly underneath the main one of the key things that I need to address that we didn't get to talk about this morning is focusing on how we expose so they make it really strong and clear everything ideo I'm using spot metering and I'm usually exposing under the shadows of the ice I'm trying to make sure that there's no more than a quarter stop difference between the shadow and the highlighted area of the subject's face. Now the key to it is knowing how to meet her if I'm eating off of a caucasian person like myself it's obviously a lot easier because it's a neutral site if I'm photographing a person of color that's where things change a little bit you have to understand exposure, compensation, the value of it, what to do and it's a bump photographing a light, a person of skin of color example would be someone like ali barry not too dark, but dark enough where it's going to make a difference? I'm going to expose and change it. I'm going to go exposure compensation minus point three, which is roughly a third of the stop I'm telling the camera as it takes the reading, it's not his dog as you think it isthe I'm telling it to under exposed the image by a third if I'm photographing a mid tone person of color president obama, I'm going to look to do it at minus point seven of a stop, which is roughly two thirds of a stop and again it's because of the darker skin. If I'm photographing a person that's really dark example being someone like wesley snipes, I'm going to go with probably one point oh, both stop now, here's the question if I'm photographing an interracial couple it's such a my wife than myself, what am I going to do? I'm going to focus on who very simple you're going to focus on the caucasian individual because they are neutral. The key is we don't want to play with anything. In terms of under exposure if I don't need to know if I could get a reading off a caucasian person, I'm gonna work off that reading and it's going to make it a lot easier and a lot more effective forming if I'm photographing a group of mixed people with this five people of color and five locations are probably still going to take that reading off the center if I could have application person and one of the things you may have noticed if you're photographing a group off all people of color, one of the things that happens is if you notice on the edges of it, the people on the end start to get darker and you said tend to think that it's delightful of from your flash for you phil that's not true necessarily in most cases it's your lend selection that has a natural been yet ing on the edges and because of that people of color they tend to go darker so we need to be conscious of that we don't change our white balancing we don't do anything all we do is work with exposure compensation light skin personal color minus point three mid tone point seven well, doc one point oh focusing on that everybody clear got it interracial location person and it's always spot meeting but the key is to make sure that there's no more than a quarter stop difference between the shadow on the highlight I feel the main light coming through so I know that I'm hot here and here I want to try to keep the faces out of that so I'm always gonna look to move the subject into a shaded area the key of what I want to accomplish is go from dr light I don't want to put the subject in a bright area out here on shoot into these trees because if I'm exposing for the brightness of the subject the trees they're going to go what underexposed looking doctor if you were in dhaka clothing darker hair it's going to blend in it's not gonna work at all we got it all right could I start with my beautiful girl rachel you come right over here so now the key is the understanding posing there's some basic rules that we need to work on that we discussed this morning she's obviously and a full face straight to the camera basic mug shot over here if we turn this way head back straight mug shot it's not gonna work there's nothing flattering about it her body becomes full it becomes not as flattering she looks heavier doesn't work so we want to turn her body to whatever the camera is we want to keep the body basically a forty five degree angle so in this case if this is our main camera she's going to kick her right leg forward okay and bring it and I want you to look at how she is now because it away hold I guess it looks fuller, but by pushing it forward just a little bit come over and you tell bringing in here just bring it in closer to you know, just like this we're bringing to tell you notice she's starting to curve that's what every woman wants to achieve, they want to start that that s curve. Now the key to it is she's at a forty five degree angle to the camera. I want to open the shoulders up. I want to keep them open, relax, bring her hand up just to tide to create a separation from the body toe outline. And as we said before her face, we're going to go through the body so we wanted, like, threw the body into the face. But the most important thing is a couple rules here we need to focus on the first and foremost rule of the face is to make sure that the nose never, ever, ever crosses the bridge of the cheek unless it's a profile image. What does that mean? So if you're looking at me here right now, I'm in a two thirds you, but the second I start to turn where you see a little bit of the eyelash eyebrow I would've been here knows turns it starts to get batter it gets longer nobody likes that so do not let the nose cross the bridge of the cheek understand that and more importantly when we have a high a camera angle we want to make sure that the nose does it cross the bridge of the lip so she brings the chin down keep going down you're gonna look all the way down keep going keep going as the nose goes down what happens it's spreads and it becomes wider that's the last thing we want so no nos coursing abridging the cheek no nos crossing a bridge in aleppo now one of the most important things chin up a little bit rachel is we want to always try to keep a weight on our back hip by keeping the weight on the back hip ok what's going to happen is we're pushing our excess weight back that's really important by stand here I look fuller but by pushing back I start to look thinner and now the keys by pushing back that's naturally going to make my body come forward by coming forward by pushing a hip back turning her head and leaning forward at the waist what happens? We start the tightening here so what I want you to imagine is your forehead pushing out chin up because we want to do what we want to get a beautiful choice structure going on so the more we leaned forward the tide of the jaw line the tide of the jewel line the more definition to the face if you're sitting at home or issue guys here if you just going forward do you feel your face tighten up? What a difference it makes so we're tightening up so you're always going to see me tightening my subjects face up on the last key especially with a female she stays there and up a little bit is this shoulder this front shoulder becomes a problem because the natural tendency is to roll it and by rolling it in you're going to get more back edge of the shoulder I don't want to get back edge I want to roll it out because it creates a better bust line while tightening the neckline and that's what we're looking for we want to tighten up its much as we can so basically you're getting a tuck a role, a lean and you getting everything good for camera so it's very very simple if I can do this I'm in real good shape about what I want to accomplish so from that standpoint it works now one of the things with the groom if we bring in our guy real quick matt, you're going to come right over here find sir okay they setting them up to look relaxed and this is where I start to set up my bond with them you're going to come here facing your beautiful future wife okay, look at how she changed her feet already she already adjusted a feat by bringing them closer together a body become stiff so what I want her to do I'm going to explain to them in very simple terms and always talked to him and I'll ask them did anybody in my office tell you what this is about? The whole idea of what this is about is for me to find out your good points and the not so good points that we all have now I'm looking to really jump on what I like and what's not so good I'm not looking to create a picasso so don't worry they're going to get better as they go along and you're gonna feel me tugging and meaning I like to touch a lot is that ok with you all right? I'm looking at you and you're so so handsome how could I not help it? Okay, so I'm leaning forward and you know it's, I'm always contact and I'm always going for the personal touch because I want that connection now when I start my suppose I want to start their body language from the bottom so in this case they just happened to be perfect height I'm really lucky, but if matt was shorter come down a little bit what what I d'oh I never, ever, ever I should say never ever, ever ninety nine point nine cents and I don't want her taller than him because if she's taller to the camera, she looks bigger and she never wants to be associated with bigger. So what I'm gonna do is start with the base of her legs by hole, opening a wider base and kicking up left leg behind him. Kick that left behind, not bring this like forward and in on utah now look at how the body position starts was shorting a coming down, turning her head away ultimately I want, huh? Lips I'm sorry. Ha! Rise at the level of his lips that's how I want to work. Relax, you could stand up so I'm opening the legs to create a wider base in this case, if I want him shorter, I'm going to do the same thing. I'm gonna open a leg kick behind. Especially what? A wedding. Because I'm gonna have the gown to cover that interior area. So now coming in close again put their arms around each other. Their body is creating of a I want you to bring your hand your thumb into your pocket beautiful just like that creating a base I don't even need to see it, okay, but notice automatically ofhe it's his boring as it gets now from here I'm going to turn her head and he goes in close and I get them into the direction of light turn your head a little bit mad now look at it like I'm making a broad hold I guess bigger so she's got to kick that leg in again on a tell when you tell right to hear beautiful I'm bringing in closer to you now do you see the difference in the body language she opens to shoulder up and they lean forward the lower part of their body kind of blends together that works really well does in it so these are basic posing rules remember but the back shoulder roll out the front shoulder head in and leaning forward and if I do this I'm going to be in pretty good shape all right and I'm leaning on forward you don't realize it but it's a much better angle can you lean forward a little bit so we're focusing here and if we look from here they're literally leaning forward roughly probably about two feet this makes a world of difference right from this angle okay so now once was said, I have to look at them and make my determinations now in this case what I'm ready to go I know that I have good light because I have the light coming from roughly behind him hitting off the white concrete and coming back up? How do I know this? I look into the center of their eyes and all I'm doing is looking right here, and I'm going to create three basic, boring images of them. I could shoot this, emanuel, I could shoot it in program, I could shoot it from aperture priority shut a priority. All that matters is that expose and lock on the face traditional boring image. Now I'm looking at it, I have a full light image, so I already have disruptions because I have all the wires I'm going to take a full length damage done, so if I'm not going to take a full liked image, I don't want the disconnect, so what I'm going to do is start and go through her hand here now look she's a thin girl, but when her arm goes up, what happens? It gets bigger, we don't like that. So what I'm going to do is bring his hand in to cover it up. It not only covers the arm to thin it out, but it also closes. It shows that they really they're into each other. Turn your head a little bit beautiful, and I just want to make sure those loose strands of hair are where they are because those become things that become a photo shop nightmare for may turn your head a little bit tilt your head to a map and lean forward tilt a little bit so now I'm ready to go michael look at the difference here that's beautiful like michael can I bother you for one second so these are going to be my close ups and right here I would normally be by myself I'd have an adirama flashpoint stand and try by holding it but what's going to start to make it more interesting again is my cropping turn your head a little bit to the right beautiful now leading forward chin on mate looking at me mike match and down a little bit but good you're looking right here and again right now I'm in four hundred years so my exposures even and I'm ready to go I'm gonna crop them in the left corner shin down beautiful looking right here and your eyes up amusing the left quadrant smiling nice and happy can you fake it a little bit more turn your head to your right beautiful a little more now till the top of your head to him smiling matt that's fake actually good keep those eyes open beautiful stay right there I want to make sure I zehr open happy teeth let's take a look if we look we got beautiful light we got soft right toe stay there the whole idea of setting this up is to make sure that each pose can lead to another on dh when I'm shooting thinking beyond if you notice any image what's happening is that I'm off centering it to one side because I'm thinking of an album I'm thinking of a page I'm thinking of a story to unfold so now she's gonna put her nose right on his cheek turn your head to him chin down tilt your head toe heart noticed the refinement by tilting the head too hard no separation but look at her chin michael you're going to slide out one second rollout the shoulder which in turn forces the chin to go for it look at him eyes down just like that way have our image we always want to elongate the face as much as we can chin down lean forward to me michael good just like that stare right there you doing terrific michael chin down wonderful smile and michael looking at me you are doing great happy michael teeth happy happy eyes up don't move keep those eyes open now look at each other now look right here do you see what happens to their chance they have toe open those front shoulders up and by leaning to may this way you're going to get it but the key is not to allow this hair to fall into the background and break up the profile of the image look at each other you could stand a four and store at your chin but look at what happens when they pull forward keep it flat so we're going right and here you guys are doing absolutely great the key here is I placement if she looks into her eyes they look partially closed I want to bring her eyes at all times above the line of sight if they're looking at the camera it's above me slightly like this much and if they're looking at each other she looks at the forehead michael stretcher chin out to them I'm sorry matt stretching out to him look at each other you're doing great and working at getting a nice and close smiling my teeth come on you're workin it don't move watch how easy the next image comes into play turn your head to me beautiful all the way to your right now we need your body and bring your nose to her cheek on her cheek matt turn your head to your right beautiful now tilt your head to him now you know turn to may tilt now lean forward turning now to your right matt can you come in with the reflector and look at the difference look at how beautiful and look at how quick it isthe because I've already started training them on how descriptive I am moving my hands up down forward looking right here you guys are doing spectacular well keeping all the vertical lines matt looking down at her you're serious, your smile drop you shoulda rachel nice and happy lean forward rachel faking it smiling beautiful happy excellent don't move and you look quick and simple and easy now if you're looking at the images here on my screen or at home, you're probably wondering why I'm giving so much crop space because ninety nine percent of my images I'm going to crop into a square or an extreme rectangle because you can't get them framed at your local drugstore and you can't get them printed at your local drug store. It has to be custom which increases the likelihood they come to me for prints on frames so we're following before we even knew it way already got four images done in a matter of seconds now from here I'm going to change it up a little bit I'm gonna bring his backhand in this case is right around but if you look his hand he's got the big man hand the manual labor hand nobody wants to see that so we're going to use her beautiful hand the other one this case because this is what has a ring on it but here comes one of the problems look at the way the hand is placed, it looks sloppy and it looks like it's slapped on their any other thing is the hand looks fuller so everything we do is based on posing hands so the key to the hand is my hand placement in it notice where my thumb is it's directly in the palm with my other finger on the index finger and all I'm going to do is push down and crack a cz much is possible I want to see the side of the hand and the reason I want to see the side of the hand is because it doesn't look is full if I turn it over like this I'm going to have a hot exposure here so I'm focusing on right in here I bring the hand up to the hip I pushed the shoulder back lean forward look down at the ring and bring your nose to a cheek stretched don't push so hard don't push relax let me control you the key is not to let him push so hard that the nose gets crunched up just like that and there's our angle now my camera height for all of these is going to be slightly above eye level turn your head to your writer what about beautiful wean forward both of you looking down at your hand gorgeous stretch that should not turn your head to your right till the top of your head to him looking there you're doing terrific eyes down notice my cameras tilted to him which in turn raises him up chin up beautiful look out at my hand smiling nice and happy teeth come on you got it don't move now watch the adjustment we make not turn your head to may a little more lean your head and costar but look at the light on his face can you help light up her face for me, michael and now lean forward matt, turn your head to your left turn your head to your right beautiful and till the top of your head to him now alina cho store hold on you see what he's doing relax one second he's bringing his chin in, which in turn is bunching up her hair so we're going toe fix her hair because that's always are concerned close your eyes and until two and turn and you till the top of your head leaning forward don't let that chin go in it's going to make it look awkward now again I'm thinking about off sent during the page turn you had beautiful look out at my hand both of you right here smiling nice and happy teeth you're doing great don't move I just created another three poses without moving anything simple and quick and easy exposure and that's the whole idea. So now what I want to do is start to make my adjustment and use different areas so we can I kind of turned this way I'm going to bring you both over here again the idea is to find areas in different spots like under this tree when I look at this tree I see a lot of different openings that we can do here creating a foreground so I'm going to bring mad and he's going to cross his feet and notice his body set up you attempted to lean him back like this but if you lean him back it becomes feminine I'm gonna lean him forward and off the tree you're going to come in a real close beautiful thumbs in your pockets crossing your feet good your thumbs in matt put your back against the tree I mean the top off you come in right here behind him so bring the leg back there and kick that right leg in a notice by kicking that right leg in do you see the sensual connection between them and now from here here's the thing that happens photographers get so tempted to sit and try and get them looking at the camera I already have a couple of them looking at the camera the goal now is to think bigger and think broader in terms of what we want to dio so I want to create that story so I'm gonna lean her forward roll out the shoulder minesweeper hair back again turning her head to me lean forward look down not turn your head into her nose on her cheek and if you can get in nice and tight don't move you could pull in tight here you'll see right in his neck we got all of this going on. I want to try to get rid of that and it's all simplified by pushing your chin out. Matt, you see the difference and turning her head here now looking down now, the key here is my choice of lens. I'm using a seventy two, two hundred two point eight lends consuming out, which is going to help compress the background and more importantly, it's going to start to blow it out. It doesn't matter what aperture, what mode I'm in, it could be program, it could be a big priority could be all of it, but I like creating this foreground and by putting them in a dark area on mike concerned about all of that junk back there, or is it going to start to blow up it's gonna blow out right? Someone asked you guys to clear and I'm going to come back here again. Everything I do is based on camera angle, leaning forward to may I'm sorry, sweetie, look down, eyes down. So now from this point, I'm looking to shoot up a little bit and I'm looking to use the tree as a foreground, excellent stare right there wonderful don't move so let's take a look, I think I screwed up, I've got to expose you lock hold on one second no I'm actually okay I did exposure lock now look at the difference the first one's a vertical image d seal amusing the tree in the backgrounds blowing out watch what I do now ice up to may and now I'm going to go horizontal and crop from right to left I'm using the lower right hand quadrant of the image now not till the top of your head too hard excellent stretched the chin out you're looking at me no not that much matt don't push ice to me beautiful and now I'm shooting up towards him and you're smiling hold on one second let's take a look at her eyes are up do I worry about not getting the perfect perfect reflective light in their eyes I know that I'm getting reflective light off the sidewalk did we see that last image can we enlarge it take a look you can't really tell that they're not in a great spot are you now from here look at the different dimensions look at each other look at each other and now again I can change my angle so I'm here now which is giving me that I'm going to move over and I'm going to adjust and decide to try to shoot up a little bit looking at each other I'm coming down I'm going to crop but the waist I'm tilting towards him which angles up gives me some treatment lean your body to me turn your head to her on meaning stretch it into a beautiful looking up and your smiling nice and happy look at his forehead excellent I'm sixty at a four on let's take a look we're angled up and I created three completely different image is dead and I I never moved them that's the whole idea now mind you when doing this I'd be more connected to them in terms of having it set up but it works out beautifully now let's take a look you're going to step out for a second rachel matt, stay right there so let me talk to you a little bit about working with a guy alone one of the duggars vegetables with guys alone question yeah before that I thought maybe with the two of them we could take some questions is all right? Of course all right let's do it let's grab some questions that did you want to ask about the compression? Well, he did ok, so I saw this earlier today and I wanted to ask it again because it came up again from so who says most of the pictures that you are taking is with smaller raptors like eight shouldn't we use apertures such as two, eight or four or similar could so could you explain again about how you're using your seventy two, two hundred and you can get the similar effect they said the question was they felt I was using f eight they thought you were using faa and instead of you know, in most cases I've been a two point eight or for you know how the idea of being wider open is that it allows me to open up the backgrounds so I'm shooting a two point eight and half four and what I'm doing because of my distance to the subject is it allows me to simulate how the background is going to be in a depth of field situation for example, if I would shoot you and eighty five millimeter one point four and I was real far away, one point for isn't a small issue would think it widens, but if I get right on top of you at one point for my depth of field is extremely shall may be a matter of inches, so I'm using the wider have to field and I'm shooting out of more zoomed out so that I can compress the background as well was softening but it's not just that it's about how much light I'm allowing in I'm allowing less light on the subject shooting from a dog to a light area which is opening it up in turn thank you you're welcome a couple posing questions are keep coming up doug and people would like you to explain a little bit more how to do full body leaning with the full body so keith asks tell me more about the leaning and when to use it I have found leaning forward looks good with waist up but not so good full body what is the secret for leaning with full body it's just a matter of making sure that you're open the camera can see if I'm here if you keep looking can't say it for your close up here on a full length depending on how you crop or you camera hide it's going to make a difference so my suggestion is especially what a plus size subject is knowing the right camera height if you were photographing someone like me on my wife I'm obviously bigger she smaller but I'm not exactly much bigger in terms of size I'm overweight but I dont border on roundness I'm gonna keep my camera height for full like damage roughly waist level but if I'm dealing with a plus size set of subjects I'm going to raise to camera height above eye level which in turn makes me look better and makes the lean a lot less obvious all right so long as we stay open and closed like this we'll be fine great I think we can I think we can keep going just wanted to get a couple of those and perfect so now let's take a look if we go into the tree and see what's going on he has put himself and his feminine opposes he possibly could and this is what guys tend to dio a guy doesn't want to look feminine he wants to look strong he wants to look powerful and that's the whole idea and he's not doing it at this moment so what he needs to do is stand straight up course your feet lean against the tree don's in your pockets and now going to top your body off open tilt turned forward relax relax don't overdo it good and now we got good posture and he's all set the key to this style is making sure okay that were able to make him look strong one of things that happens commonly is that photographers have guys smile and alone portrait's can you look and smile at them he doesn't look so good at the g it doesn't work guys wanna look strongly one of powerful like yeah and they got it all right so from here we're trying to work it out now look at his head if you see he's tilted to his high shoulder again a feminine pose till tear right turn your head to may until two you're right now lean forward relax turn here now I'm not liking what I'm getting out of the lower half of his body so now I have to work a little bit differently I'm gonna work mohr tilt your head from the waist up because it's going to make him look stronger
Class Materials
bonus material with purchase
Ratings and Reviews
a Creativelive Student
Doug is one of those teachers who combines the right blend of humor with knowledge to keep the learning process inviting. Doug's heart is what draws me in...his passion for photography as an industry not to mention his personal desire to see those around him excel in their new-found skills. I have witnessed first-hand Doug's ability to transform an ordinary environment into an extra-ordinary work of art. Don't miss an opportunity to learn from someone who studied with the great Monty Zucker and who offers a system for integrating posing with an understanding of classical lighting. Don't miss a wonderful opportunity to learn from one of the best!
a Creativelive Student
Highly recommend to any wedding photographer, be you experienced or new. Although based in the Uk, most of what doug taught is relevant and has helped boost my confidence when posing and making adjustments to peoples pose. amazing depth to the way an image is created and lovely to see the images then used in an album to tie everything up from start to finish.
Sherry Callahan
Loved and bought Dougs first Creative live workshop and learned so much from it that I intend to watch and learn from this one as well! Just from watching the first creative live workshop I can see a big improvement in my work, so I am looking forward to this workshop and learning more from Doug. This one looks very interesting and more real to what us as wedding photographer encounter in real life. Cant wait!
Student Work
Related Classes
Wedding Photography