Lessons
Class Introduction
11:44 2What is Volume Sports Photography?
06:41 3Volume Sports Accounts & Agreements
18:30 4Preparing for a Presentation Bidding Round
19:21 5Setting Up the Contract
19:09 6Know Your Numbers
05:40 7Order Form Design & Layout
03:11 8How to Price Products & Packages
06:28Products to Offer in Packages
13:34 10Different Sales Methods
09:27 11Online Ordering
13:03 12Day-of Photoshoot Sales
12:44 13Transporting Your Gear
06:20 14Prepare for Photoshoot Day
10:36 15Crew for the Photoshoot Day
07:03 16Photoshoot Day Workflow
17:12 17Photoshoot for Smaller Jobs
23:45 18Team Photo Posing
11:25 19Convert Volume Clients to Portrait Clients
07:30 20Email Marketing
17:56 21Building Client Relationships
12:24 22Simple & Consistent Lighting
05:13 23Demo: Team Photoshoot
06:24 24Demo: Individual Photoshoot
20:13 25Demo: Banner Photoshoot
12:40 26Tips & Tricks for Photoshoots
12:15 27Processing Orderforms
13:31 28Digital Workflow in Lightroom®
17:11 29Set Up Files in Lightroom®
18:38 30Organize Files in Lightroom®
13:39 31Batch Process in Photoshop®
20:13 32Demo: Banner Design
18:33 33Custom Retouching Workflow
13:34 34How to Design Products
06:00 35Order Sports Products From Labs
12:25 36Sort & Deliver Products to Clients
10:49 37Importance of Community Involvement
05:51 38Video Vs Still Images
25:05 39Build Community Relationships
04:26Lesson Info
Demo: Banner Design
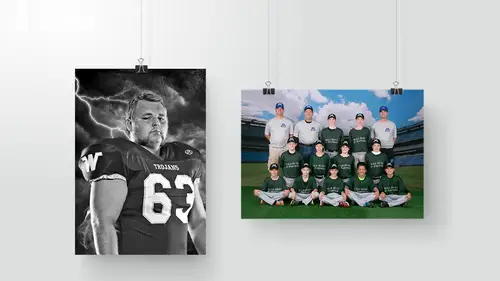
Let's talk about poster design, the banners. How we do it, why we do it. There's some things that I've seen from a lot of really talented photographers. Like, Ben's a perfect example. Ben's work is brilliant. It's truly exceptional. His custom banners, his posters, they're like movie posters. They look like EA Sport game covers. He puts a ton of time into these, and energy. He's one very, very talented artist. Those are unique one-offs. For what we're doing, we have to produce 70 posters for one school in a year. I don't have time to make 70 custom posters or the school that they get for free. We can't get into that. So what we do, is we will pick one design that we will run off of for the whole year, and it'll be a consistent look. So one year at Wayzata, it's gonna be these. This is the look for everyone. The next year, we'll swap it out to a completely different look so they aren't stagnant throughout forever, but we don't do different ones for every single team. If we were getting ...
into doing more custom ones or looking to do the signature looks, like we'll change 'em out for a soccer league. Every year, they get a new design. Baseball league gets a new design every year. What with end up doing is we buy templates from other photographers, Ben Shirk, Richard Sturdevant, and we will use their templates to build off of for our work. A lot of times also, we don't just take the template and use it exactly the way it is. We'll just take elements from it and design it the way that we think looks best. So, the one that we got from Ben for this is called Home of the Brave template. You guys'll see what I mean when I say he's a pretty good photographer. That is a poster he did. It's pretty good. Let's go in and see what we can do with it. When you're going into work with templates, you kind of need to understand how they work. .psds are essentially like old-school, old-school cartoons, how they used to draw them. You have like, Yogi Bear would be drawn on a clear piece of plastic. The background would be on another one. All of these things are then put together, so you could move one, and you'd still have the image, you'd still have the scene. So layered files allow us to put pictures in between, like you would with an old-school cartoon. We went and saved them originally as .pngs, because .pngs are a smaller file. It's a smaller size file than what you would get from a .psd, so it's not gonna dog out your computer as much. And it allows us to save the transparent backgrounds. So we go, drag 'em on, Enter, Enter, Enter, Enter. Okay, these four are on there. Now, the first thing with would want to do is make sure that our sizing is kinda where we're gonna go. I feel like Meg is not quite tall enough, and she's a little big crooked. So we're gonna pull it, make her a little bit bigger. Now remember, I told you guys, with our regular teams, we're able to use the logos on their teams as a gauge to make sure that everyone's the right size. We don't have that luxury, so it's not gonna work. We got these guys. Like this guy, I feel like this pose definitely needs to come in front of the bat. He needs to be more dominant in this. So all we're gonna do is go to our layers, and if you have auto-select on, and you go hit keyboard shortcut V, it pulls up the arrow, and it'll kick you to whichever layer you want to go to. As we get to this one, literally just drag it up. Now he's above everyone. That's it. Yeah. Is your document you're building on actual size? The ones that we would get, we would make sure that's all set up as a four-by-six. The one that he sends, they're pretty, pretty huge files, generally. Let's look. Image, canvas size. So this is 24 by 18 inches. And that would be plenty of information to build even a four-foot by six-foot banner, 'cause you don't need that insane resolution to get those big, big ones as you would for print. But, yeah. So this is 18 by 24. Okay. So we pulled him forward. Control + T. We're gonna bring him down in size. Put him right here. I like... We'll bring him up in front of Meg too a little bit. She's not gonna like that, but that's okay. Got the guy with the bat right there, and right there. Now, all these guys, we notice things like this. Like, that's not going to work. You see how we have the start right over his head? So we need to adjust where these guys are going on the template. A lot of times in this situation, what I would do is take all of these together, these three, and I'm gonna group 'em, which is Command + G. So now this has just become one huge thing. So now, we can just take and move them to wherever we need them to be. They need to be above this, obviously. So as we go back to them, Text & Motto, put that up. Done. Okay. But now, we lost this part back here, the foreground. We want that to be in front of them. Drag up that stuff. So we're just shifting around these elements to make the image look right. Once we would do this for a large school, it would be done. That's just, we do it. Like, we all of six, seven, eight in a row, 'cause they're all gonna be the same. Okay. Some of the things that'll happen when you're working on these files too is if you look at the grouping here, see this little symbol right here? It's a smart layer. Do you guys know what smart layers are, smart objects? Okay, so it use to be, Photoshop and, Photoshop and Lightroom are completely different programs in the way that they edit. Lightroom is what's called lossless editing, which means that in Lightroom, you can go in and we can take a picture, we can pull the exposure up four stops, close it, go away, come back, put it back, and we won't have lost any information. That file can be recovered. We can bring it back negative four stops, bring it back positive four stops. It never loses the information, because in lightroom, what happens whenever you make a change and you wanna put it into the file, you are creating a new file. It doesn't write over the original. It always makes something new. Photoshop, when you're editing in that, you are actually changing and manipulating the pixels. You're changing that file forever. So, in Photoshop, if you go in and you blast the exposure up, you go really, really high, really, really hot on something, and you save it and you clos it, you're done. It can never come back. So one of the things that they came out in the more recent versions of Photoshop, they have these smart objects. So it used to be a situation where you would go in and shrink 'em, and you'd say, okay, this is good. And then you hit Enter, and then you're like, oh, no, I need them to be way bigger. What would happen is when you would do that free transform and hit Enter, you would lose information. Right now, because they are smart objects, we can actually go in and click each one of these and even retouch this one independently of the rest. Okay? Which is really, really cool, but there's one huge, huge backside to this. It slows down your machine, and it makes your files really, really big, because it keeps all of that information. So, what we do once we get our images and we're like, okay, we're pretty confident this is the size, we might make minor tweaks to it, this is what we're gonna do. We wanna go in, and we want to rasterize the layer. Now, we've lost that additional information, but we've sped up the speed that it can handle these files. Does that make sense? So I don't think it's a bad thing to have it when you're starting to kind of putz around, but when you're saying your .psds, when you're saying your final jobs, when you're working on this forever, you don't need to save all that information. So one we go in an we get our poster set up like this, the next step that I'm sure somebody will ask is because we aren't shooting full body or because we haven't, what do we need to do if we wanna do a second row? 'Cause especially if we don't have that, we don't have their legs. So what do with do? It's really, really easy. Let me finish knocking out these backgrounds, and then I'll show you guys. So, nope, we did him already. Knock her out. We'll put her in there. Boom. Enter. The other thing that's kind of fun for me designing these posters is I literally just put on my headphones, and I zone out, and I listen to like Rocky for the 8,000th time, 'cause it's the best movie ever made in the history of the world. Or some ridiculous soundtracks that get me all hyped up. But going through and doing these posters, it's really a nice time to just kind of vibe out and work. It's easy. Click this one, boom, Enter. So this is gonna be a good one to show, too, with her hair, that green screen, how it got rid of that cast. That was a really good example of that. Save it, .png, save, save. Close it. We don't need to save anything on the .jpg. And move on. How we do our posters when we know we're going to bring other people into them is, let's just take these two. Knowing that these two are gonna come and we wanna put them in the back row, we are always going to design our poster to have a foreground layer that'll just hide everything that we don't wanna show. So a lot of times we'll use smoke or maybe we'll have some gravel or something like that that will have two layers. So we'll have the layer that blocks the front row, and then we'll just duplicate that, but that behind the front row, bring it up higher, and it'll block for the back row. So, again, we're putting these in. Enter, Enter. We've got the smart files. Let's pull out on this. And going to our layers, it put these women in the same group, which we don't wanna do. We want them to be separate. So, what we're going to do is take these two. We're going to pull this out of the group. We're going to make another group. That's gonna be the group that goes behind them. So now all we do, pull that back there. Now we can go in, grab her, move her independently. Once we click on her, we're just gonna start to transform her. We're gonna lower that size like that. Hit Enter like that. Ooh, we were on both of 'em there. Like that. Bring her down. And we'll go back to that first group and lower the whole thing. We're just gonna pull them down. Now, this part, this optional white foreground and this, all we're going to do is select both of those, hit Command + J. That copies those two layers, and we're going to bring those so that they are right in between group one and group two. So that will hide. We can take that layer, and we can use it to hide their legs. And if we have to get in there and do a little bit more 'til it's gone. Bring back group one, boom. You guys kind of get the principles on this though? It's like, it's really easy stuff. It just needs to be done. Once you start working on it, you just need to stay focused on how, how you can get it done quickly. The other thing that we like to talk about with our banners that's kind of a cool system that we set up is one of our accounts, the agreement that we actually reached with them, they pay me 75 bucks a banner. That's what I get paid. Which is not much more than the cost, if you factor in your time. So I get paid 75 bucks a banner. But one of the questions that a lot of people don't ask is what happens to your banner when they're done? Where do they go? What does the school do with them? Well, this school has decided that they don't want to be in charge of figuring out who gets what. 'Cause you have one banner and 30 kids, and you can easily run into a situation where the secretary might have told Dave that he could have it, and the athletic director might have told you that you can have it, and you might just be mad 'cause you didn't even know it was an option. So, 75 bucks, but we get 'em back. So every time we swap 'em out, we hang up the new ones, we get all the old ones, which really kind of doesn't seem like that big of a deal, but that way if anyone calls the school and says, where are those banners, we have 'em. We sell them at a discounted rate of 100 bucks to parents. So, at the end, I'm getting like 175 bucks for most of my banners. These are all seniors, so a lot of parents want them. Like, a group will even go in on 'em, 'cause they wanna use 'em so every kid can have it as his grad party. They'll hang 'em up. It's a nice marketing tool for us, and that way, I'm kind of able to come out a little bit ahead on it. Not a lot, but it makes us a little money. All right. So, when we would be done, going back to Lightroom, this process of doing the banner knockouts and all of this, we're going through the export presets. We also have gone in and created an action that can affect, you can batch save files differently. So if you're saving 'em as .psds, and you wanna go in and change 'em to .pngs, these are all automated things that we do, guys. It's crazy how fast and how smooth you can make Photoshop and Lightroom if you put the time into learning the software. One of the other things that we like to do is go in and I make my own keyboard shortcuts. So, portraiture does not have a solid keyboard shortcut. So on all of my machines, it's Control + Shift + T. I go in, to Filter, go down, portraiture, there it is. We can go in and affect the keyboard shortcuts for these. You can make anything a shortcut. Cool.
Class Materials
Bonus Materials with Purchase
Bonus Materials with RSVP
Ratings and Reviews
Brian T
I've watched Matthew before, on Creative Live, and in person. He never fails to entertain and his knowledge is great. This class on high volume sports photography is the best one I've watched. I'm trying to break into this are of business, and he does a great job of breaking down each area. He is a great public speaker, and does a great job explaining what I need to know.
a Creativelive Student
Fantastic class! Matthew is not only a great teacher who easily gets his ideas and thoughts across but he's fun, funny and engaging. I keep coming back to watch again, and again.
Isaiah Salazar
I cannot full express my gratitude for this class. I have done T & I work before but just little aspects of it have evaded me.this class so far has been extremely helpful and it isn't even over yet. Thank you for not just being open, but being kind. Making it a point to say to "Play by the rules" and to emphasize "Run an ethical business" is refreshing. Don't Be Valdemort! ha ha.
Student Work
Related Classes
Portrait Photography