11:00 am - Importing and Basic Editing
Lesson 3 from: Video and Motion Graphics in PhotoshopColin Smith
11:00 am - Importing and Basic Editing
Lesson 3 from: Video and Motion Graphics in PhotoshopColin Smith
Lesson Info
3. 11:00 am - Importing and Basic Editing
Lessons
9:00 am - Shooting with Your HDSLR
46:07 210:00 am - Lighting and Audio for HDSLR
31:46 311:00 am - Importing and Basic Editing
44:39 411:45 am - Adding Music in Photoshop
20:15 512:45 pm - Basics of Motion Graphics
21:37 61:15 pm - Motion Graphic Titles
25:08 71:30 pm - Exporting a Video from Photoshop
36:59 82:30 pm - Slide Shows
20:41Lesson Info
11:00 am - Importing and Basic Editing
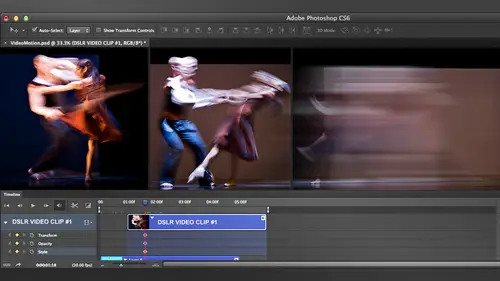
So what we're going to do now is we're really going to get into the meat of things and as you'll see here instead of a custom work space, because the things most of the tolls I don't use or need to kind of cut out my workspace while I'm working. So I just have mainly my layers and the properties of the two that I'm really going to be using. But I do like to have access to some of these other tolls I get rid of the color palettes and all those kind of things and just simplifying my work space for working for you. I mean, there's, a lot of pre sets up here and you'll see there is, you know, different ones there is emotion pre sit in there, and if you look at that one it's kind of cool, but it's got a lot of stuff that I don't want to deal with right now, you know, actions and history and stuff like this, I just create a very, very simplified work space here, which is calling video, which is that one? All right, so what we're going to do is if you don't have it already, the first thing yo...
u want to do is make sure your timeline is visible. Because this here is our control center when we working with video, this is where it all happens. All the magic is here and the layers panel and they're gonna work together in tandem if you don't have it, go under window and then go down to timeline. And as of c s six, adobe started shipping at video as part of a ll the photo shops so if you have an earlier version, you know where you used to. The photo shop extended versus photoshopped video usedto only being extended as from c s six on six video became part ofthe old the photo shop, and any extent was only three d a medical imaging. As of c c there's, no such thing has extended its gone and all photoshopped creative clouds havel the extended features so the video features we're going to look at. The majority of these features are goingto work on ly inside of photoshopped cia six on your adobe did a major change in cia six and really revved up the video, so c s five a lot of these features are not available. All right, so what we're going to do here is we are going to open a video file, so the way to get started is not even to import video that we could, I'm just going to choose file open. And and I'm just going to go to a video clip here so I've got video and photos up here and I'm going to go in the footage and I'm just going to find a frame of footage I'm just going to grab this one here's an ocean and just click open and what this does at this point here is that meeting come on zero and it puts the time um no one will give it one hundred percent and command zero will put it to fit within the workable area there so if you want to zoom in or out so basically what we've got here is I've got a reduced size video now this was shot at ten eighty p on a cannon five d mark to another mark three um because I didn't have them marked three at the time when I shot this I reduced it down in size a little bit for the sake of editing for speed just to demonstrate for some works quite well with full resolution video but this will this will just make the demagogue a little faster so just full disclosure there. So if it's a little smoother than what you're getting at home is because every geezer size of the footage and also if it looks a little blocking inequality is not as good that's also the reason why now when you bring the video inning he chews file open I noticed that I didn't have to mess around with kodak sittings I didn't have to go in if I choose following you and cameras size and in video sittings and all that I didn't have to miss with that what happens is it takes in the native resolution and all the settings of the video that I open are now inside the frame room so this project is a timeline this project is now saved what ever the default where for that video so if you're working with multiple video clips that are in different formats which you could mix max very easily make sure that whatever your baseline video format with one is the predominant one that you're going to be editing on the main format that you're going to be working in the size you want to work and etcetera bring that file in first because that will set the project to those sittings everything else comes in is going to have to adapt to whatever this is right now unfortunately I'm working all the same kind of footage here doesn't really matter but as a safe they're very easy to mix and match I can't take footage from gopro from the five d from seventy from I phoned mix it all together patricia will just take it and work with it no problem at all so having said that there's a couple of things going on right now you can see in the middle here where an image would normally be there we have a bit of a clip the other thing that we can see when we go down we'll get our timeline and an hour timeline we can see he is our clip there so in order to play that I'm just gonna hit the space bar and you also noticed there's also the soft, gentle sound of the ocean he's going to that we also have audio inside a photo notice here you big green bar and you see here it's green it's gonna let that play space fight to stop the playback and I just wanted to mention it was a green at the time because once I had stop it just shows the framing. The frame rate is twenty four frames per second members of the twenty three nine seven is kind of that what the equivalent of twenty four frames per second is because of something that happened some ancient thing matching the power cycles and getting rid of interference on television sets in america is why they got that. So anyway, so way we're just going to call it twenty four frames a second twenty four frames per second is cinematic this what you see when you go to the movie theaters and you see a film so as you can see that the timeline we're able to see a video here and whatever to play it we're also able to do what's called scrubbing this is a timeline this is that play head indicator and weaken grab it and we can move it around moving it is what is known ascribe it and you don't get any audio playback when your script you just you just goes quiet and you can see there the other thing is without audio we can all right click in here and you'll notice that we have two sets of settings here this is the video and it's the audio so we can control our volume fade and fade out and mute so if I click the mute audio and now I play back the sound is not gonna play anymore we're just going to get just emotion and we could do that poor track basis so I'm just gonna need the audio for now and I just laid there playing a background because that I think it should interfere with me too much. So what can we do with this? We've got a piece of footage in here and photoshopped will be wonderful. Great. What can we do with it? There's a number of things we can do with this the first we want to do is we want to trim the video clip because you know it's I mean even there's a beautiful beach if you know what I'm gonna meet this audio just for now because I realize this is going to get kind of annoying and well un mute it later, someone I'm playing this here it is beautiful is a beautiful scene with a little bit of a sunset coming down here and they notice here something to use one of the things I love to do and that's interesting, I could move that out of my way. There we go so way! Go here and we see there I've got my tripod set up and right now I'm running away's vest is a cancer and get my feet wet and I just got the water coming around the tripod and then it kind of goes away and now you know it's at this point but probably already started get bored with it because you're the human attention span is very short unless something is really going on notice something I mentioned earlier on the camera is on a stable shooting platform, it's not moving it's on a tripod it sitting here and it's leading the movement happened in front of it inside the frame no one's getting seasick, we're not scanning and moving across the water, which, you know would be kind of cool with the the phantom there we could fly across and it would look beautiful, but what we want to do now is they want to trim the internal points so we go to the very beginning, and we just simply click, and as soon as we click, this little window pops up and it shows us where was starting, and it shows is the duration in seconds says, here we've got a seventeen second clip, you can see that in the top right corner of that window top left corner says, we're starting at zero, which means we're standing in the very beginning so I can just click and drag, and I can see where we are in the scene there, so I'm just going to move it to where it starts to get about interesting, which I think is about here release it and it snaps into position. Now, this is video talk, this would be known as a ripple at it because of ripple in it is, rather than just leaving a gap there. It's filling in the space now by the folk photoshopped, will always do that when it's inside of video group c would get a video group here, and this is just like just like a layer group, except to controls video. And whenever you open a new video clip inside of photo shop, it's automatically create video group, the beautiful thing about the video group is apart from keeping everything together, it will report everything so whenever there's a gap, and we'll just spungen their spring loaded kind of fill in the gaps which is nice because otherwise we're watching video and it could be you know just one frame gap you get that little flicker and it doesn't look good so what we're gonna do is we're gonna go to the and we're gonna click and drag and we can see the same thing so he is our and here showing is the end is right there off our segment here and has a duration and we can see this is we were right now so we can see the duration of the clip right now if I was a trim it there that it would end the seven nineteen in a duration would be seven nineteen so we're just going to move it to where we got the ocean coming down so we get the ocean rushing down there and about there's does get boring so we release it and it just snaps it in and now we've trimmed the clip now we haven't lost anything this is nondestructive let me explain what's happening right now what it's doing is it's merely referencing the video clip that's sitting on my hard drive right now it's not putting a video clip into the photoshopped project and frank let's save the protocol project right now I'm just going to choose file save as and this is how you say the project would puppet on the desktop and we'll call it um video and photos show and I'm doing something I never do, but I just decided to do is put spaces I barely ever put spaces in my nine names, I just did it this time for fun, but typically speaking, I don't because I'm you know, my background is, you know, I did a lot of stuff in motion graphics and working with flash and one in writing action script I would do camel case and kamel case is what camel cases is, where you do the you start with a lower case and in the first thing of every letter it is like that video in photo shops, you can read it like that that's not his camel case or put underscores in there and that's a session where did I put the spaces? Because I never do that, but you can you can't put the space in the final it doesn't really matter, but my habit is always doing camel case or underscores of between and the reason for that is it's just like you see it's more computer believable and you get little this there's a special few doing stuff on the web don't put a space in a way because it puts a percent twenty in there instead of the space and really misses you so anyway there's no charge for that had absolutely nothing to do with what we're teaching so what we've done is we've saved this right now is video in photo shop psd, which means everything I throw this document that we're going to do for the rest of the thing is now going to save into this fight could put multiple clips and their motion graphics, whatever and when I'm done with it, I just had saved and we've got a whole project here is going to be saved inside the psd, which means that later on, if I want to work on, I just don't know the psd pick up where we left off. The one caveat that you need to know is if you're sharing this file with somebody else or you're working between computers and then you take this psd and you move the psd when you open it it's gonna have a very rude message is going to go where is this video clip? And I can't make you do that right now because the cash inside of photo shop is some amazing even if I move, it is still going to remember this right now, I could keep it because I could go in and clear the cash, but, you know, under here, if you want to force it to do that, which I'm not, I'm not moving it right now, but there's the the cashier you can actually clear enough on a purge, you see video cash, so if you didn't want to for some reason, get rid of the video cash, like, if you have a glitch and it's cashing something meaning that is storing it a memory, and you want to get rid of it, you can poach it there. But anyway, the point is, if you move this on ten of the driver out, including those video clips, the videos are not going to show up because the videos are not included in the psd found, which is a great thing. I'm very happy to that because otherwise we start putting a bunch of footage in the ups do become gigabytes, and then it would have that work of all of that when a loaded photo shop and it would take the ever loaded a multi gigabyte file, you know, like I just billboards, you know, I remember did a billboard for a particular client and hitting the safe, and I could go downstairs, make a cup of coffee, drink the coffee, come upstairs and I was still saving because that was a two gigabyte file. So the good news is it keeps the file size small and all the videos that just referenced, so because of that it's not destructive. That means that this video that I just put in there and trimmed it it's not gone it's still there it's known and technical lingo is they hated tale of the video at the hit is the beginning and the rest of the footage is still there you just can't see it in the tail it's still there in the tail so if I click and drag you could see that footage of stories I could bring it back at any time if I want to bring back the head I have to slide it over and then drag it that way to get it and uh that would just snapped back into position so even though this automatically ripples you can force it out of that ripple just by pulling it so there's probably something else worth known and it kind of snaps in position so it's not destructive that first clips and now what we want to do is we want to add more clips of video we can start to combine them several ways to do that one of them is to just click on here and choose ed media and that's exactly what we're going to do we're just going to go in here and add the media were going to choose video and photos so I got my footage photo here and I'm going to click on here and I'm going to hit the come on key to select two pieces of footage by the way, just on a side note, if you do happen to get my book, you get this footage with it just answer that out, eh? So we click open and now we're going to bring in eclipse notice I didn't have to bring them in one at a time. I could bring in multiple clips at once so you don't have to sit there and go important, important, important, important you can just do it on one kick, so notice right now we got more footage on a timeline and we can see it once we get this little bar here, we can go backwards and forwards to scroll through the timeline the other option that we have here see this little thing here is that timeline viewer. If I click and drag notice, it increases or decreases the size of that timeline we can click here to minimize it mostly and we can hit here to maximize it. So what? We can slide here. So what this is doing is it's not changing the length of the footage at all. It's not changing the timing all it's doing is shrinking or compressing the timeline which makes it easier for us to move around and access different parts of footage that's all that's doing and as you can see, we both the footage in right now we're up tio we're about thirty five somewhere thirty eight seconds with footage you can see down here thirty eight eighteen if you wanted to go directly to something doubleclick and if you wanted to go say to exactly ten seconds you just type in ten had in tow them and that will take us in ten frames if you want to go ten seconds you need to get ten dot zero zero well that was weird and I'll take us to exactly ten right there ten seconds so how accounts is if you look in here you'll see let me zoom right into the timeline was a medal talk about this you'll see that we see twenty to these air the individual frames because resumed all the way in right now it's showing us eight nineteen what does that mean eight seconds in nineteen frames so we're working and you know that would get a minute's here would get that would get hours minutes seconds and frames so because we're twenty four frames per second we got eight nineteen, twenty, twenty one, twenty two, twenty three and in the twenty four frame takes us to the next second which is nine seconds so that's kind of how that counts so you could go precisely there by double clicking putting it in or you can go in here frame by frame so I just kind of shows you that so let me go down here a little bit so we get the three pieces of footage let's see what we've got right now we've seen the ocean that's hit the space bar we're playing it this's uh all of this michelle laguna beach this is a book effect very easy to do what I'm doing is good the camera on a tripod and I'm just pulling it out of books you can see this night focus and the reason it works is because of the nice shallow depth of field that we're working at if we were using a a big different field on a typical video camera you couldn't do this so this is kind of very cinematic effect that you can do because I'm shooting with this big sensor and getting this nice shallow depth of field and we just keep it I think it was about to write when I said that maybe a fourth and he would go some just plain bastable down the beach and uh this is a great scene in laguna beach you see people playing basketball with sunset it's just a wonderful wonderful scene and you see that every day and unlike seattle this is the typical california weather is beautiful place guys almost every day as I said there's probably raining right now but all right don't rub it in I think about it okay so we've got three pieces of footage here background history all of these were shot at the same time at laguna beach I shot this one first as you can see that it got a little later shot this one and go darker shot that so should all of these almost within fifty yards of each other just with the five d mark two and in a tripod and just shooting on probably my twenty four seventy lens I don't I don't even remember but just in case people want to know that's what I do so if you want to change the order of these clips you can very easily change the order so we can click and drag here in a timeline and if we release it here notice it snaps and it changes position so we can do that but it's a little clumsy sometimes you get, you know trip oh doing that easy way to do it is we can do in the latest panel if we get a lay his panel dragged this went to the top it goes to the end grab the other one of the ocean, drag it to the top that goes to the end so it's very easy and we'll shuffle these around chronologically speaking, we go from the beginning chronologically as an chronos goes to the beginning to the end chronologically I chronos or chronograph time here goes from the beginning to the end so in layers you used to working with the layer on top means that it's going to be more visible and underneath those layers are going to be successfully underneath each other inside of video group of works a little differently, they don't stack on top of each other, they just change it on the timeline. And so this is the end of the times. I think this is the bottom of the timeline would be the beginnings of time. Zero is the bottom, and as it progresses in time, a chronological order, it goes to the top. So if you've got a bunch of clips, the one at the top will be at the end of one of the bottom will be at the beginning. I know I said that a couple of different times, but very important to grasp that. And because you'll be doing this a lot. Is there a theory behind that? A choice of it being on top through? Yes, very, very scientific theory on adobe engineer decided that. Okay, a it's, a feature, right? It's a feature. I mean, what? I had to either go from the top to the bottom of the bottom of the time. So I guess they chose its, started the bottom and get the top, I'm sure someone had a reason, maybe they flipped a coin, who knows thank you so if we want to change the order of these that stopped the ocean, then let's do the basketball and in this end with that boca effects have changed it there the other thing what about trimming these close? We have to trim in these clips that too long you too boring so what we're going to do is we can leave the timeline where it is wonderful thing well the timeline indicator or the play head depending on what you want to call it I think it's a dog is calling a seti ii, which is a current time indicator you can call it a play head if you want so we're gonna click on here and drag and notice that we can change we conscripts around video here so let's take it so where you know some actions about to happen let's take it to say I don't know about there and these guys are about to charge the basket and you know we're going the shooting got the shot done we don't need to see them and I coolly walk off in the distance like, hey yeah great basket so we're cutting this down and that's five seconds you can see because ten to fifteen so we get it down to five seconds now same thing here, the book that we don't need that whole thing mr scary when it starts to get out of focus maybe about there and you know, we don't need this thing to get forever either notice that end in the duration and now different when we work on one clip you remember the ending the duration was always the same inside this box that no notice there they left and the right on dh what this is doing is the duration is showing the duration off that particular clip the end is showing this will be the new duration of the entire sequence of clips, so it's adding it together for us so we don't have to sit there and together we get these three clips right now, if I can get here will be twenty two seconds and this clip will be seven seconds and forcing seven seconds and four frames, so they're just kind of that's what they're there shows you and as far as you know, these indications is there not a lot else to know one of the things here remember when I talked about this china current prime rate and I played a black and paid it back and it was green when I've noticed this green right now and the sound would come on when it close to the next one because I didn't mute that stays green means it's playing in real time means that he's some noise the computer is able to keep up with what is playing right now. Uh see where ten ripped for a second when it turns red it means it's not playing in real time means that the computer is thinking right now and it needs to catch up notice up here we have this little green bar that's going across there that green bar tells me that now that I played it it's loaded into rent just very similar and after facing think cold known is a ram preview and what a ramp review means that that video is all loaded into the memory of the computer so that means that when it's green I can play it back and I'm going to see it in real time meaning is going play back an actual time if it hasn't granted you know it hasn't loaded and sometimes it can choke and it doesn't show the rial real time you know it could be playing slower complaint, you know, choking and skipping while it's letting that once was later into ram here you're going to get a smooth playback so it's probably worth mentioning. All right, so we get these three clips one after the other what if we want to do something because you know it's a lot of stuff we can do and photoshopped photo shop has a lot of ability to do a lot more than just put these different sequences together photoshopped is a very powerful image editing program with layers we have layer styles we have adjustment layers we have a lot of different things and photo shop we have filters here is where photoshopped really blows it out of the box all of these will work on video it's very exciting. So what we want to do is we want to stack a couple of these videos on top of each other so I'm going to grab the ocean. Maybe you have tried this at home and one of the things you might have found is you dragon is trying to drag it up the top and to use the new zealand expression we can do this till the cows come home and nothing is gonna happen because he's a locked inside of the video group. So what you need to do is take it out of the video group. So we go into the layers panel which is their control center. Drag it up. Do you see that little line appeared? Release it. No it's being sit out of jail it's out of the video group and now it's on its own layer on top of the rest of the video. Well, this is a wonderful thing. Why is this a wonderful thing? Well, let's, look at the preview. What are you going to see right now? Because something has happened here inside of the timeline now we have two different timelines here working within the sequence think of this sequence as the entire project and we're going to call these just different different timelines on top of each other now these air related so if I playing thie ocean is going to keep going and if I get it and notice when the ocean ends what's gonna happen boom! It shows what's underneath so this reverts back to how layers work except if I collapse the video group everything in this video group here is treated as one layer even though these videos can be stacked in here in succession there still treated as one lights if I hide this, you'll notice that I go here, you can see a preview first clip and won and open it up a little bit so you can see that preview there. We know his basketball you can see these video clips are gonna show just like they did before. However, now that I've got this one on top thinking layers from something is in the layer does notice it layer so that layer is now sitting on top of the other video group, which works like a layer, and so that duration of this layer, you're going to see it until it runs out any once that runs out there's nothing and it is going to show whatever's underneath because that kind of makes sense I know it's a very basic principles appear civil that you really need to grasp because this is the heart and soul of how this works inside of photo shop so now that we've done that we've got the different layers on top of each other or what's the advantage of that how do they relate to each other? Well something that is so wonderful about photo shop is when we were in the layers palin panel his palate hasn't been called a pal I think since u s forces five the panel has something known as blend modes if your video head you know going to call these blend was you're going to call them transfer modes but since we have photoshopped people were going to call the blend moves because that's what photos up calls him and is what they are so we can use these blend moods if I turn on the overlay mod look at this weaken blend the different layers together and you know bland modes are broken into one two, three, four five different groups the dark and modes we've got the lytton loads we've got the overlay modes and so let me talk about you know, just quickly doc and modes what the darker modes do as you can see there the darker modes they allow the which one of we got on top here we've got our ocean is showing through it allows the blacks to show through hides the whites the light modes do the opposite hides the blacks allows the lights come through, and so all these different ones will work in different ways like that. So these are the darks these airlines hides. The white sari hides darks, you know, the way hides the whites shows black hides, black shows why, and in the different ones will blend the intermediate tones and colors in different ways. I'm not going to go through every single one overlay heights fifty percent gray and these modes here will work in different ways different math, medical concoctions of ways of blending the different layers together. Then we've got these ones down here a difference exclusions subtracted, divide these are specialty modes and nisi used for from working I I like to call them utilitarian modes it's not the real name, but that's what I call them and and an example is, you know, when we use the difference mode yesterday when we were doing some compositing that enables us to align objects perfectly, andi and we've got a color modes here. So hugh, saturation color luminosity is a great what the hugh does is basically, we'll look at whatever that particular dominant color is will take their color of the top layer applied to the layers underneath saturation where it's there's more saturated color, it will show that saturation versus ineffectually here you can see them and there's more saturation in the sky shows through less situation just shows to his grace so that's what the color murders and in the tune that are much more useful color mode will take the color from the top layer, preserve the objection under layer, and apply that color from the top to them. Um and in luminosity will do the opposite. It will take the luminosity from the top layer, and you can see that there's our luminosity, and we'll take the colors from the layer underneath, and apply that on top. So if that's too complicated, just experiment with them and see what works and is away weaken cycle through these is it for you on the layer that we want to adjust him? We want to cycle through the blame modes hit the wiki for the move tool if you don't do that because this will actually effectively using a brush, we can change the blame words and the brushes brush is also had that blame modes and some other tools does that's why we're grabbing the move toward because the move towards going to apply just to the latest power and if I had the shift key and the plus key, I can now cycle through the different blame moz. And the fine just cycling through them and say hey, I really like that one I want to go back I can hit the shift minus key and l cycle is back through so just in a nutshell that's how you would use the blameless but we're going to go overly mode on this and the cool thing about overlay mode as we play this video now we've got this ocean kind of denver the basketball which is just really cold and here we go up tight away get and believe me all right so we can do that great so I want to add a little bit of drama to this and what I'm going to do so I'm just gonna hit me come on zero key fit that's we can fit the whole thing in there so sports what happens in sports? We get drama one of the things we love to show drama and it just makes everything more dramatic is we change the speed slow motion slow motion just pulls on the emotions like you know you just watching tv and instantly commercial comes on and it's a slow motion and you start weeping that's just that's what slow motion doesn't make you what you think it's just very emotional, eh? So we're going to take this and we're gonna take the speed we're going to drop it down a fifteen of jeff first is watching right now he's probably making fun of me and quoting me about oh you're weeping when you're watching commercials and I'm leaving the end of it so anyway when we change the duration one of the things are speeding duration is to get a notice I just changed fifty percent and I didn't change the duration why do you think is the duration slider in there I'll show you why so if we just change it to fifty percent speed and we get to the end of the clip look of this it runs out before the action runs out so that means if I take you a amount of action and you know which is what we've got in there and I'm gonna play it back at fifty percent that means the same amount of time because there play head or the timeline works on time was still in forty five seconds but now that has slowed down we only get to see hoffa's much action just like if we spit it up the whole thing would compress it down so if we want to see the whole action we have to also change the duration so simple math if we have one we double the other the law of relativity if we double one we have the other so fifty percent means that we're going to double this because we've cut it down by huh? Now we're gonna double it's so four point eight is nine point six thank you all us a kind he knows I'm really bad at math and I was gonna have to pull out a calculator to figure that out sir thank you so that we owe here we go and now we can watch this in slow motion and we should get the entire doors and there we go charging the basket shoots scores and so that we get a fitted and perfectly now so we can see how we blended those two layers together and added a little drama little motion is that kind of kind of funny you know this is fine. I am telling you this kind of editing with video it's if you like to play around and you like to have fun you're gonna have a lot of fun with this. Um so what about that? You know, with these cut out you know they're a little sudden one of the other things to caveat kevin out time and love to carry out when we do the changing here doesn't matter what you've got in your audio cds you change this speed the sound is gone put a shop will not play audio for these sections where the way we do the jewish but doesn't matter because we got the sound still if you turn it on here um ten off it was to get the sound happening on the top layer here wear the sound happening there if you wanted to bring back son and you want to head the squeaking of the sneakers, what I'm gonna do is I'm going to go down here and I'm going to choose and audio notices called audio track an audio for someone who was born under iraq means sound. I mean, it seems it seems off awfully obvious, but, you know, who knows? Maybe somebody you know probably did another, but I imagine everybody knows that, but so audio is we're gonna choose add audio and hey, is one of the amazing things about photos of this really cool is if I grabbed the same clip I grabbed before and I choose open that brings them because why it doesn't bring in a video, it steals the soundtrack out of it and brings in just the audio that easy. I mean, could you imagine how hard they could be to do in another video applications? So I'm just going to meet the audio here, so we don't hear the audio on the top track. Um, there were guys off good wanted to make sure and now if we play this, you'll hear you this knickers and stuff that we got that back in there, so even though the speed is different, technically we're cheating, who knows? I mean, you know, I'm just going to trim it down as we just turned it like the other video, no one's going to pick up on that, and so we go back under the audio here we can, a new the audio maybe bring down the sound of the ocean. And now guess what we're now doing sound mixing instead of seeing a book, those layers now playing together on and and we're now doing sound mixing the sound mixing is very basic, we can control volume and it's way can fade in and fade out, which is nice, and we'll use that a little bit when we put some music and it just ramps up the audio so it doesn't just suddenly come on, it will just slowly faded, faded out, but the cool thing is you could bring it sound affects. You can do whatever you want with the audio. Now, if you want to add more audio tracks, you can to give you an idea how many audio tracks can't we do a little experiment? And because I don't know exactly how many audio tries to do so I started stacking them together and I got to one hundred twenty eight tracks of audio, and it was still going, and so some of the video tracks so the limit of what it can do really as far as I know is the limits of the capacity of your computer how much ram you've got on you computer, how much hard drive you've got and how much processing power you've got to move move all of this. However, if you're doing one hundred twenty eight tracks of audio at that point you should probably be using, you know, soundtrack or, you know, an audio on core or addition or not on car and audition would be adobes one or logic pro or whatever you know actually using a gnawed eo program because you're seriously until audio at that point and at that point what I would do is I take the audio, mix it down and drop it into one or do you track in here are a couple of tracks next known is bouncing, but having said that you could add them all in here if you wanted now that would get a little difficult when it comes to managing all these tracks because you could you imagine that gets gets kind of crazy so one of the things I'm just going to show it here is that you can do here is if you want, if you start to get a lot of tracks and you want it would organize them, you have the option here that you can choose favorite clips on lee so what we can do is we can add thes society. We want to see that what he had tracking them to sell, like these clips, and I'm going to go in here and we're going to go under the show. We can sit set favorite clips. These are now my favorite clips, even under the only ones. But on that point we can filter these by choosing show favorite clips only, and you can see it's obviously is going to show everything because everything is a favorite clip. But if I turn that off and I go here and so and we're sitting a favorite clips, um, we continue on their si that we turned it off and now was showing the favorites. You'll notice that the ones that marked his favorite of the only ones showing and so if we go back down under here and we to show we turn off show favorite clips, um, old clips, there we go. There are now. We'll show all the clips you go between the favorites and also, if you sit them his favorite, they will show. If they're unsaid his favorite, they will not miss a toggle you turn it on a rough so you know, I just want to say this if you get a whole bunch of layers and you want to manage it, sit a few of them as the favorites and what are the favorite ones or the ones you working on at the time and then you can choose to view in there and in turn is on and off anyway, now we've got the video, what about transitions in between the videos that we want to be able to make these clips look nice between each other? Absolutely yes we do is we get this little button here is called transitions and the transitions you can see we've got several different transitions um we've got fade cross fade and in favor of black white in color a fade will faded from transparency to whatever we're doing. So let me do that the very beginning I'm gonna fade this one from transparency just by clicking and dragon so if you watch now, you'll see the layer underneath and you'll see that other life because I faded it in so the other thing we can do is let's look at another one favorite one is favored black is take that dragon dropped onto the other clip so now it's gonna fade from blacks if we work this thing from black so if we wanted to take this other clip and we wanted to change it, right, click on a transition, we confide that one from black as well so we can change the type of transition we can change the duration. So if I want to make this one two seconds, we could change it just like that. Very simple. Just type in the number or click here and you can slide in iraq, get rid of the transition, just click the trash can so that's a basic transition right there and you'll see that's fading for black now. So that's the fate and what we're doing that quite a lot will be fading from black hole would just be fading. Fading is a great way to do transparency is you want to bring something in and bring it out. Just drop that in there and as you see it's very easy. If you want to change that, the fall time the duration says tow one second, if I click to now that the father is going to change to not just for the selected transition before all the transitions, not the ones that are already added, the ones already edible state what they are and in from now on, whatever, I applied to the fault that he's going to be, too. And I can change it whatever I want and I'm glad it does that because if I changed it to two and all of these changed, that would be a real pain because imagine if you got all these transitions sit all over the place and in the old trans globally you don't want it to happen the other way you can change directions to click and drag it like that so then we go calling if you have like twenty or thirty clips maybe for, like a slide show and you wanted to automatically add transitions toe all the clips can you do that? That is my favorite feature request for video with the toby right now okay, they wish it did hopefully hopefully one day let's keep our fingers crossed but the whole creative cloud thing you know, that's something that you know, if adobe felt like they could just drop in any time now yeah, so let's hope that they do so I don't have to wait two years yeah for the next cs whatever. Yeah, so the other thing we've got is a cross fade cross fade will go between two clips taken drag and release it there and what that will do is if we go down now, you'll notice we're still going to see our ocean but your notice underneath how these layers gonna blame america twenty that's across paid and if we wantto play this one with the transparency this grave the other one we're just gonna choose fade drag it in there and now we should have this smooth transition that's what's going on and everything just nicely blends into their now we're gonna choose faith for black at the end and drop it on the in and now we've created a beautiful fading sequence and itjust policies that video and we've gone through every single one of the fading or the transitions here except for they were white which does the opposite is black fade with color is where you get an extra little box appears here and I can click and you know if I want to wake someone up in the morning I'll go to bright yellow on faith from that which it would be really just me mean thing to do umm typically you know unless you got a good reason to be fighting from a color that's that's not an option I used very often but but the option is there it's so so here's a transition that just paid a hole cut through right now you can see the sound just rounded out obviously goes beyond its continue because they've got lou play bike turned on if I turn on flu playback it will go to the very end it and just stop so I'm not sure that's the basics of putting the video together assembling it on a timeline and obviously, no one working different clips. All of this is just a matter of doing this more and more. But we can also cut clips in the middle and stuff like that, which, which we will be doing throughout the day.
Class Materials
bonus material with purchase