Mixing Drums: Cymbals and Room Mic
Lesson 7 from: Tracking & Mixing with Outboard GearKris Crummett
Mixing Drums: Cymbals and Room Mic
Lesson 7 from: Tracking & Mixing with Outboard GearKris Crummett
Lessons
10 Pre-Show
02:57 2FreePreview: Intro to Using Outboard Gear
31:03 3Patchbay & Drum Bus Processing
42:43 4Mixing Drums: Kick Drum
25:34 5Mixing Drums: Snare Drum
45:34 6Mixing Drums: High Hat
29:35 7Mixing Drums: Cymbals and Room Mic
49:02 8Mixing the Bass
11:23Lesson Info
Mixing Drums: Cymbals and Room Mic
So now the next thing for that is to just set the other q exactly the way this one is and listen to a part that as symbols on both sides and make sure that I didn't tailor the you too much to the sound of just one symbol and for me the issue on the overheads is all about the symbols I'm not worrying too much about what the other drum sound like in the overheads that can be important in certain cases I put my symbol are my overhead mike's pretty close to the symbols and I'm going to mix the close mikes up pretty loud so there's not I'm not really worried about how the drum sound, but I feel naturally when I q the symbols to sound good in the overheads the drums end up sounding good too, so I'll play this on both channels and I had just unhooked the first channel in the patch bay to mute it now I'm plugging it back in these the stereo symbols with the same u q on both sides like that sounds cool both what's here on and off it's a little deceiving just because I've done so much cutting th...
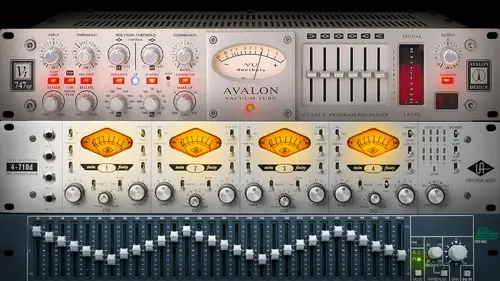
at the volume is lower because by cutting the frequency bands, I'm cutting volume as well because I'm cutting out volume from it um and I'm cutting the volumes of the things I don't like so even though the one without the cue engage sounds louder and that might be more appealing to me it sounds a lot cooler with e engaged and in a minute I'm going to make up the game anyways and so you kind of hear it more for what it really is so the next thing in the chain let me check my ball the next thing the chain is the cia for to go vsc two compressor and this is a really cool compressor for overheads um from time to time all use other compressors as well the thing I like about the cia is it kind of has that nineties two thousands late eighties nineties two thousands uh current rock sound of you know this in so many records mixed on ss cells and stuff and even though this is a different compressor just having that visa action really is like that rock and roll sound so if that's not what I'm going for probably use something else but in this case I just really like the sound of of the compression and this compressor specifically is really clean and I find that the more you compress it and turn up the gain it actually widens the symbols and um you kind of add some beef to him in a cool depth that I don't get from I've used other as the self styled compressors allen smart compressors they're all cool this one really hold symbols in a unique and amazing way so right now we've had it off have a make up game pretty high when he turned this to equal threshold ofthe um again side chain filter on this is really cool and I'll explain why it's useful on overheads same as on the western dynamo and the distress sir has one as well, but I don't use that I don't like the way it sounds on the drum bus for me so what I have going here for the overhead compression so I have a four to one ratio, which I'll switch between foreign too for will give me more control and a little more slap to the symbols if I wanted to be more more clear and not really apparent that there's compression going on all the two to one because there would be less compression, but I kind of like to hear the compression on symbols I feel like it adds to the aggression so got a four to one ratio. Um, I like my attack between thirty and ten on these and that's like the classic as a self style attack settings we'll start with thirty I might bring it down to ten we'll see out sounds the release auto is pretty cool for mixed bus or something, but I actually like point six for symbols and again I have this in a duel mano mode, which means each of these is an independent compressor I could put it in the stereo and all these controls would control the second compressor, which means anything that came in on the left side would control the right side and I don't really want that because it creates a weird dynamic between single hits on one side or the other versus two hits on both symbols and when you do multi mano I feel that when it comes to a part where both cymbals crashing, it's got way more punch because they're independent because if he hits, you know, just barely hits left before right or right before left you're not going to hear the later one as hard because the compressor has already brought it down or already clamped down on it, so using him in multi multi mano means that each symbol is compressed right when it's hit and I really like that I feel like it sounds a little wider um there are reasons if you feel like you're getting not enough separation, you might want to try stereo, but for me that's that's not how I roll it's not really my thing so have the side chain off for now I may or may not kick that and I just want to listen to first the first thing I'm gonna do is that I have kind of my normal settings four to one ratio thirty attack at point six on the release I've got the makeup being all the way down now, and I'm just going to drop the threshold, drop the threshold until it starts compressing on the meter mistake I'm making here is that a messing with left side, but symbols air coming through the right right now, the main crashes on the right so let's do the right first, like the big hits to hit around four on the game reduction and what this meter shows is how much compression I'm doing, and if I skipped that on eleven seventy six it's the same thing most the time the u meter on a compressor or the leads is showing you how much gain your you're reducing, how much air compressed compressing on each hit. So I like this to hit around four and like I said before, that's actually doing a little more than four dvd on the game reduction because it's a view meter and it's a little slower, but that that to me because I know this compressor is just about where I like to be, so since I've got that and I know what it took on the threshold to match that, or to get that to where I want who's going to match it on the other one, I kind of got to get in here right angled blocking camera for a second, okay? Is that all these air matched? Let's hear that back? Actually, we're not even hearing the compression let's put that in. All I was doing was setting the looking at the meter. So leave it off for a second and then all engages two things were happening there. I feel like I'm close but it's hitting a little funny I feel like I could probably take the attack down ten let's hear that sound? But now the attack is faster I'm compressing way more so let's, put the threshold back up a little bit cool. Let's, get the makeup game going here. One thing I really like about this box is, the more you turn it up, the more it saturates and that's just the way it's built and it gets really cool and sometimes I'll even turn my eighty converters to have a lot of a lot of head room so that I can turn this thing away because it sounds really cool and that's why I decided to set it up plus twenty two instead of plus twenty and again I'm gonna go a little faster on the release for this song. I'm compressing like all the other drums have been compressing. I can kind of hear that u q change a little bit so I'm going to go a little more drastic with the q but first I'm going to show you how the side chain works and this might not meet two apparent because my side chain filters are at ninety hurts and sixty and if you remember we've rolled off all of the sub frequency and all the forty, which is kind of affecting sixty seventy so there's not a lot down there to change, but you'll hear how it changes as I engaged side jane that being said, I thought it was pretty clear the difference is in him and I think I really like ninety so I'm going to stick with ninety and to demonstrate what they really do though let me turn the low and back up on the cue for just a second because this will show you that you actually can do some cool things with the side chain if you really wanted to kick trump to control the compressor or the sound of the kick and snare to control your the way the symbols sound overheads you can actually crank the base gets a more base, I'm gonna crank it but I'm gonna get a little bit more low end everything from one hundred sixty hertz down uh into the compressor and you can use the side chain teo to just how much of controls then after that, if you don't want that lohan and they're putting ae q again another e q after the compressor to get rid of that low and so where you eat you, what can really affect how your compressor is compressing and you still have a chance to doom or after the fact which which I often end up going on a lot of tracks, it'll be e q compression e q sometimes compression again just to gain stage things in a certain way and to get things to control um, the instrument in the way that I want so real quick, I just upped low in here on the queue, going into the compressor just to show you how the side chain really affects it. Here's the side chain off, I'm gonna go to sixty, turn it up to ninety off. Now I'm gonna take you back out that kick drum sound because I really just don't want that, but I definitely like how ninety hurts what's the symbols control the compression a little bit more than the kick on the low end from the snare. But now that I've done that, I feel like I need a little more compression, someone lower the threshold, and this compressed was different than the other compressors that have used so far. In the way that it has a threshold instead of an input gain the western dynamos the same way I just didn't touch it because like I said, I like to leave it so this one we're actually bringing the volume we're bringing the threshold down over the volume instead of bring the volume up into the threshold and you can think about the threshold like a line in the line of compressing and not compressing so kind of like tio like overhead to be pretty aggressive like that real quick, I'll show you what it sounds like when they're linked and listen to the hit that's the double hip to me it just gets a little less exciting it's out and the ducks and kind of a weird way put it back to mano that sounds more natural but obviously that's total choice that's something you could do, so I've landed on the threshold being down pretty far um the ratio being on four to one the attack on ten the release on point three and makeup gain is like three quarters the way up its craned um the other thing that we can do here is just show you the difference in the race issues which the ratio sent a little different on the compressors than they do on vt compressors like eleven seven soft, which I believe is one point five to one we'll go to tow one which is more of a mixed bus compressor thing or mild symbol compression for me we'll go back for the one which is what I prefer or the one to sound like a guy laying into a symbol with it to be just rocking out I like that eight to one it's a little heavy the territory of snare making the symbol sound awkward and since we're going that direction will do ten and I'm cool effect for the way way have things set up here it's not really what we want and then brick which is actually one hundred to one on that call break because it's basically brick wall limiting in a way it's not the same as a uh well one or two it's actually a pretty cool effect but again I'm not going for effect I just want cool symbols and now I'm going to go back and do a little more e q and again just like the kick if you end up with your symbols to scooped just duplicate the track from bringing a little bit of that dry track you'll get a little more dynamics that way I didn't feel that necessary for this record but um it's definitely a trick you can use in that regard as well so let's listen tio how the overheads are sounding with the kicks near intones created something pretty aggressive and cool their here's without the overheads here's what the overheads got hit really hard, which it was, but I'm just trying to accent that here's the drums with the overheads without any of the outboard gear. So the hardware insert and the delay compensation the worst thing but it's, just not what I want to put the hardware back in or aggressive drums with more sustaining symbols, cooler sounds so for me, symbols are really important to run out because I really can't make the sounds I can make with this and that in the box, so that definitely is a shining point, so let's go to room mikes here and and that's the last set of mike's on the drum set. So you have a process process the rooms here solo on these air printed with some compression, and I've done a little bit of q afterwards, and the thing about these have actually pulled out a bunch of low end because in heavy music, I really want the close kick mike to be the focus of below and in the drums. So I really the room mikes are more about hearing the splashing this and the symbols, the depth in the snare on the depth of the toms and the depth in the high end of the kick drum, but but I don't need any of that. Boo meanness from the room, mike so they might sound a little thin that's because I've pulled some low end out so let's go back here and that that's the printed track from the session months ago so let's go here to the un process overheads have a little bit of a plug and going on they're so with the our sorry the un process room likes and with un process room mike's because I only owned so many cues I could go back and print through one of them, but right now, since I'm running everything live, I've actually just used you eighty poll techie cue to get what I want because I'm not really I'm not really trying to do anything super crazy with the just boosted actually boosted a little low on a little highs on this is what it looks like and I'm cutting some lows as well pull texture kind of cool uh, real ones and the plug in in the sense that you have a fixed frequency point for the low end and you can boost it an attenuated at the same time, but they have a different q. So when you're boosting, you're kind of creating lycan s you have to think about it like an s if you boost in attenuate about the same amount that's what you get because they're slightly offset um that's could go into that deeper for another class, but if you're wondering why I'm loosening and cutting the same frequency that's why and it's kind of like what I did on this week with the two shelves cutting one shelf and then adding it back a little higher but the same idea on the low end you could do that with the high end sort of on this, but the high end frequency selection is different on the attenuation, but what I've done is cut a little bit of low one hundred hertz and boosted a little bit of hundred hertz um on the pole tech and boosted quite a bit of eight k just to get a little more scoop like I said before, I three tracks going on the rooms even though I had to mike's because I had m s set up not going to go in super deep into that other than um the left and the right are actually one mike and one side's out of face from the other they're they're, uh, it's kind of complicated thing explain they're both the same signal coming from the same mike that's in a figure eight pattern one you throw out of face of the focus is on the opposite side of the capsule from the normal side and then you have a center mike right under it which is in cardboard and that captures the center you mix that into the two out of phase ones to bring it back in the face and create kind of a false stereo, but it's not really false because you're getting the sound from both sides. I could go into that another time, like super deep because all kinds of cool stuff you can do with that and that set ups, but I just want explain real quick. Why? Why have three drum tracks for two mikes in the room you're in most of time yet andi and by m s I mean mid side. So the sides of the figure eight that air pointed to the left and the right and the mid is the card or a microphone in order to do what they called the coating that turning the two to mano mike's into that certain and this stereo sound is m s decoding, and I've just done it manually with three tracks again, I get into that later, but this is really just a stereo sound. So what I'm gonna do first to make this more simple, I'm gonna make a stereo auxiliary track by hitting shift come in and in pro tools go to stereo and I'm gonna select ox input, which stands for auxiliary input, and I'm gonna label it room likes not nick's room bikes, and I'm gonna put that on I'm just gonna put that on a random bus fifty seven fifty eight I want to make the output of these three mikes and by you have selected all three on the name here if I hold shift option and go to the first one hit bus and go to fifty seven and fifty eight it's elects that for the outputs, for everything I had selected and that's a shift option. Now cool trick that I'll show you real fast if you're printing multiple things on multiple tracks and you don't want to go first track goes out bus one the first track goes out bus too three for that could take forever there's shift there's ah command and pro tools and probably in every day w to do a cascading style selection. So if you hold the shift option, which means I'm controlling all three and then add command that's the cascade command. So watch me go select the first one is going to be just selected it's fifty seven we're going to mano outputs here. It's made the next one fifty eight in the next one fifty nine and that's super handy if you want to print a bunch of tracks on new other tracks at one time, you could do that for outputs or anything you know say I wanted to take a whole drum set put just different kinds of distortion on each channel and then reprint those two separate tracks so I can take it back off and have my drums again you would just do the cascading style by selecting the first track at the first bus and then you can do the same thing with the input on the tracks that you're printing to uh again that's more of a pro tools class type thing that since I was so close figured ijust tell you so I'm going to bust fifty seven and fifty eight which is something my three room channels to a stereo channel which is easier to work with cause I'll pay on these again because there's no point in sending out three channels because I'm just sending it to a stereo compressors what I'm going to do here because I've already used the already used this plug in the queue to get the curve I want I'll show you I'm going to run the room mike's into the fatso which is a funny name it's actually called a fatso junior which is even funnier than just fatso I'm not calling anyone names that's really what it's called I don't know if you can zoom in here someone maybe maybe now put definitely called the fatso jr and that's what we're going to be using next I love it on rooms it's a really cool compressor to made by the same people that make the distress sir and uh it's ah it's got a unique sound it looks like the distress sir it kind of functions like it but it sounds totally different on I like it a lot there you go fatso junior the little big guy um are big little I don't even know uh so my starting point on this actually is usually just five and five and the on ly knobs you have are input control and output control and as you can see this is a two channel unit it may seem like there's a lot on it but it's really just the same thing twice and like the distress sir it has some different kind of preset saturation options but I'm going to run it I'll run it first just clean and I'm going to pass that into my second unit channel three and four so I'm gonna go out of the prison second prison right here channel three which is actually eleven because the numbers just keep going um but I think about it as two channels of two two sections of eight but on here is just one through twenty four so channel three out goes into fatso channel one in fatso channel one out goes into three and three on the second prison and then we're just going to do the same thing with output for goes in on the fatso cable out channel two on the fatso junior into prison for and we'll hear how that sounds no my ox tracked that sending being sent uh are being given all three room likes is where I'll do my insert another thing too in pro tools I'm just going to give you a little pro tools tips is I go because I do things all the time that I don't even think about and uh and they're really any things to know so if you have one thing like an ox track that is going to be the main way you control everything that's group to it instead of soloing it which means on ly hearing the tracks that air solo you know it's hearing him alone uh instead of having a solo all for these tracks will have a group there so that group and this is the same time you can actually just make it soloed all the time by holding command and clicking that s on each track some now I never have to solve this and because they're only sent to the ox tracked they'll mute when I mean so really I don't have to touch that anymore it's all it's all controlled on the ox track again to turn it back on is just holding command and clicking at us again and you can see that it's great out which means that it will always be on unless this is off and again we're going to go to the I o going to go to three or four on my second converter I'm gonna drag over the time adjuster you have some loud symbols turn that down and as he saw held option and drag time adjuster over to duplicate it um I don't think I need to do any gain adjustment because I don't leave this preset I just do it however I want on on each session because it's on lee uh input and output knob and I use it for varying things so the first way I'm going to set up the fatso which is now running through with the proper amount of delay um is what's called the tracking compressor and I believe that's for the one I think it's kind of eleven, seventy six style compression but it really doesn't sound like eleven, seventy six it has its own thing going on so the first thing we'll hear is the four to one compressor on the room mikes on the doll it in and you can kind of hear the basic sound the most basic sound from the fatso my impression I really like to keep it under control if you slam it you just end up with like way too much symbol and you don't get that quick repeat of the attack from the snare and that's something that's really important to me in a room mike is to here that quick little I'm snapping again it's incredible that little slap back sound in the snare that's what makes snare sound cool it's what makes the snare sound wide so I don't want to cut that out with compression, but I do want to knock it out down a little bit so that there's some sustained there's still some pop to the sneering that and I'm right back it off just slightly they collected better before it's just kind of a balance between the pop in the snare and sustain in the in the snare what I'm listening to what I'm listening to room mike's is how am I affecting the snare bypass it you can still hear that it's a room but it's kind of boring so all we believe that and then I'll turn this on you can hear how exciting the compression makes it it's a lot more engaging, I enjoy it more personally it's what I want to hear out of the room just again as to the aggression of the drums and we can go through um the different settings the first thing I'm gonna do here is at what's called the tranny they'd like to get a little risque with this box obviously they're naming kind of goofy stuff, but what training means that you're putting the transformer in the loop? It can be transform a list or have a transformer and sometimes certain things of this box, I think actually on vocals it sounds a lot nicer without the transformer it's clear the transformer has a lot of color on this, and I think they did that on purpose. Um, and uh and I do, but that as a really nice and kind of knocke sound to the drums, and I'll show you right now. It's too much for vocals pretty cool on drum room makes type of sound that's the only way I know how to describe it because chinese words describe sounds ridiculous, but that's a whole we'll do it one more time. Well, I like that I'm going to leave that in, and then I'll go through the different compressors that are modeled in this model that an analog way it's interesting. So you're flipping through actually different circuits in this it's pretty cool is pretty ingenious, especially for when it was made and it really just again it's it's unique it has a really cool sound, so let's go to the bus compressor, which is two to one and you'll hear this is pretty cool on room mike's, too, and this everyone soil can be cool on other instruments. If you want to add a little like harry nous to guitar can be cool. The other thing I should mention about the fat says there's, actually a built in um uh, saturation circuit, so when you're going into it you're always saturating a little bit and the more you drive the input and the more you turn down the output, you're not only driving the compression, you're also driving the saturation circuit so that's one of the things that makes it different from this and it's not the same saturate saturation circuit as the distortion to or distortion three on the distress sir it's completely unique. So that's one thing that makes it cool. So you kind of always hearing that and so here's the two to one plus compressor it's just a little more boring not doing as much could be cool on mixed bus. If this was your only compressor years and years ago, I had access to one of these and makes a decent amount of records with this is that as the mixed bus compressor totally works not ideal for me, but it's the only one you got, it totally works on the bus setting because that's what it's designed for s o we'll go back to tracking, which is the photo one style that's pretty cool little more aggression, that's what I like and gdp is general purpose and I'm not really sure what this is a model of, and I never release it because I'm not a fan of it, but um, I will play it for you because it's probably useful for something for someone it's cool, but you can hear that it has and see that it has a really slow release, and like I said earlier, I'm just not really a fan of so slow release compressors, slow, slow, really settings on compressors, so I don't use a general purpose a lot, but I'm sure that if this was your favorite or only compressor, um, you could find a use for it so here's the spank setting kind of going for the same thing is new gun here, something really drastic and it's cool, but I feel like it makes the drum sound a little awkward in this. The other thing you can do is add this bank to the tracking compressor again. It's pretty cool had school effect, but it's not what I want, really, what I want is just some control over the way the snare drum sounds. We'll go back to that that's it that's really the sound I want now. The other thing you can do with this, which can be cool for symbols if you've used if you're using this for overheads or rooms on your drummer's, has, like a really harsh symbols, or the mikes are just too bright, but killing him out is weird, it has what's called warmth, and this is kind of I believe it's kind of like a multi banding where it compresses the high frequencies only it's kind of it's own thing but I'll go through the warmth settings and show you how it can affect things and you could make really need effects and also just control high and if it's getting out of control you can see that the war wasn't really engaged until I got a threshold until about four this control controls the amount of it's basically bringing the threshold of the warmth down so you're not always going to get it on one or two but seven and that's actually a pretty cool effect because you can still hear the symbols they're really clear but you can tell it's not the same as uh just cueing the high end out it actually saturates the high end to make it weigh more pleasant and turns it down a little bit and even though that's not necessary on this because I'm happy with the amount of high end in the tracks it's super useful it's another thing that's cool if this was your only compressor it's great for d s ng on vocals it's pretty neat that way because it takes that high end and knocks it right down so we'll set that I want to bring all the drums back into the mix and you can hear how it all works together how boring it sounds when I take the room like soft, just sounds like a tiny little drum room and that's not what it was so it's nice to have that in there, and once more I'll take the compression off the room so you can really hear what the compressions adding on what the fatso does four room mikes, some stability, what's the close, what it does to me really is it lets the close near mike pop out, and then the sustain is in the room, so you get this like close hard hit on the snare, and then it quickly fans out wide, the bigger the room, the more sustained you're going to get from compression in this room wasn't that big actually was like seventeen by seventeen with eleven foot ceilings, so I'm really actually just trying to make a bigger by adding compression to I probably wouldn't do is much compression if I had a huge room with more sustained because compression is adding sustained to the sound of the distance, and with all that means said, let me put the drum crushed back in so you can hear again what we heard in the beginning, how it's all working together, and I'm probably gonna have to turn up the room mikes and the overhead mike's a little bit to compensate because, uh, I only have um the close mike's going through the drunk russian since I've turned it back on I'm adding gain because I'm actually mixing in a whole another signal so besides thea room light room reverb and the snare verb that I have going on the drums that's pretty much the drums on the mix so let me play those this is something I have set up with a couple of you eighty plug ins, some of the songs on this record actually I also use the river bs on it they even tied um h eight thousand but not on this song actually and if I have time I'll show you how cool the river bs are on here but this song really is mostly relying on the room, mike so I was ok with using these plug ins, which are the usda ocean way and the u eighty two to four, which are two of my favorite most of my favorite river bs in the box or you eighty you ladies really making some the river bs these days they're different than my outboard ones, but again, they're equally is useful tools they're just different. So I'll play you the complete drums now and you'll notice that it looks like my drum buses aren't sold but that's because I've used that trick of having them solo it all the time and that way when I click on the snare I don't have to come over here and soul of the drum bosa's well, it's just always on here the river bse they're doing something. They're not really doing that much though it's and a little bit of sustain in space, but they're not I'm not really creating a space with, um I'm just kind of adding to it if I was actually trying to create a space with reverb, I would definitely use the even tied thousand wasn't the case in this, so now we've covered drums. We have time to move on a base. We got about fifteen minutes or that's, actually, almost exactly what we have. Ok, that's perfect days. Is it going to take a lot of time from one quick question? Vocals? Yeah, sure, yeah, just a one quick one that I don't like going pulled up here uh, sam guyana says, hey, chris, when you have two main vocal tracks, do you bust them internally and then run them to your vocal camp? Or do you use each channel or print them? Excellent question and that's something that I actually figured out the hard way when I first started trying integrate hardware compressors live like I have been today into my set up, um, and I'm actually touch on vocals in the next segment. But this is a great time to talk about that too because I could talk about it pretty quick the problem that happens if you some multiple vocals that aren't so there's a big difference in summing a multiple vocals that air layers that are all doing the same thing versus like vocal one and vocal to a lot of people know what vocal one of oak two means but if you're not familiar usually when you have a second vocal track like vocal to that means that part of vocal one at some point overlaps over vocal to or vice versa and you can't do that on the same track without fading and doing goofy stuff you have two tracks so what you have to do is send each main vocal into a separate compressor or print them separately because and you can take your whole vocal group and do some light compression but if you're really trying to get like a nice compressions even compressed even sound on the vocals what happens when you try to some two vocals that layer over each other is you create one point where there's a really large jumpin gain and a large jumping gain means a larger jumpin gain reduction and a large german gain reduction means that it's turning down the compression the amount you told it to initially on the single track but is doubling that so instead of getting this nice, even vocal sound when they overlap they double in gain, and then they double in the drop of gain. But it's? Not quite a double, but but they'll drop in, gained quite a bit. So instead of getting the desired effect, you're actually just losing your vocal whenever they overlap. And you're getting weird pumping vocals. So if you're doing anything drastic, it all and me personally, I don't ever compress a vocal bus. Every once in a while, I'll put a limiter on a screen bus if there's like tons of different layers and stuff coming in and out, but really that's stuff, you should automate and let the compression do its thing on each single channel.
Class Materials
bonus material with enrollment
Ratings and Reviews
user-0620d8
OK I bought this course to watch at my leisure. Lots of Respect for Kris - if you go to his personal website, his experience and track record (no pun!) is impressive. Clearly he knows his stuff and has developed a very efficient way of working. I am a singer songwriter in the UK with many years of experience playing live. I have my own project studio (Pro Tools 11, lots of vintage hardware, UAD, Avalon, Tube Tech etc) and all the software plug ins, virtual instruments. Also a comprehensive guitar collection, acoustics, electrics, keyboards, DW drums etc. My problem is this. here again is a well organised Creative Live presentation with a competent presenter, but the content is inappropriate for the majority of viewers. Like many people watching this stuff, I find the material used to demonstrate the techniques is awful. Grahame Cochrane is the same - over produced American soft rock which has absolutely no musical or creative merit. This 'music' isn't going to stand the test of time and will be gone within a year. I understand that the material isn't Kris's personal stuff, but he says he likes it and I'm sure he does. But what your listeners want to hear is how to produce recordings which have space and clarity. Listen to Jackson Browne, Mary Chapin Carpenter, Mark Knopfler, Ry Cooder, Dylan, Van Morrison - these artist's recordings are the ones to emulate! So please, can we kick out the over compressed X Factor style stuff and get back to basics? Show us how to get quality sounds and how to create space in a mix. Its the natural sounding music which will be with us in 50 year's time - just like the Motown stuff is now. No doubt there is a whole generation out there who think this sort of material has credibility, but I have to tell you it has almost no musical or creative merit, and I for one don't need to know how its produced.
user-7d32b7
This was the single most helpful source of information for improving my mixing that I have ever come across. I loved it and i know everybody else here will too. Buy it so this man can come back again
a Creativelive Student
Awesome course, super relevant as Issues is my favourite band and as a producer/engineer I aspire to their tone, the drum mixing was especially great, just a shame that there was no mention of electric guitar mixing