Lessons
Introduction & Overview of Skillset
01:07 2Pattern Envelope Overview
07:18 3Measuring Your Body
01:59 4Cutting out the Pattern
04:09 5Understanding Fabric Anatomy
02:29 6Cutting out the Fabric
16:39 7Fusing the Interfacing
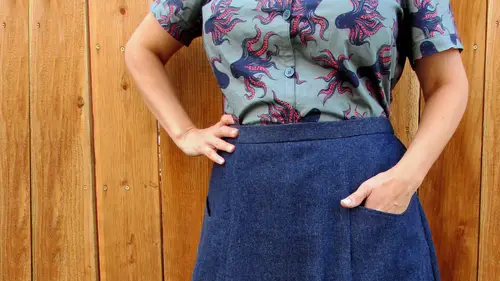
02:40 8Sewing the Pockets
12:03Lesson Info
Sewing the Skirt Body
We're going to start sewing the fronts of our skirts together now that we've got our pockets sewn on, so we have two pieces cut on the fold here one is the skirt front, the other one is the skirt back the skirt front is only going to have a single notch on this scene along here, and the skirt back is going to have a double notch that's pretty universal, most commercial patterns and independent patterns they're going to use one notch to designate the front of something and two notches to designate the back of something, so we're not going to use our backs crew piece we're going to use our skirt front pattern piece number one and the two side fronts that we've sonar pockets on already I'm gonna grab my skirt front and open it up so that the right side of the fabric is facing up in me I can see that I have single notches here one on either side and that's going to line up with the notches that are on my side front that I've used for the pocket so you want the single notch side to match up...
not the notch side that has these two notches one on top of the other this is going to be our side seem this other single notch goes over here just like this, so this is what the skirts going to look like once it's finished being sewn in order to sew it, we have to flip it right sides together so I'm going to take this side my skirt side friend and flip it right side together line up my notch and put my first pin in along this notch edge then I can kind of work up from there to make sure these edges there is even a ce possible I definitely want to put a pin in where the top of my pocket is because that's a little lumpy in it may move around a couple of other pens up here to keep the edges together. We're going to stitch from the top of this edge down to the bottom and we're going to do the same thing on the other side and that's going to so are screwed front together completely so a couple pins in on this side try to make sure that your pending with your fabric smooth this way in addition to being even on the edges don't skimp on your pins, pins equal control I can fold this out of the way a little bit to do the same thing on the second side right sides together pin is not his first and then line up from the notch up and then the notch down a soon as I've got this pinned I'm gonna go back to the sewing machine and we're going to do a straight stitch two so are pieces of fabric together at the five eighths or one point five centimeter mark on her sewing machine, so now we're gonna so the seams down the center of the skirt in the front a tw the five eighths of an inch mark or one point five centimeters with a straight stitch so if you're looking in your pattern instructions, you'll notice that it doesn't tell you where to line up at the edge of the fabric on your seem allowance line the previous step it said three eights of an inch or edge stitch at one eighth of an inch the seam allowance that's a default seem allowance for this pattern like I said, it's five eighths of an inch or one point five centimeters so the step doesn't tell you where to so that's the seam allowance to use snap your threads and then the same thing's gonna happen on the other side that we've pinned I like to, so from the top of the garment down to the bottom pretty much every time I so so it doesn't matter if your pins are on the top of the fabric or on the bottom of the fabric that's one reason why I like to have the pinheads sticking out like this no matter what it's easy to take them out as you go right snip your threads and then we're ready to do some zigzagging we need to do is zigzag edge finish on this because this is woven fabric, and it will just start to fray, so just doing the straight stitch doesn't give us the strength we need on the inside of our government, for it to be washed and worn over and over again. So I'm going to set up for a medium sized zigzag on my machine, and I'm going to say this exact stitch at the one centimeter mark because that's what's going to get it really close to my stitching without sowing over the stitching into the outside of the fabric. I want to keep it in my seem allowance, but if I get pretty close, that means that they control off some of this extra fabric that I don't need. We've used the seam allowance line to put the stitching in the correct spot, and we really don't need to have all of this hanging out on the inside of her skirt anymore, so I'm gonna do my zigzag stitches to prevent all of this from fraying, and then I'm gonna trim off any extra fabric, same thing on the other side of my skirt, I'm going to cut, so I get pretty close to the v's of my zigzag, I don't want to cut through them if you did, you could just so a little zigzag over where you cut the idea here is to reduce some of the bulk of this seems so it's a little more comfortable to wear trending on that off, and then I'm gonna head over to the iron to press these seems so they're nice and flat. So the first thing I want to do is to press that these stitches, just like I said them so that I can really smooth them out and kind of melt them into the fabric and using a cotton thread. And when I'm sewing on cotton that's really going to make it nice and smooth, so I take my own straight down on top of everything and hold it there for a few seconds to really smooth everything out, and then I can open up this seem allowance and it's gonna wanna press so it's pointing towards the center of the skirt, the weight of the pocket kind of pushes it in that direction anyways, so we're just going to not fight that fabric to do this correctly, place your iron down on this side of the fabric to hold onto it, reach your hand around and give a little tug to make that nice and tight. Then you can slide your iron right over that seem allowance and hold it there to really plus it flat you can use some steam if you like. Then skewed yourself up and do the same thing over again nice and smooth last little bit to the top edge here once you're finished doing it on this side if you like you can turn it over and do one more press on the outside that's going to make it super flat and professional looking be careful with some fabrics because some fabrics that have a linen in them the iron will create a shine on your fabric you can use a press cloth to do it on the right side if you're worried about it creating a shine you can try it on a scrap of your fabric first we're going to do the same thing to the other scene and then we're going to repeat the entire process where their skirt back so you'll pin the skirt backs together just the way I pinned the fronts so you're straight stitches so you're zigzag stitches do your trimming and you're pressing the on ly difference with the back is that the steam allowances are going to press out towards the side scene instead of in towards the middle so this step is when our skirts starts to look like something we're going to take our back and so it to our front along the side scene the back is much larger than the front so if you place them down on top of each other you can see this don't be worried this is correct we are going to start out with this side seam here, I'm going to lift it up and lay it right sides together, back to front and you can see that my two notches match up really nicely along this edge, designating our side seen same exact procedure that we used for sewing the front together and the back together, pinning all along the edges. Then we'll do our straight stitching from the top to the bottom are zigzag edge, finish trimming and pressing. This time when you press you want to press the's seem allowances, so they point towards the back of the skirt for this other edge. I have to actually lift this up and make it match. This is pretty common with sewing. A lot of the times were not sewing identical pieces to each other, so they are going to feel a little weird and you're the one that's in control here you have to pick it up and make it match with your hands and then hold it in place with the pins, so we're going to do these seems exactly the way we've been doing. The previous seems straight stitching both of them zigzagging, trimming and pressing. The only thing now you've got a lot more fabric. The weight of it is going to want to pull you off of your seem allowance line. So try to keep the bulk of the skirt on the table as your sewing. You also want to make sure that some of this stuff here doesn't start to creep up and get stuck in the scene that you're sewing. So try to keep that pushed off to the side there, and I'm going to start out with my straight stitching.
Class Materials
Bonus with Purchase