Lesson Info
2. Studio Essentials: Flash Exposure
Lessons
Day 1
1Studio Essentials: Shutter Speed
15:50 2Studio Essentials: Flash Exposure
22:26 3Studio Essentials: White Balance
21:15 4Light Principles: Inverse Square Law
26:46 5Lighting Patterns
15:29 6Shoot: Demo Lighting Patterns
28:06 7Quality of Light and Modifiers
09:59Shoot: Choosing a Modifier - Diffusion and Grid
13:40 9Shoot: Choosing a Modifier - Umbrellas
31:01 10Shoot: Choosing a Modifier - Softboxes
21:08 11Shoot: Choosing a Modifier - Extra Stuff
28:10 1210 One Light Set-ups: 1 and 2
17:07 1310 One Light Set-ups: 3 to 5
18:16 1410 One Light Set-ups: 6 to 10
15:57 15One Light Set-ups: Pop Quiz
21:21Day 2
16FAQ for Purchasing Studio Light Part 1
31:00 17FAQ for Purchasing Studio Light Part 2
25:36 18FAQ for Purchasing Studio Light Part 3
43:53 1910 Two Light Set-Ups: 1 and 2
24:29 2010 Two Light Set-Ups: 3 to 6
25:24 2110 Two Light Set-Ups: 7 to 10
22:30 225 Two Light Set-Ups: 1 & 2
13:27 235 Two Light Set-Ups: 3 to 5
33:37 245 Basic Three Light Set-Ups: 1 & 2
21:05 255 Basic Three Light Set-Ups: 3 to 5
25:52 265 Intermediate Three Light Set-Ups: 1 to 3
17:14 275 Intermediate Three Light Set-Ups: 4 & 5
12:58 2810 Common Lighting Mistakes
16:46Day 3
29Solving 12 Common Problems of Studio Lighting: 1
39:29 30Solving 12 Common Problems of Studio Lighting: 2 to 6
37:25 31Solving 12 Common Problems of Studio Lighting: 7
15:50 32Solving 12 Common Problems of Studio Lighting: 8
25:51 33Solving 12 Common Problems of Studio Lighting: 9
16:19 34Solving 12 Common Problems of Studio Lighting: 10 to 12
26:11 35Portrait Lighting: 1, 2, and 3 Lights
14:51 36Beauty Lighting: 1, 2, and 3 Lights
18:06 37Lighting Groups: 1, 2, and 3 Lights
15:53 38Lighting for Drama: 1, 2, and 3 Lights
24:19 39Your First Studio Lighting
38:46Lesson Info
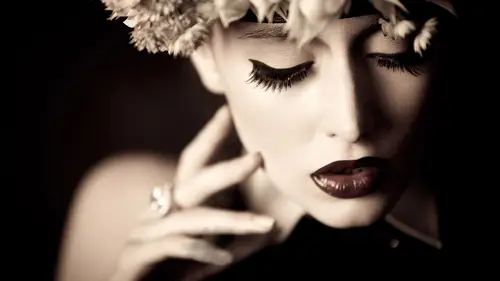
Studio Essentials: Flash Exposure
The next thing that will be talking about are the settings in your camera that actually change how you're strobe looks the exposure because your shutter isn't going to make a difference in your weight balance isn't going to make a difference to the exposure of your stroke, but aperture and I also will so when you are shooting in the studio let's, take a look at all of the different things that will change how this light looks. There are four main things, and this is really good snow, because sometimes you can't change one, so you've got to change another, like, for example, maybe maestro output. Ok, so let me go through what they are first one is aperture, and so I'm assuming most of you that are watching have some idea of the maybe you've heard of the exposure triangle, basically, what changes the exposures in your images? We'll aperture is the size of the hole in your lens, and the bigger that hole is, the more light it lets in smaller the hole is, the less light it lets in. This is ...
your number one control in camera for changing how your strobe looks, so we'll put a slide up for that as well, eh, so you're probably familiar with I suppose the sensitivity of your sensor to light so if you're in a low light situation right you bump up the aisle so you make it more sensitive to like you could do the same thing in the studio next one is strobe output which basically means on the back of my strobe do I turn it up or down like how much power my telling it to give me and then the last one we're going to get into in another segment but this will affect the flash exposure and the distance of the light so we're just going to talk about these ones right now but we will definitely get into the last one all right? So as I said actress or how much light do you let him okay, so I always use my bucket of water example if anyone has seen me present on lighting I will mention this over and over and over and over again when I was trying to figure out how light works because it's kind of a funky things like it's not tangibly gauge how does light work I compare it to water and if you think of light like water it actually helps simplify a lot of the things you're trying to figure out um so for example uh with africa if you've got a big bucket of water a big bucket alike and you've got a really tiny hole to throw it through when you toss that bucket of water, most of it doesn't go in right hits the edges of that whole being a little bit of water through, however, if you've got a gigantic hole to throw that water through, all of it goes right through so that bucket of water is like, so if you think of it in the studio, if your exposure from the strobe is just really, really bright, if you make the whole smaller, less water gets through so the picture won't be as bright or the subject won't be is wet. But if for some reason you're taking a picture it's just too dark, if you open up your aperture, you make it bigger, you're letting more light through, you're going to let make that exposure be brighter. So that's your main control in camera of how you are going to change your exposure, ok, so the next one is I esso, and that just changes the sensitivity to light and you guys have probably experiences on location. Like I said, low light condition, you bump up the ice so every single look brighter. So how I'll use this is maybe I'm shooting in the studio, and I don't know, maybe I put my camera and I s o four hundred. And I'm trying and I've got my light turned down all the way and everything still too bright and I'm closing down my op richer and now I'm not like f sixteen everything still too bright well, the other tool you have is maybe your eyes those too high you can lower it down four hundred, two hundred one hundred two these things all kind of relate together and their tools you can work with then you have to remember as always after tricks but affect step the field and I esso eventually you'll run into noise so it's like you just kind of balancing these things in your head and the last one is how much light does your strobe actually put out? And so if you already know what I also you want to be at and what aperture you want to be at, you can leave those b and ideally just change the output of your stroke so that's usually my go to like I walk into a studio space I know what I want my opportunity be at I know what I want my shutter speed to be at I know what I want my so to be and then I see if I can make the strobe match what I wanted to be by turning it up and down, I will talk a little bit about how to figure out if you're set at the right settings so all right so this is what I come out with um when is choosing a studio strobe will talk about this tomorrow you have to look for things like wattage which just means how much like how big is that bucket like how big could that actually throw water how much water is contained in that light source potentially the other thing that you're going to want to watch out for in we'll talk tomorrow is the variability of the stroke how far can you turn it up and how far can you turn it down and this will depend on like what size space or you win are you trying to overpower the sun or light really big spaces or you in a tiny little space this will make a difference from what you select for your wattage of lights and then the variability of your stroll but that's just a variable will talk about tomorrow as well and we're going to talk about distance next ok so let's kind of put some of these things together can I have my lovely model for a second? All right, so I get this question all time hi, how are you? You can take a seat um okay the question I get all the time is actually on the next slide do you need a light meter? And if so, which one do you buy okay, so I'm ready for the hate mail I'm totally ready for um if you're just starting off, it is a useful learning tool but you can make great pictures with or without a light meter in the past when you're shooting film and so this is what I'm saying is applying to people they're using digital photography de eso lars or whatever it may be in the past what would happen is you had to use a light meter to know if your light was set correctly for your camera nowadays, if you were shooting raw, you can chimp on the back of your camera to know if you're close enough. The reason I'm telling you this is twofold. First of all, if you're looking to invest in studio gear and you just don't have the money don't feel like you can't light or like you're not going to be good at studio letting it's not the case at all. The second part is now that I am more comfortable with studio lighting, I will just tell everybody I hardly ever use one it is very seldom feel free so like send the hate mail I'm ok with it I know how to use when I know when to use one the number one time that I use my light meter is when I know I have to get something exact and be able to reconstruct it in the future I can always get it toe look right by chipping and because I know my life, but if I need to recreate it, I use you want to know exactly what everything should be set at so let's just roughly take a look at how these things all work together. All right? So if I go ahead, I'm going to step on my camera right now the things we've talked about so far I'll get to white balance in just a little bit, all right? So I'm gonna set my white bones, but we'll talk about it, all right? So I said you want to set it at or near your sink speed, so I'm shooting in manual so everybody who does not shoot in the student have never done this before. You need to shoot in manual, you can't shoot an aperture priority, you can't shoot, everything has to be manual don't be overwhelmed you have control of everything it's not like outdoors where manual maybe the cloud comes in and the new the exposure's rot like everything's under your control. So set your camera on manual exposure settings, then the first thing I'm going to set is my shutter speed and I'm going to set it to one two hundredth of a second because that is my cameras sink speed, all right? The next thing is I'm going to set the cell and I also generally that also is whatever the lowest my camera can do natively so mine is I also one hundred. I know some people out there your eye so might be two hundred for certain cameras. That's the lowest it goes it's fine really makes not that big of a difference. So I've got my shutter speed set. I've got my eyes so set and now I'm like, ok, so let's get this strobe ready, but I have no idea what power it's out where it should be. I I'm just going to turn it on and see what it looks like. Ok, so one thing you can do is you can guess I'll tell you how to get rid of the guest work. Well, you could do is you could say. All right, let me take a shot here. My lovely model. Oh, trying to trigger. We'll talk about that later to get and make sure. Everything's. Okay. So if my friends will bring up light room or the tethering system will take a look at this so you can look at your photo and I decided I was let it be whatever it was up there and I shot at f ten, ok, so here's, the downsides, upsides. So this is I could look at us come ten right now and I can decide if I like that or not like you could make a judgment decision if that is too light or too dark for you. Ok, so let's say I'm looking at it and I think I think it's a little dark maybe so let's go to what our controls are what can I change to make this brighter? Well, the first thing I could do is I could turn off the power of the stroke right now notice it's all guessing so this is like kind of a guessing game you can try to get it right this way so I just bumped it up a few points we'll see if it looks any better so maybe I think this photograph looks better and I control I didn't change a single thing same aperture, same shutter speed same isil all I did was change the output of the strobe so that's one place you could start okay, so now may do a different example of what you could dio I'm going turn it back to where it wass so we go back to our two dark of photo perhaps okay, so this is going back to the original settings on the strobe original settings in my camera well, the next thing that I could do is I could look at this and say all right you know what? Maybe my strobe is already at its highest or lowest power? I can't change it, so I can say it's a little dark, what can I dio toe, let more water and let more light in? Because I want a light in that exposure up? I know I can open up my aperture, I'm going to make that whole for the water bigger, so that it's going to be brighter. She'll be wetter from the light, so let's, open it up and I was a half ten ten to five camera said, if you're half stops, quarters are third stops let's say, I want to pop down to, like seven point one pence and I every camera set pop down a little bit, give this a try, ok? All right, so now every time what I did, ok, I wanted to include that because if you've never seen the black bar, if you've never been in the studio, you have no idea what I'm talking about. This is what I'm talking about that you'll see if you go ahead and you shoot faster than your sink speed. So my cameras to two hundred and I'm at two fifty, so this is something if especially if you're not familiar with your camera and you're trying to change shutter speed and apertures. And you just don't realize that you bumped it this will happen all the time you get used to it all right so but I look at her let me fix it now it's a correct sync speed I look at her and now this is a better exposure for me in my opinion without knowing any numbers the other thing I could do is maybe let's say that I won't pretend my light is really weak okay so this is I just turn down the power let's pretend my life is a really weak light we have very, very low wattage not much output all right so I look at it and right now it's really dark but I don't really want to go really wide open maybe it's I'm photographing a little kid okay? And I don't really want to have to open up my aperture two two point eight or something because they're moving around I think I'm not going to get them in focus so perhaps I feel comfortable shooting at a toe or seven point one in this case but my light it's a weak light I can't turn it up all right my aperture I don't want to mess with that and only shutter speed doesn't make any difference so the last thing I can change is I can change my I sl and so that if I take my eyes so from one hundred tio try four hundred maybe a little bit darker I can get it much closer stir are so so far when you notice everything's been guessing and everything is me just kind of looking at the back of my camera and saying do I like it are so here the pros and cons of that all right, so one of the benefits of just looking and guessing is that you don't have to have another piece of gear right? You don't have to buy that light meter if you're on a really tight budget another benefit is sometimes what looks good to you is not necessarily what is correct to the meter like I like to shoot my skin tones a little bit overexposed I like to shoot them a little bit brighter and so if you're given exactly what the light meter tells you exactly what you're supposed to do it it might not actually be what looks best the downside of that is several fold for example I'm guessing and it takes time like if you were on a tight schedule and you want to make sure it looks good well I'm chipping and I'm changing things like it might be easier have a light meter that just tells me what it's supposed to be set up and the other thing of course is the back of your screen some people maybe it's not exactly accurate maybe it's not the best way to look at your image so if you want to use a light meter, this is what you would do and the light meter that I have here is the sick connick late master pro l forty seven eight tr here's the good news any light meter will work it doesn't matter it could be twenty five years old it's doing the same thing it really doesn't matter the thing that's cool about one of these it's it's touch screens little fancy and if you have one of the nicer meters you can actually trigger your flash from the meter instead of having to hit the test button to make it flash you'll see what I'm talking about there are other things that it does but good news and inexpensive one sixty, seventy bucks well totally do the job or if you know somebody who has one that doesn't use it anymore and you want to give it a try especially trying to learn photography, use whatever they have all right, so what I'm going to do is I'm going to set the things I already know from my camera so we already said I s o one hundred is where I wanted to be from setting that in my meter and I already know that I'm going to shoot at one, two hundred of the second so I've got that so what this will do is when I have her hold this and I triggered the flash it will tell me that last piece of the equation it will tell me what aperture I should be shooting at and so it takes takes out that guessing game and it lets you know roughly where you're supposed to be. All right, so if you've never used a light meter before a couple things to consider their absolutely like you could actually teach a pretty decently long class on light meters and like don't men and now and where you're pointing in lace lately shoes and that's too complicated for what we need so here's the basis of what you need to know what the dome out anyone in appointing you don't want to hold it like here, you want to hold it right next to her face or have her hold it because because if I'm really, really close to the light it's changing what it will read for an exposure, so you can't just go over there and say like, oh what's my light reading and hold it here the light is going to be drastically different and you'll get the wrong reading so you do actually have to have a hold it basically right up next to her face and where I do what I do is I have her point it back towards the camera and I have her put it on the highlight side of her face. Like the side where the lightest if your lights centered you can hold it in the center but for example, if my light was like way over here, I wouldn't want her to point it this way because it's not getting the light it's getting the shadow side so if it were over here just kind of more less pointed towards that light, so we're going to try it right here and let me just hold this it's cool exactly. So there's a button on the side it'll say measure it's gonna be that one, but I've already hit it for you, so just hold it right next your eyeball and you can hit the test button on the back of your strobe. You could take a picture if you wanted, but it will give you a little flashlight. Perfect. So what this said, I don't know if you guys can read this, but what it told me is based on the settings that I gave it I s so one hundred one two hundredth of a second where this latest placed I should use an app pressure of five point o so it's getting rid of that question mark for me, I could just fiddle around until it looks good, but then this gives you a little bit more accuracy, so let's, take a look, I'm going to put those settings into my camera I s o one hundred one, two hundred the second five o and let's see if it looks good if I like it perfect and it's pretty perfect exposure so that would be a benefit. You get it right right away here making sure that you're close, but you can guess. And if you don't trust yourself to guess that's another reason like maybe you don't quite know yet what over exposed is like your eye? You don't feel confident, you know what too dark or too light is you're not there. You just want to make sure it's a good correctly exposed photo that would be a use for light meter. All right, so can I go back to the keynote for thick? All right? So just to give that little summary dome out generally on the side of the face where the main light is this case just a little bit to the left hand side, sometimes different flashes have different modes, like if you see a sunshine, that means it's looking for ambient light, like if you're outdoors using the light meter so in the studio and you want the little flash icon oh, you set your eyes so you're shutter speed and you test the light and that's how it works, it's like the very basics of using light meter so I'm going to summarize where we are so far and getting this all set up so far we've got our shutter speed figured out you want to shoot at or near your sink speed which is usually around one two hundredth of a second and not slower because you pick up ambient light okay part number two your am pressure you can pick whatever app assure you want there are some downsides of picking certain apertures what I usually do in the studio it I pick f eight and so that's what we're going to use a fate or f eleven that's what I'm going to use most of the time and here's the reason um shooting in the studio right now for her I am not trying to have a narrow depth of field like a nice blurry background because I'm just shooting on gray or white like it's not like there's any distraction I'm trying to get rid of and I'd rather not shoot at like four oh and have a chance of her moving and I happened to get the focus off like essay I'm I'm going to get her and focus the other thing as many of our lenses are sharpest around faa f eleven area so this is going to be a number that is a happy medium no matter what lends you have if it's ah you know really expensive high end land or lens or if it's a kit lands so we're just going to say, f eight. For now, you can shoot at two point at one point for if you wanted to, and your lights had that ability, we're going to stick right in the middle. And I would say ninety five percent of the time I'm shooting estate or f eleven, unless I'm not paying attention, which happens next one s o, whatever your lowest, I also is, unless you need to change it for some reason, and we talked about hope. Strobe output makes the difference. I s o n aperture. They all kind of effect what this drug looks like.
Class Materials
bonus material with purchase
Ratings and Reviews
BolesMA
If you're on the fence about this class I can easily answer your concerns. BUY IT. Lindsay provides top notch professional education while keeping things interesting. Her words are precise and direct. I actually felt GOOD just watching and learning. I mean, like someone surprised me with a cupcake kinda GOOD. After the class I could immediately see improvements in my photography. The best part is that I learned enough to see the wrong in my setups. Knowing what's wrong is just as important as knowing what's right. She is funny, easy going, energetic and filled with knowledge. I would also highly recommend her Posing 101 class as a must have addition to this course. I feel like I have learned more than I could possibly use. I will be going through this course over and over again just to make sure it all sinks in. There's THAT MUCH she offers that you will always learn more with each time you watch. I hope this helps someone make the decision to up their game. That is exactly what it did for me.
Jason Ashley
I loved this course! Lindsay spent so much time with explaining each set-up in-depth that anyone picking up a camera could understand how to accomplish their lighting goals. This course covered so many unique (but, most likely to come across scenarios) and how one would approach the challenge and how to successfully accomplish with incredible results, not average-sub-standard or basic results, but above entry-level standards, high-level, money-generating lighting expertise! ZERO laziness in her explanations to the point where she is constantly refining her course in the middle of the 3 days. Her passion gleams throughout each days lessons with so much energy. You know she really wants her students both in-person and through the screen to be successful in whatever type of lighting they choose to dabble in. I am so happy, I have bookmarked, and i'm so happy and fortunate to have this course to reference for hopefully –everrrr. Thanks!
Beatrice Palma
Hi, I am Beatrice from Italy. I think this class is superb. I finally understood what are the guide lines to follow, I tried for years but never found such a good explanation. Lindsay is a wonderful teacher, she explains in a simple way, she shares a lot of knowledge and she shows in practice what are the results of every single choice. Thank you so much, it was really amazing and super interesting!!!!
Student Work
Related Classes
Lighting