Lessons
Lesson Info
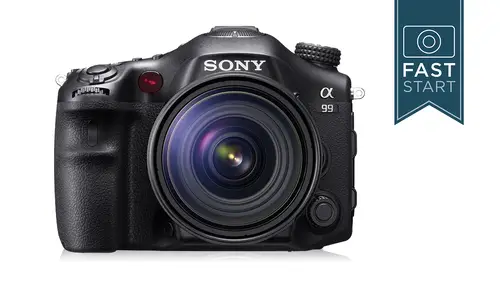
Displays
We talk about the displaced. We're of course, talking about the lcd screen on the back of the camera as well as the e v f, the elektronik viewfinder that this house and so remember as we talked about before, there is a button on the top of the camera that you can manually switch back and forth to, or you can have it done automatically. When you get into the menu system, you get to choose whether it's manual or automatic. And so if you are working with the back of the camera, the lcd there is this kind of navigation window that you would mostly use if you are using the viewfinder and this is going to give you all your pertinent data, including a live history. Graham, along with shutter speeds, apertures as well as most of your other settings by hidden the display button. You can see the image and you can see more or less information depending on what's important to you and so there's. Lots of different options in here. I kind of like to have my screen pretty clean, so I usually do the n...
o display info just so that it's real claim with all the most important information, but sometimes it's nice to have that history ram up there. Or sometimes you're making a lot of other settings, and you just want to see all those other adjustments, so just remember to keep hitting that display button to cycle through, to find the screen that you like to use. When you're in the playback mode, you're gonna have the playback button, and then you can use that display button again for changing the display and so there's different types of information for checking the exposure I'm gonna gonna want to take a look at that history and make sure I'm not clipping the highlights with shadows too much, but a lot of times, I'm just using the image only just to see if I got the composition and everything else looking good and camera. All right, so by pressing the finder lcd button, you can get it kicked over to the finder view, if necessary, and what you see through the viewfinder. Ok, so when you hold the camera to your eye, you see elektronik two point four million dots representing the twenty four million that you're actually getting off of the sensor, and this is using an ex g a o l e d system for anyone who's into the technology that's behind the scenes on this one now this is a hundred percent view finder on some other cameras, you you need to be concerned whether it's a ninety seven a lot of the amateur cameras were ninety four percent accurate which means you're getting a little bit more beyond the edges then you would normally get so on this one you could be very precise about the edges of your frame you know you're getting all the way to the very edge it is also a magnification ratio point seven one which is pretty typical but for those of you who have other cameras you can compare how that number is but it's pretty typical kind of unusual on this camera is that we have a line of information on the bottom side and the topside because it's an electronic viewfinder they're able to do things canon and nikon can't dio and so what I do like about this is the bottom line of information is very, very clean it's very very simple a lot of the other companies just cluttered up with everything they can think of but in this case sony's put kind of the top line of extra information but the bottom line is the critical line of information now we're going to get into the focusing system because we're going to be looking at the focusing points and one of the things that I would say puts this camera in the trailing category of other brands is it has only nineteen selectable auto focus points the competitors have upwards of fifty focusing points and so there are nineteen focusing points and let me show you exactly what's going on with these points. There are eleven cross type points, which means that there are eleven focusing points that are looking for both vertical lines and horizontal lines of information. The other lines, some of them are looking for verticals, and some of them are looking for horizontal lines. Now one of the options is to choose all focusing points, or you can choose one particular point. And so those eleven that are cross type are kind of the ones that you would want to keep in mind. Because those are the ones that are, well there, better performance than the other focusing points as a whole. They work is a very nice system. The other thing, that's, a little bit of a complaint to my my thoughts is that it doesn't cover very big of an area. Not only is it a small number, but it's not as big of area, it would ideally be nice. My ideal camera would have a million for every focusing, every pixel would be a focusing point, twenty four million focusing points that's what I would like, but short of that, it would be nice to cover the frame more fully from side to side. And it is relatively small but we're going to address that in just a moment all right so you can select the entire all nineteen points which is very good for action photography if you choose spot focusing it is just the center point and there's some things that don't make sense in all camera companies do things that don't make sense and one of the things that sony does that doesn't make sense is they have spot in local and the only difference between spot in local is with spot you're in one spot and can't move with local you could move it to any individual spot including the middle spot that you want they could eliminate spot and it would have all the same options it's just in spot I guess the advantages is that it won't get bumped out of center because you do use that little joystick on the back and that joystick does stick out a little bit so maybe now I'm understanding why they put spot on there as I think my way through this classic and then finally you have zones where you can choose the left zone the middle zone or the right zone and so if there is one particular area that you want to put your subject you can choose that group of focusing points and so when it comes to the focusing system it's a little on the wimpy side so far so what they decided to d'oh and this is what kind of hit the internet in rumors ahead of time people got people very excited because they didn't know what exactly it meant is that they have and this is the focusing system in the top of the camera kind of like the traditional focusing system that other cameras have but embedded in the sensor, which is something that the other guys generally don't do in their sl ours it's done in a few other mira lis cameras, but it's very rare is they've embedded focusing sensors well under the image sensor itself. In fact, they have one hundred and two plus all the previous ones that we were just talking about embedded on the sensor that is covering a much larger area now, frankly, it seems like the engineers accidentally turned the sensor sideways when they mounted these into the camera because its vertical and it seems like it should be horizontal, and I don't have an explanation for that, but I think they should have turned it ninety degrees, but in any case, you have one hundred to assist points. Now you can't select any one of these points, but they're going to be there to help out focusing in a number of scenarios, and so the first type of scenario is the autofocus range that we talked about before, and this is where you might set a range of fifteen feet let's go international because we have a big international. Don't we have a big international? Okay, let's go ten meters to forty meters. You could focus on ly within ten and forty meters, which means your lenses and then a search that other area, which means it has far less distance to go it's going to get there faster if necessary and so that's going to be a good technique now. The way you would do this in the camera is he would press the range button, and then you would either turn the back dial for the near side or the front dial for the far side and there's a little graph that comes up and it's very quick and easy to work with, and so you can get your shot set up and that rain set up usually in three seconds. Very quick to work with the other thing that's going on with this if I get this to the next slide is with the a f d depth map assist continuous auto focus just rolling off the tongue barrier. So you've got to have one of those six actually now at seven lenses and what's going on is that the cameras the focusing sensors on the sensor itself are assisting and lending guidance to the other focusing sensors. And for a camera that shoots at ten frames a second, and it does, and I know it's in the crop mode. So it's, a little bit of a catch there, but it can focus, and from my test it focuses really well. And there is not another camera out there that shoots full frame at ten frames per second at this price. Now you can get yourself a cannon, one d x or a nikon d four roughly twice as much money, and you can do it full frame at near those speeds. But even then, you know there's, some catches on on frames per second and focusing and so arguably it's the best in its class of doing that. But at normally normally full frame, you are at six frames a second, which puts you on par with the cannon five d mark three puts you couple frames per second faster than the nikon d eight hundred, but that's shooting thirty six megapixels just by comparison, and so it competes with the comparable cannons and icons. It just does so with kind of kind of in a different way. Ok, somebody was asking about this grids. It has elektronik grids that you can turn on in the viewfinder, so the first option is the good old rule of thirds. And so if you want to break your scene up into a left and right, you could do that right in camera. Some people don't like following those rules, and so there's other grids for you. You can just do a bunch of square grids if you want. If you are an architectural photographer, you want to make sure your vertical lines or vertical, and then if you want diagonal lines in there, there's another one with diagonal lines as well. And if you don't like any of that stuff, I kind of like to keep my screen nice and clean, so it's, easy to see what's going on. I'll just turn them all off, but you will see those focusing points in there.
Ratings and Reviews
a Creativelive Student
Amazing... The sony corporation should give a gold medal. Congratulations on the professionalism and elegance in worshop. Thanks 'John Greengo and all Creative Live team for providing such a wonderful experience.
a Creativelive Student
Congratulations CreativeLive and John Greengo for stepping outside of your more typical Canon/Nikon comfort zone and giving us this introduction to the A99. I have never seen any pro photographer treat this camera as fairly as John does - least of all with this much enthusiasm. John's course is thorough, comprehensive and very enjoyable and, once I'm able to, I will be purchasing this camera. With any luck. Now I'm looking forward to a course from John on travel photography that's just as brilliant.
Bob Wurst
I don’t have the Sony A99, I have the Sony A65. It doesn’t have all the features of the A99 but it has many of them and this course helped me understand them better. The material is very thorough and well presented. Thank you John Greengo!
Student Work
Related Classes
Camera Guides