Lesson Info
7. Back Side Controls: Function Button
Lessons
Class Introduction
16:37 2Photo Basics
04:38 3Camera Controls: Control Wheel & Shutter Release
04:08 4Camera Controls: Mode Dial
26:05 5Camera Controls: Top Deck
18:35 6Camera Controls: Back Side Controls
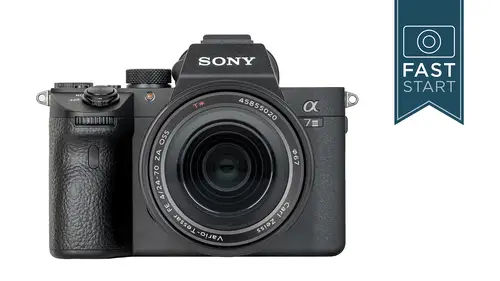
15:00 7Back Side Controls: Function Button
25:35 8Back Side Controls: Wheel & Custom Buttons
10:58Left & Right Side Controls
07:02 10Bottom Controls
04:59 11Front Controls & Lenses
13:16 12Menu Page 1: Quality/Image Size 1
09:48 13Menu Page 2: Quality/Image Size 2
03:56 14Menu Pages 3-5: Shoot Mode/Drive 1/AF1
09:02 15Menu Page 6: AF2
05:42 16Menu Pages 7 & 8: AF3 & AF4
05:56 17Menu Pages 9-11: Exposure & Flash
06:33 18Menu Page 12: Color/WB/Img Processing
08:49 19Menu Page 13: Focus Assist
06:03 20Menu Page 14: Shooting Assist
06:29 21Camera Settings: Movie
07:43 22Camera Settings: Shutter & Steady Shot
08:37 23Camera Settings: Zoom & Display Auto Review
07:13 24Camera Settings: Custom Operation
11:55 25Network Menu
11:19 26Playback Menu
07:18 27Setup Menu
26:52 28My Menu Overview
08:13 29Camera Operation
10:14Lesson Info
Back Side Controls: Function Button
We're on the back side, and next step we have the function button. The function button is a short cut to about a dozen of the most commonly used features on the camera. So rather than diving into the menu system and wading through, what is there like 40-50 pages in the menu system? You can go here and find a nice quick area for selecting the most important features. So, it comes set up for you. You can adjust it, and I'll talk about adjusting it later on. But it comes set up pretty well. So, you will press the function button and then you will use either one of the controls to go up, down, left, and right and select the feature that you want to work with. We're gonna start in the top left with the Drive Mode. So this controls what happens when you press down on the shutter release. Normally, you shoot a single photo. But there's a lot of other options in here and let's talk about what all of these options are doing. So, for basic photography I keep my camera in the single shooting mode...
. And you take one shot at a time and you don't run off too many shots. Next up, is the continuous mode and there are a number of sub-options in here. And so you can shoot up to 10 frames per second. Or just a three frame per second rate, depending on the type of sports that you are shooting. And, you will find that different sports require different shutter speeds. For instance, I've shot a lot of runners. And runners have a running gate and this is kind of surprising to me, and I was a runner for many, many years. All runners run at almost exactly the same cadence. And if you shoot that at six, nine, or 12 frames a second, every other photo tends to look identical. And if you want to get things mixed up, you want seven frames a second, or five frames a second, or 10 frames a second. And that's why you have all these different rates in there that you might have for different sports. And one of the things to note about, when you are shooting at the high plus mode, which is 10 frames a second, that may vary according to some other settings that you'll see on the camera. And the camera does normally shoot in what is called 14-bit raw, which is going to give you the most amount of color information, the most amount of detail information. But if you have the camera set to compressed raw, which is a feature we will fully talk about here in a little bit, if it's set in the compressed raw, it drops to 12 bit raw, which is a little bit smaller file size so that it can keep up with the motor drive in that case, and so there is a compromise in image quality. Now the compromise in my quick opinion is very, very, very small, and so it's not a major concern. Some people get hyped up about it a little bit because something's changing behind their back, but I think it's not a big deal from what I have seen and tested in the camera. Next up is the self timer. Obviously, 10 seconds to get in the shot yourself with your friends or something like that. There's also a two and a five second self timer, which is really good when you're working from a tripod and you don't have the cable release and you just wanna trigger the camera and let the vibrations settle out. We also have a continuous option, which is what I usually do when I'm doing group shots that I'm a part of as well, because if you take a single group shot somebody will always blink on the first picture. And that's why you wanna shoot three or five pictures, depending on how many of your friends are what I like to call blinkers. And we all know a lot of them. Next up is bracketing. Exposure bracketing is the main first option in here, and this is where the camera will shoot a multiple of exposures on different frames so that you can either work with them or choose one later on. I'll do a little demo here in just a moment. We also have the option of a white balance or dynamic range bracketing, and these are a little bit... Well, let's call it truthfully, a lot less useful than these other things but I will talk more about those. Let me talk about exposure bracketing first. So exposure bracketing is shooting a series of photos at different exposures. You'll see this little icon in the camera so you can see that the bracketing is turned on whether it's in single or continuous. Single would be, you get to choose exactly when each of those moments are. Continuous allows you to press down on the shutter release and it fires through the whole series and then stops at the very end, so that they're all taken as close together in time and lighting. You'll have a number of exposures, three, five, or nine options available. And then you'll have a variety of exposure increments that you can use to vary your images from one to the next. So I'm gonna do a bracket series right here, right now. Let's see. Let's go with aperture priority on this one. And so go ahead and get this camera fired up here. And so we are in the function menu. We're going to go into the different Drive Modes, we're gonna go down to the bracket settings. There's single and continuous. I wanna do continuous so that I can shoot a whole series of photos. The first option is point three EV, which is a really small amount, for only three images. And I'm gonna do one stop EV for nine images, so I'm gonna go to the right. You see over here in orange, these light colored arrows? Let me put it over on the background where you can see it a little bit more easily. Those arrows over there indicate that you should go left and right with the control on the back of the camera. So I'm gonna go to the right. And I'm gonna first try to find the correct EV, I'm looking for one EV. I'm up to point seven, here's the one EV. Now do I want it three, five, nine images here. So this is gonna be a big bracket series. And then I'm gonna hit this center button for set here. Now it's all ready to go and you can see the little indicators down along the bottom as to where it's going to shoot all these photos. And I'm gonna press down on the shutter release. It's going to focus. And take all nine photos in one big burst. And I'm holding on just to make sure I got the longest exposure there. So let's go back and play this back. Let me turn on the display, I've taken a bunch of photos. Let me go back to the beginning of this series. Oh wait. Did I go the wrong direction? Nope. Let's see. So here they are. And if I pull up, let's see. Where does my series begin and end? So this is the first picture right here, 5 of 81. That's the normal exposure. And then we have a little big darker and a little bit lighter. Little bit darker, little bit lighter. Little bit darker, little bit lighter. Little bit darker, and a lot lighter there. And so it kind of varies, it goes back and forth. I'm not a big fan of the order of the bracketing, but we can adjust that later on. So if you don't like it, we can adjust for it. So, back to the key now. As you can see we can shoot our nine series bracket in here and there's gonna be a variety of controls in the bracket settings under Camera Settings that you can get into and get in and specifically control more of how this is done. Next up is white balance bracketing, and this adjusts the white balance so that you take a photo that's kind of an average white balance and then one that's a little bit warmer, and then one's a little bit cooler, and you can do this in a low or high setting. This, to be honest with you, doesn't make a lot of sense to me because if you shoot a raw image, you can adjust white balance to your heart's content later on, you can do whatever you want with it. The only reason this would make sense is in jpeg and the jpegs can be adjusted too by this small amount without really a problem. But, if you did want to do it in camera, it can do it. And it's there because somebody has found use for it. DRO stands for Dynamic Range Optimizer. And what this is is where the camera is gonna jump in and shall we say play Photoshop with your images. What it likes to do is it likes to brighten up the shadows, and hold the highlights back. Once again, this is of no use for anyone who shoots raw. If you have raw, you have great control over the latitude of the exposure. And so in this case, in dynamic range, low and high, it's taking multiple photos that are increasingly trying to protect the highlights and brighten up the shadows. And it's a very subtle amount. And if you're looking at these six photos going, they look identical to me, well they look pretty close but the highlight and shadow area is slightly different, and so it may be of some use to people who are shooting jpegs. This tends to be a little bit more helpful with people shooting people shots. Often times you see the faces a little bit better if you're brightening up the shadows. But I think both the white balance bracketing and DRO bracketing are not features that are used on most Sony cameras just because they're not that practical for most photographers. But that is the list of the different things that you can do in the Drive Mode. One of the things you'll notice in the top left of the frame is images downloading to the card. So if you do shoot through a bunch of images very quickly, you'll see that it takes a little bit longer to get all of those images stored on the card. And you'll see that active information up there. And the Sony cameras have made quite a bit of improvement over the years in being able to access other features of the camera while the camera is working on another task at hand. And so playing back an image and getting into the menu has gotten quite a bit easier to do than on previous generations of the Sonys. Next up is the focusing mode. And if you are experiencing deja vu, that is because we talked about this in a previous section where the C3 button was programmed for controlling the focusing mode. So we're not going to go back in and talk about this, but you can change it here from the function menu. So, what this really means is that you can reprogram the C3 button if you don't use it that much, and come in here and change it. Next up is the focusing area, and deja vu once again, this was the C2 button on top of the camera. That's a prime place for reprogramming a button, and so if you don't change it too often, you can just access it here in the function menu. Next up is exposure compensation, and you know, golly gee, there's a dial on top of the camera that controls it but if you don't like using it up there you can set the camera so that you are setting it in the back of the camera. And so a little bit of duplication, you might say. Next up is ISO. Okay, so this is a first. We haven't seen this one before. So ISO is the sensitivity of the sensor in the camera, and this is something that can be adjusted according to the light levels that you're working in. And the standard range goes from ISO all the way up to 51,200. And the native or base sensitivity of this camera, as is most cameras, not all but most, is ISO 100. If you want to get the cleanest, best information, and I'm gonna show you examples here in a moment, you would set the camera to ISO 100. If you need more light gathering ability by that sensor you could then raise it up from there. We do have a number of low settings that have lines above and below them. And so these are not better than ISO 100, but they do allow you to let in more light. The main time that I personally use these is when I'm trying to get a really slow shutter speed, like a waterfall, and at ISO I might be at a half second. If I go down to ISO 50, I can then get a full second for that waterfall and get a little bit more water movement out of it. The downside to all of the low ISOs is that they have less dynamic range than ISO 100. So 100 would be the standard number that you would use most of the time. We do have an auto ISO, which is where the camera will adjust the ISO for you. And the way that it works, is it tries to keep the number as low as possible, down to 100, but it looks at your shutter speed. And if your shutter speed falls below usually a 60th of a second, it bumps up the ISO. The thing about the auto ISO is that it's a very simplistic way of handling the exposure. I like to think of auto ISO as like automatic drive in an automobile. Automatic drive is a great feature to have when you're stuck in traffic and you're just doing simple tasks, you don't have to worry about shifting. But I don't know a lot about NASCAR racing and auto racing but I don't think those drivers like automatic drive in their car, because they are very specific about what gear they wanna be in. And so serious photographers are probably gonna be pretty specific about what ISO, what shutter speed, what aperture they wanna choose. And so auto ISO can be very helpful and the type of tool that you can implement in certain locations, in certain instances, but you definitely should strive to be able to control your camera manually and understand that portion of it so that you can put it in auto and just kind of watch what it's doing and make sure that it's doing what you want it to do. And then we have some high settings. And these have lines around them, they don't really need to have lines around them, but they do. I'm not really sure why they have lines around them, but they are the extra high settings. And I theorize that this is where the camera is using software rather than hardware to achieve these ISO levels. They're pretty low quality, as I'm going to show you here in a moment, and so you're gonna try to stay away from these if you can, cause they're only for very, very desperate times. So let's take a look at what these different ISOs look like. So just using my standard ISO test case here. ISO 100s gonna get you the sharpest images. You don't really start noticing grain on this camera until the higher numbers. You can see that 50,000, 100,000, 200, are going to be very noisy or grainy here. And if you can't see the screen really well, I can say that ISO 6400 and 12,800 might be the top end that I would feel comfortable using the camera in most situations. But ISO is a pretty simple concept. You wanna keep it as low as possible. And you just keep going up and up as you need, depending on what your situation requires. And so try to keep it at ISO 100, but you know, ISO 100 to 1600 is just really clean. So there's not a lot of stress. If you need to bump it up to ISO I would not be real concerned about image quality, because it is so good at those higher ISOs. So keep it at 100, bump it up as necessary. Next up is the metering mode. And this is controlling how light is being measured in the camera. So let me talk about the different options that are available in here. First up, and most popular, is the multi-segment mode. This is what I recommend for most users most of the time. It uses a 1200 segment metering system which measures and compares all the different readings from these different light sources and is really good in a general mixed-lighting type of scene. And I, to be honest with you, rarely ever take my camera out of this mode because it does so good on its own. Cameras traditionally had a center-weighted metering, which is a nice central area of brightness and kind of doesn't really care about what's happening around the edges. And for those of you who like that, it's there. For a very specific reading in a small region, there is a spot, there is a standard spot and a large spot. And so this might be very good for a bird photographer who wants to measure the light on the bird but not on the bright background. So that can be a handy tool in tricky light situations. An entire scene average. And Sony says that this is a little bit better for subjects that are moving around more frequently. Now, to be honest with you, I haven't done a lot of extensive testing because multi-segment just seems to work so awesome all the time. But if it's not working for you, you might try this entire scene averaging. And then finally, there is a highlight option, which the whole goal on this is to prevent areas of overexposure. And so if you wanna make sure those clouds don't get too bright, if you wanna make sure a person on a stage in a spotlight doesn't get too bright, this will look over the entire area for whatever is the brightest, and hold it back. And I think this holds a lot of potential for a very good metering system for a lot of people, because when it comes to exposure, kind of the big thing for photographers these days, is don't blow out the highlights. And if that's a really important call to action for you, this is a metering mode that might work very well for you. And so for most people I think the multi-mode does a very good job. I'll be honest with you, when I've used the multi-mode I just let the camera choose the final exposure in aperture priority, for instance, and shooting with a raw image, I don't know that I've ever had highlights that have been completely blown out with the exception of pointing the camera directly at the sun. It's about the only time I've lost highlights in situations with the Sony camera. Moving on to our second row, we have flash options. But as you know, the camera does not have a built in flash. So this is kind of null and void until you add a flash onto the camera. But the options that we do have in here: auto flash, which will just turn the flash on if it needs to; fill flash will force it on even if the camera thinks it's bright enough you don't need the flash; slow sync will utilize slow shutter speed so you can add some background blur or more ambient light to your images; rear sync synchronizes the firing of the flash with the second curtain closing and this can be very helpful with subjects that are moving quickly and the camera in a stationary position; and in a wireless system you can use the Sony flashes to trigger other Sony flashes so that you can position lights in a more attractive manner for good lighting on your subjects. And so there's a good number of options. And the top shutter speed is 1/250th of a second when it comes to flash. Next up is a little bit more flash, and that is flash compensation. And one of the things about flash is that when you have the camera mathematically fill in light on your subject to an amount that it thinks is the proper exposure, aesthetically, it's not quite the right amount. And so as you'll see the example TTL here is a little bit on the hot side, we've lost some skin tone, you might say. Blown out skin tones. And so powering the flash down is a very, very common trait that photographers who are shooting people tend to do. And so powering the flash down to minus one or minus two, sometimes you have to go all the way down to minus three, it depends on the other tonalities in the frame as to what's going on, as to where you're going to get the best skin tones and so, if you do have a flash, I encourage you to play around with the flash exposure compensation if you are doing portrait photography. Next up is another item that we've talked about before, which is white balance. We're not going to go back into it, because there was a button previously on the camera, I believe the C1 button that did white balance, and this one is one of those buttons that you can reprogram and still have access to that control pretty easily in the function menu. Next up is the creative style. And so this is where the camera is going to go in and adjust the look of your image. The analog equivalent to this is different film types. And we all remember films as having slightly different color and contrast and saturation looks. And so you can go in and play with this. And so this is something that's only going to be valid and important for people shooting jpeg images, but it does also have an impact on raw shooters in what you see in the view finder. And so for instances, one of the things that I love about a mirrorless camera, is that we have the electronic view finder. I can put the camera in, notice down there at the bottom the black and white mode, I can put it in black and white, now I can look through the view finder and see the world in black and white. When I record a raw image, I get an original raw full-color image that I can change to black and white or keep in color. But I get to compose, focus, and see the world in black and white. And so that's one of the ways that I use creative styles on this. But some people leave it on standard, that's a pretty good place to leave it. If you leave it on neutral, it's gonna be a little less contrasty and might allow you to see a little bit more information in the shadows. But the main idea on this, the long-term goal, was to affect your jpeg images, which you can do in camera. I don't know that it's all that important, cause I think a lot of people are going to be shooting raw and adjusting to their needs. But this will give you slightly different looks to your image. It's not changing settings like shutter speeds and apertures on your camera, it's just taking the image that you originally shoot with the camera, tweaking the colors and the saturation. Next up is some information about how you are recording images in the camera. So the camera does have two card slots, and so you can be recording to one or two cards simultaneously. And this will give you information that will tell you if you're selected on card slot one, card slot two, or you're recording to both cards at the same time. So we'll talk more about the card options, because I think this camera has more options than just about any other camera. It's giving Olympus a run for the money in the way that you record jpegs and movies on cards one and two in here. And then the last one is just a simple little reminder as to where you have the mode dial set on top of the camera. So not really much you can change there, it's just a little visual reference of what it's doing. So this is your quick menu. And I kinda consider this the quickie mart of features, it's just the quick place to go in. Don't expect to find everything here, but the thing is, is that this is fully adjustable. So if you dive into the menu under function menu set, and you don't like the position, you wanna group all the exposure things together and all the focus things together, and whatever you want together. You can move them around. And if you don't like the options in there you can get rid of them and just leave them gone, or you can go in and select new features and put them wherever you want. So these are 12 empty vessels that you can put whatever features that you want. And I know on my camera, I just got rid of everything and I just kinda started from scratch, saying okay, what do I want in box one? What's really important, okay? ISO is really important there. And I got my focus and I got my exposure things all lined up exactly where I wanted, and you know, like everyone, I got a few funky things that I change on and off. Like, I like turning the grid screen on and off pretty quickly, so I added that into the back. And so that's one of those areas that you get to really customize to make your camera unique and fitting your needs. All right. The function button on the back of the camera. When in the playback mode, you'll see the secondary little icon next to it, send to Smartphone. So we're gonna talk a lot about the wireless capabilities of this camera. One of the features is that you can have this camera connected to your phone. And you shoot a photo and you say, okay, that's a good photo, I wanna be able to send that out to Facebook or some other social media site. You can hit that and it's gonna open up the function to send it to your phone so that you can then work from it, from the phone. So it's a way for you to select individual photos. Now, I'm a big fan of WIFI, I love WIFI, I love connecting the camera up to my phone, but I also, I hate it. Because it drains batteries and it's got spotty connections, and so it's still in the early, I remember them doing this 10 years ago and it was terrible. It's gotten a little bit better. But normally I turn off all the WIFI stuff in my camera, because it's just draining batteries unless you are specifically using it. When I do wanna use it, I turn it on and I use it. Then I turn it off. We'll talk more about the WIFI functions. And so that's just a shortcut button that you can use.
Class Materials
Bonus Materials with Purchase
Ratings and Reviews
a Creativelive Student
John GreengO! What a wonderful teacher! As always to the point. You do all the testing for us and we get an amazing tour of the camera. Really thrilled with your class once again. Thanks a lot!
user-7002e3
Thanks John. Another great class! I appreciate the thorough explanations. I many never use all of the features on this camera but at least I know what they do. Love all of your classes and would definitely recommend them.
Mary
Wonderful class. John is a great instructor. Learned a lot. Only wish he'd include a bit more on using a7iii to shoot video, such as using Clear Image Zoom, and including video in the ending Camera Operation settings section. Loved the course though.
Student Work
Related Classes
Camera Guides