Lessons
Class Introduction
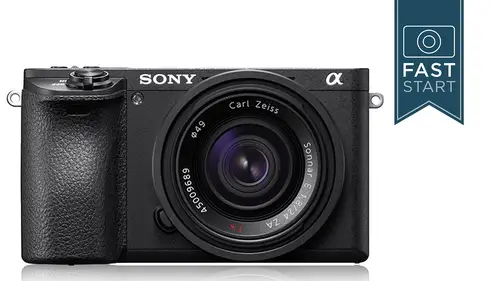
15:31 2Photo Basics
06:08 3Camera Controls - Top Deck: Mode Dial Part 1
15:46 4Camera Controls- Top Deck: Mode Dial Part 2
13:00 5Top Deck: Custom Settings and Focus Mode
13:17 6Backside: Electronic Viewfinder
07:52 7Backside: AF/MF
05:24 8Backside: Function Button: Top Row
20:58Backside: Function Button: Bottom Row
08:08 10Backside: Control Wheel
10:12 11Left, Right, Bottom & Front Sides
09:58 12Sony Lenses
10:11 13Menu Overview
03:47 14Camera Settings 1: Pages 1-3
14:00 15Camera Settings 1: Pages 4-6
17:29 16Camera Settings 1: Pages 7-9
07:22 17Camera Settings 1: Pages 10-14
21:50 18Camera Settings 2: Pages 1-4
16:02 19Camera Settings 2: Pages 5-9
14:50 20Wireless Settings
06:24 21Application Menu
18:46 22Playback Menu
03:35 23Setup Menu
22:27 24Camera Operation
10:53Lesson Info
Backside: Electronic Viewfinder
Let's get started on the backside of the camera. LCD obviously for a lot of information or for framing up your view finder. We'll be talking about more how to control this as we go through the class. The EVF is 2.4 million dots, which is very good, only slightly eclipsed by the new Sony A9 which has close to I think 4 million dots on there. The camera has an eye sensor which will automatically turn the EVF on and off depending on whether you're holding it up to your eye. You can go in and manually adjust this if you want and I'll show you how to do that here in a little bit. There is a diopter which controls the focusing of the EVF. This gets bumped a lot and there's a lot of people who hold the EVF up to their eye and it's not totally sharp and they just think that their eyes are not as good as they used to be. In reality, this little dial gets bumped every once and a while. So just adjust that so the number and the information in the EVF is as sharp as possible. If you do want to cha...
nge this automatic eye sensor over to a manual system you can choose to manually turn on the EVF or LCD. There are some cases where it's kind of irritating that it's constantly going on and off as you get closer to it, and you can custom, set one of the custom buttons to control a manual on and off of the monitor. And you wanted to do that, you could do that in Camera Settings 2, page six of nine, under Finder/Monitor. You can also adjust the Live View Display which is gonna show you whether you are getting, it's gonna give you the option of either giving you a representation of what you're gonna get in the final exposure as far as brightness and darkness, or, it'll just give you an optimum brightness all the time and then you would have to look at the exposure indicator to tell you whether you're over exposed or under exposed, and there's different reasons why you would wanna do that and we'll talk more about that as we go through the different display options on the camera. So, looking in the view finder, the frame that you are looking at is 100% accurate cause it's just pulling all the information off of the sensor. You are gonna see a variety of focusing frames. This is gonna depend a little bit on which focusing bracket area you've chosen, whether it's in the process of changing, whether it's just been focused on a subject, and so you might see big brackets, you might see little boxes, there's all different options for the different types of ways that the camera can focus. There is an option of turning on a grid system, and this can be nice for composition, for leveling the horizon, for a variety of reasons, and so, these can be very helpful in general, I kind of like to leave these turned off unless they are needed for something specific I just prefer to have less clutter in the view finder. By hitting the display button on the back of the camera which we haven't officially talked about yet, that will allow you to cycle through the different options that you will see either on the back or in the view finder itself. In the view finder, it can turn on a number of these different options like the level or the histogram, which can be very helpful for certain types of situations. Now, how many of these options you see will be something that you can customize, lots of customizing in this camera, of course. And you can do that in camera settings page six of nine under the display button and under finder, you can choose which options you will see in here, and so, if you don't wanna jump ahead right now, we will get to that in the second half of the class. Some other information you might see in there, a green light letting you know that the camera is either trying to focus or it has focused or it's tracking focus of a subject that's moving around. Information along the bottom is gonna give you kind of the critical exposure information and then along the top some other general settings. I'm not gonna go through all of these, a lot of these are kind of obvious, and they're one's that we'll be talking about throughout the rest of the class. Up in the top left is something new I haven't seen from Sony before. This is, uh, a little kind of download meter that is showing you how quickly your images and how many images are waiting in the cue, or in the buffer, to be downloaded to the memory card, so if you shoot a burst of images, you will see how many are waiting in the buffer to be downloaded, and so every time you shoot a photo, you're gonna see this kind of click on real quickly, and count down as it's storing all the images to the card. I love graphic visual displays, and so this has a graphic display of where your shutter speed and aperture is. Trying to give you an idea of what the shutter speeds, the effects of the shutter speeds and the aperture are, but as much as I love visuals and graphics, I don't like them on top of the image, and so I'm kind of torn on this, I like the concept of it, I just wish it wasn't blocking the image, and so my preference is to usually leave this graphic display turned off. But that's one of the options you get to choose. Another option in there is the histogram. I think this is a great way of determining if you have the correct exposure, but, I don't like it in front of the image itself. We have a leve which I find very helpful for making sure that my horizon is level, and it luckily doesn't take up too much space and they've made it fairly small. When it becomes green is when you know that you have got it level, but there's also a forward and back tilt as well to tell you if you're either tilted left and right or forward and back. And so these are all gonna be in the display options that you can control by going into the menu setting, and setting the custom settings itself. Follow along with the class and we will be able to get to those settings in the menu setting of this class. The frame rate can be set to either 60 frames a second or 120 frames a second. For standard photography, 60 frames per second is gonna work out totally fine, if you are move, shooting subjects that are moving back and forth a lot, or if you are moving the camera and panning it around, moving the camera around a lot, you might find it preferable to put the camera at 120 frames per second, it will use more battery life, but it will give you a better, sharper image as you are moving the camera around. If you were doing just landscape photography, 60 frames per second would be totally fine cause you're not gonna notice any difference and there would just be a battery drain doing 120 frames, and so that is gonna be another control that we're gonna be able to take care of in the menu settings. Color and brightness of the viewfinder can be changed. You can make it brighter, you can make it darker depending on what your eyes like. Normally I would just keep it right in the middle unless there is a really good reason to change it. I hope you don't have to change the color temperature, but if it was to drifting color over the years, you could potentially do a little fix in there if you needed to. Alright, we have our little button for popping up the flash. The flash does not pop up automatically even when you have the camera on auto mode. And so you have to be very careful about popping the flash up because it is not the most powerful flash in the world, it's only good for about eight, ten feet, three meters or so, and so, with people who are close in front of the camera, and you wanna add just a little bit of fill light to it, I think then is a good time to use it, but for anything that's very far away, it's just not powerful enough. Now, you can go in to the flash mode, in the menu settings, and you can control a number of features about how the flash works, and we'll see this more when we get into the menu settings, but, uh, just that button to pop it up. The menu button will dive us in to the full menu, that is the second half of this class. So we will totally get into all of this when we're there.
Class Materials
Bonus Materials with Purchase
Ratings and Reviews
Nichola Johnson
GREAT CLASS. I HAVE JUST ENTERED THE 'MANUAL' CAMERA MODE AND ACQUIRED THE SONY A6500...THIS CLASS TOTALLY HELPED WITH THE CAMERA BASICS. I WILL DEFINITELY TAKE MORE. JOHN GREENGO IS FABULOUS. CLEAR AND EASY TO FOLLOW.
a Creativelive Student
I've owned the A6000 since it came out and still learned a TON from John's A6500 class. I will definitely be getting his original A6000 class. I'm SO glad he's doing Sony cameras now. Thanks John G. - You are a truly great teacher!
Lee Kneisz
I bought the a6000 course a while back and when I upgraded to the a6500 this was a no-brainer. I love how comprehensive the coverage is and it was a great refresher on previous features. If you're a newbie to the Sony a6500 this is a must!
Student Work
Related Classes
Camera Guides