Sue & Felix: Shoot: Natural Light Portraits - Maisie
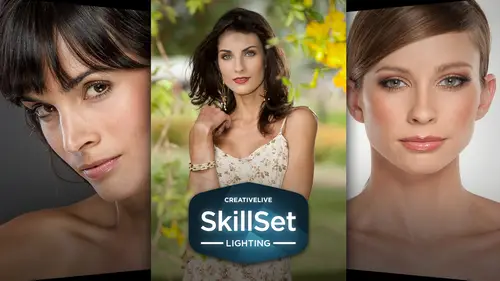
Lesson 1 from: SkillSet: Best of LightingSue Bryce, Scott Robert Lim, Mike Fulton, Tony Corbell, Clay Blackmore, Mark Wallace, Zack Arias, Joey L, Felix Kunze, Joel Grimes
Sue & Felix: Shoot: Natural Light Portraits - Maisie
Lesson 1 from: SkillSet: Best of LightingSue Bryce, Scott Robert Lim, Mike Fulton, Tony Corbell, Clay Blackmore, Mark Wallace, Zack Arias, Joey L, Felix Kunze, Joel Grimes
Lesson Info
1. Sue & Felix: Shoot: Natural Light Portraits - Maisie
Lessons
Sue & Felix: Shoot: Natural Light Portraits - Maisie
21:30 2Sue & Felix: Shoot: Natural Light Portraits - Katie
25:45 3Sue & Felix: Shoot: Natural Light Portraits - LaQuan
15:36 4Sue & Felix: Shoot: Studio Light Portraits - Maisie
39:40 5Tony Corbell: The Power of Light Part 1
18:50 6Tony Corbell: The Power of Light Part 2
37:39 7Tony Corbell: The Power of Light Part 3
23:58 8Scott Robert Lim: Live Shoot - Natural Light
1:21:40Mark Wallace: Position of Light
18:40 10Mark Wallace: Intro To Flash Photography
47:48 11Mike Fulton: Using the Flash in Auto Modes
26:42 12Mike Fulton: Slow Speed Sync
22:08 13Mike Fulton: On Camera TTL and High Speed Sync
31:39 14Roberto Valenzuela: Multiple Speedlights
20:02 15Roberto Valenzuela: Multiple Speedlights with Multiple Subjects
43:03 16Scott Robert Lim: Creating Drama
1:21:39 17Tony Corbell: Light Control and Shaping
30:35 18Tony Corbell: Beauty Dishes, Softboxes, Reflectors
18:07 19Tony Corbell: Live Demos with Lighting Tools
31:40 20Tony Corbell: Tools of Light Q & A
13:56 21Clay Blackmore: Basic Posing
50:48 22Clay Blackmore: Refining and Lighting the Pose
17:10 23Clay Blackmore: Posing Two People
17:24 24Mark Wallace: Studio Strobes on Locations Part 1
25:24 25Mark Wallace: Studio Strobes on Locations Part 2
44:51 26Zack Arias: Gear, Money, and Building Your Studio
1:22:44 27Joey L: Using One Light on Location
1:12:02 28Joey L: Using Two Lights on Location
1:05:43 29Zack Arias: Modifiers: Octabank, Softbox, Strip Bank, Umbrella
49:40 30Zack Arias: Modifiers: Reflector, Grids, White Beauty Dish, Etc
46:42 31Sue and Felix: Shoot Studio Light - Backlight
34:57 32Sue and Felix: Studio Backlight and Lens Flare
17:49 33Joel Grimes: Photographing Motion
17:53 34Joel Grimes: Shoot: Athlete in Motion
43:33Lesson Info
Sue & Felix: Shoot: Natural Light Portraits - Maisie
As you can see right now these lot to share those on her face from the light so the first thing I do is turn off all the lights have a look at what my window light is and I've got two things that I can use to diffuse the light of have got to match one of the mist screen but you know felix and I were talking about these screens of four hundred dollars it's a scrim created I don't know in one I get pieces of fabric you know as you know that a four dollars a yard and I usually kill them up in my camera bag and I clamp them onto the blind or thing and that is my scream so you can either pay forty dollars for a scream or you can pay for hundred for when and looked like a professional and I often clamp this onto my blind at home with here clips like I just came along I'm really macgyver and then I like lift up my blind so what I do is I bring it down clamp it on and then I rolled the blind up and so it just hangs like a team pre kitten so we've got both way want to try and teach you througho...
ut this two days that you can do this on the cheap as well that you don't have to do this with expensive lighting I think way have expensive lighting but everyone no one wants to spend three thousand dollars just to get started, but most people have enough speed light yeah, they have bed sheets. Most people on dh we could get some fabric so well with the proper lights and then through the good bad guy version as well just to show you we have our referee bythe all right, as you know, this is the final call wait, I'm cool b flat it's black on one side it's white on the other. So the first thing I'm going to do to take a shot of here is open it all the way up. By the way, I want a white you want and I'm going to attend the white the flat so they working by b flat everybody asks me that you know, things you can google felix things google we get these from glazer's you do? Yeah, just a camera store. Yeah, yeah and you buy them and then you give taped them together. The genius I couldn't shoot without everyone should have so have a look now at the amount of light that's hitting here and come into the center a little bit more. So this is going to do two things one is I need to reflect the light back to my client I'm watching you and I'm trying to lighten up her face so it looks even and then I'm lightening up the background as well because I'm putting the be nice and close to afflict like back if this light is too strong can you lift that up for me john? And just see if it works can you see now how diffused her face is getting and can you see how I've even doubt all the white light on her face there's no shadow there's no hard line it a soft in flat okay that is the light I want now if it is a dark day she walks towards the light to come this way towards the light yet stop and I bring this with it but this comes with him and it just keeps going with here and keeps going with here can connive a student just push this forward and what it does is it just keeps lighting her up so there it is there okay now that's a lot of light on here and it's a lot of light in this hole area so I have to decide then whether I want to diffuse mohr I just double up on the sheer curtains and just bring it down or if I take her away from their bright light I'm not going to get it even so that even this is what I'm looking for even this on her face and with my teeth let me take a before and after shot and I'll show you the difference because I think it's really significant thank you. Now, as you know, most of you know I shoot on one sixty every twenty six forty I like to shoot a two point eight because I love that painted lee drop away that you get from that if stop and I usually shoot on those three ten percent of the time I would go over six forty maybe least than ten percent of the time six forty years may go to s o generally in natural light it's what the cameras reading that I like so it's always where I meant if I get too slow then obviously I want to speed it up felix but I kind of need you to send her here maybe I'm going to put a little bit of life into here bored it's right here. This is all right. You okay holding that junk you're not getting any movement so we don't use fans we can use, you know, boards you can use reflectors to blow here just for some movement there. All right, what I want you to do macy's just kick out onto one hip so that yeah and just let this on go around a little bit further that's it beautiful ok, we're not getting much opens here but let's see just live together and just relax your mouth. All right? So here I'm a two point eight six forty my shutter speed is two fifty and I'm just gonna take a shot and I've got a nice even exposure straightaway, okay? No, what would do is I'm going to shut this down. Yeah, let me just tell you to shut this down first so I can just quickly take what it wass this reflector is doing so I'm not going to turn to my exposure and that's the difference that reflector is giving me so much bounce right now that that's the difference, okay, so I have to have that reflected light. I also always cut my beef let's really small like this because often, when I'm looking at her face, I can bring that reflector and really close, but sometimes I just need to put a bounce in here now, sometimes I've been shooting on my own, I'll get a chair and I'll put this here or I'll go like this and I'll push it again my model's leg, my client's legs push against me and I will literally do that like I do what I have to dio about slight I get people to stand, you know, I get assistance toe move around at this I mean, this little thing here will save your life because that big reflector is one thing, so those two shots is really all that eye looking for any questions around there? You might think that that sounds what I just see. It sounds really basic, but I do not see many people achieve that. So basically, when you start off, you get your model and just move over to where you want that side of facing that way, you know where to move to d flat two and you got it. So if it's a dark window, I need to get it closer to the window and I need to bring the leaflet with her if it's a bright window, I've gotta pull her away, but the problem is, is that white board is not going to reflect the same amount of light on this it's a certain distance from the window so it's better to be brighter and reflect more light and then adjust your camera sitting than it is to try and get away from the brightness. Because the more I took her away from the brightness walk away from the window into the reflector, it still didn't change the shadow on her face. That reflector is too far away from the window let me so I'm bringing here further away from the hot light. And into the reflected light only when she's standing in there is she bride enough so I just bring it closer to that window which most people don't do that they're worried about the hot light it so now it's here so come back to here and I'll just start shooting now and then I'm just going to start building in more contrast okay so let me get a reference for the first look on christmas for I haven't charlie get let me shoot when you can shoot her okay do we need this drop it feeling no it's not enough I can't just bringing this reflector a little bit more so why do I have one reflectors going to hear the other one is bouncing a shell of light onto the backdrop why okay let's have a quick look at that I'll show you why because what I want just puppet about bring you turn around this way bring your children that's it's davia now what I'm gonna do is because I'm shooting at two point eight to fifty shutter speed six forty there's my shop here I've got a good drop away to that background if I want that too look softer I just need to pull her off that backdrop right and I never should close to the backdrop that to me is is where I want to pay usually about a meter away from the backdrop or a little bit further than a meter makes a big difference okay so that is my first lit shot and I just I want to look around this and see I usually if I'm trying to figure out light I'll just go with the model is your car over way go on just look where the lightest I'm like okay so I'm going to be replicating the window light that's coming from her right and so would you mind if she holds this through this like I've got this mountain understand it's very very complicated setup here just pop it where she was standing just move to the right are you gonna hold it okay yeah if you hold it one of your face and we have a reference with your fast behind it just stand back and here then yeah right there don't understand quickly lower lower and we put up on the screen you can see why it's so genius getting close to spring your ten forward bowl one people on that they look at it but on we'll put this in the download as well but if you can see here you can see exactly what light sources at the main light source is coming from here and you could almost see was well how much that light is reflecting off the side you have to do a little bit of thinking to get that sphere into kind of something you can replicate but that's what this image I'm going to use to replicate that lights the suit that's all I have to do that's a simple that is there's nothing more complicated to it so this was the only gig moment I was going to allow feelings with the black hole like I want to shoot a black ball almost like why you good black oh e but I just thought to myself afterwards it didn't it didn't make sense to me I was like no, I don't want to teach lighting the way people teach lighting thank you be technical stuff to show me how to work the life and then I realized something he actually recreates my windows shape and height and everything so he's not going to show me a lighting set up he's going to manipulate studio like to make it look like my manipulated natural like you know, when I when I have it set up you should be able to do all the same things exactly I'm excited okay kitchen bowl out let's do one without the model in it just sorry. Matloff. Yeah, just right there and you actually need to go this way but maybe because you're gonna make it we're going to make it all gold just skip past that b flat for us just yeah, you can walk around as much as you like it looks beautiful all right there's a shot good references all right this is something I soon learned I can't put my tether down so this is something I learned that really blew me away I learned that if you swap the white deflect for a black b flat like this just jump up and help back there yeah perfect if you swap the white for a black what does the black side does sucked out life okay so now when she comes to stand back and here I'm essentially exacerbating the fact that the light is coming from one side I need you about a meter and a half away from the back top and over here and so right now yeah towards it like right now she has a really strong light I'm going to take that shot because I want you to see it because now the contrast and this image is coming in a very, very strong all right so all I have to do is take my little half my little food and just bring it into her face okay so that black is still sacking all the backdrop color and it's putting contrast all around her shadow but this little wee thing here this bouncing like to face can I have it danielle or okay I just want to get somebody to hold their effect so if you want to go on that side yeah ok so now when I lift up my camera I'm on the same sitting just chin down. Just a tickle macy that. I'm installed two. Fifty. So let's see how it raids and I'm starting to get more contrast in my image what I found. So you won whatever you say. Okay, john fifty four hundred for the strobe. We set at fifty, four hundred. Okay. Okay, so now what we're doing is I'm slowly bringing in more contrast around your body and around the back job. Okay, so let's do one more. Well, do you want to shoot the ball? No, because all I need is this, and you're going to do the rest, eleni, just the window. And you're going to control it from there and just add more contracts on the rest. You can come. So the second one is I get another v flat. Let's are our friends and you can and I'm going to put it which on this we're getting stand it's gonna take a while. So, john, slide this down the cheer, slide the cheer towards you and then we can help this side, and then you wanna be in the way. I know that you won't be in the way if I want to keep going come stand beside and then I consign this here so now what I'm doing is I'm going to open a second b flat can I just be a geek for minute suit everyone goes what's the c stand why the call to see stand it's just the mittelstand and it's called a c stand because a company called century originally manufactured it not any I always look at them go they don't look like a c shape why is that okay too much much too powerful okay so this is what we call I need a man to hold that for me this's what we call the black tunnel okay we're going to make a black tunnel around here but still use the lighter backdrop and it's just going to bring in more contrast now come and stand here macy and now step towards me so this's putting walked to contrast into the background and lots of contrast into here then I get my half reflector and my half reflector is just going to go up to macy's face okay and that could be half of this I could literally do it with this that's right I'll just folded in half like jimmy like this is it for me right there and what I've done is I put lots of contrast so if you come and hold that for me john I can take a shot just going for the face okay so now I'm a stuff under but I'm going to take a shot I haven't changed my sitting once the reason I'm going to take it is entry darken your image the meter and the camera gets confused by the white skin the dark here and the contrast that's coming into the image and it's goingto ask me to up my exposure so I'm cheating one stop under this is something like common lido and high key images backlight and white I shoot one to two stops higher and as I'm bringing contrast into images I shoot one stop lower always I'm at six forty I so just straighten you here that makes it that in just a little baby smile is perfect girl so there I am one stop on that if I push it any further I'm getting a lot of contrast step towards me into the light come back with me john yes it's just there that's the one ten down now and so now I've got chin forward a little bit more good girl stay there I've got lots of beautiful light contrast around the backdrop into here and I'll just keep doing this okay so now my nix it up do a reference for this sure because we've changed the shape of the life yes we've changed the shape of the light source is coming in on the right by putting a beef let there I'm going to use this I like holding it okay but you're in the light say you're right, I'll just wait just a bit lower felix I'm sure you know what I mean macy coming off okay, now what I'm gonna do and you can actually see it kind of makes that black you're not getting anything anywhere else see what's happening? You just get that main light source that's where your contrast is really coming from his room? Absolutely. Yeah. So now what we're gonna do is come back my thing is in a perfect world I would have more life in the room. So this is a very dark space that's putting a lot more contrast and then then I want and so I feel like if I'm if that's happening, I shut down one of the black tunnel sides. So basically, I turned one of the black tunnels toe white and it's gonna open up my whole shell, bringing in cannes every time I come here just jump up yeah, because then I don't have to walk around in time, okay? So now I assume as I bring the white and I'm gonna bounce light back again step back so that's really beautiful also watch with the black tunnel I try and push it back to the backdrop otherwise that causes a white lake onto the backdrop which you don't want and step back a little bit more no matter where she stands it's putting lots of beautiful contrast into the image so late I've moved it against and I have a half reflector just to hear face yeah, so near john perfect. Just turned down a little touch. I meet her on her eye and I'm still one stop under n amit two hundred shutter speed six. Forty two point eight. Okay. And now I've got a really nice dad. Got the image. Oh, wow. So it will be so neat to work all of these in their stages it's. So subtle, but it makes a huge difference. I turned that white tunnel. So now I've got half white tunnel tunnel. So the tunnels are really quite amazing if you think about it in terms ofthe controlling natural life, the closer I bring these, you can bring this one. And the more I open these are, the more I can block light to hear. So if this one's open and then I opened that one has a foot a long tunnel, and then I bring her forward. But I still proper to the out of that ground is she comes into the light, so go back because they can get a really good shot of this as she slowly inches into the light, look at the light coming into a face. Stop there! And so then what I'm doing now is I'm now controlling the light on her face in the light on the backdrop and it's really not because I, by having the tunnels I've created deep, my best images come from this one studio that I think my favor images and I couldn't work it out for years. What I liked about the state of images, I worked there for a long time. What is it about these ones that is so good? And it was a big hi stud and I had this massive deep from where I was shooting into the backdrop, and now I should in these little tight spaces, so the more space I can pull her away from the backdrop, but still control the light was the bit of my shots were going look, and so we don't often have a lot of space, and we simply don't have big studios, and most of us have lounges that we should end stuff, but the higher this dad, the bit of the light and you can tell you can tell like that, you know, in a big room.
Class Materials
Free Downloads
Ratings and Reviews
Vincent Duke
I am pretty new to Creative Live and this is my first purchase so for me I am loving this! So many good gems of information and having some of the repeated content from different speakers with different perspectives really helps drill in these concepts. I say for anyone who's looking for an great all around drill it into your head lighting bootcamp this is a winner. But if you're like the others here and have purchased videos from these authors before then you will probably want to look elsewhere as this is a bundle of highlights from previous sessions on lighting.
Camerosity
If you’re just starting out with photographic lighting (especially studio lighting), this set is a steal. I already had the set by Sue Bryce and Felix Kunze, and I’ve bought all of Joel Grimes’ tutorials. Since I’ve watched them recently, I didn’t watch their videos again. If you’re into commercial photography OR darker moods and low-key lighting, anything by Joel Grimes is well worth buying and watching. If you’re into glamour portraiture, everything by Sue Bryce is worth buying and watching (although I haven’t been able to acquire all of her tutorials yet). However, the videos by Sue and Felix are not where I would begin. The two videos by Joel Grimes in this set cover aspects of lighting that aren’t often discussed. However, most of his knowledge of lighting (from his other sets) isn’t covered in this set. If you’re thinking about going into commercial photography, Zack Arias’ discussion of how to gear up to open a commercial studio is a must-see (as are Joel Grimes’ two sets on commercial photography, neither of which is represented in this bundle). I agree with virtually everything Zack said. Although there are a couple of areas where I might have gone a bit deeper than he did in this video, it’s a much-needed reality check – with great advice before you start spending money on equipment to start a photography business – and he gives a LOT of great advice. While his lighting style and mine are very different, his thoughts on equipment for a startup photography studio (or just beginning to learn studio lighting) are right on target. (Zack’s and Joel’s videos on the business of commercial photography cover different areas, and there is very little overlap between them.) One of the reasons why I bought this set was the lighting wisdom of Tony Corbell. Tony is the closest thing to the late Dean Collins at this time (I have all of Dean’s videos on VHS tapes AND DVDs), and Tony holds nothing back. Great stuff! Joey L covers material that I’ve seen covered in many other tutorials (on CreativeLive and elsewhere), BUT he gives a MUCH clearer explanation of why he does certain things than I’ve seen elsewhere. For example, he gives more information about feathering light than I’ve ever seen in a video, and few people besides Joey and Joel Grimes (but not in Joel’s videos in this set) give as good an explanation of WHY they’re changing the position of a light by two inches. Clay Blackmore was a protégé of the late Monte Zucker, and he’s as close as we can get to learning from Monte (aka the master) these days. I have Monte’s VHS tapes, but they’re worn out, and there’s nothing to play them on. While they apparently were also issued as DVDs, the sites I’ve found that are supposed to have them all lead to 404 (page not found) errors. Clay covers both posing and lighting – and how to fit the lighting to the pose – in great detail. I haven’t watched any of the videos on speedlights. I still have about a dozen Vivitar 283’s, 285 HV’s and 4600’s that I used in combination during my photojournalism years (back in the film days), but you’re much more likely to see me lugging 1,000-watt second strobes outdoors to overpower the sun than using speedlights in studio (or on location) these days. I’ve seen some of Roberto Valenzuela’s work and tutorials, and I’d say he is the Joe McNally or David Hobby of wedding photography at this point in time. He knows his stuff. One or two of the videos are slightly dated in terms of the equipment being used, but that doesn’t make the information about lighting less valuable. Equipment may change, but the principles of lighting, the things that determine the quality of light, and the elements of “good lighting” have changed very little if at all since the days of the Dutch Old Masters painters. There’s a lot of great lighting information in this bundle for the price.
Student Work
Related Classes
Lighting