Lessons
Every Quilt Has a Story
10:14 2Suitable Textiles for Quilting
05:59 3Cleaning and Preparing Textiles for Quilting
06:51 4Gear You Need to Make a Quilt
15:29 5Cutting into Clothes to Make Quilts
16:26 6Cutting the Squares
14:40 7Planning Your Quilt Design
06:17 8Sewing Squares into Rows
17:59Lesson Info
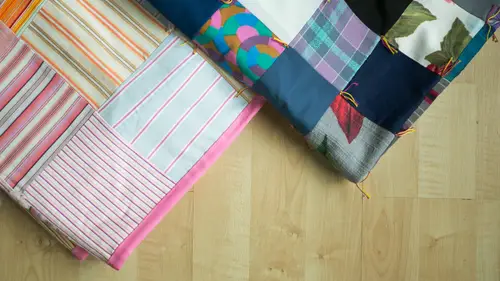
Cutting the Squares
So let's, cut the actual squares. I made some of these things out of the way here, so I'm gonna give this shirt let's see, we'll do the back. Give it a little press here. You definitely want these pressed out when you start cutting him it's just so much easier. I don't use starch. Um, you know, you see a starch in your quilting, I don't you start because it's corn starch and I've heard that will attract bugs if your leave your quilt stored. So there's a couple products that air corn starch free that you could get quilting shops that I've used, but I don't use starch I guess if you were gonna wash your quote a lot, it wouldn't matter so much. But I would be mortified if I saw that. You know, bugs have been feasting on my my quote, all right, so let's talk about the self healing cutting that this has lines on it that air really useful? I don't use them for measuring, necessarily, but I use them tow, line up edges and in something like this, the back of the shirt you're going to need to k...
now what the strait of grain is it's helpful to know that and it's not a hard thing, so if you cut things off to the side diagonally if you just start, you know, cutting squares and in this you're going to get some squares that air cut on the diagonal and it's a bias edge which can create it can sort of misshapen it has been stretched to it so in order to and I don't I'm not you know, fanatical about finding the strait of grain, but I'll show you how I do it just so that we kind of keep it pretty consistent so I fold the shirt this is the shirt back I folded in half and then I use these lines on my cutting matt to just sort of lying this up doesn't have to be exact, but you're going to want to cut your straight edges from this folded line because this is the strait of brain so you could cut it from this edge, but the chances are I mean, I was cutting for this class and I cut from this edge and things were a little weird so just cut from your folded edge. So that means you're cutting two layers at a time and then the way that we do this because you're going to want to this is a really jagged edge because I didn't cut it very well so this is why these clear quilting rulers are so helpful you lay this down, you can see the lines of the cutting mat underneath you know that you have basically lined this up pretty evenly to this line you're going to want to just find one of these lines that runs all the way through and cutting away as little fabricas possible you're going to want to line it up here I've got it lined up right here with the fold and I found a line in here and then you're going to want tio cut this straight so now you have a straight edge that you can work off of to measure cross so we're going to cut five and a half inch by five and a half inch square so the first thing we'll do is we'll cut five and a half inch strips and just see how many we can get so in this particular ruler I'm looking at this edge which will be my cutting edge on lining up the bottom across this line here which I'm really only using it for the straight line I'm not using it for a measurement but then over here on this side I'm looking at where the five and a half inch edge would be and once you find that measure once our measure twice cut once is that what they say then you're going to cut and then you've got your stuff and I just lay that defied and I'd do it again I go all the way across the shirt can we get one more out of here? And then this I would say this is too big to throw away, so I would say that so it cut the whole back. I've got these four strips, so then we're going to need to cut these into five and a half inch strips that to do that, I'm going to again use a line, pick a line on my cutting matt, and how however comfortable you are using, these would sort of determine how many layers that you would like to cut if I'm in a hurry. I'll cut all of these together, but you may be most comfortable cutting one strip at a time, it's just whatever works best for you, so I'll cut to a time just so that you can see what that looks like. So these air stacked on top of each other and you just sort of, you know, coax them into place again, I'm going to need a straight edge here to start off up to do my measuring. So I'm going to do that same trick of picking an edge on the mat or picking a line on the map, lining the edge of the ruler up to cut his little of the fabric office I can and then just cut that off, so now I have a straight edge. And if you've done cutting, if you've done pretty accurate cutting, you're going to get really it's gonna line up at the top it's going to light it, but the bottom you're going to find your five and a half inch mark and you're going to get your squares pretty easily. I definitely recommend listening to a podcast while you're doing this is such a good time, tio catch up on your podcast cereal I'm waiting for cereal to come back on well, and I also watched create black cloth with tio it's just, you know, it's, really the process of quote making involves so many different steps and parts of your brain like this is not the creative part that this is, like, really satisfying to cut these little squares and, you know, it doesn't require a ton of thinking, so this is like this point I can watch a movie or, you know, something? There are other times when I can't really even talk to anybody because I'm busy counting or something like that. So this one, I'm gonna have to cut off a little bit more because I want to make sure you get that off. I would not include this little shoulder seen in in my quilt because it's right on the edge there so I would be really bulky too, so is there a standardized place that you can go to that will tell you how many squares you need for a certain size quilt so that you don't have to calculate this all out on your own. So as part of the class, I have included a pattern. It is not a four patch pattern, but it is a pattern of squares in a it's called a sunshine medallion, and so and it gives squares the number of squares that you would need from crips eyes to king size. So there are ways that you can figure that I like for this one that we're making in class because the individual for patch locks are ten inch by ten inch here it would take a little math, which I don't like to do, but, you know, you could figure out how many tenants blocks across and how many tenants blocks down and the one thing I will say for these four patch quotes that I make, I always have an even number of garments to cheese from just you don't have to, but it just makes it easier because then you've got enough variety to mix and match and to pair up nicely, nobody feels left out that so when you get the class, you can also download that when you get the class, you'll have the pattern, it is my most popular cool pattern. Cool and it's kind of beginner friendly and it goes over all of the things that will talk about today binding and that sort of thing so those were cut and then let's just cut this one so I would do this one we press it out a little bit I would do the pants because I saved that seem I would do them from the scene I would fold them at the scene so I'm just folding them right at the same that's gonna turn him over if you're left handed you would do all this on the opposite side and you know there are some seems here I wouldn't at this point I wouldn't take the time to cut those off, which is why you want a really sharp blade because then it'll just slice right through it so I would lie in the sub and I would find my line and I would slice off the edge and then I would make my strips thiss looks like this team has a little bit of angle to it which we concert turn this around st at the other edge and that's the thing if you're cutting into these when you feel like that you might need to sharp your straighten up your strips kind of just a teensy bit big and then you can just cut them down and then let's cut some of these I might actually just fold the's in half and this works the same way and if you're cutting into jeans and you're saving the pockets again if you have a sharp blade, just slice through on some of the quilts you could see that I use part of the pocket but not the whole pocket. If you've got a sharp blade, it'll just slice right through and I really recommend these air really cool little details the one thing I will tell you is that if you're going to incorporate any of these details like the buttons, you want to make sure that you have it towards the middle of the square and not the edges because you don't want tio so through the button so just when you're cutting, um if you're if you're five and a half inch square would start here when you're measuring out to smooth it over a little bit and just you might wait a little bit of fabric that then you'll have that nice detail, so we'll cut these and then peace will be ready. I don't have an average number of squares that I can get from pants, but I will say if you're looking for denim for quotes, look for skirts like long skirts because you can get a lot of squares um out of those and these pants are really small so I might not be able to get a ton and those jeans skirts are just not fashion. I kind of feel like I'm doing everybody a favor by just taken those out of circulation. Those are ok, same with those little leather skirts that you see in size zero who wears those guilty one more here. So you pretty much get the gist. That's, how we cut.
Class Materials
Bonus Materials with Purchase
Ratings and Reviews
a Creativelive Student
This class is a very basic class on making your first quilt out of square blocks. And on tieing a quilt. It is good on that level. She didn't go into much detail about how to work with different fabrics, advantages and disadvantages and different applications for say using jeans vs. linens vs. cotton. Or how to combine them so it does work. I did like that she wasn't from the quilting police and really encouraged us to try things. And to get stuff from Thrift stores, yards sales, etc.
Janelle Embree
I have been sewing for about 55 years and have made a few quilts. This class was better than I expected, in that it got me thinking about how I can use fabric scraps, fabric from my stash, and designer swatches I got from Fabmo in Sunnyvale!! The teacher had good ideas that you may not find in more traditional quilting classes. So not so perfectionistic and limiting. GO for it!