Lessons
Day 1
1Essential Retouching Techniques
55:08 2Intro Q&A
25:31 3Portrait Retouching
1:10:38 4Body Shaping: Liquify
25:37 5Beauty Retouching
1:04:41 6Shoot: Portrait, Beauty, and Avant Garde
41:29Day 2
Workflow and Lightroom
24:15 8Beauty Image Retouch Review
40:08 9Portrait Recap and Frequency Separation
15:40 10Frequency Separation Q&A
25:21 11Blend Modes
11:32 12Creative Techniques: Color
14:40 13Miscellaneous Creative Techniques
08:13 14Faux HDR Look
12:53 15Avant Garde Retouch
23:25 16Displacement Maps
35:10 17Audience Image Retouching
17:14 18Special Shoot: Halloween
24:59Day 3
19Compositing Basics
45:55 20Compositing Examples
26:01 21Creative Skin Effects
21:12 22Additional Creative Techniques
22:21 23Retouching Dark Skin and Q&A
17:13 24Common Problems
29:12 25Perfect Mask Plug-in
13:37 26Audience Image Retouching
18:46 27Sharpener Pro and Color Efex Plug-ins
30:41 28Cinemagraphs
37:32Lesson Info
Beauty Retouching
I would prefer to shoot things correctly and camera obviously uh but a lot of times for example maybe I get a dress that I love it to proof out of the bottom well, it doesn't so I could photo shop it if so, for this I wanted the girl to have I was trying to go for like, bride of frankenstein inspiration uh but she didn't have enough hair to do so and so that's exactly I'm actually shooting this afternoon um and I wanted to do this kind of cool side swept hair look and the girl doesn't have enough hair uh that's when you have yourself a makeup artist bring their extensions and all of that but even so there was enough hair so I photoshopped a bunch mints all this show you kind of where this started where it ended go through real quick this retouch it's more of an extreme but I wanted to let you know uh selecting the eye key on the bottom holding my all I could do my before and after so it can be really drastic if you want it to be uh so all this was going to run through that example real...
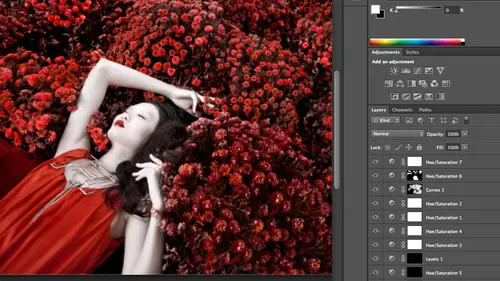
quick and the other example has been running through would be this example okay kind of ah more intense beauty retouch um I will say that often for beauty photography and I s o a little bit, the career part, I start off doing portrait had a portrait studio for, like, ten years in upstate new york, added family ended shoulder ended senior portrait so I know all about retouching nah, average people, but a lot of times when I shoot beauty campaigns, I'm photographing girls with that ar fifteen, you put make up on the twenty three, so granted that's so much easier. Uh, but I understand the full gamut of what needs to be retouched, uh, I would come in here, I won't duplicate my background there, and I would zoom in and see this, um, so I'm really bad at that really bad all the time, and most of time, my solution is to do a combination of two things, a combination of using and fight those of you who are running with tech. I was just talking about they weren't looking really messy sensor really bad sensor, so it's, often a combination of me using spot healing, clicking around and then also using portraiture, because I can select the background and red portraiture to kind of even these things out now big, anyway, something that I find useful. Have you ever had a photo where you didn't see that there was a problem until it was printed, because things don't print a cz dark or something like that for pretty much any of the re touches that I do, especially if something is on a white background or a great background, I will create a top level there that is pointless, except for to see what I'm missing. So what you do is you come down to half moon cookie and you might go to levels or curves, I'm going to go to curves in this example, and I'm gonna pull down on this, and I might maybe increase the contrast of it, something like that. So if I do it before after real quick, what allowing me to do particularly on like a white background is it actually pulled out more of that nasty background detail. I'll turn it off in the end, but it makes it easier for me to see it, so I don't have any surprises. This happens a lot for me when I'm photo when I have something on a white background that wasn't quite actually a white background, and I didn't notice and then there's like what there's lines in the background there. So what I do is I put a top level curves where I drag it down, make it darker, increase the contrast, and then I noticed those details in the background that I might have missed, I just turned it off before I'm done so this is this one I picked because it is quite a mess so bear with me I wouldn't I would actually have to go through and kind of click these all but I said that you want to run portraiture later except maybe in this example because you could actually run it on the background it's not something you know that needs to be run before him freezing my computer sorry. Okay, okay cancel. Okay. Cool. All right, so what I'm gonna do is I'm going to go to filter image gnomic portraiture now by default when you have the skin tone mask on what it does is it looking for any things that are typically skin tone so it's looking for reds and yellows and that and the like so it wouldn't by default uh smooth out the background so I actually have to turn that off and now it's going hypothetically smooth everything and what I can do is I can zoom in and I could take a look and see how it's cleaning up a lot already no, I would have to actually go in and get rid of most of the big swatches but it does really clean things up so I can hit okay and then using my lair mass an adjustment layers I can go in and paint that effect on her off so even looked as though a foreign after how much that cleaned it up and so that's what I'll do on white grey backgrounds it's very useful the problem you run into is it applies it to the face so that's why you add jeweler mask you can paint it off and then just go around and say ok let's zoom down here this area looks awful let's paint at a hundred percent and it cleans up the background of it um like I said, you still have to get rid of the big areas but who wants to sit around clicking to clean up their background? This is why I need to clean my sense or more often I guarantee you that will be dust on my sensor today like no doubt another reason that this is really helpful how many of you have gone ahead and tried teo get rid of extra hairs um on the outside so lake overlooking here okay? And I'm just gonna merge that layer down real quick when I zoom in how how you really there's not that many shortcuts for getting rid of excess hair. There are a couple shortcuts um a majority of the time you have to use your healing brush and you can use your he spot healing brush, click and drag and you can get rid of things that way um another example that I didn't tell you I honestly don't use it most of time with hair I get stuck doing the long way sometimes what people uses, they'll do a gosh gambler which blurs the hair if it's if it's a background that doesn't have detail if it's for example a studio background, do goshen blur and then paint that over and it kind of it makes her disappearance has been blurred out of out of the picture basically, um, but usually end up doing this. The problem run into its vice chairman really, really tight. You can usually see where I did it. I see it there's a good example. You guys can kind of see that you can actually see where the retouch was done. Yeah, like right there kind of see the texture if I go ahead and I don't want to spend forever being sick super careful with all this hair but I don't want it there I can go around, I can spot hell it out okay, imagine I do this all the way around and then I can go ahead and run my portrait. Sure. And it it gets rid of those blemishes. It gets rid of those problem areas. So if I was going to hit portraiture and it's gonna apply it if you hit portraiture from the top level without actually going into the program, it just does the most recent settings that you had applied so that works really nice if you have a whole bunch of pictures that were taken the same lighting of the same person you can to supply it multiple times. So when I come down here and the before and after seo, it cleans up a lot of the problem areas that I had created by getting rid of the hair. So most of time, that's how I get rid of her, I go ahead and take either my clone stamp or my spot healing. I get rid of it. It's not perfect. You can usually see a little bit in the grain or the texture of the photo where I did it, but then I run a portraiture, um, on the back under and the entire photo and it's painted on, and it gets rid of that. So typically how I handle it. All right? So let's, go back ten I kind of went over the hair, I would go in and I would work on the photo of this young woman and I would use and I'm just warning you through things you guys already know, I'd go ahead and use spot healing to get rid of big blemishes do that click around, I would also go ahead and grab my clones damp on lightened to fill in under her eyes. Maybe hire a pass ity that wasn't really showing up too much what increased capacity so I fill it in that's what we have so far looks good um I think her eyes look a little doll no there's not really much life to them so I would select them with a lasso tool command jada copy and paste them in a new layer do my image adjustments shadows highlights see what I can kind of pull out for detail there so I can pull a little bit of detail on the bottom didn't work super well is the same thing you can never tell so I'll go back I have I added my their mask you've done this a bunch of times before and so I've increased the contrast in the eyes a bit it makes him pop just a little bit okay all right then the next thing that I'm going to do is run portraiture so when emerge that down and I'm gonna run portrait drawn her face someone to duplicate the background and I'm going to go in filter image, gnomic portraiture and I would assume right in and right now it's on the way over done effect because I didn't select the skin tone um and I had everything pumped up to the right so the next thing I'll do is I'll actually select a skin tone okay? And I can zoom in and take a look and down here, it's not looking too bad if it's meant to be a fashion image and she doesn't have to have a ton of detail, so probably just back off the fine detail a bit and I can always click before and after just take a look, so that looks pretty nice, you know, still have some of the skin texture there, so I had okay, it'll process and I will go ahead using my mask and apply it to her face where it belongs. If I'm looking, I can actually turn off the bottom layers, but I just clicking and dragging on the eyes so I can see where it applied to and where I don't want it applied to, so I pretty much it can apply to her arm, but I don't want it really in her hair on her dress so I can erase it in those places was important place I don't want to his honor on her hair because that should be sharp and then zoom in. I don't want her to have softer this's jewelry case you're wondering and then I also don't want softer eyes soldiers start there and I'll back up so you're looking before and after of kind of smooth out her skin a little I personally I just merge down, I personally would duplicate it and go back in and I would do my clone stamp and I would go through and do you know the dark and light, and and so, for example, that's a highlight on her forehead? Maybe I would take the clone stamp on darken in darkened it down just a little bit, and I'm just kind of telling you my thought process of how I'd work around so dark and down that highlight you can see the change so far kind of smooth it out, darkened it down I would come over here and maybe light enough a little bit on her cheekbone, so clone stamp on light and I could kind of lighting up over here too strong of an edge in back ofthe same thing, kind of lighting up on her cheekbone smooth out around here, something I look for is wherever there's highlights like a noses and cheeks when it's speckled and there's a lot of texture. If I could go in with my clone step on light and it kind of even that out, so watch on her nose if I could just click a few times and let's maybe increases just a little bit shaken, click a few times, I'm just clicking and sampling sarah knows kind of smooth out a little bit kind of gets rid of that, so it gives it looks like she has a smoother ridgeline to our nose so I will do the same thing over here and kind of smooth out with light and smooth out those features um and I'm clicking around okay, so I could do this forever, you know it's somewhat cathartic a little bit and I could keep clicking around um so then the next thing I'm looking at is show you what we did with her skin so far give you quick before or after I won I don't need that top level there so here's a before and after smooth things out ok, so here is where I need to fix liquefy and her hair I kind of cloned out a little bit of the the, uh, background area for the hair, but you kind of had to go back a lot of what I would do is create a new layer and if you try to clone in this new layer by default, your clone stamp is selected to current layer, so if I try to clone and I hit the all key to sample and click, nothing happens because I'm in a blank layer and so it's saying ok on ly clone from this current layer but in this example I want this this new hair I'm adding to be on a new layer and so I have to switch it to current and below, so I'm going to grab my clone stamp and now when I select the hair over here and painted in I'm going to go to normal at a hundred percent I clicked the hair and drag you know now I can fill it in and what I would do is I would click around and fill in this hair as much as I could and wherever because it's on its new own lair wherever I see repeated patterns when I'm looking at it I could just erase it or mask it off so for example I see a repeated pattern right there and that's the giveaway that's been cloned so I might clone over it again I might blend it but it's on its new layers I'm not damaging anything and I can kind of smooth it out coming here filling other holes in the hair okay so I do that a lot for photography particularly when I get hired to do like photographing here uh you've got to go in and perfect everything there should be no holes it should be all even um and so my last step that I would show you for this is using um liquefy so I'm going to open this up in local five filter liquefy and a couple things that I see here that I know I'd want to change she's already really really skinny so that's not really something I need to worry about I might use the push left tool a little bit right in the center just to move that in a tiny bit um probably wouldn't do that much would probably just do maybe just tiny bit so I can kind of just nudge it in a little bit um couple of things I know I would dio is her ear her ear is caught by the light and so it looks large I shrink probably seventy five percent of people's ears if they're showing because they're distracting and their light colored and they're sticking out of the side of head um so I usually look if I people's ears in smaller, especially kind of for straight on, so in her example I would use the ford warp tool and like a fire in the top left and I would just pull her ear in my bump of my density my pressure I just pull her here in a little bit and so now it will be less noticeable if I want teo make her hair bigger. I could also increase my brush pressure so it means like the amount that it's going to move and I could drag her hair and it's a matter of like at what point you think you're stretching the pixels enough for it to be noticeable that that's what you were doing so I can I can change his shape and I can move things around um I think her forehead looks a little large I might pull it down a little bit on this side and so it's basically just a lot of tweaks lowering the shoulder pulling in the ear, luring doubt you could make her eyes bigger if you wanted to I could go into the bloat tool and you usually make it a little bit larger than the size of the eye and you just click once and I usually switch between the eyes so the blow tool is the one one, two, three four five down and looks like a circle with lines out because it takes a center point in it expands everything out um this tool is annoying because it's hard to control you're controlling it by you know the density and the rate but it's still kind of a pain s o see what I did with one click of shape before and after any one click makes your eyes a little bit bigger when click eyes a little bit bigger um you can also do that outside of local fine you can select the eyes and using your transform controls make them bigger. You could also use the ford warp tool to kind of drag her eyes again, dragging the edges to make it bigger. The biggest thing you're watching for is that the iris and the pupil stay circular when start making them bigger and changing sizes and they're all different shapes and it's clear that you liquefied it all right, so to give you an idea school and I would also smooth this out so it looks nice though ahead okay and so you see in her face she's gonna have a bigger eyes figure hair smaller ear knows something like that you watched her body saying so we do the phone after you could make a few changes like that uh typically I try not to have to do that much work that's not ideal um and I would go further so you saw the original image if I opened it up to what I actually did what I did a full retouch open that up for you guys real quick. Um it was a lot more work over finding the hair in the body. I'll show you one more beauty images well that I'm not going to retouch you just want to show you the before and after you can get an idea of how far things do go. So here was her before and after here wass zoom in a little bit, you know it's a drastic difference one other sample is this one. This is a beauty image that I did um using portraiture and a lot of local fi um and you'll see I made her forehead smaller and I smooth that her skin and I pumped up the eyes, so if I zoom in sam's tryingto perica you know, giving her more structured jawline and pulling in the shoulder and increasing the contrast in the eyes so there are a lot of changes I'm sure you guys have seen the well I've seen a bunch of times the dove commercial where they make the changes to the girl um I feel I have mixed feelings about that because half the time in fashion photography the girls start like that they start beautiful, they start perfect and so the question is will which one's more right picking a girl that is not representative of the general population but we didn't retouch her or taking somebody who is maybe more representative but retouching or to that point I mean it's this is the end result is the same so wholly different discussion just something to think about. All right? So I'm going to retouch a beauty image using what we've talked about so far and I love for anybody if they have questions as I retouch this, this girl was a super cool girl that I met recently she had recently won a battle with cancer um and she was just beautiful and awesome and really, really cool and she was actually just, uh, one of the volunteer models at a workshop that I was at and so I'm going to kind of walk you through them the things for this retouch keeping in mind that I wanted a more perfect version, but it was also kind of a portrait who's about her as well, so just my thought process and again, please ask me any questions that you want. I'm just going toe go through this as a beauty retouch for what we've talked about today so far, and I'll tell you what I'm doing as I'm doing it, but you guys, you're welcome to stop me. I'm just, uh, higher level question from shame photo and norway says, do you ever get feedback from the models that they didn't like some part of their body? Liquefied and how do you handle that? Uh, models? No, um ok, I'm nice, so take this and nicest way if they're my models and I wanted to, I was they were hired to her, I can turn them into whatever I want that was that was the agreement, but if a model hires me to shoot their portfolio and they're paying me to create images for them, then they do have a say and how it works for me with my clients all the time is all retouched damages, and they get you should, like eight hundred pixels to a thousand pixels low rush j pegs toe look at to approve the retouch before they pay, and I send them the higher s files on and so it was the same way that worked with my portrait clients as well as they were able to view the lo rez for the retouch before I went ahead and printed them or whatever they're going to be used for or sent them off to a publication I'm photographing a very, very, very famous celebrity in a few days when I get back super excited so you'll see the pictures eventually but I've been told that she hates being overly photo shop so every single image I take a fur and even that I would want to use I have to retouch them as they'd be retouched and sent to her agent to approve so it totally depends the realm that you're in but if they don't like it I will have to change it so it kind of depends on what we get okay all right, so we're walking through this retouch I duplicate the background and the first thing that I want to go in and do is that wanted to make sure that my levels we're correct overall you know the the highlights and the shadows and the exposure and so on my screen that one's a little bit brighter but overall it looks pretty good um I may want to come in and darkened down her forehead a bit I could do that um but I think in general is pretty good so I'm going to start with blemishes so I duplicated the background and I'll go ahead and use either my spot healing or my patch tool to move around and get these blemishes so you were supposed to be editing at about one hundred percent when you're going in for close because sometimes if you're further back and you're clicking the spot healing brush, you may not realize that sometimes it doesn't work and you have rough edges and then you have the print blown up huge and you don't see it so I am clicking around here and I'm going to hope that my swat healing busch works if not, then I'll switch to another tool but in general I'm at one hundred percent right now it seems to working pretty well on most of these and I can click around same thing here and on her cheek so I would go ahead and do that for any of the blemishes I see same thing over here on her cheek no one thing that is really helpful for a lot of the work ideo like that guy's hopes this is crucified tomorrow um with helpful is most of my models have gone through her and makeup beforehand to which makes a difference so you see that area didn't exactly work um so I might have to go in and use a different tool for that blemish I'm clicking and that's pretty good overall see if there's anything else appear get rid of the hair all right looks good for this let's try the patch tool when you use the past tool to select slightly larger than that and click and drag it to an area once we replaced with looks okay, not perfect, but I know that I am going to go over it with portraiture so we'll see if it's looking okay later um a couple of things that I'm seeing is right here along the lips um it's kind of it's not even so I am going to smooth that out. Um as I'm analyzing her face let me zoom back I'm seeing that this lip is lower and floor than the other, so I'll probably wanna even that out her eyes air pretty even I probably want to darken her eyebrows to make that pop so I'm going through all these things in my head I can get rid of any of the bags under her eyes because they're so minor I don't even need them s o I think that's the next direction I'll go once I've more or less think I've cleaned up most of what I had to do and I do a couple of spots around here all right, so next thing I'll do is take my clone stamp my clone stamp on lytton pretty high opacity and go ahead and fill in under her eyes here same thing fill in under her eyes to notice you know I could do a lot more and get away with a lot more with a beauty retouch I'm not trying to keep it as realistic um for her forehead I want to fill in some of those textures so I'm still on my lightened clone stamp and I'll try to fill in a few of these unwanted textures that have around here it's gonna film that in a bit okay um the next thing I'm gonna do I'm gonna back out take a look is I also know if anyone else says I get bored of doing a certain things I do kind of bounce around it's just like okay, very touching they've been like getting rid of spots forever I'm ready for the next thing, so I know I really like her eyes and I want a pop and bring out her eyes so I couldn't use my last o'toole select your eyes and youth command j copies and pace into nuclear what we've done before image adjustments, shadows highlights and it's popped out a little bit of detail in the eyes you can see that in the before and after my head okay, I consume in, take a look and see if it did what I liked you know apply my lair mask paint off of where I don't want it okay, the next thing that I think when I'm looking at this is all right, I need to pull I need something a little bit too plumbing into our eyes because they looked really beautiful, so what I'm going to do is dark and down that eyeliner, so I think that will pull me in and then also darkened down around the edges of her eyes so you can do that by I'm going to select around her eyes with lasso tool, I'm just going to select one for now, so it doesn't apply to the whole image, but you you have your letter mask you can use, so go down to my half moon cookie, grab onto my levels and darkened down my levels. Now, obviously, it applies it too much, but I was looking for more. At what point did I like kind of the darkness around that bottom I around the eyeliner, you can do this by also creating a new layer, painting black and turning into soft light, or multiply like that's how you can use blood moans as well. It depends on what you're comfortable with. So with this eye also you have to do with levels with the other, I'll show you the alternative, all right? So I can kind of see before and after kind of dark in it down a little bit can apply just I'm just applying underneath ry so I could do that with the left eye if I go ahead and want to show you a different technique for the right eye, I can take black, I'm gonna paint black underneath the eye and above the eye and then changed the blend mode so some of the blend ones you might try overlay, and that worked really intense and you could back off the a passage if you wanted to. You could also try soft light, and they look pretty similar. You know it in knowing how the photoshopped works to figure out which technique work stress for you. And so knowing that I can come in with my soft light and draw around that iris to make it pop out the next thing that I want to talk about, really briefly, we've talked about blend modes you've kind of touched on. This is what do you do if you want to intensify the color of the eye or if you want to change it so long and talk real quick about it, changing a couple things with the eyes five human, the first thing that I could dio is if I want to totally change the color of the eye I can, I'm going to select her I roughly for now, if you go up to where? Right above where you're last ritual is few click you have your shape selection tools, you have your rectangular marquis, which draws you rectangle. You have your elliptical work markie, which is a circle. You have all these different tools, I'm just going to grab elliptical marquis. It doesn't matter what I select, but I don't like when I applied to the whole image and then I can't like going selectively. It's it's just easier to say, okay, I just want to just the color of the eye that I don't have to see the whole picture change and then flip it back. So when you select your eye for now sector I for now, if they keep dragging in your things and put it into a new layer and I'm going to go to hugh saturation when I go to q saturation, I think a lot of people's inclination would be pump up the saturation, which you could do and so ignored the bottom half. You can paint that off it's not a big deal, but it didn't really pump up the color that much if there wasn't that much color in her eye, so another option I could do is go ahead and click on colorized when you click colorized, it changes the entire photo, the entire spectrum there was drug was up uh change the entire spectrum to kind of one tone of color so if I drag this around for example I could make really really green eyes and you could drag the saturation, make them saturated you also have the ability to make things kind of richer by dragging the darkness the lightness I could drag it down so that's a tool that I could use to apply to her eye and I could paint it off the areas around because it created lair masks like cream paint black around get rid of that effect and he wanted to look realistic so you need to paint the effect off of the iris and then back off a little bit. So if I back off my capacity I can still make it look realistic because I can see some of the colors coming through but it's taken it and made it a kind of a rich green if I want to make that color and all that totality pop even more I could do the same selection of the eye or similar selection and do a levels adjustment just for that. So I use levels to increase contrast so if I go ahead and bring in levels and I want the ways you can increase contrast is if you pull up the pull down the black point it'll make the blacks blacker you pull up the white point it makes the whites whiter so in essence, increases your contrast so I can actually do that to the eye and all these things I can do there all air mass, I can paint them off where they're not appropriate. So if you watch what I just did to her, I and those two steps, I mean, I've made it bright green and kind of brought out detail so I can go over to her other eye and because they were lair master, an adjustment layers can paint that green back in around her eye, and I can increase that contrast around her eye as well. So that's one way that you can change color, and if it doesn't look realistic, you just back off whatever you need to see, maybe it's going to be backing off the color a little bit. Yeah, since you have a question from clare of ira, do you, when do you do anything differently for people with brown eyes if you want to enhance them? Um, so it all depends on the brown eyes a lot of times, it's much harder for brown eyes. What I'll do is if they look just kind of really dark, I can lighten him up a little bit with levels kind of brighten them up a little bit, but usually end up painting color on we're doing colorized the color's, not there. You have to actually colorize you can't increase saturation to pull it out, so I usually aim for more of, like, kind of a honey color if necessary. Something to that effect. Let me show you guys real quick that the difference between her eyes means a massive difference. Now I think it's a little bit too much. Ah, that red is a little bit too bright now, because I've increased the contrast and I might back off just a little bit over here, um, but makes a massive difference in her eyes one other way that I will change the color of eyes besides doing the shows highlights is you can actually paint on eye color and like kenna's eyes, if you wanted to do something like that, you'd have to paint that cause they're crazy, incredibly awesome. They're amazing just the coolest eyes ever, so I'm going to turn off those top two layers real quick and show you how I would paint on color of eyes. So if I went and created a brand new lair to the blank empty layer right here, I'm gonna zoom in and I can pick whatever color I want maybe I'll pick bright blue and it's going to look ridiculous to start off with let's pick my bright blue again, right blue and to pick bright bright blue if you're on your brush tool and you go down to the bottom left where you have your swatches if you click on it you just get your color picture and you can pick whatever color you want so I'll pick bright blue and I'm going to paint that bright blue on her eye and it will definitely look ridiculous it's not gonna look real what you want to do then is mess with your blend modes so right now I don't want that color just to be sitting on top of that layer the blend mode when you change them says okay, take this layer and interact with the layers below it so I usually run through a couple different layers that I know you should give me roughly in effect I want I'm usually it's overlay soft, light, hard, light or color for this effect and these are all these different options here. So watch when I switch it to overlay it's a bright crazy blue or soft light or hard light or color and so none of these look right at one hundred percent of capacity but what I used to do, I'm going to pick overlay for example, if I back off my capacity a little bit and then I soften the edge by blurring it, you just need to kind of tweak the color so I could go filter flor gosh gambler and kind of softens it a bit and then you can tweak it from there obviously that's not a real eye color so you could go up to image adjustments hugh saturation and dragged the hue around so maybe I could pick you know that's a real color blue now maybe that's a little bit too intense you could back off of it a little bit but I could make her eye blue and I think it's more realistic if you erase and bring back a little bit of that green because blue eyes aren't solid blue so I could always addle air mask we've done this a million times grab my decreased capacity brush and bring back a little bit of that green around and now she has blue eyes so that's totally other way that you can change the eyes they look a little bit different so this is blue that we did using a new layer and changing a blend mode in this instance I believe it was to overlay yes overlay and then here this is when we created uh two different layers using colorized and increasing the contrast is there any questions over there? Okay, I think I like them green so it probably proceed using green ok the next thing I do looking at this photo is obviously you're going to look at her face but I think that my eyes are getting tourney to the edges I try to look and say, okay, look at her eyes the next thing I look at is the top left my eyes feel like they're getting pulled there, so in the very, very beginning I talked about how I use been yet to kind of focus the eye, so I'm going to use that using my adjustment layers, so if we go down to our half moon cookie and select curves, I can open up curves if I drag down the center point, it just kind of darkens everything, so I'm just going to that and so I'm looking for when I think that background looks dark enough, the problem that we run into is everything gets darker so I can fill that layer and filling it with black hide all the effect hides all the levels and I can go ahead and grab a brush and paint the effect back in so let's paint the fact back in and I just want to darken down around here and when I'm doing what you'll see is when I do before and after your eye will be a lot more drawn to her face and a lot less distracted by the edges and I'm just painting right now at forty percent capacity and is darkening down those highlights, so if you look kind of a quick before and after and this one's striking to me as well, your eyes drawn back in a lot so I'm looking at that and I'm looking for more distractions, okay? What's the next thing that's distracting me, I haven't proved your skin a lot there's a few things that I need to improve the next two areas that distract me first of all is this string so I'd use my spot healing brush and see if that works because if it works and it saves me a lot of effort, it kind of works and that's your decision of if it's good enough, I probably would extend the feather in with a clone stamp because I think you can tell but it's that's personal taste the last thing is her shoulder here that's distracting to me and you could clone it. We could give it a try. You could create a new layer, your nuclear button and clone. I'm going to go back to normal cloning and I could just say, ok, let's, clone this feather down and then go back in a race where it kind of cloned in part of the arm so I could do that you kind of go in and blend it another option, though what I would probably dio is select some feathers, command j copies and pace it oops copies and paste it into a new layer goto my move two on the top left and kind of angle this so that I could blend it in, and so all you need to do is make it good enough, make it believable, like I said before, so I could erase or I could use my adjustment layers and put their masks to blend it to the point where it's believable and I could spend more time on this, but something to that effect. So the next areas that I want to do is I'm going to finish up with her skin and fix her lips. Um, so the first thing that I would probably do here is I would go in and fix her lips up and a little bit of her face, probably in liquefied. Um, not that honey face needs fixing, but you guys don't I mean, um for the sake of I'm working here, I'm going to hit command option shift e I mean, you have to be selected on the top player, so I got to do that. Come on, let me see if I need this one, which it will call or I do we want let's do one of each, okay, we're doing one h I actually a friend whose eyes were like that she's one blue, one green, crazy high caesar because her dog has the same thing command option shift e and the top blur it emerges them all and put them onto one layer at the top so I'm going to work on liquefying a little bit and I think your face looks a little wide so I'm going to say pull in and give her a little bit more of defined features and I wouldn't even out her lips so I can go up to liquefy and I'm actually gonna duplicate that background lair filter liquefy anyone opens up now a few things that I can consider doing first of all, her ears are uneven and I maybe can't fix it completely but I would bring in the left ear a little bit so it's not protruding as much put in just a little bit okay and looking here I think that a couple of things I want to dio um our zoom in on her lips and even them out of it. So I feel like this side is a little lower kind of pull it up when I wanted to find someone's lips a little more I use liquefy ford warp and I can american raise the ridge on people's lips or pull down the center ridge and I could really give people very decide defined hills and valleys basically um and I could make her lips plumper and bigger, but the things that I'm looking at right now is ok are her eyes even it's like my mental checklist okay, so I mean liquefy our her eyes even yeah, they look good do I need to make them bigger? No, I think they're fine. I don't think they need to be bigger is her nose even she's not quite totally straight onto me so it's a little bit uneven I might want to just pull down one side of her nose a tiny bit but she's not straight on so that's probably ok are her lips even well? They weren't quite even so I've just been tweaking it a bit kind of rays of one side or the other all right, so I'm answering that question ah how do I feel about her forehead? I think I want to lower it a little bit this kind of part of my liquefy checklist so pull down her forehead a little and if you wanted you could freeze that top edge so that it doesn't pull away see how it's pulling away but you can also do is if you lower the hairline you can also go back in with a smaller brush and push the edge back up so depends on what you feel more comfortable with whatever looks more realistic so something like that okay? And then the next thing that I want to dio is that gonna pull in her cheekbones and her jaw line a little bit give her a little more definition swing it back up just a bit and I'm just gonna pull in on the sides here since okay giving her a little bit more to find jawline they could do that it's time to finding her jaw line just pulling it in a bit might treat her nose over a little so it feels more centered to me something like that okay, so we'll just we'll say that it looks good there and that's pretty much my liquefy checklist so I said okay I years you're still bothering but that's just I'm having here thing I want them to be even your armpit and feet my thing so is there knows even yes eyes yes lips yes to find her cheekbones that I make a forehead smaller okay, everything looks good I had okay so it's going toe apply that effect apparently made a lot of changes. Okay thinking quick questions for you about the lips and see what is that? Um oh, there was a well the shell preempted a little bit I mean a tramp something is if somebody's facing straight onto me I usually will mirror the lips and nose if somebody's facing straight on I copy them one side over the other so it matches exactly it's gonna think in a second apply that change so see how kind of even under nose pull given her a little more defined structure zoom out and take a look at her forehand justice before and after again ready you know it's it's kind of pulled on her cheekbone under drawl and fixed her nose um she is not quite straight on to me, but what I would often dio for a beauty shot is that would go to my rectangular marquis tool, grab my rectangular marquis tool, select her lips and hit command j copies and paste that side of her lips into a new layer. I'd go to my move tool, which is the top left and I have my show transform control button clicked if I drag the right hand signed over it flips it over the left okay and so know what I can do is I can kind of move it kind of shifted around if I want and then I can use a lair mask add that leather mask, paint black and blending the edges so I can kind of blend in here funding here and just tweak it so that I can't see other layers so I can make lips perfectly symmetrical you just don't want like you kind of see the repetition right there that makes it not believable you can zoom in and paint that off do the exact same thing with the nose for beauty shots you forgot your question well, this one is from phil birdie how do you get rid of lipstick bleed all right so usually to do for like lipstick bleed and I'll let me undo that cause the lipstick bleed was what I just hid which is why a lot of beauty shots of someone straight on and I could get away with it liquefying different syrup smearing different things I only have to retouch half the face um and I do it all the time if somebody is facing me symmetrically instead of retouching I mean I literally wouldn't slip it over and works awesome um but let's look at this lipstick bleed example let's undo this merge down we delete that so if you look at the lipstick bleed here what I'll dio is I will draw you can do two things I might draw a polygon polygon a lasso tool I might draw a straight line up the lips roughly and you make a selection and anything in this election is going to be solid um so what I'll do is I'll grab my clone stamp at a high opacity soft brush and then I just kind of clone it and so that's obviously going to be too hard so what you can do it you can either back off the a passage a little bit or if when you go back and do it the other time is you feather like a tiny bit like two pixels or something so what that does is buy feathering it you give it a slightly softer nge and so you could make it a little more believable if you back up, I mean that you could have that, chris, but depends on the look that you're going for, and so I would do that to the entire mouth same thing over here like that little this little extra area that's the other side of her lips that's distracting to me so I would do the same selection and get rid of that I also will do the control, click, then hold my shift key so what, you wanna hold my shift key? And it did kind of a straight line and so that's kind of the whole shift and then it will smooth it out, so I'll do that as well. Um all right, so and also I'm just looking at something that bothers me, this area under her nose bothers me, I'm just telling you, like in my brain, when I'm thinking of it all depends on what is the use for this, this image and the client, but I know like I'd clone stamp on light and to get rid of like those under nose wrinkles, they don't really not really bothering anybody, just me, all right? So I get rid of that I would soon back so here's all the changes we've made so far okay, and this is more of a beauty image but again this was for her portfolio as well so I wanted to look like her but I'm trying to make it look like a really strong beauty image I'm going to keep going like all the things that I'm seeing so stop me if anybody out there's saying like yes no questions her hairlines bothering me we talked about how to fix this um it's as if she had light roots so I can go up I can select this lighter area I can command j it and then multiply so I changed my blend mode to multiply it darkens everything down I need to add a lair mask and I can kind of blend the edges in a little bit now one of the problems that you run into sometimes it is when you do you do that you kind of mess with the color so sometimes things can be oversaturated you might have to back off the saturation or you can also try putting the lair and luminosity luminosity also sometimes will help depending on what the effect is for this I would try darken our multiply and it looks like multiplies going to be the only way to go all right so if that's not too distracting to me um I'm going to more things that I would change um I know that I think I'd make her eyebrows darker um so I could go ahead and do a levels where I darkened down and I'm looking I'm just dark and down to where I think the eyebrows look good I can fill that layer with black I'm just using a paint bucket, filling it in and I can go ahead and paint white back on those eyebrows so I can go and fill them in I'm going to kind of to find them so to find her eyebrows a little bit more she looks good may make her mole pop out a little bit all right zooming back my checklist is going ok there's only like two more things that are bothering me I want to clean up her skin and that area right under her chin bothers me so ok, good question since you're asking for them so a question from theresa callie is in california is when you when you flip it over I think this was when we were talking about the lips, but I'm not one hundred percent positive do you pull the layer out of the image, flip it and then put it back or another or another way basically so I select it with the usually the rectangular marquis tool hit command j copies and pace into a new layer then when I'm on the move tool, I have my transform box that shows and I can drag it and flip it over and then once I blended and I'm happy emergent down so it's that's what fundamentally, what she said is what I'm doing it's just depends on if that's what she meant but yeah it's copping it, pacing it, flipping it, merging it thank you all right, so I'm going to dio um I think the next thing that I'll do is her skin and then we'll finish with that area under the neck so so many layers we have this depends on what you're re touches for like it's they don't usually do that so I'm going to dio again for our purposes man option shift e copy and paste into two to mueller so I'm going to mess around with my portraiture and I can tell by this image that it will work really well um you you kind of just learned what it's going to work well for it's one of those things so I'm going to go to filter image gnomic portraiture and I want to smooth out this area kind of the area around her face it's really bumpy and I could go ahead and go in very carefully with light and and dark and clone and dark and down areas that are too light lighting up and that's kind of you just evening things out when you could go in and do that, but I'm going to do it with this plug in um also I know pretty well that that high pass softening would work well um in this area so you could you could do that same technique so I'm going to go in and I want to select this area skin kind of this darker area and it's too smooth with large so it was kind of tweaking things but let's take a look at the before and after here so that smooths up things a lot that still keeps a lot of my detail and I have some blemishes that if I were really going to do this whole retouch that I would get rid of someone apply it and I'm going to apply just those areas of skin I'm gonna see what else it's retouched that I don't want so I consume in and take a look and it's really smooth that out but it still kept skin detail so it still looks nice and I can turn off the other layers if I want to see I want to see what it's smooth that I didn't want it so I could do that um I'm just gonna leave it for our purposes here alright, good so that looks nice when I'm sorry coughing then emerged that down um I tell you these things are driving me crazy I got rid of them okay, hold on all right, so this last step that I would do before fixing underneath her chin is we talked about bringing out facial features so if you remember how we did that to create a new layer gonna put on soft light and first and when a paint white at a low opacity to bring out cheekbones so grab my weight brush low capacity and I wanna paint on top of the cheekbones so I'm just painting white at right now thirty percent thirty four percent capacity so so far okay, you know it's kind of been overdone I'll have to pull back it's fine at another layer on soft light going to grab a black brush on a low opacity paint underneath her jaw line something like that and the rest is kind of blurring and adjusting so I'm going to back off that a little bit and I'm going to filter blur goshen blur and blur underneath a little bit okay same thing let's blur the highlights a little bit absolutely, really so they ok s o to soften the highlights and in the last step um is going to be getting rid of the area under the chin which is going to be the exact same way that we handled a double chin it's gonna be the same kind of warp and erase so I'm softening the highlights right now he's in the same blur slights generally better to be on the desktop it's ok though alright so to see the before and after for how it pulls out her cheekbones I mean, it makes her look like she has much more defined cheekbones and you can back off, for example, in this upper left. It looks a little bit too bright, so I can, you know, back off there but again, before and after so I can really plotter features, you could do the same thing if I wanted to maybe go ahead and give her more defined line down the middle of her knows you could do the same thing with white. I could put a line down the middle of her nose and change it to softly. You guys get the idea. All right, so the very last thing I'm going to dio is fixed the area underneath her chin. So I'm going to graham a selection of it when make kind of a loose selection. Do you like that? Nice selection. It's it's an art, not a science. Um command j so copies that into a new layer and it's looking like a double chin to me even though I know it's not, but it looks like it's me because there's an area of skin underneath so I'll hit my command. See? Right click. I can grab warp and I'm gonna kind of pull it up a little bit and what I'll be able to dio is when I decrease the capacity of that I can see where the chin was roughly ok and kind of see where it was and so I can go in adler mask and on lee allow where the chin was to show through and because I raised that up so far he won't be able to see the area of double chander needs so let me I'm kind of I have a low capacity and I'm just painting the chin back in because I can see where that chin wass and what's good is if I bring the capacity back up I mean I can always undo redo and add to it so I can keep going ahead and saying all right so this needs more for chin and I can add a harsher harder brush if I need teo and kind of blend along this area but that's roughly what what I would do something like that so if I back up and do the before and after and there are million layers um I if you look uh I focused in biba netting the edges lowering down her hairline straightening out her nose even ng out her lips defining her cheekbones um cleaning up her skin really bringing out those eyes using shadows and highlights and colorized I'm getting rid of that area of skin underneath her chin darkening down the hairline a little bit getting rid of the shoulder I mean you can go that far if you so choose if she needed to I could have added fake eyelashes you know there's a lot of different things that squished in her ears. So this is a beauty shoot but also portrait shoot in general, when I do a bit issue, I can also take it even more extreme if I want. So that was a quick run through kind of summarizing what we've done today for using liquefy and cloning and different blend modes in a little bit of everything. So does that make sense? So far, I'm checking. Yes, absolutely. All right, let's. See if there's a way of about five minutes. Okay, our questions before break is that good? Yes, absolutely. And then I can also run through, um what we're doing tomorrow on a couple things like that sounds good. Let's, take some questions and before we go to break so a question from mr software and I know we're not try not to ask you so many. What about this? What about that? But do you ever try to fade out most of the face but leave the eyes and lips? Sharpe, was there anything that you do? Not usually, um, the okay, the equivalent of what I would say I would do is all smooth the skin and sharpen the eyes but I never just do eyes and focus and everything out of focus uh the closest I would say is I believe it's on one that has focal point um where you can kind of mimic a really narrow down the field in general I don't do it that way if I'm going to shoot in camera that I'll shoot it that way but that's something that mr software probably knows like if he's mr software um he's probably tried it maybe um but yeah for this picture, for example, if I zoom into her eyes, I could go back to that tool that I that I mentioned I could go ahead and grab the sharpened tool make sure you have protect details sharpened selected and maybe in this instance I'd want to sharpen her eyebrows a little bit, you know? Maybe they looked a little too sauce and I could pump out around the eyes and add a little bit more detailed but usually it's a combination of sharpening eyes and softening skin that it doesn't equivalent effect the earlier on your other model uh, where you're filling in some of the hair I like photos house do you ever use a paintbrush by sampling ah the color of the hair and just hand paint the hair if I'm hand pains in the hair, the only time I usually do that is for eyebrows um and I don't actually typically hand paint I have downloaded, I told you, there's a ton of free brushes online, I download brushes that look like hares, and then we'll paint them near a painted one hundred percent capacity and then back it off. If you know how to control the different settings in your brushes, you can actually go ahead and change the angle of the brush and you can change so that, like as you're painting, it would look more realistic, or you can have them taper at an end if you if anyone does, uh, choose to draw in hairs, the two tips that would give would be used a brush that looks like a hare or if you draw a straight line, create these straight lines on a new layer and then use this much tool to have them tapered to a point because otherwise it doesn't actually look like hair. But when I am painting here, that's how I kind of kind of fake it. Great. Okay, we have a question from oscar, and the question is, hey, amazing workshop, really learning a lot, but I have a question using liquefy or free transformed do lose a lot of the quality of the image, uh, says you do something to fix the blur that I make not sure about that last part, but do you lose quality of image if you go far enough? Absolutely. You are degrading the cloud and it's like by definition, when you're changing the shape and warping them working or liquefy? Yes, you're damaging pixels, but if you're trying to make someone skinnier, the the long way to do it or the way that you would see it done, maybe by a professional re toucher is what they would do is they would copy and paste things in, and so they're always working with the original pixels. They haven't changed the size the shape, so they would maybe copy the arm, move it in and then blended eso wouldn't actually be a warp for liquefied, but, um, I don't think I've ever had a problem where on image was large, and it goes with the image quality degraded because she liquefied. I haven't really had a problem with that cool have a follow up question from underland sounds so would that ever the question was all those little moves with liquefy? Wouldn't that show up in the final print, or is it a method to keep it is their method to keep it clean? The is expected to keep it clean is not to sample from the same pixels over and over again so if you're trying to move the body in on this side sample from above sample from a little bit further back to push all those pixels in so instead of grabbing just one area and moving it sample from outside that area inside that area above and it's kind of just moving it similar to what you would do maybe with cloning where if you keep cloning from the same area you see repeated pattern so you want to select it to mix it up you're basically trying to mix it up so your eye doesn't detect the changes in the pixel or the repeated pattern it's the same thing about thie being good enough you're just trying to trick people's eyes into believing it and that's why um if you guys have seen so many composites it's just about tricking your eye enough to you know say it's acceptable and not distract you and saying oh that was definitely retouched have a question from fashion tv of singapore probably back from earlier when you're doing a lot of the eye manipulations do you have any practical tips for fixing lazy eyes? How should we approach such issues repositioning now so there's a couple things you khun d'oh um for fixing lazy eyes one of the things you could do is in local fi um opening up the eye, moving it over. If the subject is facing you straight on, you can copy and flip the eye over. If it's. If it's kind of symmetrical and you can change the shape, the thing you want to be aware of is with the lighting. If the catch lights are now both in the middle, for example, like, maybe that your light was over here. Okay, this is maybe this is your main light. Then your catch lights would be there. But if you flip it over now, both class, like you're either on the edges, are in the middle. And so it looks funky is you have to fake your catch light if you flip the eye over.
Class Materials
bonus material
Ratings and Reviews
Sean
Fantastic Photoshop course. I knew Lindsay was great at Photography, Lighting, Posing and Public Speaking, but I am really blown away by her mad (great) skills at Photoshop. Lindsay really is a fantastic teacher. She turns what might be a more or less dry topic into a fun and entertaining topic. Thank you Lindsay and thank you CreativeLIve. You have a real superstar with Lindsay Adler.
a Creativelive Student
This is a great workshop for photographers wanting to learn and hone in on their retouching skills. As a photoshop user and photographer of 10 yrs I have been able to take away some further techniques to help better my skills and more or less tailor them. I would suggest you have some adv beginner knowledge of photoshop because I don't think some of the techniques you will be able to keep up with unless you buy it. There are two things that I wish she did better in her teaching and that is to teach new users to label all their layers and what they are as you are working. As you can see Lindsay ends up with 20 layers and unless your the one doing the editing you will have know idea what is what when you have to go back to it. So its best to teach this in the beginning so people get into the habit of organization early. Also I wish she used a Wacom. It really does cut your editing time in half and you have more solid movements in precisely selecting areas of a photo. From a photographer to other photographers. Use a wacom. You can start with a basic baboo for $89 and when the apple wireless mouse cost $69. Time is money, and a wacom truely save time! I used to use a mouse and my trackpad and once I switched I was like OMG what was I thinking before! So I wish she just emphasized that point more. Overall I think it was $99 well spent.
Christian G.
Not only is Lindsay very knowledgeable and a very good teacher but I REALLY TRULY appreciate her no-BS, straight-forward style.. No time wasted on long tangents talking about herself (or what have you), on cute remarks or on off-the-mark humor. She has showed us many great techniques, has presented to us various creative/different ideas AND she has also really been able to explain "how she thinks of a solution", how there is a bit of trial and error, "even" at her level.. All in a all, a truly excellent course and worth every penny!! Thank you Lindsay and thank you to the CreativeLive team for a great course!!