Lesson Info
1. Class Introduction
Lessons
Day 1
1Class Introduction
25:09 2Basic Tabletop Photography
17:55 3Basic Tabletop Q&A
27:08 4More Basic Tabletop Photography
10:42 5Lighting Setups and Implementation
26:47 6Building Simple Tools
27:41Day 2
Why Tabletop Photography?
30:36 8Product vs. Still Life
27:28 9Product vs. Still Life Q&A
21:48 10Basic Tabletop Setup and Gear
14:38 11Setup and Gear Q&A
19:44 12Lighting Considerations
25:21 13General Q&A
28:43 14Shoot: Wine Bottles
49:37 15Shoot: Jewelry Part I
23:16 16Shoot: Jewelry Part II
34:37 17Q&A and Business
19:05Day 3
18Shooting for Dimension
22:28 19Shooting for Dimension Q&A
14:13 20The Challenge of Shiny Surfaces
29:07 21Working with a Variety of Surfaces
14:33 22Shoot: Make-up and Brushes
35:17 23Shooting to a Layout
37:41 24Student Shoots, Part I
53:09 25Student Shoots, Part II
31:13 26Fixing a Missing Pearl in Photoshop
18:39 27The Value of Your Work
41:30Day 4
28Product and Still Life: The Modern Challenge
26:54 29Still Life Demo (Shoes)
08:32 30Bidding and Pricing Q&A
31:17 31A Sensible Approach to Gear
12:18 32Shoot: Guitar with Multiple Light Layers
17:41 33Guitar: Compositing Lights in Photoshop
30:06 34Drop and Pop
12:40 35Special Shoot: Motorcycle
59:53 36Q&A and Relief Cut Shoot
10:14 37Creating Your Product Photography Business, Part I
40:09 38Creating Your Product Photography Business, Part II
27:08Lesson Info
Class Introduction
product photography and still life tyree is so related but before we get into all the things that separate them and there are a few things that do separated we want to talk about lighting in general so what I want to do is to get everybody up to speed on what I call subject centric lighting but up to speed on lighting for table top it's one thing toe light for something very large but when we're talking tabletop photography we really are talking about something that'll fit up here we're not talking about cars or boats or those things we're talking about something that will sit up here blenders and food objects or cooking tools we have an entire space back here devoted to lots of fun stuff that people have brought in thanks to john cornyn cello and celeste and a bunch of folks that have brought in some stuff for us to photograph where we picking out some of these things jewelry cosmetics these air all great things to photograph but we have to understand how that works so I'm gonna walk ...
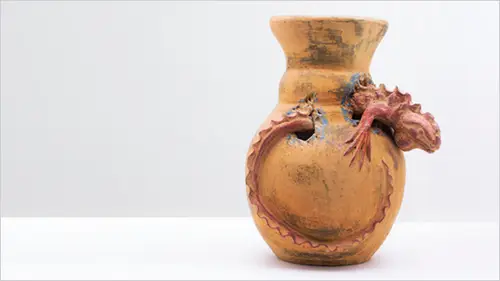
us through some different things um the basis of lighting anything is that everything reflects everything reflects the light something's reflect light differently than others and some something's reflect light maur than others and what we're looking for is five different areas of light were going to go through that but understanding what we're looking at here is some leaves but we're really seeing the light reflected from the leaves not believes themselves thes leads air slightly damp so instead of being a flat matte leaf they're very shiny this because we've changed the surface dimension that the texture to be very shiny have to understand that everything reflects and this particular shot we're using one light source above the subject and you can see the light source in the eight ball first thing you could look at you see the shiny part around here that's the light source to why's it smaller in the eight ball in larger here because the eight ball's rounded and the surface is flat says the same light on the subject has on the background and yet it renders differently we call this a speculum because it is a reflection of the soft box that area there is a reflection of the soft box that's a reflection of the soft box so when subject centric lighting what we do is we talk about the subject out to the light the subject will reveal to you how it was lit and why it was lit we use it to create dimension and shape and texture we use highlights and shadows to show shape and texture this is the goal of every photograph whether it's a an eight ball in a spoon and who hasn't really ever want to photograph an eight ball in a spoke seriously uh or a waterfall or ah seascape it's light and reflection and how you work it I'm going to show you this we'll talk a little bit about this this is three there are three pool balls there of different colors right the light above the pool balls is the same light it's one strip light above the pool balls and yet look how it represents differently on every different they're the same thing that pool balls on the black when we see on lee the reflection of the strip light on the yellow one we see the strip light and we see color around it because it's yellow on the white one we hardly even see this trip like color matters color of our of our subject matters we call that the true value of the subject the true value of this what is that the six ball who plays pool but seven more never the yellow one is yellow well the true value of the black one is black so it is rendered correctly the true value of the white ball is white so when the the highlight slips down to the white ball it's almost un discernible it just goes from highlight which is white down to the to the white ball and do you notice that all three highlights all three speculators are white so in this case we have white against black in this case we have white against white and it changes how the light renders backto us this is our challenge when shooting almost anything but we get into tabletop and product photography everything is reflecting much at a much maur productive level because we're working in such a small area tabletop photography is this big so we have lights in a lot closer then if we're shooting an engagement shot you know across the street type think we're really in tight and so faint everything that we do really matters a lot because of the detail what else does the speculum show us she was a shape we know they're round because the speculum follows the shape and we also know that their deep because we're the r eyes tell us that since the speculum is there and we have true value in front of it it comes forward we know all of this information about lighting because it's what we've been seeing since we were born we understand where light comes from we understand that wood is splintery because of the way it looks to us right well when something looks something tow us what is it we're seeing what is it a seven year old says that looks plenary what is he saying he's saying while dad from a subject centric lighting standpoint we seem to have a very bright highlight very deep shadow with a sharp edge to the highlight transfer which means it's probably prickly he just says it looks you know that's what we do we already know this so our job is photographers is to recreate for our viewers what they already know that this pool balls round that it's yellow it's white and that it's smooth why do we know it's smooth because the edge of this speculum breaks off to the true value instantly so it's a really honest to goodness reflection and that only happens in shiny objects in a non shiny object that's the that's the reflection of the light source I know because I have just previous to this shot I had put a very shiny light source there and that was a pure speculum so that's the speculate on this on the set but we don't see it because the surface is rough it's absorbing the light it's a matte surface we call it defused just like we defuse a light fromthe light source like with a soft box light is also diffused coming back from the subject a diffuse source would be wood ah highly diffuse source would be like a bob a fur coat it's going to take all the light and it's just going to defuse it back to us we're not going to see any texture at all you'd have to create that texture so we have very soft transition areas from the highlight to the true value a true tone of this subject the true tone of the subject is exactly what we want to see and the only way we know that it's shaped the way we want to shape is the highlight and shadow on a white object a bright object our goal is to create highlights and to create shadows because the true value of the subject is already bright we don't create shadows we're not going to see shape does that make sense when we take a very my waist is the same light has the previous shot but this is with a very dark shiny head looks a lot different doesn't it well first of mater no it's it's my mom I know it's just a little glass we have a glass head and a another head in the studio that we play with well we just have fun with it on the weekends I don't want to get into detail thie light is purely reflected back to us because it's shiny glass we know instantly that it shiny we know when we looked at darth vader that he was wearing a very shiny mask right because we could see the highlight down it what we were seeing was actually reflection of the light itself and that's what we're seeing here but we don't have any true value left it's gone because the true value is a reflected surface so what this part of the the glass head is reflecting is my big dark empty studio if I go back one this is because thie surfaces defused it's grabbing it's almost like it's grabbing the light it's almost like you had felt in you know and and dust goes across felt angel's pick it all up right the same dust could go so over something that was very shiny and not get stuck with it same with light the light is going in over this and being defused and picking up and reflecting back to us where in this particular shot there's nothing left of the light the true value of this is its pure dark you can see the forgot that neil yeah you can see the the little highlight on top of the steel rails there that's a reflection of soft box that's sitting on top of the of the head and we go back to the next shot and that remains the same it's we haven't moved that just changed our subject so now isn't it interesting that you hear somebody say well I have a photo shoot to do and it's fill in the blank what light should I use do you see right now that that's an impossible question to answer if you don't know what it is they're going to photograph and what it is that they wanted to look like I've often seen in in um forums questions on how to light a car you don't light a car he liked what the car reflects the shiny class object will reflect all kinds of stuff when you put it around it that's all you have to do is surrounded with something for it to reflect same head same light but now we have white cards all around it the white cards are reflecting and now we can see the same white haven't have not changed the light but we have gotten some more highlights in this grill here haven't we seen that little one right there I'm being really specific but you know what one of the fun things that tell you about shooting still life is you could be so specific with your lighting you can be so deliberate you khun bring your lights and create little tiny highlights where you want them you have total it's your world is in two square feet there you could do anything you want with it especially with all that wonderful tools that we have here so we go from the same light here just our headlight and you notice that this light up here stays absolutely the same and then we bring in reflections now what do we call those I call him highlights horse or my terminology and this will light up the internet I call him secondary speculators because they are reflections of light sources but they're not reflections of the main light source is source now some people call him phil cars I don't use the word phil card I should back up yes I use the word of phil card but I don't really mean it I really meaning reflective card I use the word phil card because when I say to someone who's a reflective car they go huh phil card okay I got one so I use it but what I'm always thinking when I'm grabbing a white card or ah black card or something along those I'm thinking of the subject reflecting out I'm subject centric I want you to be subject centric I want the card to reflect out or the subject to reflect out toe what I put their good question s so you're saying basically when you're lighting something shiny you're not necessarily lighting the part about the reflection of that light to come back off your quarter filled car yes yes because you can let's say this let me go back to this shot right here I have worked with with clients who have said wow that's really dark put more light on it make the light brighter okay I can make the light brighter the soft box I could make it really bright it will have nothing to do with this I can make this blow out way off the charts history gram that's not going to change this this is still reflecting my big dark empty studio my big dark empty lonely studio I should say just give it a little more honks doesn't it and by the way when I'm shooting still life I get to play my own music trust me I create what it reflects doesn't matter by the way I do the same thing with people photography I'm always thinking what's the person going to reflect what's the jacket reflect but when I'm in the studio I'm thinking of what the object is going to reflect these apples by the way don't taste that good just sorry about that guys plastic apples but anyway um I think about what this sub this subject is going to reflect back out to me and it's a shiny surface we call it it's efficient it's efficient because it reflects the light and uh guys if you can get in close you can see all kinds of little white speculators on this can't you and we know what those are that's that light that light that light and probably the little I think between the the the blinds up there you see the point about a speculator light sources it can be very far away and still reflect back on here it can be so far away that you could take a meter reading and not even pick it up as a light enough light to photograph the subject but the reflection of it will still be bright because it's a reflection not a light not the light on the subject it's a reflection from something over there so I'm working in the studio I have to be very aware of what my subjects going to reflect that's where black cards come into play and white shower curtains that air hung around sets when I'm shooting jewelry or silverware um or glass where one time we were struggling with a a glassware shot it was actually a beer about pouring beer shot who had this black line and we just could not figure out what that black line wass is me wherever I stood there seemed to be this little black line going down the glass because it was picking up me because I wear all black all the time so we had to take myself and cover myself with a shower curtain and make the shot so everything can reflect well I stay dressed on shower that's my story and I'm sticking to it um and again we go back I want to go back to moore we can see how diffuse light works look at this beautiful flow in here and we can see how it's speculative secondary speculator highlight light works on this this is such an important part of lighting anything ah but tabletop in product is really important your clients they're going to come to you with things like a blender or a toaster oven and the toaster oven is going to be a kind of a new modern toaster and it's got all these wonderful curves on it which are going to reflect all kinds of angles and you're going to have to control it do you get rid of all of the negative no we need to have some areas in this in this that are negative because we need to create create depth we could turn this whole thing into a white head by surrounding it with a tent and then you have something that's boring now we just we don't have any texture to it or no feeling to it so we have to be very careful when we do it and we'd be become creative where the master of this domain we put light where we want it don't way we get to control it that's kind of a fun thing when you're working with yourself in here you can see how we did it white cards all the way around one light above when you're working in tabletop everything's in close proximity you can have a set of two apples sitting here and around it you could have three or four stands maybe five stands with little arms coming in and holding something teo to give you the light that you want we can totally create a world of oven ambient light and then add more powerful um special lights to it we can raise the ambient with a soft box use cred spots when we're shooting something white light anything from above middle gray up we have to create shadows that's our job to create the dark when we're shooting something dark our job is to create the highlights think about how that transfers took people photography it does you no in fact there's a creative life workshopped that talks about that so I'm gonna be accused of being a promoter I am a promoter I promote lighting so we create our highlights and when we get to something that's in adamant like a vase that's that's kind of new england for vase beefy create our highlights down the side and we do what we need to do to create the shape of it this base has lots of cuts I needed to show those cuts so I needed to let the back of it go dark because if I'd lit up the back of it I wouldn't see the difference between these little lines in it and the background I needed to see that to have them set up shot in here I do and this is the set up shot but I want to show you something see where this thing comes up like this and curves over what happens up here if I don't have this white board up here the light comes up and breaks it would break right there you can see this light coming up and breaking right there then what happened to that part of the base it went black my studio is very dark in comparison to the f twenty two used tto light this up so I had to create something to keep this curve going around when you're working with your table tops where it's going to fail is the little places you didn't see your product disappearing where it faded back into something other than what we needed put the light above the top of the ice looks fine the ice looks great what happens to the glass it's gone it's just gone until we had two cards to the side and we have our glass it's not hard you know tabletop photography isn't rocket scientists science it's being aware of how the subject brings the light back to you and here's how I do the same thing in people photography here is a shot from my portfolio I've got all of the sharp speculators so we know that this is a shiny glass we have a much the same light how much softer transition in the in the accord at the top a very soft transition that shows us the shape of the bottle cap everything works and then when we make all the calculations we get a get a shot like this where we can see the detail yes so that maybe I uh chime in with a question from the internet sure question from tim see bring from ohio so that's a little bit ago but don are you saying that if you increase your lighting I brighter flash all you're doing is adding lighting to this spectaculars more if you want highlights you need reflective cards etcetera can you explain that again if it's on a dark subject especially a dark shiny subject if if the answer was to this let's say this is f eleven if the answer was to take it to f sixteen one stop brighter we could do that this would become one stop brighter this wouldn't change it all because it's black it's black glass what we're seeing here is a reflection of the soft box right we're seeing here is a reflection the studio the studio hasn't changed just because I moved the soft box to have sixteen the studio still big dark empty lonely place being reflected back in it's not changed how do I change that I add something for that dark glass to reflect now if I'd gone from f eleven two f sixteen that would be a stop brighter and these would be a stop brighter right the whole thing's going to move up because this is going to light these cards up brighter asked him if that answered his question tim get back away so huh there's usually a little delays yes we'll get back to us let us know that answer the question because yes it would make no difference in this shot if I added f um sixteen to this image in the dark parts of this sorry I said it wouldn't make it would make a huge difference if I went to f sixteen in this because this is a white subject it's all light it's all reflecting light it would jeff definitely jump up it wouldn't have been the black faith black head
Class Materials
bonus material with enrollment
Ratings and Reviews
mc
THere are some courses in CL i think of as not covering a to z but covering -z to z. THis is one of those courses. The value proposition is over the top. The instricutor: Don Giannatti is so experienced he's a relaxed in his knowledge and practiced in cutting to the chase to provide answers to really good questions about set ups for product photos (vs. art/ still-life). The topics: complete workflow from first principles in order to understand what we're trying to achieve with table top work, Don Giannatti makes it clear that we're using light deliberately to give shape to an object. Example insight: using a white card (or black) reflector is not the same as using a silver/gold reflector. The latter create a new light source; the former shape the light that's there. Can imagine the arguments but the demo brings the points home. Or how about NOT using umbrellas for product shots. Or for "drop and pop" product shots, how to do that without umbrellas and tents "that's 50 dollars a shot right there" says Giannatti. Example tool demo: one of the joys of this course is that such an expert does most of the class using readily makable tools like scrims from shower curtains and baking paper. The specialist tools like a modifier on a flash is well within the range of an aspiring commerial table top photographer. And Meaningful Demos LIGHTING/composition what are some of the most challenging and compelling things to shoot when building a portfolio/photographic experience? Can you shoot shiny stuff - like bottles and jewlery. PHOTOSHOP making photoshop unpretencious and accessible, Giannatti presents examples of how to fix bits of a shot, as well as - and this one is worth the price of admission - how to put together a composite of a guitar product shot if you only have one limited sized light to light the whole thing. We also see where highlights can be added - and how. Some basic knowledge of Photoshop layering, masking and brushes would be good to have, but one can work back from seeing it applied into those basic skills. BUSINESS We start with light giving shape to objects as a demonstrable principle, move into how to use light structurally for bringing out something fantastic about that product - that as Giannatti points out - puts bread on someone's table, so respect. From these demos we go from light and camera to post to produce the finished image. Now what? or how have a product that needs shooting? That's the business of product photography. In these excellent sections on Business, Giannatti details the heuristics of hard graft to get gigs: where to look for contacts, frequency of approach, engaging with social media (you don't have to, he says, but effectively, it's gonna cost ya). "Doing just these few things you're already way ahead of your competition." I can believe it: they are many of them tedious, but can also well believe they are what pay off. COURSE BONUSES JUST FOR SIGNING UP - for those who subscribed to a live broadcast, all the slides were provided in advance (you can see this offer on class materials) Now that's classy. What other CL courses have done that: given something to participants who just show an interest to sign up? (It's that gift thing kevin kubota talks about in his workshop on photography business - makes one want to work with that person: pay them for the value they create, eh?) TRUST/VALUE Instructor Personality Throughout each part what's delightful is just the EXPERIENCE of this instructor. He's put together a thoughtful course from light to lighting to parts to gear to post to business. There's immediate trust: plainly this man has made a living from what he's talking about, and has addressed almost any immaginable scenario. There's a great demo towards the end of the course of working with students to take shots. The value to folks watching is to see how he helps us all think about how to problem solve (the mantra for the course) to find the shot - to use light card after lightcard to wrap the light to bring out the countours of the material. Even when he says "that's just not working" - there's not a sense of the people shooting having failed - but an opportunity to think about what's been learned - to keep working the problem. There's a whole lot of HOW in that interaction that is highly valuable. Thanks to the participants in the workshop to be so willing too to do that work. This is the kind of course you leave feeling like ok, i can do this - or at least i have the tools and some knowhow now about them to start to work these problems, to start to create value in these kinds of shots. I am already just from being here a better photographer now. Related CL Course: This course feels like a terrific complement to Andrew Scrivani's Food Photography. And no wonder: both take place in small areas and use light in similar ways. A contrast is that in editorial food photography - scrivani's domain - there's a focus on skills to work with what's there; in table top/product, one can enhane - knowing how to do that effectively/believably is where the skills - learning to see that - come in for this kind of work in partiular . If tabletop/product photography is a space you wish to explore, or you just want to be able to practice working with light in the small, and see how to bring you will be delighted with this -z to z deep dive introduction.
a Creativelive Student
By chance I stumbled accross Don Giannattis’s Website and his creativeLIVE selection of videos. I was impressed by the material presented and decided to purchase the course for adopting some of his methods and concepts of light control in table top photography. The course covers a wide field, from building your own lighting tools to guidelines for getting in the product photography business. Emphasis is put on understanding light control related to the specifics of the object, discussing the how and why of the creative process. Insistence and patience were demonstrated to be prerequisites for achieving the desired quality of the pictures. I liked to follow the course, because Don Giannattis’s makes an excellent instructor. He has a clear concept, a wonderful sense of humor, and he is very flexible when listening and responding to questions of participants. I really liked this course and recommend it to all beginners in table top photography. William
a Creativelive Student
What an amazing workshop. Don holds nothing back, taking us from start to finish in a manner that will allow anyone doing this workshop (and I mean DOING) to go out and do product photography. What's more, Don is not pushing a bunch of expensive gear as the key to making good photos - he makes it accessible to those starting out with a low budget. I could feel Don's good-will toward beginning photographers in the way he conducted this workshop and that is deeply appreciated. It makes him a good teacher. I bought this course and his Lighting Essentials workshop and consider myself lucky to have the opportunity to learn from him.
Student Work
Related Classes
Commercial