The Photoshop iPad Interface and Must-Know Settings
Lesson 2 from: Photoshop iPad for BeginnersJesús Ramirez
The Photoshop iPad Interface and Must-Know Settings
Lesson 2 from: Photoshop iPad for BeginnersJesús Ramirez
Lesson Info
2. The Photoshop iPad Interface and Must-Know Settings
Lessons
Class Introduction
00:53 2The Photoshop iPad Interface and Must-Know Settings
10:36 3Understanding Layers in Photoshop on the iPad
04:17 4Crop, Rotate, and Export a Photo in Photoshop on the iPad
01:49 5Remove Distracting Elements From Your Photos in Photoshop on the iPad
04:26 6How to Color Correct Photos with Photoshop on the iPad
07:34 7How to Color Grade Photos with Photoshop on the iPad
04:12 8How To Change The Color of an Object in Photoshop on the iPad
10:56Lesson Info
The Photoshop iPad Interface and Must-Know Settings
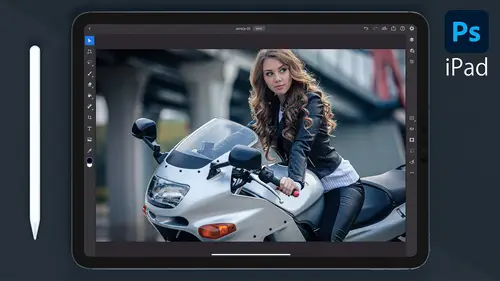
before we start working on this classes image editing projects. Let's take some time to understand the Photoshop work space. I want to start by mentioning that I will be working in the landscape view to make things easier to see on the video you're watching. But most of the time you'll probably work in the portrait mode. Let's take a look at some of the must know app settings from the home screen Tap on the gear icon. Under general, you can select your color theme dark or light. I prefer the dark theme, and that's what I'll select for this class. Also, I have my font names in English. I'll tap advanced, and from here you can restore your APP, default settings and morning dialogues under the input tab. You have your apple pencil and touch options from the touch options. I'm going to enable show touches so that you can see where I tap under account. You can see information about you, including how much available cloud storage you have. Photoshop for. The IPad relies on cloud documents, a...
nd this is a storage place that you have available. If you want to edit your profile, you could do so from here. And this is also where you can sign out of your creative cloud account. The about tab shows you information about the Photoshop version that you're on. I'm currently on version 2.0 point one. From here, you will also find social media links to Photoshop social networks. Under help, you have access to tutorials, gestures and other essential items. For example, view gestures will show you all the gestures that you have available in Photoshop on the IPad. I'll use these throughout the class, and I'll mention the gestures that I use as I go along. Also, if you have a keyboard attached, your IPad, you can use keyboard shortcuts. I will not use the keyboard for this class, but these keyboard shortcuts are available to you if you use one. Also, the keyboard shortcuts are the same as the shortcuts in Photoshop for desktop, so you may know a lot of these already. I'll close the APP settings. The first thing that you'll see when you launch Photoshop on the IPad is the home screen. From here, you can create new documents, open photos or even take a new photo using your IPad camera. Let's take a look at the home screen and at the options available from here, the home tab on the left brings you into the home screen. This is where we are now. It usually this place. You recently opened documents on the bottom, but I have not open any documents on this installation of Photoshop that your work tab takes you into your Photoshop Cloud Documents, Photoshop Cloud documents or adobes. New cloud native document file type that can be accessed online or offline directly from within. Photoshop Photoshop on the IPad and fresco, and your edits are automatically saved through the cloud. Also noticed the deleted tab. From here you will find the cloud documents that you have deleted. You will have to delete your cloud documents permanently to clear a cloud storage. You can do so by tapping on the corresponding documents. Three dot icon. The learn tab gives you hands on tutorials, videos and more that discovered to have this place recorded live streams from Adobe Photoshop on the IPad users. This could be an excellent place for you to get inspired and even learned some tricks from artists who share their work. Then, in the bottom left of the screen, you will see that create new button tapping on. It brings up a window where you can create a new Photoshop document. I'm going to close the screen for now, but we're going to spend a little more time on it a little later on next. Let's look at the import and open button. Before we do, I'll go back into the home screen. Notice that this box also has an import and open link. When I tap on the import and open button, the menu will appear next to the link. From here, you can import photos from your IPad or even take a new photo using the IPads camera. We're going to start by simply tapping on photos, and I'm going to import a photo of this beautiful sunset shot in southern Italy. I'm going to skip the tour as soon as you open a document. You will enter the editing workspace, and your creative work can begin in the center. You will see the canvas, and this is where your photos it's an and it is the area where you will apply the edits to your image. Let's look at other important workspace areas. First, at the very top, you'll see the header bar. The file name and the current zoom level are in the center. You can change the zoom level to anything else by tapping on it and typing in a new percentage. But most of the time you'll probably just do a two finger pinch to zoom in or out to the right of the header bar. You will see the undo and redo buttons, which you will probably use often. The cloud icon allows you to see the safe status of your cloud documents. The sand to button allows you to publish an export, a file, do a quick export or start a live stream. We're going to look at these options during the crop. Rotate and export. Example. The help button shows you important information, like a gesture list and a keyboard shortcut list. And finally, we have the document properties. From here. You can resize your document by tapping on the image size button. I don't want to resize my image, so I will cancel on the left hand side of the editing workspace. You'll see the toolbar. I'm not gonna go through all the tools, but I'll mention some of the most important ones. First on the list, you'll see the move tool, which allows you to move layers. Then we have the transform tool, which allows you to scale a layer. When you tap on it. You will enter the transformation mode, and you will see a bounding box around your layer. You can tap and drag on the corner handles to scale. Also, this transformation mode gives you extra options on the left tap on any of these icons to select a different transformation method and continue distorting your image. To exit this mode, you can either tap on done or cancel. I'm going to cancel so that no distortion is supplied. Next, we have the lasso tool, which allows you to free Hannah selection over your image. Also, if a tool has options, they'll appear next the toolbar in a free floating window and notice a little triangle on the bottom right of this tool. If you see one of these tiny triangles in any of the tools, then you can tap and hold on the tool to reveal the nested tools. In this case, we have more selection tools and the select subject button, which uses artificial intelligence to make selections. We will take a deep dive into all these tools. When we work on the color change example, I'm going to skip down to the place photo tool, which is not really a tool. It's more like a menu option. As the name suggests, the place photo tool simply places a photo into this document as a new layer. You can place photos found in your IPad Creative Cloud libraries, or you can take a new one with your IPads camera. Next, look at the very bottom of the toolbar and you'll see two circles currently there black and white, and they represent the foreground and background color. These circles are known as the foreground color chip in the background color chip, and you can swipe up and down between them to swap the colors, and you can tap on them to bring up the color picker and select a new color. The foreground color is used by the brush to when you paint, and the same is true for the fill tool, which will fail with your foreground color. The Grady in Tool, which is nested under the filled tool will use the foreground and background color to create a Grady in between the two. And then there's this particularly important button right below the toolbar. It is very important that you master it. This circle is the touch shortcut. You can use the touch shortcut to quickly access alternate actions of your selected tool. It only shows if the selected tool has a shortcut assigned to it. If you select the move tool, you will see the circle. The move tool has both a primary touch shortcut and a secondary touch shortcut. If you tap it, hold on this circle. You will enter the primary touch shortcut. The blue label on the top right will tell you what this primary touch shortcut will do. In this case, the primary touch shortcut will keep your move constrained. In other words, you can only move the layer up and down even if you move left to right. If you start your move by moving left to right, you will not be able to move it up or down. The move will stay constrained horizontally. If you drag out on the touch shortcut button, you'll see that the blue label on the top right now. Read, stoop, Lick it. The move tool now is using the secondary touch shortcut, which will duplicate the layer if you drag on it. Now I have two layers, and they're represented by the two layer thumbnails on the right. In this case, I don't want to layers, so I'm just going to tap on the undo button on the right hand side of the editing workspace, you will see the task bar. The first button is a simplified layer of you. It is currently enabled, and it simplifies the layers panel into the little thumbnails that you see here. But you can tap on the detail layer button directly below it to expand the panel, and it will look more like the Layers panel in Photoshop. For the desktop, the Layer Properties button gives you layer properties, including opacity, blending modes and more. Then you have the add layer icon, which creates a new layer when you tap on it. But you can tap and hold so that you can see a list of other types of layers that you can create. I'll undo to remove the new layer below the Adler icon. You'll see the I icon, which disables or enables the currently selected layer the great checkerboard pattern in the case transparency. You can also enable or disable a layer by tapping on the I icon in the Layers panel. The layer mask icon creates a layer mask, which allows you to hide or reveal pixels. We will discuss layer mask further in the color changed example and the compositing example. I'll tap on undo to remove the layer mask. Next, you'll see that clipping mask button. A clipping mask uses the visibility of the layer below to control the visibility of the layer on top. Since we only have one layer, this option is disabled. The filter and adjustments button gives you two options. Gaussian blur and invert. Gaussian Blur blurs the image in the invert button inverts colors. For example, it turns white into black and blew into orange. The three that I can give you more options, including locking layers, the leading layers, renaming layers, copping layers, emerging layers and more. Now they have a basic understanding of Photoshop on the IPad's workspace. Let's spend a little bit of time understanding one of the most important elements for editing and Photoshop, and that is layers