Lesson Info
26. Martian Karen
Lessons
Class Introduction
00:52 2Introducing Photoshop
02:37 3The Class Materials
01:36 4How To Open Files
01:42 5Using The Home Screen
02:35 6Exploring The Interface
03:30 7Getting Additional Help
01:36 8Understanding Workspaces
05:11Tools and The Options Bar
03:50 10Why You Should Use a Tablet
04:31 11Finding Hidden Tools
04:23 12How to See What You’re Working On
08:12 13Selecting Things
08:01 14More Selection Tools
12:25 15Testing the Magic Wand and Quick Selection Tools
07:25 16The History Palette – Undoing Things
05:24 17Resolution and Bit Depth
07:03 18Photoshop Preferences
01:31 19Menu and Item Shortcut Keys
02:39 20Non-Destructive Editing
02:57 21Working with Layers
12:19 22Groovy 3 Exercise
11:43 23Layer Effects and Styles
05:38 24Layer Masks – Karen on Beans
08:33 25Using Adjustment Layers
05:38 26Martian Karen
03:37 27Advanced Compositing Using Layers
08:43 28Non-Destructive Editing Techniques
05:22 29Understanding Smart Objects
07:28 30Smart Sharpen
06:42 31Understanding Histogram
06:24 32Adjusting Curves
03:48 33The Healing Brush Tools
10:26 34The Clone Stamp Tool
07:47 35The Burn and Dodge Tools
05:55 36Understanding RAW Files
01:44 37Adobe Camera Raw
04:18 38XMP Sidecar Files
02:14 39Camera Raw: Edit
12:24 40Camera Raw: Crop & Rotate
03:13 41Camera Raw: Spot Removal
04:56 42Camera Raw: Adjustment Brush
08:17 43Camera Raw: Graduated Filter
05:40 44Camera Raw: Radial Filter
05:11 45Camera Raw: Red-Eye Removal
02:04 46Camera Raw: Snapshots and Presets
09:39 47Neural Filters
10:09 48Portrait Retouching Session
36:53 49Scenic Retouching Session
11:25Lesson Info
Martian Karen
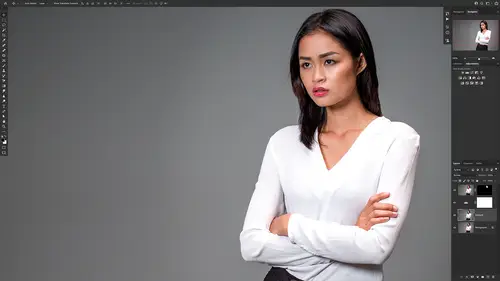
Alright, let's take our wackiness one step further. And what we're going to do is we're gonna make Karen into a martian. We're gonna learn about bit depth and some filters. So let's jump back into Photoshop. We're gonna pick up where we left off. What I'm gonna do here is the photo filter in the black and white filter that we created. I'm just gonna take those away. I'm gonna select both of them by hitting the photo filter shift in a black and white filter and then this delete button, I just want to get those out of there. And so we're back to just carry on beans. And so the first thing we want to do is we want to make Karen into a green martian and we can do that by going down here. We're gonna click on this and we're gonna click on hue and saturation. And so what we want to do is we want to click colorize and we're gonna change her to green. That's pretty green, it's pretty Marchini. And so that's pretty good. We can hide this. And remember we want this to apply to Karen not the bean...
s. We want her to be a martian on normal beans. Like all Martians are so we're going to option click between these layers so that that only applies to Karen, she doesn't look Marchionni enough to me. So I think we need to add a filter. Now, Photoshop has all kinds of really groovy interesting filters and they're right at the top by say filter, You can see that we have the filter gallery and establish some of these things that are just they're great out. What the heck? Remember when we talked about bit depth, I mentioned the fact that some of the filters and features aren't available on images that are 16 and 32 bit images. So let's see what's going on here. Our image. We click on mode. Sure enough. This is a 16 bit image. And so some of those filters are not available. So what we need to do is we need to take this down to an eight bit image that's going to remove some of the color. But for martian, Karen martian, it's not gonna matter at all. So we're gonna go down to eight bits per channel. You can't see any difference here. That's only really if you're doing some fine art printing or something, you're going to see a difference. And so now we can go again, make sure you've clicked on Karen, not the mask, but on Karen on that layer here and then go to filter. Now we've got all the filters showing up. So let's go to the filter gallery and right off the bat, we have a really cool filter. This is the half tone pattern. So this is in the sketch area of the filters so I can click on note paper, that's pretty cool or photocopy. But what I wanna do is I want to use an artistic filter. So I'm going to click the disclosure triangle here. And let's choose plastic wrap. Okay, this is going to put this weird sort of groovy plastic wrap over Karen. And if we hit okay, there we go. Now we have Okay, it's a martian Karen. It's something that we can learn from. If you're laughing you're learning, right? So we have created Marcin Karen learning using layer effects and styles layer, mask adjustment layers and filters. And uh yeah, all these fun things. So what we want to do this is sort of crazy. Nobody's ever going to make a martian Karen and maybe don't know, maybe you would need to make martian Karen. What we wanna do is learn how to use all of these techniques to do something real. And so in the next session, I want to show you an exercise that you can do at home. It's some advanced compositing. And so we're gonna do that next
Class Materials
Bonus Materials with Purchase
Ratings and Reviews
Katie
Mark did a great job at explaining things and going over them multiple times throughout the lessons. My only issue was that sometimes it went a little faster than I could keep up and I needed to rewind it a bit and start again. But from someone who has never worked in photoshop before I 100% recommend this class to anyone trying to learn.