Lessons
Lesson Info
Shooting Menu Part 2
We're on a page for in the record section of the menu the panorama settings so we talked earlier about the panorama options in this camera and you khun do the camera horizontally or vertically I recommend vertically because then you're going to be able to get a little bit more resolution more pixels which is good for better resolution and if you want to do this just be aware that these air only going to be j peg images there's no raw when doing this and if any time you want to end the panorama earlier than the camera wants you to end it you can just hit down on the shutter release for a second time you just hit it wants to get started and then it will go to the end or you can stop it early and that's all controlled and that you have to be in the scene mode of course you have to be in the scene mode and you have to select the panorama mode in order to get to that next up is the elektronik shutter so this is what I was talking about earlier with the forty frames per second it works on el...
ektronik center which makes no noise and we did have somebody who asked the question about is there a rolling shutter effect and so the problem with this system is that as the digital sensor it reads the lines either I think it works from bottom to top as it reads the lines and what happens is it records one line of information and then it goes to the next in the next and the next, and it does this very quickly, but the problem is is that they're not all simultaneous it's kind of panning up as it's doing this, and so the effect is if you are moving, the camera lines get recorded a little askew because you're moving the camera sideways and that vertical line has changed its position as it's scanning upward. And so if you do move the camera while it's in the elektronik tschetter, you're likely to get some weird result and so you have to be a little bit careful. I don't know you might be able to use this to your advantage and something I'm not sure what, but be aware of that if you are using the electronic shudder. The shuttered delay on this camera is for technical reasons. Perhaps if you are in a scientific environment, perhaps you have your camera hooked up to a telescope or a spotting scope and you don't want any movement while you're taking the pictures. This is essentially the same thing as setting a two second self timer. The difference is is that you have the choice of one to four or eight seconds on this normally it's not something that you would turn on the flash option is going to dive into a whole other flash sub menu and you can go in here and control the way that the camera is firing first off the power of the flash you consented at manual or t t l I recommend tl which stands for through the lands automated flash the flash mode can be chosen I think just leaving it on basic flashes fine it's got a nice little pop up flash that's only going to come up when you choose it to come up. I don't like red eye reduction because there is a little bit of delay between the time you press the shutter release and the time that the actual picture is taken and for a lot of times with subjects that you're going to want to use red eye reduction on like kids the reaction has gone the moment is gone and it's easier to fix these sorts of things in post in some sort of photo shop or light room program afterwards the slow sync can be a kind of a fun option if you want to play around with slow shutter speeds the synchro mode for getting into those slower shutter speeds you have the option of a first curtain or second curtain sink for kind of basic photographers you could just leave it in first curtain it's probably going to be fine, but if you are working with subjects that are moving and you're not moving the camera, and you want to let your subject have a little bit of blur out of the back side of them. You might say you would use thes second curtain sink. As you can see in these photographs, the second curtains state looks much more natural. When is thie flash sinking up with the first shot or curtain? Or the second shudder curtain? Next up is flash adjust now, while the cameras flashes going fire in a t t l automated mode, you may want to go in and adjust for it because with flash, what you don't want is too much flash it's better to have too little than too much flash, and a lot of times the camera will fire off too much flash on its own, and you'll want to power it down. Ah, stop or so in power. In some cases, it can be really, really evident depending on what other atonality zehr in the photograph. And so in this example, I think minus two is probably the best skin tone represents representation, and so generally I like to leave it dialled down about two thirds of a stop some people like a little bit more at a stop or stopping a third, you can do your own test to see where you like your camera set out. Moving down still in the flash menu auto exposure compensation what this does here is this allows you to let me check my notes here it combines exposure compensation with flash exposure compensation and probably for most people who are trying to do exposure compensation it's probably easier to lead this left turned on if you do have the camera set in manual which was back on page one, you can go in and you can make manual adjustments to the flash where it fires at one to one full power all the way down to one over one twenty eighth power, which is just a little bit of light. Perhaps if you're trying to get something triggered trigger another slave unit to trigger another flash you might want to use that there is a wireless option on this if you have external flash is this will be able to communicate with external flashes and the reason that you would want to do that is if you want good looking flash pictures the number one tip is get the flash off the camera and so if you can get the flash away from the camera, you're going to end up with much more interesting shadows you're going to be able to illuminate your subject much better than anything that is attached to the camera that goes into a whole another area that we do not have time to go into in this class but wireless is a great option if you have the extra equipment that goes with it if you are in the wireless system you can go through and select different channels so that you could have different photographers working in the same area and they're not triggering each other's flashes and then finally I mentioned earlier in this class that the top shutter speed of the camera was one three twenty eighth of a second or one two fiftieth with an external flash and that was a little white lie the actual truth is that you can go faster than them but you have to have the cameras set up in this f p mode and this will work with the external flash that you would add on to the camera and that has to be in the ft mode and it will allow you to fire at really fast shutter speeds like four thousandth of a second now the flash won't go very far it's very limited in its power and its only for special effects and so for practical use three twentieth is the top shutter speed that you'll be able to use with the built in flash the communication light eyes how bright of light it is going to communicate with an external flash unit and I would if you were going to do wireless you probably want to leave it on high so that it has a very good strong signal to communicate between there if you do have this wireless set up, there is a whole bunch of stuff that we're not going to go completely into where you khun group your flashes into different groups so you could have flash on the left is group a and on the right is group b and behind the subject is group c and you control the power of each of those different groups. So finally backing out of the flash mode, we have a red eye removal option which I would normally leave turned off that's something that could be better done in extra other programs. I also limits that allows you to go in and control how high your eyes eso can go in the auto or the eye I s o mode and so if you know that you don't like the look of s o twelve thousand eight hundred, you could set the upper limit to sixty four hundred for instance, theis so increments uh that is the differences in the sensitivity of the censor, the settings a lot of people, a lot of photographers like to be able to have the fine tune control of one third steps extended. Eso this will allow you to get to the higher eso settings of twenty five thousand six hundred and all the way down to one twenty five I liked leaving this turned on I don't usually use those extended esos but I like to have the option of turning them on if I want to, without having to dive into the menu system to do that long shudder, noise reduction. So when you have a long shutter speed, for instance, one second to thirty seconds the camera would like to go in as you can see here and fix the noise problems. When you shoot with long shutter speeds, you tend up getting more noise, and the camera would like to go in and fix that problem let's say you're taking a fifteen second exposure camera takes the fifteen second exposure if you have this long noise long shut her noise reduction turned on. What happens is it takes another fifteen second exposure to figure out the dark areas to help reduce the noise, which means you can't use your camera for another fifteen seconds. And so I don't like this because it slows me down in the actual shooting process out in the field, and I could do just as good a job as the camera can do with a program like light room or any other software program out there today can probably do is good. A job is the camera can, and you're gonna be able to see it on a much bigger screen with more fine tuned controls. Shading composition this deals with lenses that have a little bit of vignette ing or light fall off. So in this example, you can see that the corners of this image are a little bit darker than average if we were to turn shading composition on, it would make it more even toned. And so in this example, I like the shading compensation turned on. The problem is, is that doesn't look good on all photographs a lot of my people photographs I like adding a little bit of been getting to it, and so this is something that I can do later something I don't want to have the camera do because when the camera does it, it's only got one look to it moving forward page six external tell a converter this is going to do this is going to automatically zoom things in and you don't want to do this it's just going to lower the image quality and it's only available in the medium and the small size j peck so it's not even going to be available if you shoot large sized gay pigs or raw images anything that says digital zoom is probably bad and so I'm going to recommend keeping this turned off you're going to lose image quality by doing this it's very much related to the previous one it's just got slightly different magnification is this will work in large jpeg images and I believe a loss of work in raw images, but what it's doing is it's basically just zooming in on the sensor and it's blowing up those pixels your throwing away data that you probably shouldn't be doing color space indicates the range of colors that you are recording when you shoot raw, you get the largest color space possible, which is adobe rgb if you shoot j peg as a standard, you are set at s rgb if you have no further hopes other than just uploading pictures to facebook and emailing just quick, simple small pictures, you can leave it in s rgb if he would like to print if you would like to take kind of full quality control of your images, you probably want to get this set to adobe rgb the camera has a built in stabilizer that we've talked about, and you can leave this in a normal position. You can also put it in a panning position if you want. It is recommended that if you are using a tripod that you should turn it off, although it seems to do a pretty good job not moving around. Part of the problem is that a lot of stabilizers want to move around a little bit even though they're on a tripod and so the safest protocol is to turn it off if you are working on a tripod and keep reminded that the stabilizer does not work in the video mode the facial recognition is pretty simple there is on and off there is also a memory on this so they could memorize different faces and what you can do is you can take a picture of someone and you couldn't do a profile set up if you have a baby one baby two or pet yes, it remembers pet faces you can actually register a name and even in age of that child or pet so that you can add that information at the time that you were shooting it. This is something a lot of people do afterwards using key words, but it's kind of interesting that it can actually do this in camera I haven't had a great chance to play around with feature I think it works all right and so if you happen to have two babies and one pet, it'll work perfectly for you. Okay, next up is the motion picture mode our menu settings and there are a number of the motion picture settings that you're going to see that are exactly the same as the ones that we just looked at in the recording setting it's and it's whatever one you have set most recently, they're going to be the exact same ones and so will pass by these pretty quickly so officially in the motion picture mode photo style now in j, peguy said, just leave it on standard and it didn't really matter too much here leave it on standard to start with and it matters a bit more and the reason is is that when you're shooting movies, you don't have the option of shooting raw movies it's going to be the image is going to be kind of baked in tow, a particular format, and if this is not looking right to you, you can go in and adjust the sharpness, contrast saturation and even the noise reduction in the way that your motion pictures look for them to start with, I would recommend standard, but if you need to adjust it, you certainly can recording format is going to choose which of the two formats that we had talked about earlier the mp for or the hd the mp for is the smaller, more designed for computer options. Theeighty chd was more designed for blue ray on tv options. The recording quality is going allow you to choose the resolution and the frames per second, according to which mode you have chosen in the record format nineteen twenty by ten eighty is the standard format for tvs as of today on thirty frames per second is normal when you turn the camera into the video mode the motion capture mode on the camera, you can choose program shutter priority aperture, priority or manual when you go into that mode, if you're wanting to record very simple videos without a lot of fuss and must, you can leave it into the p mode very simple to use if you're a little bit more serious of a shooter and you want to have specific control over depth of field, for instance, or exactly what shutter speed is chosen, then you're probably going to want to choose them for manual when you are in the motion picture mode. If you happen to take a still picture, you need to choose what is more important to you the video or the still picture. Not many people are taking still photographs while they're shooting video, but if you shoot if you have the camera set in the motion picture mode, what happens is that your camera records a small j peg and does not interrupt the video it anyway. If you have your camera set to the still picture priority, what happens is that your video cuts out momentarily blacks out there is a pause in the video. You can get a raw picture if you want and then the video is spiced back together again and so your video is severely interrupted, you might say, but you did end up with a high quality raw image, so it depends on whether your priorities are still pictures for motion pictures next page in the motion picture menu is whether you want to have your camera on a continuous auto focus or not. One of the things that doesn't look good in video is when your camera is changing focus as your recording video, and so I highly recommend turning this off. You need to be very careful about the lens changingfocus, because it generally doesn't look good in the final video, you can choose a meter in mode for shooting in the video. I think the multiple mode is definitely going to be the best you can adjust the highlights and shadows. We talked about this before, but it might be very important with the video mode as well as the eye dynamic, not us fund is this one, because the camera is more in control of the look of the image than you, and finally on this page is the eye resolution. If you are going to be working with this in a good video editing program, you're probably going to want to leave this turned off so that you can do your own sharpening and contrasts adjustments later on. If you just want to record a simple little video and have it looked pretty good, you could leave it at the standard setting and it's going to give it a little bit of sharpening, which is probably going to look good third page recording highlights this is going to show you the zebras s o n e highlighted pixels that are blown out two hot over exposed are going to start blinking at you, and this is something a lot of serious video shooters like to see because then they know that they need to adjust their exposure for everyone else it's just kind of irritating, and they're not too specific about a little bit of highlights getting blown out so they could turn it off the extended tell a converter, which is basically a digital tell a converter something you're probably going to want to turn off but does have an interesting advantage. So here is your full sensor. Okay it's four thousand five hundred ninety two pixels by three thousand four hundred forty eight when you record video, this is the area that you are recording and you'll notice that that is much higher resolution than standard hd quality. What the extended tell a converter will do is it will record this area in the middle of the sensor but still recording it at full resolution of nineteen twenty by ten eighty so this is one of those few areas where you can shoot with an extended tell a converter and not lose quality at all, so this is basically a digital zoom and it's simply because that tvs have much lower resolution than our cameras do the normal digital zoom that I've been talking about before that's what you're normally going to want to have turned off you can digitally zoom in two or four times we'll se if you zoom in to times there is no quality loss if you zoom in four times, there is equality loss and so this is exactly the same that we saw in the recording in the record menu before flicker decrease the screen on the back of the camera may encountering encounter a flickering problem when shooting under certain types of fluorescent light. If you do, you can come here and change the shutter speed at which it's showing you the light s so that you don't have that flicker problem. There is some silent operational controls and this is on the touch pad on the back of the camera that you can go in and control. So if you want to be able to zuma lands now, you do have to have a zoom lens that has a power zoom feature to it. To do this, you could actually zoom in and out change shutter speed aperture without clicking any of the buttons or dial's on the camera would all be done on the touch screen itself, which is a nice option especially if you're on a tripod that's holding the camera very steady so the camera doesn't move while you're lightly touching the back of the camera continuing on final page, we have our mike level display if you are listening and you're watching the audio levels and you want to see what's going on for serious shooters, they like to be able to do that for your average mom and pop shooter it's probably more clever in the viewfinder than they want to see so you can leave it turned off, but it just gives you visible sound levels to see where the sound recording is that you can adjust the levels of the microphone on one to four three is kind of the standard, probably a good place to start off if you are encountering high winds when you are shooting, you can put the wind cut at high standards or low normally, you can just leave this in auto, and it will do a pretty good job trying to pick up the best sound possible. Can I think maybe I'll just do a quick check in with you to see if there's any questions or comments at this point? Sure thing, john, back when you were talking about the wireless sync and the flashes, did you talk about what external flashes that you can use? Bilis sink? And that was with from rick the problem right back in the section where they have the slide, where I had the pictures of the flashes, I'm trying to think I believe that the panasonic flashes haven't f l, I'm not a hundred percent on this. I think they haven't. F l that follows in the name designation that they can do the remote flash.
Class Materials
bonus material with purchase
Ratings and Reviews
a Creativelive Student
I bought a Panasonic G9 camera and couldn't find a good visual user guide anywhere. I've hunted through YouTube and online, only to waste hours scrubbing through off topic babble just to find bits of useful information, but there is nothing complete out there. I found John's Panasonic G7 presentation, and it's been immensely helpful. Though the camera button locations and handling are different from the G9, the menu system, and camera functions are mostly similar. I try reading user manuals, but it's easy to get lost and sometimes hard to relate to. John presents everything so clearly, logically, and in terms easy to relate to and follow. He puts in so much time to make everything look professional and make sense. I really appreciate all his hard work, and his love and passion to share his knowledge. I'm so thankful he creates videos like this, as modern cameras have so many features now, that they can get overwhelming to learn how to use. Watching him demo cameras is also really helpful. I've also taken his Fundamentals of Photography class, and it's phenomenal and foundational. It's helped me learn a lot. Thanks so much for these great quality classes.
Nhahanh Nguyen
Simply wow! Worth every penny. The whole course is totally professional and delivered in a classroom-like setting. The visual presentation and live demos are flawless and so helpful if you have your camera on and play along. I would never buy another expensive camera without taking a course like this! I've looked everywhere else online for camera-specific information like this in one place (I have no time to browse the poor manual that came with the camera). John also gives great information on basic photography. Highly recommend the class to all newbies to this camera. I will be much more comfortable using this little beast after finishing this course. Thank you!!
Guy Holt
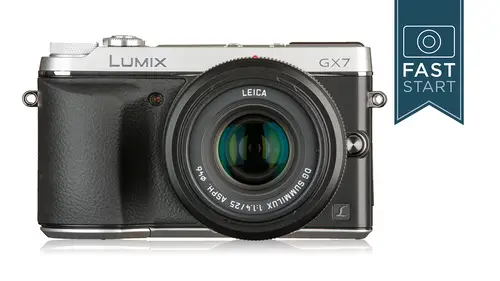
I have had the GX7 for some time, and never fully understood how to use all the settings. This course was brilliant, clear and precise and easy to follow and interesting. Brilliant!
Student Work
Related Classes
Camera Guides