Lessons
Lesson Info
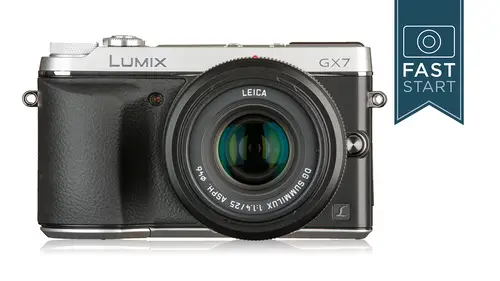
Button Layout: Left & Front Sides
The so is the sensitivity of the sensor on the camera. How sensitive is it too low light levels or highlight levels? In general, the best quality images you get from this camera will be with the camera set at I s o two hundred. If you are under lower light conditions and you need faster shutter speeds for hand holding the camera or action, you'll be moving the center the eye so up we do have a few different options we have an auto eso which is good for generally letting the camera pick things I don't like that, but for people who are new to photography that aren't sure about where to set it that's a good option the camera has a low setting of one twenty five extra high setting of twenty five thousand six hundred. In order to get into this, you need to go into what is called the extended eso option and turn it on so that you can access this it's something I would recommend turning on just so that you can get access to it now. The final one is called I s o and what this stands for is int...
elligent esso, which means the esa will change but it's looking at the types of pictures that you're taking and is going to try to make a judgment call as to where it should be and whether it should change some other feature in the camera at that time and I don't like this mode at all one of the main reasons I don't like it is as I'm looking through the camera or I'm looking at the back of the camera it doesn't tell me what s so it is choosing it's just kind of something that's mysteriously happening in the background and what it's doing is it's trying to look for movement it's trying to judge if you need a faster shutter speed and then it will raise up the s o even higher than it would normally but once again it won't tell you what it's doing until after you've taken the picture and so if you have the camera at least in auto I s o it will show you what it's choosing and so you can try I s o but for anyone who wants to really have manual control of it I don't think it's the right thing but I did run the camera through a quick little standard test I have just to see how good the so is so I shot my standard subject and blew up a little cropped frame of it the camera has very clean I s o two through eight hundred once you start getting to sixteen hundred you're going to start seeing noise in my opinion twelve thousand and twenty five thousand are very, very noisy you want to try to avoid those sixty four hundred is still pretty rough you probably want to be pretty hesitant at shooting there and then down at thirty two hundred starts getting a little bit better, but with a smaller micro for size sensor, my typical recommendation or for most people is really try to state sixteen hundred or lower on dawn lee go up as far as necessary on the cell. Ok, so that is the s o next up on the four way little tab is the white balance we talked a little bit about this before. This is where you can adjust for the type of lighting that you are shooting under what color light source are you under and this is all measured under a kelvin scale? It goes from red to blue, we have sunny shade and cloudy or kind of natural day lighting options to choose from the incandescent or tungsten setting is the dark orange one that is probably the most different of any lighting source that you'll be working under and that's what we often find in our homes. And so if you're ending up with orange skin tones of people that you're shooting, you should adjust it to the tungsten setting and that will correct for it. We also have a number of other kind of more manual modes we have a kelvin mode where we can go in and actually choose the specific kelvin scale number that we want to shoot under so if you want to shoot under fifty two hundred you can set it exactly to that. Another option is that you can shoot a white piece of paper and customized the camera to the light that is hitting that paper so it basically allows you to customize the light that you are working under right then and there and there are two different settings one into that you can save so you can have two favorites two different types of light sources that your work under and then finally there is auto white balance where the camera will look at the image you're shooting look particularly at the highlight information to see if it has a particular color cast to it to see what color your under working under and adjust the white balance for that and the water white balance works pretty good on this camera it's not perfect and so for many people what I recommend is just leave it in auto white balance until you see a color issue that you can identify and then adjust the white balance accordingly at that time an advantage for anyone who was shooting in raw is that you can leave it in auto white balance all the time and you can just go back afterwards in post in a program like light room or photo shop and you can adjust white balance without any damage to your photograph one of the downsides of shooting j peg is that you do have to be a little bit a little bit more sure about your job or your white balance settings. You should really try to dial those in if you are shooting j picks so it's yet another reason to really look at shooting raw images. Okay, that was white balance and next up we have the drive mode on the camera, so I've mentioned this before when we were in the quick menu. We have four options single, continuous bracketing and self timer. Three of those options have a lot of little sub options that you can go in and adjust, so within the continuous mode you can select the burst rate. Now the camera's normal shutter firing can do this up to ten frames per second or excuse me five frames per second, and if you want to go up to ten or forty frames per second, you have to go to the digital shutter or the global shutter. And this can be very interesting because we can shoot at forty frames per second, which is the fastest of any camera that I know that is kind of a standard consumer production camera. And so I thought, I better go out and shoot this in something that really shows forty frames per second, so my favorite new little pieces in this is going to show what forty frames per second looks like so I went to the city championship track me and I wanted to shoot a runner starting in the start blocks at forty frames a second and so what I want you to keep an eye on at the first part of this is I play through these images is the guy in the red shirt the starter and I'm going to start a clock in the left hand corner so that we can count down to the start of the race and so each of these are different frames from forty frames per second you can see a little bit of movement in the background and as we get to the start of the race you'll see the crack of the flash from the gun which only happens for a very, very, very brief second now forty frames per second means that each picture represents roughly twenty five hundreds of a second and as we go through the first few frames you can see that our runner has not moved an inch while the race has been started here we are at point one seven five and if you'll notice her calf muscle in the next three or four frames she's starting to put pressure on the back of her calf right here and we're going to play through these now and so each of these images was captured at about a thousandth of a second but at forty frames per second really allows us to break this whole scene down, and if we want to grab a still image from this, were able to grab a pretty high resolution still image from this, and we can do this up to eighty frames at a time so you can shoot for two seconds and the final image is not full resolution of the sixteen megapixel that this camera can shoot it's, a smaller three megabyte image it's going to be a little bit larger than an hd resolution tv that you can see listed there now, one of the other great benefits of this is that it could do this one hundred percent silent. And so at the start of the race, I'm really not very far from this runner starting the race and I don't want to be there with a camera making a lot of noise, and so I put the camera into the silent mode put it into the forty frames per second burst. I waited for the starter to call him to the start. I was trying to yes, the start just a little bit ahead of time because I knew I only had two seconds in which the camera could fire, and then I started firing and got this little siri's within the eighty pictures that I ended up shooting. And so it's a fun little way to shoot high speed sport action you could shoot anything that happens really, really fast like a golf swing and a lot of other little need things that can happen that you just couldn't capture with a normal camera in a normal five frames per second or even a twelve frames per second camera which is what many of the top professional sports camera shoot so that could be controlled in the burst rate within the recording section of the menu and when you do go through this and record this you will record a burst that will store them together eso as you go through the images you won't see all the images you'll have to kind of dive into those images in the playback mode next up is a bracketing option and there's a lot of different ways you can customize the bracketing so let's talk a little bit about the bracketing mode bracketing is where you let the camera automatically shoot a normal picture a light picture and a dark picture you know there's a lot of little sub options within this how many pictures do you want to shoot? Three is the normal bracket but there's a lot of people doing hdr photography that want to shoot five or seven frames per second and so you can select the number of frames you can also select to have the whole thing over exposed or under expose or the exact increments of the frames. You can shoot one stop increments, which is what most people do. But if you want to have a smaller difference, just a third or two thirds, you could do that as well. Now this is not something that you would typically do in manual exposure modes, but you would use it in the aperture value time, value and shutter priority shudder priority modes and so that is auto bracketing. Finally, there is the self timer mode, which can can be gone into and customized as well. For ten seconds. You can shoot ten seconds where it takes three images, or you could have it just be a two second self timer, which is very helpful for anybody who has their camera on a tripod and doesn't want to touch the camera while they're shooting a picture. They would set the two second self timer they would get their hands off the camera, and that way, there's no vibrations when the camera is actually shooting a picture. So that is the drive mode. And then we did talk a little bit about the mode before we already went through that so weak. Kind of move on to get into the full menu setting, which is what we're going to be doing in an upcoming section of this glass. You would hit the menu button right there in the middle, which also doubles as thesent or confirmation button. Once you are in the menu or many of the other function control, moz let's, take a look over on the left hand side of the camera, we have a little door that opens up, you may have to flip out the back lcd screen in order to get access to open this door, but within the door, we haven't a v connection for digitally connecting our camera to our computers that uses a usb two point oh, interface, I don't recommend using the system, I'll tell you about how I download images. I don't like connecting my camera up to my computer. It's a very slow download you could hook your camera up tio, a tv in hd tv with this h many htm I type c socket, so you could do slide shows your so your movies straight from your camera there's also a remote socket where you can get the panasonic r s l one it's, the remote release that should sell for around fifty dollars, and if you do a lot of nighttime photography, very helpful tool to have down at the bottom is a little speaker, so that when you do play back your movies, that is where the sound is coming from round on the front side of the camera, we obviously have our lens release up on the side, so pressed down and about a third of a turn to get the lens on or off. We have our lens contacts, which are transmitting and receiving information from the contacts on the lenses are sixteen megapixel sensor, and there is an nfc antenna on the side of the camera. Unfortunately, I don't have any nfc enabled devices here that you can kind of tap our touch or just get near nearby and the ideas that you can transfer images without having the wifi problems that we had earlier, it would just simply know what item is nearby and what you want to send pictures to. And so that is built into that side of the camera are lens mt mark for aligning our lenses, and then there is a self assist lamp and an auto focus assist lamp, self timer lamp excuse me, self self timer lamp, auto focus assist lamp, it's a light on the front of your camera that turns on under various situations and if you do, I don't want this on you want to go into stealth mode, you can turn this off in the custom menu so we'll get to that I like to leave my camera mostly in a stealth mode don't like to make a big fuss about things and so turning that office one of the options I like to take looking at the bottom of the camera we have the serial number you can mark that down for insurance purposes standard tripod socket so all the standard tripod accessories will work on the camera there is in the door that opens the battery there's kind of a little rubber cover and the reason the rubber covers there so that you can plug in the a c adapter if you needed to have constant power to the camera you can get this a c adapter for around fifty dollars and you might need the dc adapter as well if you want to plug it into a d c outlet and that's going to be about another fifteen dollars or so so you could have constant power to the camera normally you're going to be using the standard battery which drops in there the blog ten that's going to sell for around fifty dollars as well you get one with the camera as with the d a ninety nine battery charger, nice little travel charger and on the light on the charger it will come on when it's charging and turn off when it is completely charged and will blink it you if there is a problem the memory card goes into a nearby slot right next to the battery on the angled side there uses thie sd memory cards be aware on these memory cards. There is a little right protection switch on the side of the card which will lock the data onto the card, which means it cannot be deleted off the car now before warned you, khun still reform at the memory card and lose information that direction. So this is not the greatest way of safeguarding your images, but it is a short term safeguard for card speed is very important. If you're going to shoot video, you want to make sure that you have class four or faster cards, which are very common these days. Class ten is kind of the standard at this point in time, it seems if you want to reformat the memory card there's going to be a setting in the menu for re forty reef formatting, the memory card and what that means is the leading all the pictures, all the ghost files, all the directories, anything that has been stored on that card has deleted and it's kind of reformatted to be the way it's supposed to work in this camera. So when you buy a new card, you should reformat it even before you use it for the first time, so that the camera has kind of written it's way of working with that card on it itself and so it's something that is important to do every time you go off on a new shoot is well second most important thing first thing is make sure that you have downloaded and backed up your images then put the memory card in the camera and reform at it now as far as downloading from the camera to the computer if you want to take your camera to your computer and you can't do that but it's a relatively slow system if you use a card reader it's generally going to be easier and faster to work with you don't need any special software it has a faster transfer rate as well and the card readers they about these days work with macs and pcs without any special software so they're very very simple to use let's talk a little bit about some of the panasonic lenses so the greats these were the awesome lenses from panasonic they are zooms they have fixed apertures as faras their maximum aperture of either to aid or f or they have their standard zoom which is a twelve to thirty five which has the same angle of you is a twenty four to seventy which is very popular with full friend cameras the thirty five to one hundred ten a mimics that seventy two hundred look and the seven to fourteen is a nice really wide angle lens I I have a slight little problem with the seven to fourteen it's so wide you can't put filters on it so there are no screw and filters it's very hard to shoot through filters because it's got such a bulbous front lens sticking out. One of the things you'll notice with panasonic as with everyone else is lots of little names and words and letter codes on their lenses to describe features or aspects of those lenses. And so these are for the most part excellence is thie twelve thirty five and thirty five one hundred r x, which is their premium level of lenses and you can see some of the other designations that they use up there they have gone from mega o I s which is their optical image stabilizer to power o I s which is even better and better for video for lenses that have the power o I s they have also partnered with like a to make some lenses and I have one of the like us here. This is the twenty five millimeter f one point four so this is the equivalent angle of view of a fifty millimeter lands here and it's a very good quality lands and if you're kind of wondering like I am is this panasonic or is this like a because it definitely looks different than the panasonic lenses and it seems to have a little bit better construction and better look to it what's different well the lenses designed by panasonic the quality standards are set by like a the instruments are certified by like that check this lands the whole quality assurance program that it here's two is like a but it's built by panasonic eso it's basically the panasonic but with a little bit higher standards one of the things that I really like about this lands and some of the other of like lenses is they have a really smooth manual focusing ring on it that is well as we used to like to say that the camera store it's like but a very, very smooth and so if you like to manually focus the like a lens is a really nice kind of the standard run of the mill panasonic lenses to be honest with you they're not that bad they're pretty they're much better than most aa lot of the cheaper say nikon or cannons it does very little fourteen millimeter lens here this one's a little a little stiff it's not great for manual focusing and so something to check out for anybody that does a lot of manual focusing the twenty five great beautiful standard lands they have a forty five macro lens for anyone who wants to get into macro work that's a very nice lands they recently introduced a fifteen have not been able to lay hands on this lands yet so it's still kind of coming out as we speak right now, and this little beast of a lens, the forty two point five is an f one. Point two lends its fastest lends available for the micro for third system from olympus or panasonic as a full auto focus lens. I'm going to share with you something else that's a little bit faster in just a moment. But if you want to do portrait photography, thie angle of view on these lenses, if you want to compare him to full frame lens is what you do is you just very simply, double the number. And so forty two point five it's kind of an odd number of what they were trying to do is hit the number eighty five, because a lot of people love the eighty five millimeter lands for shooting portrait work, and so forty two point five times two is that eighty five, and so that would be a very nice lands for anyone who wants to shoot a lot of portrait work, a few other lenses that you might be interested in. These are some of the panasonic favorite lenses, just people who on panasonic really enjoy a lot of these lenses, so we have the fourteen millimeter lens, which is the lens that I have here in front of me. They call this the pancake lands because it's so small in size and so if you want to put this on your camera your cameras going to be about the size of a typical point and shoot very, very small in size the twenty millimeter lens is about the same size as well, extremely small very, very lightweight a number of people really like the fourteen to one forty, which is kind of the big super zoom it's a twenty eight to now close to three hundred millimeter in focal inc so if you're looking for one lens does everything the fourteen to one forty and optically it's pretty good I seen some pretty good reviews from that it also has the power o I s o for shooting video it's going to have nice, smooth built in stabilization to the lands. And if you want the biggest telephoto lens that they make for auto focus on this it's the one hundred to three hundred and so if you shoot sports or wildlife it's probably more popular, I think with burning photographers who want to have the smallest possible package that's got a long reach, so it does a very good job at that I will mention I have really talked about this yet the camera does have built in stabilization and some lenses have stabilization I don't have any panasonic lenses here in front of me that have stabilization and the beauty is is that with this camera you can use the olympus lenses that don't have stabilization like this forty five millimeter one point eight or the olympus twelve to forty millimeter two point eight lands and so this is the very valuable focal links of full frame of twenty four to eighty so decent quality wide angle good quality telephoto right in that portrait range two point eight is a pretty nice fast aperture for the style of lenses and that's a good general purpose lanes it doesn't have any stabilization but when I put it on the gx seven I have stabilization in the camera so now I have stabilization with that lance and that's one of the kind of key points about this camera that makes it better than previous g x or gf cameras so let's talk a little bit about the olympus lenses because they're fully compatible love using the olympus lenses on the panasonic camera olympus kind of started off with some really sweet primes some fixed focal length lenses and they have a nice little range and they come in this beautiful silver color ranging from the twelve of seventeen through the normal twenty five and the little forty five which is what I have on here and one of the sharpest lenses in all of photography from what I can tell is the seventy five one point eight people who own this lands absolutely love it these lenses are generally not on the cheap side any of these lenses, but they're not overly pricey either. There is going to generally range between four hundred and about a thousand dollars. Maybe, and there might be come down a little bit to nine hundred dollars for that seventy five one point eight. And so if you're looking for simple, small, very sharp lenses the's olympus primes are just really, really nice for this small size of camera. You know, if you want to get into olympus, zoom lens is the one I just showed you was twelve to forty two point eight lands and not out on the market as of the recording of this class. But we'll be out soon. Is theseventy fourteen? We looked at the seven to fourteen panasonic and this is going to be very similar, but it's going to be one stop faster? How olympus have some big plans for some big lenses, so we have the equivalent of eighty to three hundred f two point eight. So that's a pretty fast lens going to be good for anyone who wants to shoot sporting events or wildlife, and for those bird photographers and wildlife that's even further away, they're going to have a three hundred f four, which is going to be a stop faster than the panasonic one hundred to three hundred that we talked about a little bit earlier, I don't know the prices on these because they do not exist at this time. S o at the some point in the future, probably in the later summer parts of two thousand fourteen, you'll see these lenses starting to hit the market. Ok? For anyone who wants a really fast lands, voight lander makes a serious of lenses a wide, a normal and a short telephoto point nine five and so for low light gathering it's going to be good for shooting under low light conditions, or if you want to shoot with shallow depth of field, these lenses will allow you to get the shallowest depth of field possible on a micro for third system, they are manual focus only. There is no auto focus, and so you do have a little bit of work that you're going to have to go through, but that's, one of the neat options of the whole muralist system is that there's, a lot of different companies making lenses for them, because it has a very easy mount toe work with for adaptive lenses, so that brings us up to the conclusion of this section check in with cannons, if there's any questions, perhaps, well, what? Thank you, john what's going through my mind right now as you as you show these massive what looks like massive lenses is how does that work with this little tiny camera body? Have you experimented around with well the lens that I do like when we took off my tripod here on dh switch lenses here because I really do like the camera with the olympus small little prime lenses or the little pancake winds let me just put on a pancake lands and you can see how well that that just, you know, fits in hand that's the size you have a fuji x one hundred and so this is about the same size is a fuji x one hundred but I have interchangeable lenses exactly. You have a little larger sensor than this but I can fit on a number of very small little lenses so one of the lenses that I do like is the olympus twelve to forty because that is just a great range now a great range means it's a valuable range not that it's the biggest range I know you could get bigger resumes but a twelve twelve millimeters means that gives me a pretty good wide angle. It is a nice portrait lands two point eight is gathering a fair bit of light under low light situations and so that's just a very valuable ends. Now the camera does have a pretty good grip on it kind so it feels pretty comfortable in the hand they positioned the buttons and some of the rubber controls on the back so that it feels pretty nice in the hand right there. But it is. It is, you know, it's a little bit heavier on that side is this is where holding the camera properly so that you can. I put a little bit of the corner of the camera in the base in my hands so that I can control the zoom and the focusing right here and another little feature on this particular lenses. It's got a push poll option. So if you wantto manually focus, you can just pull the ring back or you can push it forward toe, let it do its auto focus thing. And if you say, I just want to manual focus right now, you can pull it back and do this and so it's a very quick fill system views. Now, the question is, what smaller this aura camera and three of these lenses. I think this with his own lands is a little bit smaller, but you're always shooting with all the weight. And so I know some people would prefer to have three little prime lenses, and some people would prefer to have one's inland if you go with the primes. It's going to be a lighter weight option when your hand holding it? The lenses will also be faster, especially if you get the twenty four hour to that's a stop faster. The twenty five one eight's, a little over a stop faster, the like a lens or the twenty five. One point for panasonic, like a approved lands, is a little bit bigger in size, but does have that beautiful manual focusing, which I love it's, one of the smoothest focusing lenses I own, you have a lot of lenses. Do I really like that about that? That is props for that lends for sure you have a question from attash, who says that you talked about the panasonic seven to fourteen won't take filters. Do you know if the memphis fourteen does? I believe it will not pretty sure about it, but I'm not one hundred percent certain the same sort of it has that same kind of built in linz hood. In my opinion, if anybody cares, I would rather have had an eight millimeter lens that I could use filters on, then a seven it's just I find filter is very valuable to use from time to time, I like using a polarizing filter, and I like using a split neutral density filter for landscape work, which is who is going to want to buy that lands? A big portion of those white angle users are going people be people who want to shoot landscape. Right? Right. We have another question about these voight lander lenses on the f point nine five that's like a millimeter focus and the rest out of focus. Well, what would that be good for? Not down there, there is a there is ah, a lot of internet disputes. If you want to go on the internet and get yourself into a good old internet brawl, you khun go start talking about depth of field on different styles of sensors and cameras. And so the point nine five. Okay, let's, just say it for what it is they're trying to do bragging rights. It's in f one lands it's just a smidgen smidgen under it on so it's an f one lands when you scale it up to what a full frame is like a sce faras depth of field it's probably like, well, it depends on which focal inc to choose, I think a little bit for probably closer tio in f two lens, which is fast but not out of the world faster is a lot of f one four lenses available in full frame, and so it depends a little bit on how close you focus in, which lends you choose it's going to be pretty shallow depth of field, so you do have that option of being able to blow the background out of focus, which can be very valuable in many different types of photography. Cool, jenna, have a couple questions that are not about lenses go back a little bit further in the class is are you cold to take those? Sure? All right, fire away, guano says. Is there a way to access format sd card function from outside of that regular menu, for example, access via the quick menu or pressing a key combination as his old nikon, d ninety, did? Like you recommended, I perform at the card every time before I go out shooting and it gets tiresome to always navigate through them and you may be right function button set comes down here, I don't think I can do we're going to set a record mode let's see if we can set function. Uh group three, you know, and I'm going to look for format in here, guys, if you see it, just yell out, and I doubt that I'm going to see it here because my only hope is that I could added to this there's eleven pages of things that I could add to any one of these function buttons. And I kind of knew I was going to be able to do this. But I just wanted to show you the process of how to set this up. And so I would say, you know, you can well, thank you for looking and checking, john. Ok, one more question on and this goes back to is the gx seven in elektronik, shutter mode, prone to rolling shutter effect. Yes, it is, and I will be showing those of you who don't know what rowing shutter effect looks like, because I took it out and I did a little test with it. If you do panning shots with it, you can get some very interesting effects. So, yes, it is prone to paint. It is prone to the jello effect, because what happens is you get a little of this in it, and it didn't look so good.
Class Materials
bonus material with purchase
Ratings and Reviews
a Creativelive Student
I bought a Panasonic G9 camera and couldn't find a good visual user guide anywhere. I've hunted through YouTube and online, only to waste hours scrubbing through off topic babble just to find bits of useful information, but there is nothing complete out there. I found John's Panasonic G7 presentation, and it's been immensely helpful. Though the camera button locations and handling are different from the G9, the menu system, and camera functions are mostly similar. I try reading user manuals, but it's easy to get lost and sometimes hard to relate to. John presents everything so clearly, logically, and in terms easy to relate to and follow. He puts in so much time to make everything look professional and make sense. I really appreciate all his hard work, and his love and passion to share his knowledge. I'm so thankful he creates videos like this, as modern cameras have so many features now, that they can get overwhelming to learn how to use. Watching him demo cameras is also really helpful. I've also taken his Fundamentals of Photography class, and it's phenomenal and foundational. It's helped me learn a lot. Thanks so much for these great quality classes.
Nhahanh Nguyen
Simply wow! Worth every penny. The whole course is totally professional and delivered in a classroom-like setting. The visual presentation and live demos are flawless and so helpful if you have your camera on and play along. I would never buy another expensive camera without taking a course like this! I've looked everywhere else online for camera-specific information like this in one place (I have no time to browse the poor manual that came with the camera). John also gives great information on basic photography. Highly recommend the class to all newbies to this camera. I will be much more comfortable using this little beast after finishing this course. Thank you!!
Guy Holt
I have had the GX7 for some time, and never fully understood how to use all the settings. This course was brilliant, clear and precise and easy to follow and interesting. Brilliant!
Student Work
Related Classes
Camera Guides