Lessons
Lesson Info
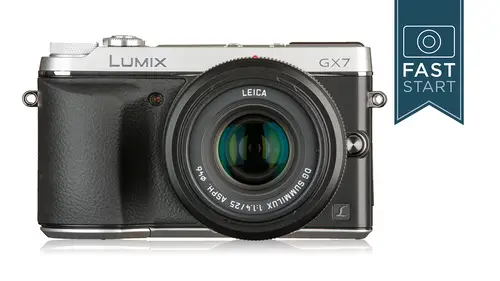
Button Layout: Top Deck Part 1
First off, just some basic controls, obvious stuff we're going to talk about everything, we're going to start simple, the on off switch, make sure you got that turned on the shutter release you're going to need to press that down halfway to kind of wake up the camera. The camera wants to go into a sleep mode quite frequently, so be aware that you do need to tap that halfway or lightly to activate it. There are two dials on the camera, the front dial surrounds the shed, a release, and there is the rear dial, which is not only a dial, but it's also a push button as well. So it's, a dual purpose type device, and so we're going to be pushing in on that button to control a couple of secret features on the camera. The set button is going to be used for entering confirming menu settings, for instance, so the camera has one of the greatest number of customizable function buttons of any camera that I've ever seen. And so there are four physical buttons on the back of the camera that you will be...
able to re program to do almost anything that you want will be a long list of things to choose from the camera also has a touch screen. We'll be going into the touch screen a little bit later, and there are an additional set of customizable elektronik buttons you might say or soft touch buttons that you can program on with a touch pad and back, and so you can have a lot of little different features right at a fingertip touch away in this camera, which is really nice, okay, let's, start on the top of the camera we're going to go through and just talk about everything and make our way through the camera, turning the camera on and off turns on a super sonic wave filter that vibrates it eighty thousand times per second to knock dust off the sensor, and this is doing a great job, but help keep that sensor clean so that we don't end up with black spots on our pictures. If you do get stuff on the sensor, it will be needed. We'll need to be cleaned off, and I'm going to talk a little bit later in the class about cleaning the sensor, but that's happening just every time that you turn the camera on and off I mentioned before about the shutter release it's, a two stage device, so you need to press halfway down to activate the meeting system and the autofocus system, and just in general it wakes the camera normally the camera as it just sits there in front of you is going to go to sleep after a number of seconds and pressing the shut a release halfway down wakes the camera up and you want you want to make sure that its weight woken up any time you're ready to shoot pictures there is a status light on the top of the camera that comes on when the camera is awake and alive you might say if it turns off that means the camera has gone to sleep in the battery conservation mode so just get very comfortable pressing halfway down on the shutter release now beyond taking pictures with the shed a release you can also do it with the lcd screen in the back of the camera so I think this is maybe where I'll do a little live demo on my camera if we got something here to point it at and if you touch the screen you should be able to see a touch symbol on it on and let me make sure that I've been there right note for doing this so there's a little symbol up here that indicates whether you can touch the screen to take a picture or you can turn that off and so I'm choosing focusing points by where I touch on the screen because it's got the x next to the shed a release so I'm going to tap that so now it's yellow and active so if I touch the screen it's going to shoot a picture it's going to focus and shoot a picture on what's right there and just as an experiment I'm gonna put a lens hopefully in frame right there and see if I can get it to refocus and shoot on that so you can see it refocuses and shoots who missed that one not perfect but it's ah about nine out of ten so that's the touch screen and we'll talk more about that as we go through the class as well. Do you think john that you would actually use that out in the field to you? I did use it for something that I created a stop motion movie that I think everyone will get a little kick out of because nobody seen it before I made a little stop motion movie it's very, very brief on it was very handy using that because it's in even lighter touch using that, then the shutter release on the top of the camera I don't know that I would hand hold the camera and do that, but I can see using it on a tripod and it can also work quite well if you're shooting movies, you can kind of do a rack focus where you change focus from one thing to the other and it's a very smooth focus so there are uses for it not super common cool thanks okay also on the top of the camera probably the most important control up there is the mode diallo and this is how we're going to set shutter speeds, apertures and a whole bunch of other stuff so let's, take a closer look at the mod dial itself, and if you want to follow along, we're going to start off on the most simple mode and make our way to be more interesting mode. So I a stands for intelligent auto mode, and this is where the camera will automatically set shutter speeds apertures s o in a whole bunch of other stuff for you. One of the things that I don't like about this mode is that it sets everything for you and there's. Nothing left for you to dio, which isn't any fun, but beyond that there's, a lot of what I call child safety locks that are turned on on the camera, things that you can't get to, you know, technically, there are two ay ay modes there's the intelligent auto plus mode as well, and what the plus mode is is it allows a few adjustments on the touch screen for depth of field, shutter speed and brightness adjustment and let me go over to the camera again and let's, go to the er screen and see if I can change this back and forth there's actually two different ways to change back and forth one option is to press the set button. On the camera or the other ways to go onto the cameras touch screen so let me do the set button on the back of the camera if I go to the set button and I'm gonna go over to the left up, up, up, up and you'll see I have the choice of I a and I a plus and so if we could go to the place, they're going to go to the I e here and I can also do it on the touch screen because I have an I e in the upper left hand corner, so I'll touch that and then I can come down and I contest the a plus a plus for intelligent auto plus and then I gotta hit the set button over here and now what I could do is I can go in and I can control so I can concur go in here and I can control shutter speeds in apertures to a small degree by using the rear dial and punching in on it to either make it darker or lighter. I can punch in again and control shutter speeds, but now I can do I can do that stops there we go shutter speeds and apertures and the camera's still controlling things you know I should be able to get in here and control him on the touch screen as well. I'm not a big fan of this because it's still highly highly controlled and highly limited but it is possible and if it was my camera and this is my camera, I probably would not use that much just because it is very limited in what it could do so let's move on now well another little demo yes, you place I showed you that real time I build everything in the keynote in case something doesn't happen live that I wanted to have a backup on the kino ok s so we did a little pressing in turning for changing shutter speeds and aperture so that's a very simple way of doing that without getting kat in a bad exposure mode, you might say all right, next up is this little paintbrush painter's palette this is the creative control mode, and what you'll do here is you'll hit the set button and you'll be able to choose from any one of this long list of items you will also be able to do this with the touch controls there'll be a little painter brush, you press that and then you'll have the options and so I have taken the liberty of going out to shoot all of these for you and so here to start with is your standard raw image from the camera and all these other different modes are tweaking with the color they're boosting the color there diminishing the color, adding a little bit of tone to it and coming up with all sorts of little photo shop in a camera looks one's dark one's life they've added a brown black and white, the cpi atone black and white contrast in black and white. Uh, noisy or grainy, black and white, the soft filter, the press isn't that impressive. Very impressive are very, very instagram like in many ways, and so this is a lot of little things built in this is not what you're going to do for the greatest image quality, but if you want to goof around and play around, you might have some fun in here. A lot of different little looks to things one of the miniature effect is very strange because what it does is it keeps things on lee in the middle line in focus. It's ah, this is a bad situation for shooting that you should normally be up high shooting something, download a look like it's a miniature and then one of my weird ones is the coming up here on sunshine you can add in a great big sunshine flair, and you can move it around anywhere you want in the frame uh, so those are some of the goofy things that you khun dio in the creative control moat kennedy, you have a question well, I like that sun flare but you said that that using those might not not necessarily give you the best image quality is it because it's turning into j peg or what is it that it is going to be a j peg image by and so it's taking that original nice information and it's messing with it and it's doing things to it? And if you decided you know I don't know that I want this is a c p a toned image anymore, right? You can't undo it and so you do have to be kind of careful about when and where you use it because it's it's locked in and that might be also kind of the fun of it you know you shoot your friend's birthday party in black and white you just like that's the way it isthe there is no changing it right well and it takes away it's just kind of like having all those different filters that you can use in other locations but getting it done right away yeah, thank you. Okay let's move on to the next setting which is the scene setting and this is where the camera has a lot of different settings and I did not shoot all of these. This is going to set shutter speeds apertures in a bunch of other camera controls as best they can in the photographic laboratories at panasonic for these situations and they will do a slightly better job than the intelligent auto mode because it has a better idea of exactly what you were doing. However, you're still going to be able to do better than what the camera has if you know what you're doing, there is nothing going on in the camera that you are not allowed to get to on your own. S o I'm not a huge fan of this because this is something that you could totally do on your own if you're willing to take a little bit of time and effort to do it, let me just show you a little bit on the back of the camera we can go through all the different modes they give you actually examples in here if you want to use the touch screen, you can scroll back and forth and the one that I think kind of is the exception to the rule of what I've been talking about is there is a panorama shot mode, so if you do want to do with in camera panorama stitch, this is something that is different than everything else in the camera and the only other way to do this manually is to shoot individual pictures and stitch them together and for some people that's just a little too much work and so it is kind of nice if you want a quick panorama to use the panorama shot mode I think that was quite handy and a good one to know about for a number of situations, so actually want to show you just a little bit of what the panorama could do so you can shoot extraordinarily wide if you have a lens that's not quite wide enough, and there are two different ways to shoot you can shoot with the camera horizontally, which seems to make sense at first, but the vertical is a better system to use what because what's happening is you're trying to stretch as far up and down as possible and you can swing is why it is you want, and so you get a little bit higher resolution if you put the camera in the vertical mood mode and then kind of swing the camera are generally like going left to right, kind of sweeping across the frame and just for in class demo unplanned let me see if I can shoot a panorama shot in here, so I'm basically going to hit set and I want to see if I can go in and I want to change the direction oh, I think I have to go into the menu into it, so I'm just going to do it horizontally and so what I'll do is I will start over here move the camera slowly I was moving too quickly, he could get a little picky ok and so let me show you the panorama that I just created and so we can even play the panorama there's can over on the left panning over there is that control booth in the back by guys and my camera over on the right so the it does work pretty well it was a little didn't work twice for me here because I was using a forty five millimeter lands which is a short telephoto lens and it's a little bit harder to get things matched up it'll be easier to work with if you have a wide angle lens which is where you would normally shoot it but I didn't want to put one on so you were just john holding that buttoned down correct you and that was a lot how many there was a lot of yeah it takes a lot of them and stitches it together that automatically yeah cool and actually no I don't think I was holding the button down you just press it wants to start and then it starts firing automatically for you and it automatically stops at the end okay and it actually shows you how much of the frame you have left to go so you know how far to keep on swinging got it cool and so that is the panorama mode which is a good handy one because it's it's a simple way of getting those panorama has done a cz quickly as possible ok, next up we're going to kind of move around a little bit on the dial up to the p setting p stands for program hand program is where the camera sets shutter speeds and am pictures and nothing else so it doesn't restrict you from any of the other menu settings or any of the other modes on the camera a lot of things that you could be able to do here and so this is a good quick mode for anyone who manually wants to have control of the camera but as faras shutter speeds and apertures go they want to kind of have a nice, simple preset and so when you put it in the panorama of one of the nice things is that you can adjust those shutter speeds and apertures by either turning the front dial or the back dial and it's what's called program shift and we'll do another little live camera demo so I'm going to throw the camera into the program now and right now in this city the situation we're at f one point eight at a hundredth of a second and if I turn the front dial well, I can't go any lower than one point eight because that's his open as this lens gets but if I want more depth of field I could close this down and let me throw another lens into the scene here so that we have some step the field work with if I wanted more depth of field let's go back to more depth the field I'm going to go to f twenty two I can take a picture here and we can see in the final picture I was able to get the lens in the front more in focus with the back and so no matter where I set this and we can see our numbers changing down here I can take a picture on any one of these and I'm going to get the proper exposure I may get a different look let me play back our three images we turn off this display so there's shallow depth of field a little bit more depth of field and more depth of field because we can see that lens and focus so there's picture three picture too picture what's picture one, two and three and so it's kind of hard to screw up at all in the program mode but you're able to go in and make some quick changes. What I don't like is that if you were to turn the camera off and turn the camera back on it's going to reset all your settings for you it's also not good if you have your camera set up and you shoot a bunch of depth of great depth of field and you kind of forget about it and then you go take another picture where you want fallowed up the field, the camera was kind of stuck in that last position, and so I find this best just for simple, basic picture taking, where you don't have a lot of either depth of field requirements or shutter speed requirements. If you do, you're probably going to want to go onto aperture priority or shutter priority. If you have adjusted the program mode into program shift, you'll notice there is a little pea with an angled arrow down at the bottom that will show up to let you know that you've adjusted the program from its default setting. All right, moving up to a for aperture priority. This is one of my favorite modes on the camera. This is where you get to control the aperture and the camera will figure out the rest, and so on this, we're going to be able to control the aperture with either the front dial or the back dial of the camera, and you'll notice that the control that I am working with has yellow numbers, and so if I'm setting the number it's in yellow and aperture, priority is great because I can control how much depth of field I'm shooting with, and I'll just be keeping an eye on the shutter speed, and so I think that is a very good mode for general photography, I know when I was in cuba. My camera was on aperture priority as I walked down the street and had no idea what my next photo could be and I liked it there because I could just quickly go from shallow depth of field to great depth the field with just a few flicks of the control dial on the camera next up is the shutter priority mode and this is very similar to the a aperture priority mode that we just talked about should a priority obviously allows you to control the shutter you get to choose what shutter speed and the camera will work with whatever best aperture it khun set let me just do a quick they'll change on this camera on dh let's go ahead and get this set up okay so now I have control of the shutter speed with either the front dial or the back dial I'm still in aperture priority switching over to shutter there we go so now I have control of the shutter speed you can see that in yellow at the bottom of the screen here I can control it with the back tile or the front dial and if I set a shutter speed of let's say thirtieth of a second we get a pretty good looking picture if I said a shutter speed of we'll go real fast two thousandth of a second I've ended up with a perfectly black picture let's go to something six forty still pretty darn dark the problem with the shutter party mode is that if you're not paying attention to the fact that you are out of range and don't have enough light, you're going to get you through a dark picture or an overly bright picture and the reason is is because there are so many shutter speeds to choose from the camera doesn't always have enough apertures or the right apertures in order to make that adjustment, and so you have to be very careful when you're working in the shutter speed priority mode and it's not something I recommend for most people in most situations there are some special situations that it will work, but in general for most people who are new to the camera, I say just avoid it for the most part, I never you shudder priority moat there's a rare rare case that I would ever use it if there is something that I am really trying to do a very specific shutter speed with I'm probably going to use manual exposure on the camera manually set my shutter speed and manually set my aperture, which is our next mode so let's talk about the old forgot one of the little thing we've got to do uh four program aperture priority and shatter priority the dial in the back of the camera can also be pressed in to do exposure compensation and when you do that you're going to get this compensation scaled down at the bottom that will allow you to shoot over exposed or under exposed pictures. The problem is, is that the light meter in this camp and all cameras measures what it thinks is an average gracin in front of them and some things are brighter and something's air darker and so if you want to brighten it or darken it, you would, for instance, go to plus one to make it brighter or minus one to make it darker. So let me do a little live demo with the camera in this I'm gonna put a camera in aperture priority and I'll go ahead and just take the first picture right here you can see that's a pretty decent exposure right there. I'm gonna press in on the button and I'm going to go down to minus one and you can just immediately see how much darker that iss I'm going to go into this and go up to plus one and you can see how much brighter that is there and so very simple way of making your pictures brighter and darker and you want to remember to leave it at zero most of the time because that's kind of the general set point that you're going to want to keep it I don't want to leave it at minus five you're going to end up with some very dark pictures if you do that okay, what do we have next? Oh, my favorite mode full manual. So when we flip it over to full manual the front dialogue, the top tile on the camera now controls the aperture and the back dial controls the shutter speed and you're going to have to look in the view finder or at the back lcd forgetting the exposure set properly. So let's, go ahead and do a little demo on camera here let's just say we want to choose f eight make sure my cameras in manual here so I'm going to change f eight on the camera and you can see it in yellow down here and now I can see that my light meter is way off to the minus side, so I'm going to need to start changing my shutter speeds tow let in more and more light until my light meter down at the bottom, right next to that, two hundred is coming towards the zero it's lined up right and right about there we've got the plus minus zero, which means we haven't even exposure, we're att f ate at one three point two of a second, so it's about one third of a second and let me just choose something back here, I'm gonna move this lends a little off to the side well, go ahead and take our picture and so we're lucky we were on a tripod because that was a pretty slow shutter speed about one third of a second and let's play that image back and so we have a proper exposure. If we wanted to make that picture a little bit darker or a little bit brighter, we could adjust either the shutter speed or the aperture all adjust the shutter speed and go up to one eighth of a second that is less light, so it's going to be darker if I go down to a full second that's going to end up with a very bright photo and so good way to control how bright it it is or dark it is in manual just by controlling your shutter speeds, apertures or potentially your eyes so which we'll get to in a moment so that's the full manual known next up we have the movie mode creative motion picture mode when you flip it into this mode, the camera knows that your goal is to shoot video, and so the shape of the screen changes into a sixteen by nine aspect ratio so it's much wider than the four by three kind of boxy shaped to the screen, the screen on the back of the camera is kind of in between so there's always going to be something blacked out depending on which mood you're in now when it's in this creative mode you don't have specific control over shutter speeds apertures, or is it in program? And so within the menu system? Here's your shortcut? If you want to set your exposure mode, you're going to need to go into the special motion picture menu so that you can choose which exposure mode you would normally jews. Now, if you're, I don't know, maybe the family photographer and you're just taking simple videos, you probably put it into the program mode toe let the camera figure out shutter speeds and apertures. Panasonic is known for their very high quality video cameras and video functions in there, still cameras. So if you are interested in shooting video with this camera on a more serious note, you might want to go in and set that up manual so that you can stay set specific shutter speeds and apertures and so forth. Then finally, above that we have c one, two and three, and these air custom moz, that allow you to go in and customize the camera. The idea here is that there are so many controls in the camera that is, you change from one type of photography to another type of photography it's going to take you two or three minutes to change all the different features in the camera, so if you do this ahead of time and you kind of lock them into these different customized modes. You can just switch quickly, go from c one two c two and you've changed the meeting system, the motor drive system, the exposure system and who knows how many other different parts of that camera? So the camera has three main modes, but the third mode actually has three modes it's in, so it actually has five votes, so let me just show you, I'm going to flip my camera to c three, and if I hit the set button and you'll notice on the very top of the menu is the c option, and I can choose version c one c two or c three so you can have five different setups in your camera ready to go, just basically the flip of a switch or touch of, ah, touch of the screen, we get to it through the touch screen as well. So very cool for anybody, who's, just who has kind of set things that they do that are very different that require a lot of different set ups on the camera, and as we get through and into the menu system, you will begin to realize that there's a lot of different options and trying to remember all the options that you want to change is a little difficult and it's very time consuming when you want to switch from landscape photography to shooting birds, which is something that you're going to find potentially back to back. And so, as I said, you could do this, either with the set button and the dial on the top or with the touch pad on the back of the camera. And how do you do this? We'll just set the camera exactly the way you want it aperture priority shutter, priority manual and the full list of the menu settings that you want, and then you go to the custom page on page number one and you can set your custom memory and you just basically go in and register those settings on c one, two or three one, three, two or three three very good system for people who do a lot of different types of photography quick question on that, john, is it possible to name those or do they just have to remember? Well, I have physical ink on the top and so they're not able to change the c one two in three I mean, like it doesn't there's not an option for to show up on the no, that would be a great idea or something that would be a great idea, so unfortunately not all right, yeah, no camera has done that so far.
Class Materials
bonus material with purchase
Ratings and Reviews
a Creativelive Student
I bought a Panasonic G9 camera and couldn't find a good visual user guide anywhere. I've hunted through YouTube and online, only to waste hours scrubbing through off topic babble just to find bits of useful information, but there is nothing complete out there. I found John's Panasonic G7 presentation, and it's been immensely helpful. Though the camera button locations and handling are different from the G9, the menu system, and camera functions are mostly similar. I try reading user manuals, but it's easy to get lost and sometimes hard to relate to. John presents everything so clearly, logically, and in terms easy to relate to and follow. He puts in so much time to make everything look professional and make sense. I really appreciate all his hard work, and his love and passion to share his knowledge. I'm so thankful he creates videos like this, as modern cameras have so many features now, that they can get overwhelming to learn how to use. Watching him demo cameras is also really helpful. I've also taken his Fundamentals of Photography class, and it's phenomenal and foundational. It's helped me learn a lot. Thanks so much for these great quality classes.
Nhahanh Nguyen
Simply wow! Worth every penny. The whole course is totally professional and delivered in a classroom-like setting. The visual presentation and live demos are flawless and so helpful if you have your camera on and play along. I would never buy another expensive camera without taking a course like this! I've looked everywhere else online for camera-specific information like this in one place (I have no time to browse the poor manual that came with the camera). John also gives great information on basic photography. Highly recommend the class to all newbies to this camera. I will be much more comfortable using this little beast after finishing this course. Thank you!!
Guy Holt
I have had the GX7 for some time, and never fully understood how to use all the settings. This course was brilliant, clear and precise and easy to follow and interesting. Brilliant!
Student Work
Related Classes
Camera Guides