Lessons
Class Introduction
03:11 2One-Light Basic Fundamentals
09:53 3Shoot: Create a Dramatic Look
12:14 4Shoot: With the Background in Mind
06:57 5Shoot: Short vs Broad Lighting
03:09 6Shoot: Use Soft Light to Create an Flattering Look
08:36 7Shoot: Create an Everyday Portrait Look
10:45 8Shoot: Reflectors to Add Extra Pop
02:39Lesson Info
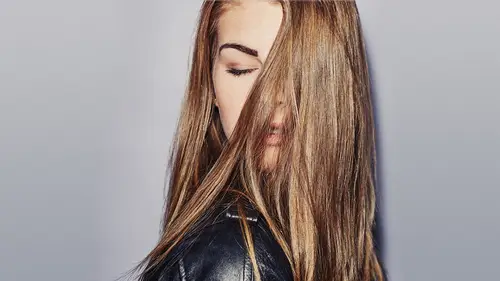
Shoot: With the Background in Mind
So many people ask me, well, I have this white background or they'll text me and say, or email me and say, which gray seamless should I order? I don't have gray seamless, I only have white, because if I want gray seamless, take a step towards me, like way out here, I don't even, we're gonna do, ah let's go back out two. So now we're moving him away from the background but I'm gonna move closer. We're gonna maintain the same settings for everything, if I don't drop my camera that'll be great. Five six. Five six, so we need to go up a little bit. All right, I'll just move in. So, we're gonna do one more, now watch how dark the background will get. One, two, three. Yeah, so, again, I don't own a gray background and that's only, we're only like four or five feet away from the background. So, if you wanna shoot and make a white background gray it's a lot easier than making a gray background white which is pretty much impossible unless you just wanna blow it out. So, I only own white bac...
kgrounds because it's so much easier for me to make it gray and it's a good lesson to know when people do ask is, you can make a white background white with one light, you just need to position the light accordingly. So move your light away from your subject and that falloff will be less and the background will be whiter. So, Joe I'mma have you take one step back. I'm actually, John I'm gonna have you hold this light almost directly to the side. And now we're gonna have no light on the background. So yeah, maybe just a little bit higher and angle it down. Right in there. Actually I'll meter and. We're gonna continue to shoot at F just because I think consistency's important when we're learning about this stuff. Four five, we gotta go up a little bit. Alright, we're at F8. So yes. I'm gonna have you stand straight on, head towards the light just a little bit, right in there. And it's feathered a little bit in front of him, we'll get a little bit of a gradient on the background. I'll have you aim that just a-- oh there we go, that works. So you can see, still the exact same light, still F8, everything's the same. Now if this is a situation where you don't like that shadow on the background, if you think it's distracting, this is a case where we can move, yeah if you just wanna raise that up. I'm actually gonna move everything in sync here. So we're gonna get rid of that shadow. That's high enough, yeah. Feather just how you had it. And I'm actually gonna have you take a huge step forward. And I'm gonna take a huge step backwards. So we're gonna get rid of that shadow by moving him further from the background. So we'll take a blast of F8 here. And normally on rushoots I don't meter this much, but I think when teaching and trying to explain things it's important to be consistent and accurate. So I just want all of them to be at the right setting. So same thing, how you were looking off this way. Frame we're about the knees, up. So same idea here. Boom, F8, and now we should get rid of that shadow. So again, we didn't change anything, this is the same light as this. And now, along with the same lines of falloff, notice how if we wanna light more evenly from head to toe, all we have to do is angle this down. I like what we did there. But this is the same idea as our background. So the other way in which you can use falloff to your advantage is re-angling the light. We're gonna leave it right here, we're gonna angle it downwards. And I'm gonna feather it in front just about how we had it. Does that look similar? Similar enough. Nothing should have changed. We can meter just for fun. Alright, bingo. Six three. Six three, so we'll go up a few clicks, should be about eight, nine, alright, we're good. We'll call it good. So I'm gonna continue to use the same frame, but what this is gonna do, this one should have a little more light on his hands, but then I'm gonna show you the real magic after that with full lighting. One, two, three. Alright, so we've angled it downwards, little more evenly lit. His shoulder blade and forehead are just a little bit brighter than hands, but the same thing is true when you're lighting a white background as when you're lighting a person from head to toe. His forehead is still what we're exposing for, but that light falloff from this distance is about three feet, this distance is about four or five, so all we need to do, move the light up higher to maintain that angle as we move it back. So you'll see now, stay. We'll meter one more time. Let me pop the power up, I know we're gonna have to. We're going for F8, boom. Eight. Eight, we're gonna keep the same frame. And now he should be a little more evenly lit from head to toe and I bet our background might even get a tad bit brighter. Yep, so there you go. So by moving the light away from him we have a little more even light and the background got brighter. So it's the same thing, it's all about where you positioned your light relative to where your metering. Further away it is, the less falloff you're gonna have, so the more your light's gonna extend into the frame. Think about this, if you were lighting a family of four with one light and you have Dad over here, and Kid and Kid, and Mom and you have one light off to the side. If you're light is close to Dad, he's gonna be really lit. Pretend that your mom is the background over here, like we just did, she's gonna be dark. So the key is to get that light as far away as possible so you get nice, even lighting across everybody. So that's another way to think of it. So it can be, I mean, the inverse square law is relative to, and very useful, when lighting backdrops and groups of people with one light. You can obviously put the light right in front, but if you are trying to get that shadow, you just need to move the light further away, so that distance is effecting the falloff a lot. Does that make sense? Any questions about anything? I have a question about metering. Yes. I've never used a meter, well years ago when I shot film, but I use a histogram and I test shot and I look at the histogram on my camera. Is there a vantage that a meter could give me that reading my histogram doesn't? I mean, your histogram is just showing the highlights on the right and the shadows on your left. Rather than do that, I like to use the meter because I like to just see exactly the spot, let's say something else within your image is brighter or darker. Your histogram can change. So I like to use the meter because it's spotlighting the exact spot that I want to be exposed properly, so by metering on his forehead, which is where the center of interest I want, that's gonna tell me exactly what the light's gonna be at the point where I want it. Where looking at a histogram, depending on your situation, if you're lighting someone on a white background and you're lighting the background independently, your histogram's gonna shift to the right a lot and show really bright, but they might not have a lot of light on them. So by using a meter you can specifically tell where the light is at your proper aperture within the frame. Does that make sense? Alright.
Ratings and Reviews
Ryan Redmond
I have mixed feelings on this one. I would still recommend it because the theory and explanations are solid and he gave a wide array of examples that show you the incredibly broad spectrum of results you can get with a given light just by changing distance and position. Having that general understanding of the fundamentals will be very useful. I'm a little bummed that he's using thousands of dollars in lighting for something that felt like it was promoted as an introduction or fundamentals class. I am a hobbyist and I am using speedlight and small softbox or umbrella combos that cost under $100, not 500 watt strobes in 60" softboxes or $1500 strobe and beauty dish combos. It would have been nice to see some examples with more basic equipment. I know the concepts will scale with some practice though, so the class was certainly still valuable.
a Creativelive Student
Fantastic little course. I knew a lot of this stuff already but still learned a couple things, too. I love seeing how different photographers explain the same things and Dan was crystal clear and highly effective. Glad I bought this course.
Jeff
Brilliant course for beginners. Would like to have seen some comparative examples with slightly cheaper gear, but that is for the individual to experiment. The inverse square law theory of light was a great help to me.
Student Work
Related Classes
Portrait Photography