Left, Right, Front and Bottom Sides
Lesson 16 from: Olympus OM-D E-M5 Mark II Fast StartJohn Greengo
Left, Right, Front and Bottom Sides
Lesson 16 from: Olympus OM-D E-M5 Mark II Fast StartJohn Greengo
Lessons
Course Introduction
04:48 2Olympus History and Product Overview
12:56 3Photography Basics
09:46 4Basic Controls and Touch Screen Demo
04:26 5Mode Dial: Auto, Art, Scene
11:30 6Mode Dial: Movie Mode
05:06 7Mode Dial: Program, Aperture Priority, Manual
14:18 8Top Deck: Function Buttons, Microphones, Flash
11:51Electronic View Finder
12:31 10ISO and White Balance
06:28 11Auto Exposure Lock, Info and Playback Buttons
13:30 12Focusing Options
03:50 13Super Control Panel: Flash Options and Image Stabilizer
08:39 14Super Control Panel: Sequential Shooting and Quality
10:29 15Super Control Panel: Auto Focus, Metering, and Aspect Ratio
08:29 16Left, Right, Front and Bottom Sides
11:57 17Lens Options
17:37 18Shooting Menu 1
10:35 19Shooting Menu 2
12:06 20Playback Menu
06:01 21Custom Menu A: Autofocus/Manual Focus
14:30 22Custom Menu B: Button/Dial/Lever
06:09 23Custom Menu C: Release/Drive Mode
08:09 24Custom Menu D: Display Items
15:44 25Custom Menu E: Exposure/Metering/ISO
13:15 26Custom Menu F: Flash Sync
02:34 27Custom Menu G: Quality/Color/White Balance
05:43 28Custom Menu H: Record/Erase
06:57 29Custom Menu I: Movie Mode
09:46 30Custom Menu J: Built-In EVF
03:45 31Custom Menu K: General Utility
06:06 32Setup Menu
11:17 33Camera Operation
13:20Lesson Info
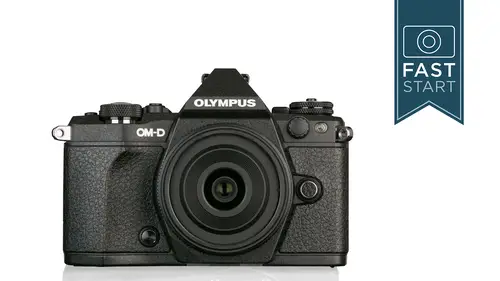
Left, Right, Front and Bottom Sides
All right let's continue our tour onto the left hand side of the camera we have a rubber door that opens up and we have a few little things that we can plug into so we have a mic sock sock it which is tthe e three point five millimeter jack for plugging in standard size microphone so if you want better quality video you want better quality audio fact of the matter folks is people will watch bad videos we know that but they do not like bad audio and so if you have bad audio that is a big no no in the world of shooting video so get yourself a nice microphone if you're going to shoot lots of video the hd my connector will allow you to connect this camera up to your tv for instance to play back your movies or do a little slide show right from your camera the multi connector is used for a number of different things this is kind of an olympus proprietary connection on here and what we can do is we could hook up our remote control so that we can fire the camera from the cable release so that ...
we're not bumping the camera we can also have a cable that will connect up so that we can do firmware upgrades and this is something that you want to have and I actually have mine right here because we were just doing a firm up square up update the other day we'll talk about this is we get into the menu system and so the way that you update the firmware is you gotta plug this into the camera and then you're going to plug this into your computer and it does kind of live download over the internet new firmware for your camera and so you want to keep that around I gotta keep my labeled so that I don't get it mixed up with all the other chords that we all have for all of our computers and so that's what you're going to be using that plug in for over on the right side of the camera and not too much going on over there that's where we plug in our sd memory cards be aware on these memory cards there's a little lock switch on them and that will prevent information being written to the card or deleted from the card and so if you have a car that has really important information you khun slide that down to prevent it if you can't operate your camera because there's something wrong with a card check to see if it slid down and you did it in two and for it to slide down the main reasons you're going to be buying different types of cards is the memory size it takes sd the hc and the xia version they're all sd cards they're just different sizes of cards this camera can work with all three different flavours of sd the speed of the card is important to still photographers who want to shoot images and have downloaded onto the card as quickly as possible and or plugging the card into their computer and pulling the images off as quickly as possible for your day to day mom and pop shooting. This maximum speed of the card is not very important, because if you're not shooting rapid sequence of photos, you're just not going to notice. A difference in the speed of the operation has nothing to do with quality of images just house past the camera can record for those of you shooting video, you want to look at the minimum speed of the car and there are different card classifications, and so a class ten card is very common these days, and they're working up in these new you hs speed class's, class one and class three. Class three is the highest on the market right now, and so if you're going to be shooting hd video at high frame rates, you want to make sure that it gets going recorded very cleanly to the card and doesn't have any skipped frames or jumps because it doesn't fat and it's not recording to the card fast enough, you want to make sure that the minimum speed is fast enough, so check your card out, see what speed it isthe. As faras downloading, I'm not a big fan of downloading straight from the camera to the computer. The camera is a little bit on the slow side for downloading images. A faster, better way of doing this is getting a card reader or just plugging the card directly into your computer. If you so have that option. Next up front side not too much going up here we have a little uh plastic cap that covers up the p c synch if you want to hook your camera up to studio strobes you khun do so here that's always a sign that your cameras a little bit higher aunt on the low end cameras they do not put pc sinks on them there is the self timer lamp a f illuminator and so this is something that I like to turn off for all you private and investigators out there sitting in your dark and car at night not wanting to let other people see you taking photos I tend to want to turn this off I like to turn off all the distracting bills and lights on my camera but it lets you know that the camera is about to fire can be very handy for self timer shots to know when the camera is going to fire and this could be turned off if you want in the f illuminator option in the auto focus manual focus custom menu options so that's where we're going to turn it off a little bit later in the class our lens release for taking our lenses on and off we have our lens contacts which is transferring information to and from the lenses about aperture and focus control we have our sixteen mega pixel sensor in the camera and we have our function button another one on the front of the camera so you can program this one to do almost anything you want there's a whole control of him and you would go into the button functions choose the depth of field button which is what this currently set for and you can re program this button to one of the many other functions on the camera our lens mark lens mount mark which we're just going to line up with our lenses for mounting our lenses on and that's the front of the camera on the bottom of the camera we have our serial number you can record that for insurance purposes standard tripod socket so you could hook up any sort of device you want in there battery door comes with the bl in one battery fortunately that's kind of stayed the same with olympus for a lot of their more recent cameras the comes with the bc in one battery charger which I have here and one of the things that I am tired of sick and tired of is this little thing here I hate having to plug this six foot court and every time I want to charge my battery and a lot of these manufacturers they put on this generic adapter here and you got they send you with one of these chords for the a country that you live in and the shortcut around this whole thing is and I hate to say it. Apple apple makes these little adapters for their power and this is known as a duck head and a duck head is very different than a duck face and so the duck head if it looks a little like a duck here all right and so I went on ebay and I bought three duck heads because they were like two dollars apiece and I knew I would lose him and now you can buy these and plug him in and now this has become a travel charger and so there's a lot of places generically if you want if you want to buy this from apple you can't they don't allow it can't be but you want to buy this in the charger fifty bucks but I just went on ebay and this one was like a three dollar generic I don't want to guess what country it's made it very chic model and if I had to critique it it's not quite a smooth is the apple it's a little rough on that little little rough there but you know what it charges my battery just fine and so this is a great little shortcut way as I said I bought him because I know I'm going to lose him I haven't lost him yet done so far and so that's a great way for simplifying the charging process and it's called a duck head not a duck face so be careful of what you asked for okay moving on uh there is a little rubber cover on the bottom of the camera and this is so you can attach the power battery holder what we often call the vertical grip of the camera and this is very handy for people who've got big hands or people who like to shoot a lot of verticals which our portrait photographers and sports photographer so if you shoot with the camera in a vertical position a lot this is going to make it much more comfortable now this actually has two parts look at this it spreads apart and you get two different parts to it one is an additional grip if you just want a little bit more grip on the camera the second is where you would have extra batteries go so if you want to have two batteries in the camera if you're going to do like a long time lapse or it's going to be operating for a long period of time you can have batteries down there and adds additional vertical capability now the h l d ate g the external grip adds a little bit of finger grip for shooting horizontal sze the vertical grip is the six p part of it which has the external shutter release and so when you buy this it comes as a package and you can use one part or the other part and you may even be able to buy these individually depending on where you shop in what they how they package things up and just as a completely separate well no it's not completely separate it's related in some way in case somebody is wondering if you'll notice my camera let's get a close shot of my camera I saw this for sale from likea for about one hundred fifty dollars and it was a leather little finger loop on the side and I saw that's cool but that is way too much money because I have a little bit of webbing and I have a little bit of electrical tape so I made this for probably about twenty cents and the ideas that I stick my two little fingers through here and I now have a little bit of more friction control on the camera and so if I want to carry it I can carry it like that and then I could grab it with my fingers and I still have good finger control for my shutter release for taking pictures and doing control my thumb is free and my little my little pinky goes down here on the bottom side to help support the camera and so all I did was just take a little bit of nylon webbing that I had I don't know from an old camera strap or from something else and then I put a little bit of electrical tape took it through a couple loops and so you can see that there's uh let's see where you can see that there's a couple it's tze doubled in thickness so even if even if the tape wore off it have toe we're through there a little bit and so that's my little finger loop I use this instead of the camera strap and it's just a nice little hand strap that has a minimum amount of space because I can still not use it and it doesn't even get in the way so for holding the camera that's my little secret and I'm going to turn around and sell those for one hundred forty nine dollars on ebay I have a small little profit margin in that all right so that's the back of the camera in the bottom of the camera and this camera has a lot of customizable buttons so I wanted to do one screenshot here that shows you where all the buttons that you can customize on the camera so in that top little cluster we have buttons one two, three and four we have the dial's can be customized in addition, we also can customize the movie dial the movie record button to do something other than recording movies we can go into the back of the camera we can customize exactly what the lever does. We can go into the front of the camera and customized with the preview button does and so there is a lot of customization on this camera and you can do this all by going to your custom menu diving into the button dia ll lever option, which is the b group, and going into button function. And you're going to see a long list of things that you could go in and customize on your camera and sell. Yeah, folks, I gotta tell you about one of my little secret problems with doing these classes is that I get the camera. I go home and I start playing with it and I go. I want to do this and I want to do that. I start customizing the camera and then I go away. I can't, because I want to do the camera in the standard set up, so I have to reset the cameras so it's, the same way it was coming out of the box and so it's in the standard set up, but there's all sorts of things that I like to do on tweaking my camera for the way that I like to work, and I'm sure that you are going to find your own.
Class Materials
Bonus Materials with Purchase
Ratings and Reviews
a Creativelive Student
I had previously purchased the Fast Start for the earlier OM-D E-M5 model and found it invaluable. I was lucky to catch this E-M5 Mark II Fast Start when it was live and had my camera set up beautifully - until I updated the firmware recently and discovered how uncooperative the camera can be in the absence of the combination of settings recommended by John. So I bought the course, which enabled me to restore the camera to the optimal settings and gave me may "Aha" and light-bulb moments about things I'd forgotten or not understood the first time around. I am glad I now have this course so I can revisit it as needed. NOTE: There IS an option to save settings to the PC before updating firmware. I will be doing that in future!
a Creativelive Student
Excellent course. John's ability to patiently and throughly cover all elements of this detailed camera is impressive. He converts the stress level of learning a new camera to a fun level.
Susan Gutterman
I watched most of the live broadcast and just finished going through all of the modules with my camera. I learned so much!! My camera is customized to my preferences and I am now very comfortable shooting in M mode. My picture quality has already improved. John is an excellent instructor.
Student Work
Related Classes
Camera Guides