Lessons
Class Introduction
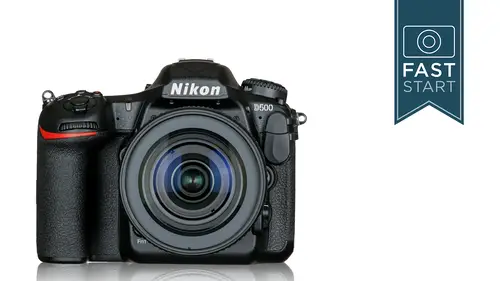
03:59 2Nikon D500 Overview
11:25 3Camera Basics
08:31 4Basic Camera Controls
03:22 5Top of Camera: Exposure Control
25:50 6Top of Camera: Buttons
16:33 7Back of Camera: Release Mode
05:55 8Back of Camera: Viewfinder Display
08:44Back of Camera: Play Back
10:18 10Back of Camera: Buttons
09:36 11Back of Camera: Live View
22:56 12Back of Camera: Movie Mode
09:48 13Left of Camera: Exposure Bracketing
03:19 14Left of Camera: Focus Mode
12:00 15Left & Right Sides of Camera
05:18 16Bottom of Camera
04:56 17Front of Camera
05:34 18Nikon Lenses Overview
09:26 19Playback Menu
08:24 20Photo Shooting Menu
14:26 21ISO: Photo Shooting Menu
26:14 22Movie Shooting Menu
14:01 23Custom Setting Menu: Autofocus
14:20 24Custom Setting Menu: Metering/Exposure
04:05 25Custom Setting Menu: Shooting/Display
07:33 26Custom Setting Menu: Bracketing/Flash
03:16 27Custom Setting Menu: Controls
11:38 28Setup Menu
16:00 29Setup Menu: Wi-Fi
06:47 30Retouch & My Menu
06:06 31Camera Operation Overview
08:13Lesson Info
Photo Shooting Menu
Alright, so this next tab is the photo shooting menu and this is generally where you're gonna find the most important shooting operations of the camera. First up is our photo shooting menu bank and what this is is a collection of your favorite settings. So you can go through the camera, through the menu settings, and start adjusting things as you would like it to be and then you can save four presets under A, B, C, and D here. And if you want, you can go in further and you can rename these photo banks so you could have wildlife, sports photography, studio photography, and your camera is gonna be tweaked and adjusted for those type of settings which might require you dozens and dozens of changes and here, you can very quickly change by going in and selecting A or B or renaming it. So extended photo menu banks. The previous one keeps settings that you have set in the menu settings of the camera. If you turn the extended photo menu banks on, it will keep track of what your exposure, your ...
flash mode, your shutter speed, and your aperture are. And so if you have very specific settings for the actual camera operation as well as the settings in the menu, you could select to have this either turned on or turned off. You can create different folders and this is where you can choose and rename folders if you want. I personally would just recommend having a separate memory card. For instance, if you have business and personal photos, just have separate cards for those but if you only had one memory card, you can create different space on that individual card where you're storing information. Your camera gives a three-letter code automatically to all the files that you shot and it just does a DS, it's a digital, uh, I forget, what is a DSC? Digital system camera? Something in that regard, and you can go in and you can rename it. You could put your letters in or you could put a job description in there in some way just as long as it's either three letters. It's slightly different with sRGB and Adobe RGB which is the color space we'll talk about in a bit. But you can choose a three-letter code that prefaces the file number of the photo that you have just taken. Primary slot selection. So you can choose whether your primary card is the XQD or the SD card. If you have both, I would probably select the XQD coz it's a faster card, a little bit better connection, a little bit stronger, more robust card, so I think of that as a preferred card over the SD but if you prefer the other one, you can select that. If you have two cards in the camera, you can choose how does the camera work with that second card and so their options are overflow where everything goes to the first card and then if it doesn't have enough room, it goes to the back up card. Under the backup mode, it goes to both cards simultaneously and then RAW primary JPEG secondary separates the RAW and JPEGs and sends them to different cards and so everybody has a slightly different workflow and they're gonna want something different. I think a basic photographer is gonna be fine with an overflow option. I would imagine that there's gonna be a number of professional photographers that would prefer the backup option coz if you're gonna go shoot a wedding or any sort of gig that you're gonna get paid for, and you really wanna make sure that nothing happens to those photos, you can write both photos to both memory, the same photo to both memory cards and if something should happen, whatever that may be, you've got a backup immediately after creation. Flash control doesn't do a lot of good when there is no flash in the camera or flash attached to the camera but if you did have a Nikon flash attached to it, you'd be able to go into a sub menu and so this is our first sub menu. There's no specific control right here. We're gonna dive into a sub menu and there's gonna be a variety of controls that you can turn on and off. First one dealing with basic control of the flash. Most people are gonna keep TTL set here which is the Through The Lens flash metering option but there are other options that you can go in. Once again, this is kind of more for another class just on flash photography. You can do the flash compensation we talked about that's powering the flash down a little bit for a little bit more natural look. For using the wireless flash option, there's gonna be a number of options that you can use that WR-10 can be plugged into your camera and you could have the WR-R10 plugged in to your flash and your camera can communicate through that system. There is also a radio system used in the SP5000 flashes so if you have one on your camera and one or more separated, you can have them all communicating together and this is just letting the camera know, how do you want the flashes to communicate. Then, you can start working with the flashes in various groups and this is where things can get very complicated and we're gonna kinda brush by this stuff very, very quickly. You can put flashes into different groups and then you'll be able to take a group and you'll be able to power it down or power it up or set a flash ratio of one group to another and this is where you'll be able to dive in here and identify all those units and group 'em and control 'em. The normal area is what's called the DX area here which is 24 by 16 millimeters, that area in red. If you want to crop in, you can, and I was trying to think, "Okay, what can I tell you? "What's a good reason for cropping in on the image?" because this is something, you can always crop in later and if you know that your subject is not feeling the frame and you know you need a little bit more powerful of a telephoto lens, and you maybe wanna save yourself from cropping, maybe you're gonna print an image directly from the camera or maybe you're gonna wirelessly send an image from your camera to your phone and you just need it to be a little bit closer and you want it cropped, that's when I would do it but it's a pretty rare situation. Most of the time, you'll simply leave it in the DX area. So scrolling down a little bit, we get to image quality and this is one of our first, really important settings here and so this is where we get to choose either to shoot in JPEG, RAW or TIFF. Now, Nikon calls their raw files, Nikon Electronic Format and so that's why they are called NEFs and you'll often see that referred to as NEFs at Nikon's website. I think a serious photographer would probably wanna have this in RAW. If not, you probably wanna have JPEG fine with the little star. That's the highest quality JPEG that you can get to. We do have that TIFF for very special purposes but it is a very large file. Then there's also the option of shooting RAW plus JPEG and I don't recommend that for most people because once you have a RAW, you can create a JPEG anytime you want. The best time for choosing that is when you know that you need RAW long term but you wanna have access to JPEGs right here, right now. If you have an emergency quick need for them, for instance, you might be shooting for the local school and they only work with JPEG images and so you could shoot RAW plus JPEg, you could unload the JPEGs after the event that you shoot, give it to the school and then take the raw images home and those are ones that you could work on and they could come back and say, "Hey, could you take a look at this one image? "Can you make some adjustments to it?" You could go back to the RAW image and then make some adjustments. So as I go through the menu section here, you will see my recommendations in gray. The ones in red, I think, are for more advanced users and any of you could be more advanced users. It just kinda depends and so sometimes, I have one, sometimes I have two recommendations and you'll notice this on the PDF as well. Image size is gonna be dealing with JPEGs and TIFFs and so you can go in here and you can change different size, large, medium, and small JPEGs or TIFFs and so if you knew you needed something smaller, you could do this. Most people are just gonna leave this in the large setting unless you know for very certainty that you are needing only a very small image. That way, it uses up less data on the memory card. Okay. So we're gonna talk about raw images and there is a bit of nerdiness that Nikon gets into when it gets into the RAW because there are different styles of RAW and so we have two different factors to deal with. One is the number of color bits we're dealing with. There will be 12-bit and 14-bit and then there are three different flavors of compression and the three that we have here are uncompressed, lossless compressed, and finally, compressed. And so this is the raw information. So this is the original information from the sensor and when I said it's untouched, pure information, that's a slight exaggeration. Nikon does go in and they tweak with that a little bit. What does this mean? Well, uncompressed, that's pretty obvious. There is no compression being done on this format at all. It's the full information. Lossless compressed. Lossless means we're not losing any information but it is compressed. It's a smaller file size and you can see it's gone from 44 down to 24. Well, what did it throw out? Well, lossless means it threw out stuff that it doesn't need. Well, who determines what it needs and what it doesn't need? Alright. And so then we have the option of compressed and what happens here is it's no more longer the lossless and they're throwing out stuff that you may need, alright? Kind of the big question is between uncompressed and lossless compressed, is there a visual difference? And I have tried shooting this in a number of ways and I can't see a difference. I mean, I really can't see any significant difference, any notable difference between the two. All I might be able to pick a little, tiny thing out that's a little bit different but I'm just not seeing much difference here. Now, all of this is done with a 14-bit file. Now, this is 4. trillion colors, okay? So think about hundreds of colors and thousands of colors, millions of colors, billions of colors, trillions of colors. How many colors do we need to describe and show a photograph? How many eyes can ours see? How many colors can our screens project? How many colors can our prints get out of the ink? So the other option is 12-bit and this is 68 billion colors. Now, we have the same options between uncompressed, lossless compressed, and compressed, and all of these are options that you can go in and very nerdy like, tweak the way that your camera shoots raw. So if you want absolutely, no questions asked, the largest file, best, most information, you choose 14-bit uncompressed. You get a 44 megabyte file which is huge and very clunky on most computer systems these days. Now, you can see the file size has really changed around. Now, I've done a lot of testing and I've done a lot of research and I may anger some people here but, you know, this is my opinion and what I'm gonna recommend is lossless compressed 12-bit photos. And the reason I would shoot this is because 14-bit is more information but it seems to be information that we can't see with our human eyes, that we can't see with our screens, with our prints, with any other ways that we see photos. And so yeah, there's more data, but it's not useful data. It's just taking up empty space. Now, if you don't trust me, you don't believe me, that's fine, I don't care. Go ahead, do your own test, see how it comes out. So I wanted to do this in as many ways as possible so I underexposed the image by five stops. Don't we all like to underexpose our images by five stops? And then rescue that information in post-production. So I corrected it in post. I know it looks terrible and I was trying to see, is there any difference between compressed and uncompressed. 12-bit, 14-bit, and I was hard pressed to see any difference in any of these photos as far as, oh, this is clearly better quality over here or clearly worse quality over there. I think the lossless compressed 12-bit is gonna be fine. There is no significant difference here. So I went in and I overexposed it five stops and then I corrected for it in post and I wanted to see, well, does this make a difference? Will I notice the difference here? And looking at it here, yeah, this is terrible images but we just wanted to see how far can we go in things and I can't see any significant difference in the compression or in the bit rates here and so I think I don't like throwing information away which is why I don't like the compressed and so, it's a very small jump to go up to lossless compressed in file size. Just a couple more megabytes in size and so that's why my recommendation for setting the RAW settings is lossless compressed and then on the bit size, going down to 12-bit and so if you can see a difference, I welcome you to show me that difference and I will change my opinion but I do a lot of research on the internet, see what you can find out yourself, I haven't seen anybody who's been able to pull out much more information out of a 14-bit. Maybe, as we develop as humans, several generations in the future, our eyes will be more sensitive to colors and those photos will be slightly better. So that's my recommendation. Lossless compressed 12-bit and this will also mean that you'll be able to shoot through information, you'll be able to store information on your memory cards and your hard drives just a little bit more easily.
Class Materials
Bonus Materials with Purchase
Ratings and Reviews
Carl Vanderweyden
John Greengo is the best! I purchased a Nikon D500 and this course around the same time. Because of this camera being so complex, I felt that a course would be beneficial. This course that John teaches is exactly what I needed. His knowledge of this camera as well as photography in general is exceptional. In fact, I own a couple of other courses presented by John and I also bought a couple of his books! I would highly recommend this course to anyone who wants to know the ins-and-outs of this D500! Thanks again John for a great course and your great way of explaining things with clear dialect and great visuals!
M Jo
Wow! What a great class! John is a natural teacher, moving at a good pace and explaining things carefully, never assuming you already know more than you might. I just got my D500 last week and am so pleased to have gone through this entire class. I learned a LOT and took some notes to refer back to. I've also just bought a Z6 and have purchased John's class for that. Can't wait to dive in!!!
Christina Brittain
By The class. John is the gold standard for teaching. He repairs lessons to perfection. He speaks in ways students comprehend all that he presents. Never waste words. Never bores. Always demonstrates his points. I will continue to purchase his classes as they provide the best learning I have found. He is making me a much better photographer, both technically and creatively. You can't make good images if you don't know your gear. Hope he teaches lessons in Portland Oregon one day. I know Pro Photo Supply would sponsor him.
Student Work
Related Classes
Camera Guides