Lessons
Class Introduction
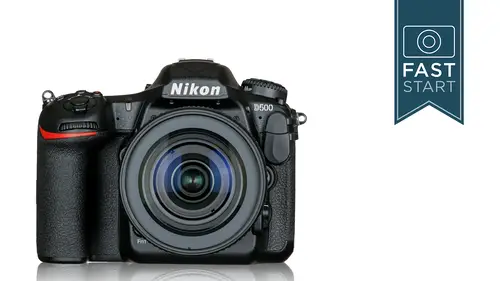
03:59 2Nikon D500 Overview
11:25 3Camera Basics
08:31 4Basic Camera Controls
03:22 5Top of Camera: Exposure Control
25:50 6Top of Camera: Buttons
16:33 7Back of Camera: Release Mode
05:55 8Back of Camera: Viewfinder Display
08:44Back of Camera: Play Back
10:18 10Back of Camera: Buttons
09:36 11Back of Camera: Live View
22:56 12Back of Camera: Movie Mode
09:48 13Left of Camera: Exposure Bracketing
03:19 14Left of Camera: Focus Mode
12:00 15Left & Right Sides of Camera
05:18 16Bottom of Camera
04:56 17Front of Camera
05:34 18Nikon Lenses Overview
09:26 19Playback Menu
08:24 20Photo Shooting Menu
14:26 21ISO: Photo Shooting Menu
26:14 22Movie Shooting Menu
14:01 23Custom Setting Menu: Autofocus
14:20 24Custom Setting Menu: Metering/Exposure
04:05 25Custom Setting Menu: Shooting/Display
07:33 26Custom Setting Menu: Bracketing/Flash
03:16 27Custom Setting Menu: Controls
11:38 28Setup Menu
16:00 29Setup Menu: Wi-Fi
06:47 30Retouch & My Menu
06:06 31Camera Operation Overview
08:13Lesson Info
Movie Shooting Menu
Alright folks, a little celebration. We finished our second tab, trying to get on to our third tab now. The movie shooting menu. So these are all things that are specifically dedicated to when your camera is in the movie shooting mode. And so one option is to reset everything in here if you need to. If you want to adjust the file names of your movies, you can do so by changing those three little letters. You can choose where the movies are sent to. Now if you have most of your still images shot and sent to your SD card, you could choose to have movies sent to your XQD card. In general, you probably... If you have an XQD card, that's probably where you want to send your movies, 'cause that's the fastest writing card of the two. When you're shooting movies, you can shoot a crop area. And this is normally something I would stay away from digital zoom. And this is essentially digital zoom, but because we're not using all the pixels on the sensor, you might say, you can go into the 1.3 crop...
area and not lose quality. So if you are shooting video, you want a little bit of extra telephoto reach, you can put this in the 1.3 crop area because your camera, when it records an HD video, it is recording much more than the 1920 pixels across, and it's kind of rezzing it down to fit in there. And so this is not gonna lose image quality. It will give you some telephoto capability. You can choose the different frame size and frame rates. And so this is either your 4K option, your HD option, or your standard option. And as I said before, there is a crop mode. There's a crop mode, and when you're in the 4K, it also crops as well, and so this will show you. So on the far left is what your standard photo is, and you can see the red, the green, and the blue crops as to what you're going to get. And so 4K has an additional 1.5 crop. The HD, 1920 by 1080, is simply giving you black bars on the top and the bottom, but we also have the HD with a 1.3 crop. So if you need a little bit more telephoto capability, you do have that option in the HD which gets us very close to what the 4K crop looks like. And so, some interesting options when choosing the video mode. So most of the time, you're gonna want to be shooting probably either in HD or the 4K mode, but the downside to 4K is, it's hard to get wide angle because it's cropping in a fair bit on that. And there's no getting around that at this time. Next up, movies. Movies are not raw images. So we don't have the option of raw in JPEG when it comes to movies. It is a compressed movie format, and you can choose whether you want it high-quality or normal quality. And this will change the file sizes. If you find that you just don't need as large of files, you could change this down to normal. But chances are, you're gonna want to have it as high a quality as possible. There is a separate ISO setting when you get it into the movie mode. So if you would prefer to have a separate setting here than for still photography, you may do so. Then here, you'll have the option of setting the ISO. And then we'll have some auto ISO options like we've seen before. And so if you want to have auto ISO on in the movies but not when you're shooting still photos, you can really separate those functions on the camera. And then you can, of course, set the maximum sensitivity if you have auto ISO set for the movies. We also have a white balance option, so that if you're shooting videos, you can have a separate white balance from your still photography. So it's very helpful for people who are switching back and forth from one to the other. You can have it separated and unique when you get to those modes. The picture control is a little bit more important when it comes to video because video is a little bit tougher to work with compared to still photographs. And so one of the new settings that we have in here is the flat option. And what this does is, it records a less contrasty image which gives you an image that frankly, doesn't look real good out of the camera in the video mode, but it's something that you can work with when you want to work and adjust the colors later on. And so just as a quick example, you can see the flat mode on the right. The trees on the right definitely do not have as much contrast. And so this is something that a video editor would go in and color grade. They're gonna set their black points, they're gonna set their saturation. It's not quite the perfect mode for shooting video that a lot of serious video shooters want to have. They want an S log mode, and this doesn't have it. But this is a simple way of getting relatively more in that direction, you might say. And so if you plan on doing editing and the color grading yourself, you might want to shoot it in flat. If you're just trying to get basic video out of the camera, the standard setting should be fine. If you want to go in and tweak with these even more, you can do those and you can save those custom settings in the camera, and you can rename 'em if you need to for different types of environments or different types of looks to your photos or your videos. The active D-lighting is where the camera was trying to raise the shadows up, and some people like it, some people don't like it in their video, so to each their own in this case. High ISO noise reduction, this is very similar to the topics that we talked about in still photographs, it's just only applying it to the movies. And so leaving this turned off and working with it later is something the more serious users are gonna want to have. If you don't do a lot of editing, you just want basic clips out of the camera, that's when I would leave it on normal. So flicker reduction here is something a little different than the flicker we were talking about earlier. And so here, you probably just leave it in the auto mode and if there are lights that are flickering, it'll allow the video to record around it and kind of offset itself so you don't see that final flicker in your video. If you are recording with an external microphone, you can go in and adjust manually the recording levels. If you have headphones and a microphone attached, that's when you might want to go in and be able to control this. Otherwise, you might just leave it at auto if you're doing very simple videos out of the camera. The sound that you're recording can be set to wide range or vocal range, so if you knew that you were just gonna be recording a speaker, you could tune it to just that vocal range of the voice. But most of the time, you're gonna leave it in wide. There's also a wind noise reduction. The wind hitting the microphone on this camera is one of the most unpleasant sounds in the world. And so if you do want to record video, getting good quality sound is the first step into recording better video, and so that's where the external microphones really come in handy. But if it is windy, you can dampen that sound a little bit by turning this wind noise reduction on, under windy conditions. Time-lapse movie. You might be saying, "Deja-vu. Didn't we just talk about time-lapses?" We did. And so the time-lapses we talked about earlier was where we shot a whole bunch of individual still images and then we as photographers took those images, plugged 'em into a program, and then turned 'em into a video there. In this case, the camera does the work for us and we don't get the individual images. We get a final video. And so if you wanted, "I don't need all the pictures, I just need a basic time-lapse." You could shoot it in camera and end up with a finished product right in camera, which, convenience-wise, is really nice. But if you ever need to go in and tweak some of the images, you don't really have that opportunity as you did with individual images. And so it's the same thing. We're gonna see a sub-menu with a lot of the exact same controls about start time and interval time and shooting time, and so forth. And so do you want to end up with a final, ready-to-go video, or do you want the original images so that you can work and edit with them? And it all depends on what you're planning on doing. So that's our time-lapse movie mode. The electronic VR system. And so, the camera has, well some of the lenses, have a VR system in it. And they'll be able to figure out if you're moving the camera. But there is an additional electronic VR that does not take away from the image quality on the camera. And so if you have the camera, what it does, it does crop in a little bit. And if you're shaking the camera, it will balance that scene out so that it is more stable in the final video. And you'll might wanna throw this through a little bit of a test to see how well it works for your type of handheld shooting, or however you're having the camera move in its system. And so for a basic shooter, it's kind of a nice thing. It helps you get a more stable shot. The more serious video shooter may not like the way that it controls motion. They may not like the fact that it crops in, and that's why I have Off recommended for the more serious video shooter. So that gets us through the first three menu tabs in the camera. And we're gonna take a little check-in on questions here and see if you guys have questions here in the classroom or anybody online has questions. Hi John, I got two questions. One, when you're using the backup function, and using two different cards, how does it affect when one of the cards is a lot slower than the other one when you're trying to shoot a lot at high speed? Right, so that can be a problem if one card is slower than the other. And so you kinda want to try to match your cards in speed the best you can. And so it's a chain of events, and it's only as strong as its weakest link. And so if one of the cards is slow, it just slows up the data for the other card. And another example of where this is important is if you're shooting raw to one card and JPEG to the other. If you have two cards that are the same size, the raw card is obviously gonna fill up first. And as soon as that fills up, game over. You stop there. And so it's kind of the weakest of the links is what you go by. Your second question? Second question is on the time-lapse. And I've played around with it, and that requires a lot of processing. So I'm thinking, what does it do to your battery, or do you have to be connected to an external source? Because some of these can last all night, and-- Right. I've done a number of time lapses, and there's a few little things that you want to do. You wanna have a charged up battery. You might want to have the vertical grip so you can have two batteries that work kind of in concert with each other. You want to turn off the display on the back of the camera. And you want to turn everything into manual, in most cases, and so that the camera's not trying to focus or do anything like that. And then you set it up, and it's usually gonna be good for several hundred shots. I think I said the battery is good for about 1,200 shots. Now if you're at night, and it's cold out, you might get less life out of it. And so it's just getting those things checked off to make sure that the camera is set properly before you begin the time-lapse. Thank you. John, we do have some questions coming in from some folks at home. Steven Cornell had asked, "Why is my time-lapse menu grayed out?" Okay. So this is gonna happen in all cameras, this camera from time to time. Something is set on his camera that conflicts with time-lapse being set. And I don't know what it is. And I... Maybe it's raw images. Maybe he has the self-timer set and it won't work with use combined with the self-timer. And so, put your camera back into its normal operating state. Just see if there's anything like bracketing turned on. I don't think it'll work if you have the bracketing turned on because bracketing only works for two to nine shots. And so there's something else set that is preventing them from doing it. Now if you get totally stuck, there is a reset all the functions of the camera, or all the menu settings of the camera. You may need to do that. But I would say just kinda poke around. See if you've been playing with your cam... I bet you've been playing with your camera. And see if something's set that doesn't make sense. The self-timer is one of the ones that's caught me near lockup. There's another one that might cause a problem. And there's probably a whole host that I can't come up with off the top of my head, but those are a few of the ones that I can think of right now. And Steven said that his HDR menu was grayed out as well, so maybe it's the same scenario. So on the HDR, it's possibly the same thing. In that case, I believe it'll be grayed out if you are choosing raw, 'cause the camera... Let me just do a quick little test. If you wanna follow on the back of my camera with me. My camera is set in raw right now. And now I need to go find HDR. And can I remember where HDR is? And my HDR is turned off. So let me go back to my image quality and change this to... Let's just go to JPEG fine, right there. And let's go back down to HDR. And right around the corner, there it is, it's all lit up. And so HDR cannot be used with raw images. And so in that case, it's probably they're in raw, and they need to be in JPEG if they wanna shoot the HDR.
Class Materials
Bonus Materials with Purchase
Ratings and Reviews
Carl Vanderweyden
John Greengo is the best! I purchased a Nikon D500 and this course around the same time. Because of this camera being so complex, I felt that a course would be beneficial. This course that John teaches is exactly what I needed. His knowledge of this camera as well as photography in general is exceptional. In fact, I own a couple of other courses presented by John and I also bought a couple of his books! I would highly recommend this course to anyone who wants to know the ins-and-outs of this D500! Thanks again John for a great course and your great way of explaining things with clear dialect and great visuals!
M Jo
Wow! What a great class! John is a natural teacher, moving at a good pace and explaining things carefully, never assuming you already know more than you might. I just got my D500 last week and am so pleased to have gone through this entire class. I learned a LOT and took some notes to refer back to. I've also just bought a Z6 and have purchased John's class for that. Can't wait to dive in!!!
Christina Brittain
By The class. John is the gold standard for teaching. He repairs lessons to perfection. He speaks in ways students comprehend all that he presents. Never waste words. Never bores. Always demonstrates his points. I will continue to purchase his classes as they provide the best learning I have found. He is making me a much better photographer, both technically and creatively. You can't make good images if you don't know your gear. Hope he teaches lessons in Portland Oregon one day. I know Pro Photo Supply would sponsor him.
Student Work
Related Classes
Camera Guides