Lessons
Day 1
1Course Overview
19:50 2The Bad and Good of Nature Photography
28:22 3Cameras and Sensors
17:18 4Lenses for Nature and Landscape Photos
16:42 5Macro and Tilt Shift Lenses
34:56 6Filters for Nature and Landscape Photos
31:41 7Tripods and Monopods
26:10General Camera Tips
16:56 9Exposure and Metering
17:17 10Exposure Modes
16:55 11Exposure Values and Apertures
24:16 12Focus: Modes, Points and Buttons
20:23 13Focus: Advanced Techniques
26:42 14Day 1 Q&A
12:30Day 2
15Mountains and Forests
25:03 16Rivers, Waterfalls and Shorelines
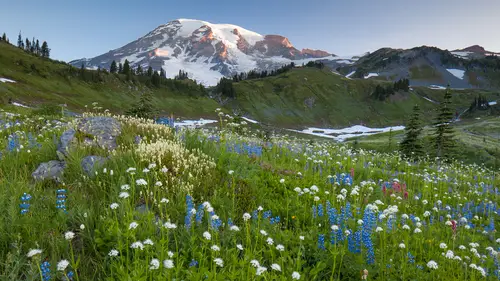
25:45 17Open Land, Flowers and Skies
17:30 18Macro Shots and Adding a Human Element
15:43 19Elements of Design
16:17 20Working the Subject
14:36 21The Photographic Process
27:46 22Timing: Seasons and Time of Day
28:01 23Types of Light: Direct Sunlight
38:31 24Types of Light: Indirect Sunlight
42:35 25Composition: Basics and 7 Framing Tips
16:18 26Composition: Angle of View and Aspect Ratios
29:51 27Composition: Panos and Subject Placement
29:47Lesson Info
General Camera Tips
I don't use a lot of flash photography in my nature worked these days back in the early nineties there was kind of a flash revolution that was going on the manufacturers have got very good about t ell through the lands flash technology and in those days of film we didn't have quite the latitude and the ability to shoot under low white that we did now and if you check the end the camera bags of a bunch of landscape photographers from the nineties almost all of them would have a flashing their camera bag and if you do it today hardly anyone has a flashing their camera bags because our cameras are much more sensitive toe low light and we don't need to fill in the shadows a lot of times photographers would add flash to some flowers in the foreground or a rock in the foreground because they just couldn't balance the brightness of the background in the darkness of the foreground and so I rarely take a flash with me out in the field but I mentioned it because it occasionally can solve a littl...
e bit of a problem the low in flashes typically don't have enough power to really be of great help and so I would probably avoid them the mid range flash might make a good option for general flash that you could also use in nature photography where these flashes were most likely going to be handy is in macro photography because you could bounce these off of a white seif soft box or some sort of reflective area to soften up the light to light something up pretty close and the advance ones they're going to offer you more power so you could bounce off of a larger soft box it's also going to give you some extra high tech features that we're not going to go into this class that don't really fall in the genre of nature or landscape photography but these could be very handy especially for people shooting macro photography and if you are going to do it for a macro photography you want to get one of these corns there a little bit of money they're not terribly expensive but they're going to allow you to take the flash off the camera get a position in a much more interesting position for doing macro photography if you do really want to get into macro photography they were also very specific macro flashes that you mount on the front of your lens that air enable you to position the lights and balance the ratio of lights to get that little tiny amazonian frog right in front of your lands well lit I don't do enough macro photography I don't really play into this stuff I've used it you know how it works it's nice but you really got to be into that field and so that's maybe a whole other class here creative life let me just finish up this section by going through a few quick camera set up settings I'm not going to go through this inasmuch length as I do in my other fundamentals class but just want to make sure that you have your camera set properly forgetting the best pictures possible the two types of files that we can all shoot on our nice sl ours and muralist cameras these days r j pegs and roz the raw image records the original data coming off the sensor the j peg takes that original data and it compresses it and that throws some of the information that it deems unnecessary and throws it away and photographers who are really serious about quality do not like it when somebody else throws away good information and so if you want to maintain the highest quality you of course want to be shooting wrong in the slot canyons in this photo you can see here in this image and this is just kind of what you would see this represents what you would see off the lcd on the back of your camera the areas that we have lost in the shadows is in blue the areas that we've lost on the highlights is in red this is what we call clipping so dynamic range wider than our camera can handle and when you look at it on the back of your camera you're gonna be thinking oh my this is not coming out correctly if you shoot a jpeg image you can take that into photo shop or some other program and you'll probably be able to resurrect brighten up some of those shadow you might be able to pull back some of those highlights and retain a little bit of them compared to what you saw on the back your camera but if you shoot a raw image this is going to require that you use the right type of software software that probably came with your camera for free but is available through many other companies like adobe and light room which is what I use if you do that with a raw image because you can see in this image here we've been able to resurrect all of the shadow information and all but just a little tiny bit of that highlight information and this is one of the struggles of landscape photography is capturing that wide total rage and the raw images are goingto enable you to do that more easily then j pegs and so if you're serious about your landscapes if you want to get the widest range possible you want to be shooting in raw in your cameras there's going to be an area for you to set different size images if you are choosing j peg for instance you can choose large medium and small I don't even know why this is on the screen here it's of course you're going to shoot large you want to get the largest resolution possible you didn't buy a twenty megapixel camera to shoot it at five moving on the mod button on your camera that dr mo this talks about what happens when you press down on the shutter release of the camera do you take a single picture do you take a motor drive well if you're shooting sports or wildlife you're going to put it in either the low or the high speed motor drive normally my camera is in the single shot mode and quite often as I mentioned before my camera is in the two seconds self timer mode it's a great way of shooting in many different situations just make sure that you get everything set you get your hands off that camera and that the vibrations are actually settling out in two seconds if you are using a longer lens like a two hundred or three hundred millimeter lens you got to be very careful that those vibrations are actually settling out within that two seconds there have been some cases where I've been using a three hundred millimeter lad and I could see that there's still some movement in the camera and so I would either set a ten second self timer or I would plug in the cable release so that I could have a complete separation of that movement white balance this is the way our camera records color your camera doesn't know what color the light sources that is illuminating your subjects and so you can set your camera to a variety of white balance the benefit of shooting raw one of the benefits that I like most is that I don't have to worry about setting white balance I could just put it in auto white balance and let the camera figure it out and if I need to adjust it later I can at any time I want without damage to the image in any way if you shoot j peg you need to be a little bit more up on your game and you need to make sure that your white balance is set correctly because changes you make later on are technically damaging your photograph so we have a number of preset modes that you can put him in we also have a kelvin setting where if you happen to know the specific temperature you could set it there you could also do something called a custom or pre set where you would photograph a white sheet of paper or a great card out in the field and then you could calibrate it later on you could either do it in the camera or you could help you calibrate things later on a little too much work I always have a great card or a white card with me and so I leave my camera in auto white balance most of the time that I am shooting out in the field this is when I'm shooting raw I can fix it later if I notice that I'm getting slightly funky colors I will fix that I'll set it on cloudy I'll set it on sonny I'll put it in shade to fix that but that's only if I'm going to be in one environment for a long period of time and I just don't like that bad feedback on it if I take a photo and it comes out with kind of wacky colors like this is way too blue this is much much too blue if this is a raw photo that I took and this is the way it came out I would simply go in the light room on the temperature slider and I would slide that temperature over to the right hand side until it got to yell okay that's a little too yellow and then I would bring it back to where I think the right balance wass and that's the beauty of shooting rods that you can just click that slider and fix things up very very simply and very very easily another thing that you need to have writing your camera is you need to have your sensor clean if you take an image that has dust spots all over the sky you've got dust on your sensor that needs to be cleaned off there's three different steps that you can take the first step is to get one of these rocket blowers and put your camera into the manual cleaning mode and simply knocks ameren there hopefully knocking off any dust that is on the sensor step two not everyone is comfortable with and that is where we are going to sweep the sensor clean so in this case you've got some dust on your sensor you put a couple of drops of alcohol on these special types of swabs very specifically designed for cleaning sensors and you will sweep and hopefully clean off any dust that is on the sensor I've had to do that from time to time after I don't know maybe every six months for every year of shooting is something that I have to go in and dio a third option that is unavailable on most all the cameras out there now is a digital version of cleaning this up and in some cases you'll need to do a little something in cameron which is first off what you would do is he would photograph a white sheet of paper and the camera would be able to map out where all the dust iss and then it would clone that over or keep that information to clone out later so that you can get nice clean image is now a number of the programs and step three required that you use proprietary software after the fact but it's acquiring that information from you out in the field to help out later on but the best thing to do is to be very careful about where you change lenses and just keeping your camera clean with one of those air blowers or rocket blowers very easy to do there not much money we had a question I think earlier on about cleaning cloth as faras keeping the camera clean I always have some micro fiber cloths around I also often have a soft towel in case it's raining and I want to sop up some rain or or something like that they also worked pretty good as a lens cleaning cloth themselves if I'm going someplace really dirty I might bring a garbage bag to throw my camera and just to keep the dust off of it and if I'm going to be around dust and dirt I'll keep some sort of brush around so I can brush away any sort of dust that's starting to accumulate around the lens mounted around the battery or anything like that so those are tools that will often have with me I don't always carry all of these out in the field in the backpack with me they might be left in the car but they are nice tools to have for keeping things clean so that finishes up our equipment section is there anyone that has a question anyone is there any questions we certainly do have questions john and mostly questions that have come in about tripod so maybe we could take a few of those okay question we talked about not using the pr and stabilization when you're on a tripod but what about if it's really windy is that a scenario when you would yeah there is there is scenarios for every rule that I have there is a reason to break my rule lt's because they're just suggestions people suggestions and so for instance if you have a four hundred millimeter lands on a tripod and the thing was shaking around it's not steady and so then throwing on the stabilisation would be a good thing and so if it was a very windy situation yes throwing that back on would make sense at that point glass from and so one of the things you could do is and I'll get into this in an upcoming section on live you but if you go into a live view and you magnify the image you can see your image a highly magnified and if you just kind of tap on your camera you can see how much vibration and how long it lasts and you can see how stable or unstable the system is at that point that's a great tip never heard that one they also this is from stuart and that one was from susie q so thank you suzie q this is from stuart for the l bracket option would you bring two cameras one with e l bracket when you just need to swap them out for going from vertical horizontal no I don't think I want because that makes it easy to normally when I'm shooting as muchas I love having backup cameras when I do nature in landscape photography wait and space is a major issue and if I'm going to go up for a hike for a couple of hours I'm probably just gonna bring one camera body it's probably it's so highly unlikely that that camera's going fail on that one trip I just can't afford the weight of a second body now if I am going to say take a road trip and I'm gonna go down to california and I'm gonna be shooting for the next two weeks by all means I'm gonna have a backup camera for something like that great we have a couple questions about the mirror and how that effects thie lenses in the vibration so from gary how how much of a factor is mere movement when minimizing vibrations and then from spg do use mirror lockup so we're going to get into the whole near lock up great he's section there's not just a slide there's a whole section on it and that will be coming up in the focus which ask one or two sections ahead okay great maybe a couple more this one is from kate a moment over with a couple of votes what about the jovi gorilla pods using for taking those low to the ground instead of a full size tripod which can be heavy and when you're not using a long lens do you ever use those a little full gobies well really wide when I told you earlier that I had five tripods that was a little lie because I have several more than that but I kind of don't count tabletop puns there so I went through a phase of having I got like you know a half dozen little tiny ones and the little jobe ones they're they're kind of nice I kind of like I think they work better for travel photography the problem with landscape photography is we deal with kind of this soft underbrush and the suddenly they're just they can't get like more than four inches off the ground in some cases I mean there's potentials that you could use them they're just so highly limiting nature photography there's very few places they're going to be a good value I mean is it better than nothing yes but not by much ok two more really quickly how do you transport your tripod do you have it in you have a strap on it in a bag strapped to your back pack and then do you keep your camera attached to the tripod when you're carrying around so no bags no straps on the tripod I used the cork bicycle hand grip tape which makes it if you guys have never felt cork it has a really nice feel to it and so that's I mean it feels good they design it for people who are holding on to a bar about that big diameter all the time so it's like perfectly designed for this and I'll just carry it for miles in many cases all throat over a shoulder and the throat over their shoulder I figure if I'm walking for five miles I should give my arms just a little bit of a workout and so I don't mind it as I say I'll throw it in the backpack in some cases five you say if I'm gonna go for a long hike I would like to use trekking poles tracking polls on a tripod and I know that tried to make trekking poles that turn into tripods and they're all garbage and so then I would throw the tripod in the back back and then I would use trekking poles if I'm on a very rigorous trail for instance and then if I have my camera on my tripod I will take the whole thing and just flip it over my shoulder and walk around with it because I know that that connection is so solid on there it's never fallen off but I do when I have my tripod and I know I'm going to throw it over my shoulder I locked the tripod head make sure that's tight and I go and I just give that little nut that's tightening the camera or they clamp onto the camera I make sure that that's just good solid and I do that every time I throw it over my shoulder and I'm perfectly fine and so I'll walk around quite a bit so when I get into a field or an area that I'm going to walk around this lake or something that it's a small little lake I'm gonna leave my camera out and ready to shoot I'm not gonna pack it away every time I'm done with one shot unless I know that I'm kind of done with one area
Class Materials
bonus material with purchase
Ratings and Reviews
Thomas Hamlin
Most of nature's beauty has been photographed by lots of people over the years. However, nothing compares to actually visiting famous places, buildings, mountains, etc. and taking your own photographs. John Greengo provides the necessary equipment information, photographic principles, and techniques in a manner which inspires you to put in the extra effort to take the best nature photographs that you can with the gear that you have. His unique illustrations, actual real life photographs, and easily understood explanations are top notch. I highly recommend this outstanding course. I have several of John Greengo's photography courses, and I highly recommend them all. His vast experience with film and digital photography, gained through traveling and working with some well known photographers, gives his courses a unique perspective.
a Creativelive Student
I love this course, John. It is one of my all time favorites. First of all I loved your effort scale. I knew as soon as you went through the scale that you are a guy that I want to listen to. To me, the effort part IS the fun part of photography. When you asked the question about one wish ... the first thing that came to my mind was that I wish I had more time for photography. I like the technology, but I do not wish for any special powers. To me, that would take the challenge away. Photography is wonderful because every subject challenges the photographer to get the angle right, the light right, the settings right ... I love that challenge. I think you do too, John, and that is why this course is so special. The attention you pay to every detail comes from the drive you have to meet the challenges with every thing you've got. That is why your class is so special. Your work ethic is exceptional. SandraNightski
a Creativelive Student
While delving more thoroughly into Nature and Landscape photography in a smaller format, John Greengo provides us with an amazing companion to his outstanding courses Fundamentals Of Digital Photography and Travel Photography. Here he gives us another necessary treatise to study before packing our gear and heading out in a car, a plane, a boat (or just for a long hike), and it’s as entertaining as the others. Thank you again John Greengo and Creative Live for these expert and brilliantly illustrated programs. I just hope you keep finding more subjects to photograph and provide the instructions for.