Create a Slideshow with Adobe Premiere Clip®
Lesson 34 from: Mobile Workflow with Adobe Creative CloudJared Platt
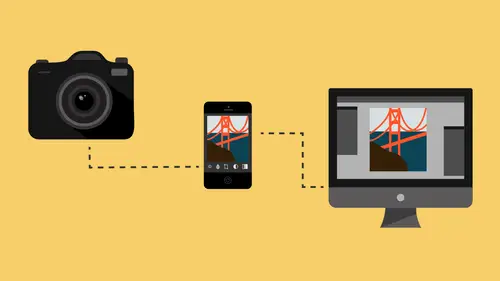
Create a Slideshow with Adobe Premiere Clip®
Lesson 34 from: Mobile Workflow with Adobe Creative CloudJared Platt
Lesson Info
34. Create a Slideshow with Adobe Premiere Clip®
Lessons
Class Introduction
08:53 2Camera Settings on Location
06:08 3Take Notes & Edit in Camera
05:58 4Mobile Gear Review
18:42 5Location Shooting Guidelines
03:51 6Adobe Creative Cloud® Mobile Framework Overview
24:46 7Adobe Creative Cloud® Tools
09:50 8Lightroom Mobile® Settings
16:26Use Collections for Your Photos
23:58 10Select & Organize in Lightroom Mobile®
15:23 11Edit in Lightroom Mobile®
23:30 12Dehaze Filters & HDR in Lightroom Mobile®
40:44 13Edit Images in Lightroom® on the Desktop
23:51 14Edit Images & Basic Searches in Lightroom® Web
13:14 15Create Panoramas in Lightroom®
07:01 16Edit Video in Lightroom®
12:00 17Questions on Lightroom® & Lightroom® Web
14:54 18Workflow: Working with Clients on Location
12:48 19The Mobile Master Workflow Part 1
23:08 20Workflow: Outsource for Professional Photographers
20:36 21The Mobile Master Workflow: Part 2
32:35 22Questions on Mobile Master Workflow
16:29 23Use Feedback & Share Collections in Lightroom Mobile®
03:39 24Comment & Favorite Images
14:18 25Share in Portfolio & BeHance
11:46 26Editing Tips In Lightroom®
18:08 27Workflow: Traveling Photographer Using Geotags
19:38 28Use Easy Trails For Non-Geo Locations
15:03 29Clean up, Organize & Archive your Mobile Photos
38:45 30Collect Images for Sharing
04:45 31Tell Stories with Animoto®
08:17 32Working With Adobe Sparks Post®
10:07 33Using Adobe Sparks Page®
15:38 34Create a Slideshow with Adobe Premiere Clip®
34:27Lesson Info
Create a Slideshow with Adobe Premiere Clip®
Now we wanna talk about something really cool, which is the Adobe Premiere Clip. Adobe Premiere Clip is a very, very useful tool. I love it. So, the first thing that I'm gonna do is I'm either gonna collect my images for a slideshow or a movie, or whatever, videos or whatever, I'm gonna choose 'em here in my iPad or I'm gonna choose 'em here over in Lightroom. Somewhere in Lightroom I am going to choose my images. So let's go back to the computer where we're going to look at a entire wedding. So this is the wedding that we had looked at earlier. You can see that I've selected all of my favorite images, and it looks like we have 66 photos, and we have a couple videos. I have three videos in the mix. And the reason I have the three videos is just to show you how to use video with your photos. In order to first use the videos I have to explain something. Photos, currently, and this is right now we are saying this in July of 2016. If you happen to be watching this in a recorded form later ...
than July of 2016, it is possible that sometime in the future video will also synchronize through the cloud, but right now it does not. Right now what happens is your photos synchronize to the cloud and then down to your device. And then same thing back up and down to the computer. But the videos do not. And I think that's just because videos can become too large to do that, and maybe that's why they're doin' it. But, sometime in the future I hope that that changes. So, when I make a collection full of images with videos and I synchronize them to the cloud, only the photos show up, the videos don't. So it becomes a problem because I wanna make a slideshow with video. And interestingly enough Spark, not Spark, but Adobe Premiere Clip allows for video. It allows you use video, but you just have to get it in in a different way. And I think mostly the expect you to be using it by taking pictures on your phone or using pictures on your phone and then doing a video on your phone and then putting it all together on your phone, and then sending it out. In fact I have friend who does that for a magazine called Luca, and he does a great job with it. He'll be on the photo shoot doing little videos and photos and stuff like that and then by the time the photo shoot is over he has actually sent out a video to Facebook of the photo shoot, and it's really well done. So he's really good at it. In fact I watch him all the time doin' it because he's so quick at it. But he uses Adobe Premiere Clip and that's it, but he does it all from his phone. Every photo and every video is taken on his phone and then he sends it out. So if you wanna him go to Luca Magazine's Facebook page and you'll see a bunch of these video posts, they're really cool. But, they don't synchronize that video. So what we need to do is we need to find a path to get those videos into the system. So I'm gonna show that path right now. So this is in preparation for showing you the actual process of making the slideshow. All right, so I go to my collection, which is already synchronized up to the cloud, but the videos have not been synchronized and so I'm gonna go into that collection and I'm gonna search, so if I go to Attribute and I click over here, so if I click that little button right there, that means I'm searching for movies. So if I click that video area, oh I've gotta unstar that. There, see there's the three videos that I want to go. So I'm gonna highlight all of those videos and I'm gonna go to the export dialog box, so that's this button right here. Or you can hit Shift + Command + E for export. Once you get into the export I'm going to actually choose to use a preset but I'll show you how to make a preset. So, if you wanna make a video the first thing you ought to do is choose where it's gonna go. So I'm gonna choose to put my video inside of my Creative Cloud Files. Remember, the Creative Cloud is a cloud, but it is not the mobile cloud. The mobile cloud is an independent cloud that has no space limitations for you. The Creative Cloud is your space where you have 20 gigabytes of space and you can put whatever you want up there until you fill it up. So just only put things there temporarily because it's kind of a temporary holding place. So, what I am gonna do is I have a folder called Video. Right there, see that? Video. And I've already done this pre so that we don't have to wait for it to upload, but you can see that I've exported images or videos into this here so these mp4s are videos and this is called cutler SS for slideshow. So anytime I put video that needs to go somewhere I'm gonna put inside of this Creative Cloud and when that green check tells you that it's in the cloud, it's ready for use, all right? So that's where I'm gonna put it. I'll put it in this video area here and hit Choose. I'll put it in a sub folder and I'll call it Cutler SS just like you see there, and then I'm not gonna rename it, I am going to include video files and I'm gonna choose to make them H.264. So H.264 means they are going to be compressed Vimeo type files that are good to play on YouTube and Vimeo and stuff like that. So H.264 is the right compression method and codec for making these videos. And then I'm gonna do max quality. So I don't wanna deteriorate the quality anymore than I have to. And then everything else is gonna be zero, copyright only is fine, and nothing else, like there is no other options. So then I'm gonna hit Export, which I'm not gonna do now because I've already done it. Okay, so once I've done that now all of these videos are also in a cloud. A different cloud; Adobe Creative Cloud, the Lightroom Mobile Cloud, right? So you have the videos here, you have your photos up here. So now we're gonna go over to our iPad because all that stuff is now in the cloud and in our iPad we can go to Adobe Clip, and inside of Adobe Clip, and let me make sure. Let me see if I have, I don't know if I have the ability to show you my touches inside of Clip. I don't think I do, unfortunately. Okay, so let me go through preferences really quickly. So we're inside of Adobe Clip. You are always gonna come in and you're gonna see a series of options here. These are all of your projects that you're working on. Over on the left-hand side just like with Lightroom if you click on the top left-hand corner it will take you to your preferences. You're gonna sign in, so you have to be signed in to your Adobe Cloud and then you can click on preferences, and inside of preferences there is bumpers and watermarks. A watermark, you can upload a PNG logo and it will watermark the entire video. So if you were creating a video but you wanted to have your logo on a corner or if you wanted to make sure someone didn't steal it because they hadn't paid you for it yet, or whatever. You can put that logo on there and it'll just over the top of the video. It's not attractive, it's your logo on top of a video, but it's just a big logo. So that's what the watermark is for. A bumper is something that you put at the end of your video so that it like has your logo come up, or it has another video of you saying hey, thanks for joining me, blah, blah, blah, blah, blah, sign off. So, those bumpers can be added in here. You just click on bumper and then you choose a custom bumper. Now watch my bumper. If I hit play it just goes like that. That's my bumper. It's just a motion logo. That's my bumper. Okay, and then you can also link a Dropbox. So if you have Dropbox you can link your Dropbox here so that you can bring stuff from your Dropbox as well. You'll be able to bring stuff from Lightroom, you'll be able to bring stuff from your Creative Cloud files and from Dropbox. Okay, so we're going to make a video. So, go to Lightroom and inside of Lightroom we're gonna choose the collection. So I am gonna go and look for my collection. So we are doing the MW, okay where did I see, there it is, right there. Okay, so I'm in the slideshow. This is what I'm going to be presenting right here. I think this is the right one. MJ, yup, right there, that's it, okay. But there's no video in it so what I'm gonna do is I'm gonna click on those three dots just right over here, I'm gonna click on those three dots and when I do it says create a video inside of Clip, do you see that one? So we're gonna choose that and it's, what it's doing is it's taking stuff out of the cloud and putting it into Clip. And that's why it happens so quickly because I didn't have to upload it and download it or whatever, 'cause you're in the cloud anyway. And now it's taking the stuff that it has in the cloud and it's applying it to this video clip. Now I want you to see how cool this is. First off, you can just use, Adobe has their own royalty free music, which is fine, and you can use that to your heart's content. But I have purchased licenses to use various pieces of music from Triple Scoop Music and Mindy Gledhill is one of those artists and she has a new project. So I'm gonna hit replace soundtrack and I'm gonna go to Artists and I'm going to go Hive Riot and then I'm gonna go to, what was that one? Yeah that's right, that's what it was. Kiss My Lips You Fool. And then I'm gonna hit Add. So right up here I'm gonna hit Add at the top right-hand corner and see how it shows me the waveform. And now I'm just gonna hit play and let's see what happens, right? (upbeat music) Okay, do you see how it's going too fast? So now I just have to hit this metronome at the bottom. When I click the metronome I can say I want the pace to be slow, okay? Now let's try it. (upbeat music) Great, right? It's perfect. Now I'm gonna up to the, I mean over to the, so you have the music selection area, you have the metronome and then you have the pictures themselves. So those are the three options you have. So what they do is they enter you into the most basic slideshow maker on the planet, right? And it does everything for you. So in this slideshow area I'm going to say I've have three videos that I wanna add so I'm gonna click on the place that I want the video to be added, which I think is gonna be right here. And I'm actually gonna delete the phone booth. So I just hit that little X button, and then I'm going to add the video right after this photo. So I click the plus button in the bottom right-hand corner and I click on Lightroom, and then once I'm in Lightroom I have to go find that photo. So I'm gonna click on View Collections and then I'm gonna look for that collection. Oh I'm sorry, whoops. Okay, it's not in Lightroom. The videos aren't in Lightroom. So I click plus and I go to Creative Cloud, 'cause remember I already have the photos, I'm telling you to remember this, I have to remember this. (audience laughing) So, the photos are not in Lightroom, they're in the Creative Cloud so I click on Creative Cloud and it takes me to all the folders inside of my Creative Cloud and if I go to the one that says video, and I go to Cutler slideshow, there's my videos. So this is the one I want to add right there, so I'm gonna open the file and it's just adding it to the movie right now and it's gonna put it right after that one. See that, it's right there. So then I'm gonna go down here to this one right there, or this one, no actually that one, and I'm gonna hit plus, Creative Cloud, go into the video and choose that video and Open. Okay, and one last one is gonna be at the very end here, and I'm gonna click on plus, Creative Cloud, to go my video and choose that video, Open. Now remember that yesterday or earlier in one of our earlier lessons we actually showed you how to edit videos inside of Lightroom. So we clipped these videos and the exported videos that we sent to Creative Cloud are the ones that were clipped. So we've chosen to clip those. All right, so we're adding those videos that have been cut to the slideshow. And it should be done momentarily. Any questions while we're waitin' for it to add those videos? Do you have a preference, the Adobe Clip or Animoto? Or do you think they have different purposes? They're different. So, I use Animoto a lot and I use Clip a lot. So Animoto, the reason Animoto is useful is that it does everything quickly for you and it's like, I mean, we have to fuss with this one. We're making something, but it makes it unique to you and it's very special and it's very specific and it's very timed. So this is like when I wanna do something that has really specific timing, and I wanna put a lot of blank space in it, and I wanna trick it out, and I wanna add a whole bunch of titles, and I wanna time it just right, and I want it, like when I wanna get really, really specific I'm gonna use Adobe Premiere Clip. If I wanna make a slideshow that will happen really fast and it'll look good but it's not tricked out and it's not really, really specific, then I'll use Animoto. So, it's like two different scenarios. One scenario is I need to make this fast and I need it to look good, but I don't need to have like very specific requirements. But when I wanna put video into it and time it just right, and Animoto can do video too, but you don't have as much control over Animoto's process. Whereas this you have ultimate control, and in fact you have so much ultimate control over this process that if you don't like what Clip has done perfectly, you can actually send it to Adobe Premiere Pro on your computer and finish it. So we don't have time to show that in this workshop, but what we're doing is we're providing, we're gonna teach you that in an additional video. So anybody who purchases the class will have an additional 20 minute lesson that teaches them how to take this video and move it into Premiere Pro and finish it out. So we're gonna show you the basic here, and then you have the ability to go there. So that's the difference. It's like complete control versus limited control but super fast and still good quality. Okay, so we have our videos into our system and now it's time to start tweaking. And so what I've done and rather then waiting for that video to come in, what I, oh shoot, hold on. What I did is I took the older slideshow that I had already kinda put together and I, so it's like cooking shows you already have one ready so that just in case this happens. So, but let me show you how you get from the simple editor, so once you've chosen your photos and your videos, then what you wanna do is go through and make sure they're in the right place. So you can grab an image here and drag it and put it in different places, and let go, and then it'll move the image around. So make sure that you're pretty much close at least, to the way you want the slideshow to be presented, and then hit done. Once you've done that, now you could hit share from here. And all you would have is a slideshow with video, whatever timing it's coming up with, great. 'Cause it's analyzing the audio. So it knows when to cut. But if you wanna have more control you're gonna click on the top right-hand corner there's a little film looking icon. If you click the film icon you convert to the freeform editor. When you click to freeform editor, now you have control over a lot of things. So you can still grab this and drag it around. So you can drag things in timeline. You can delete 'em still with that little X button. But you also, if you click on the actual photo, you have reference to the time of the video, so if I click on something and hit play, you can see it's gonna change now. (upbeat music) and then now, and then now. Now if that was too quick I can go back to this one and grab this and extend the amount of video that I have and now let's try it. (upbeat music) See that's too long, right? But I'm you know, for effect it's great. So, let's close this project and go to the one that I have waiting ready to go. So, I've gone through and timed this out. So I went through and hit play and I watched that timeline on every single one of these and if one was too short I extended it. If one was too long I shortened it. And all you have to do is grab on one, on the little handle on the right-hand side and increase the size of that clip. So you click on it, you grab onto that, and you move it. And the big dots represent the downbeats, the hard beats, and the little dots represent little beats within it, so little sub beats. So as long as you click to one of those little circles or big circles, it's gonna look right. It'll look more right if you hit the right one. But sometimes like you'll get an offbeat that's much better for the transition than the hard beat. So sometimes the downbeat's right, sometimes the offbeat's right, and you can just play it through and so I can just click on this and hit play. (upbeat music) See and even with a hard cut you don't even see 'em, they just flow through because they're hitting right at the right beats. And that's what that analytics of that waveform is doing for you. So now what we wanna do is we wanna add something. So there's a little plus button over on the right-hand bottom corner and when I click on it, it allows me to add videos, photos, whatever. So, if I wanted to add another video I could go to the Creative Cloud and add another video. But I can also add a title. So I'm gonna click on Title and I can add whatever title, and I'm just gonna call this Ripe, England, 'cause that's where the wedding was. So Ripe, England and hit Return. Oh, not Return, I'm just gonna go like this. So now Ripe, England is the title for the video, and notice that it put it right after the first slide. I wanna grab it and move it over so that it's the first slide. Okay, so now I've got that. You still have the ability to go to the music section and you can change the music. So you could choose a different version by hitting Replace which is right here below the Play. You could test the music, you can change the volume if it's too loud. So when we first started listening to it you could hear some distortion in it because it was just too loud for the system here, so I have it down to 50% of the total volume because of the system here. Usually 100%'s fine, but if you have a, you know, if something's clipping when it comes in you can always bring the sound down. You also have the ability to tell it to sync to the music or not. So if you just want it to go on a two second increment or something like that you can tell it not to sync to the music. You can also tell it to auto mix. Auto mix is when, we call it ducking. So like, the music is playing, but if you have a video that has sound and you wanna hear the sound, as soon as the video comes in the music will dip and allow the sound to become the primary. And then as soon as the sound on the video clips out it'll go back up to full strength. So it's just an automatic process. And remember all of the stuff that we're doing here can then be fine tuned inside of Premiere Pro. So if I'm just setting up the construct and every time I use Premiere Clip, this is not true, my friend Isaac, he uses Premiere Clip and he just does everything in Premiere Clip and sends it out, and he loves it. But me, when I'm using Premiere Clip, I'm using it because I want Premiere Pro to be super easy to use. And so this sets everything up and then I go into Premiere and tweak it. So I use Clip to set it up. It's like having an assistant who does all of the fussy work to get my slideshow setup and then I go into Premiere and just kinda do the final tweaks and make it perfect. Okay, so you also have Soundtrack Looping. So if you have too many photos it'll just start the song again, which I'm not a big fan of, so I would turn that off. Also, you have Audio Fade In and Audio Fade Out. So I don't want it to audio fade in but if it ends early I want it to audio fade out. Now the beauty of it is that if I go to Premiere Pro the audio is left in with the fade. So now I'll be able to tweak it. And we'll show you how to do that in the video that we'll do for everybody that purchases the course, you'll have access to a 20 minute video that allows you to see how we do all that tweaking inside of Premiere. And we keep it real basic for people who just don't know anything about Premiere, we'll keep it real basic for ya. Okay, so those are your options for sound, but you also have this little gearbox in the top right corner that you can click on that gives you other things like fade from black and fade out to black. So at the very end if you want it to fade out to black go ahead and click on that. Now I'm gonna have it clip out to my logo that's gonna come in. So we're gonna do that on our own. And you can also have it crossfade to clips instead of the cuts only version that we're looking at. You can have it crossfade so it's always crossfading between your images. But I don't really like the way that looks, I love a hard cut or I want it to dip to black and then come back out. So, I'm gonna say no to that. And then of course you have the option to turn on and off the video bumpers and watermarks as well. Okay, so now we've got our slideshow and we're gonna scan through it and see if everything looks okay. And at the very end I want you to see that number one, I've given credit to Hive Riot because they're the ones that wrote the music and are performing the music, and I'm also giving credit to Triple Scoop Music because they're the ones I licensed the music through. This is very important if you're going to be using music that is not your own or is not something that Adobe gave you permission to use. Make sure that A, you purchase the right or got permission from the artist to do because otherwise you're just stealing, and secondly notate it for two reasons, number one give credit where credit is due and number two, that way if you put it on YouTube or if you put it on Vimeo and they watch it they'll realize oh, this person has a license 'cause he's actually gotten the license from Triple Scoop Music, and if they know that they'll be less likely to block it from YouTube. And if they do block it from YouTube, if you're buying your music through Triple Scoop, Triple Scoop will go to bat and within a day they get it back up. So, all right. And then after that I've placed a video in of my, you can see right here in this bottom corner, I just in order to add that video bumper I just click on the plus button again, go to Creative Cloud and inside of the Creative Cloud I have a folder called Platt Logos and inside of there I have a Logos 2016, and see those two videos right there at the top left corner? So I have a white one and a gray one, and both of 'em are video bumpers that show my logo kinda come in in white or gray. I like the gray one better, so I click on it and add it, and that's how I get that in there. All right? So let's watch it, shall we? So I'm gonna go to the beginning, click on the beginning and we're just gonna click on this, see those two arrows? Click on those two arrows and enjoy. (upbeat music) ♪ Why do you drive slowly ♪ ♪ In front of my house ♪ ♪ Shaking ♪ ♪ Well come on inside ♪ ♪ I will show you how ♪ ♪ I'm feeling ♪ ♪ In the corner of the bedroom ♪ ♪ On the leather in the backseat ♪ ♪ In the light of a full moon ♪ ♪ Kiss my lips, you fool ♪ ♪ In the frame of your doorway ♪ ♪ In the middle of the dance floor ♪ ♪ I don't want to ask you anymore ♪ ♪ Kiss my lips, you fool ♪ ♪ The sound of your voice ♪ ♪ Breaking ♪ ♪ Over the phone ♪ ♪ Aching ♪ ♪ Don't be afraid ♪ ♪ Of this magic we keep ♪ ♪ Making ♪ ♪ In the corner of the bedroom ♪ ♪ On the leather in the backseat ♪ ♪ In the light of a full moon ♪ ♪ Kiss my lips, you fool ♪ ♪ In the frame of your doorway ♪ ♪ In the middle of the dance floor ♪ ♪ I don't want to ask you anymore ♪ ♪ Kiss my lips, you fool ♪ ♪ Talk a little ♪ ♪ Talk a little softer ♪ ♪ Stay a little ♪ ♪ Stay a little longer ♪ ♪ Shadows in the ♪ ♪ Shadows in the lamp light ♪ ♪ While we are dancing ♪ ♪ In the dead of night ♪ ♪ In the corner ♪ So, that was pretty good, right? Yeah. (audience applauding) And it didn't take us much time to have that much control over our slideshow, and once we're done with that if we want to, it's very easy for us to simply click the share button and we can send it, you see that option to send to Premiere Pro? I can send it to Premiere Pro and it will literally give us all of the options that Premiere Pro has and I can as tricky as I want to with it. And so I, and I often do do a lot more to that, and we'll show that in the bonus video that comes with the class when you purchase it. So, and we'll show you how to do it in a very basic way, but do some very powerful stuff to it. But in the meantime though, if you would rather just share it, you can always save this video to your camera roll or you can publish and share it out to social media, or save it to Dropboxes, share it on Twitter, any of those options are available to you. So, that is Clip. And Clip can be a very, very valuable asset for you in making and sharing stories. And that story is very near and dear to my heart because they are some of my favorite clients, and I've worked with them for a long time and unfortunately the husband, two years after their wedding died from cancer complications. And so the wife and their one year old daughter are left here. And so it's been a tough six months for them. But, super great people, so much fun to be around, and so a story like that is really important. And so it really matters the music you choose, and the photos you choose, and we're making very important memories for people, and I, you know you never know how important those photos are gonna be until sometime down the road when that person is no longer available. And so it's an honor as a photographer to be involved in people's lives and to tell stories. And the real question is how, how possible is it for you to be able to be ever present and quickly share images with people, and when you're inspired to actually create because the things that you're creating are super important. They're not just pictures, they're not just videos, and so hopefully as creative people, you find a way to clear out the trappings of everyday life and the difficulties of everyday life, and things like this I know they're just products and I know they're just programs, but in the end they enable you to do things that help people and change lives. It's not as important as an EKG, but it has an emotional effect on people's lives to have the capabilities to do a better job at what you're doing and to do it whenever you have the time or the inclination to be creative. And so with that, I leave you with Lightroom Mobile at your disposal to do whatever you want, whenever you want, because Adobe has been it possible for you to really do things anywhere and everywhere and share your images anywhere and everywhere. And I am constantly amazed at the abilities that we have now. I grew up in the darkroom era. It took me five hours to come up with two or three really good prints. All day. And now I can quickly in about an hour or two I can select and edit a wedding, and then I can share it with the client within four hours of having sat down to edit it and I can do most of it from a line at the grocery store. That's amazing. I would never set foot in a darkroom every again. (audience laughing) Ever.
Class Materials
Free Download
Bonus Materials with Purchase
Ratings and Reviews
JIll C.
I was able to participate in the live taping of this course in the CL San Francisco studios, and it was a great experience. Jared is an enthusiastic, entertaining and very knowledgeable trainer as well as an accomplished photographer. He not only understood every aspect of the Lightroom mobile technology, but was able to advise us on how to adapt it to our needs and develop an efficient workflow to leverage the capabilities of this emerging technology. There are complexities of the interface between your mobile devices, the LR Mobile Cloud, and your primary computer that would be challenging to figure out on your own, and I highly recommend this course as a way to provide a clear picture and help you develop a path to adopt this very useful technology. Whether you're a high volume professional photographer or an avid hobbyist, you will find ways to incorporate LR mobile into your workflow as a result of this very informative course.
Tracey Lee
Great course for those who are new to Adobe mobile products or for those who want to understand how to implement an organised and efficient Adobe Mobile Lightroom Workflow. I was in the live audience and over two days Jared covers everything from beginner to advanced in a logical sequence with clear demonstrations, excellent supporting visual materials, detailed Q and A and a fun and engaging delivery. I'm really excited about what is possible! Definitely worth buying and watching from start to finish.
Rick
This class is ESSENTIAL for anyone in photography. Jared's teaching style, humor and sheer knowledge have me so excited about everything I can do with Lightroom Mobile and all the FREE Adobe CC for products that go along with it. I am currently reorganizing my entire LR catalog in order to utilize these tools for my past, current and future work. I cannot emphasize enough the amazing value of this class. I was lucky enough to be in the audience for this class and had such a fun time. So many aha moments. He really knows how to make a seemingly complex subject simple and easy to use.