Lesson Info
8. Selective Edit Breakdown Demo
Lessons
Class Introduction
06:25 2Capturing for Day for Night
02:36 3Selective Edit Intro
03:04 4Selective Edit Tool Functions Part 2
02:58 5Selective Edit Tool Functions Part 3
03:45 6Sunset Lake Demo
02:58 7Expose for Highlights
02:13 8Selective Edit Breakdown Demo
05:48Looking at the Lightroom Desktop Interface
03:02 10Selective Edit Demo NYC
04:41 11Adding Lighting Effects with 3rd Party Applications
09:35 12Lens Distort 3rd Party Application
02:31 13Lens Distort Demo
05:00 14Day for Night on Water Scene
04:15 15When to Use Photoshop
04:15 16Using Depth Capture
01:26 17Wrap Up
00:50Lesson Info
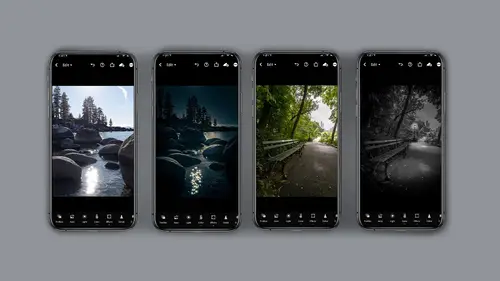
Selective Edit Breakdown Demo
Let's take another look at and edit. That's a little more complicated. So it's going to require being on the light room mobile ecosystem and then the light room desktop system so that the masking can be done a little more precisely. I'm going to show you this process in a slightly different way. First step is to get a generic darkening overall, I do that by selecting the light module, pulling the exposure down slightly and pulling the highlights down quite a bit again, this is in the light module on the first mask which is done with a paintbrush. I'm going to use the light to darken the exposure and darken the highlights down. Keep in mind this mass can be re edited at any time. The next edit is going to be this left hand side and once again, I'm going to use the light module. I'm going to bring the exposure down and the highlights down. But this time with a different opacity on this next edit, I wanted to change the upper right hand corner, there was a window that I really wanted to d...
arken down again. I used the light module but this time I only brought down the exposure in that one area and please note all of these masks have been made with the paintbrush and you can see the diamonds which show all the edits that are there. The one I'm currently on the Diamond will turn blue. Next edit is something a little different. I'd like to lighten the face so I'm always going to be on the light panel using a paintbrush. But this time I'm going to bump the highlights up because I really like the female to be the subject of the story so far, none of these masks have been perfect. I'm going to clean them up on light room desktop. Again, the snacks. Little edit is just to lighten up the phone screen and again a paint brush with the light module upping the exposure and the highlight to get more of a dramatic change now for this little tiny edit, I thought it would be nice if the light from the phone was reflecting slightly onto the blanket. So if you notice again, just light paintbrush and I've changed the exposure and really bump the highlights. At this point we have a pretty decent starting edit. As you can see the image has gotten darker. The subject has been highlighted. The only issue we really have is tightening up the mass. Let's do that on the desktop version. All right now we're in the desktop version of light room. This is not Light room classic. This is light room and you'll see the image that we worked on on the phone and over to the right, you'll see that's for a radio gradient. A linear gradient, which you see no pings or diamonds or circles or anything. And here you have the brush mass that we made in selective at it. Now notice it doesn't quite work the same in that there's no diamonds. These are all and they're all blue, But that's okay. I think we can live with it. And when you open it, chances are it's gonna look like this. Here's at a brush, there's the brush, there's eraser. This little sign here will show you the size 11. And then if you hit the little delta, it'll show you feather flow, which is opacity really. Um for my purposes and density. Okay, so I'm gonna close that for just a second. I go back, I click on the brush often so that I can get these dots back up. That's just my way. Listen, some people may ask, why don't you work on this in Photoshop? And it's because I'd rather just keep it native in light room. But if I wanted to, I could click here to the three dots on the right and click edit in Photoshop. Now. That option is only available on a desktop version. Or if you're working on light room on an ipad and you have Photoshop on that ipad as well. Okay, so let's see what we want to do. The idea here is I'd like to refine these mass because on the phone it was kind of hard to do it precisely. So first thing I'm gonna do is I'm going to use the bracket. I can make my brush smaller. I'm going to add to my highlight. Just have to remember what it was. This was the highlight on the face. And then I'm going to click up here to the right and click on the eraser and a race it where I don't want that to be. And again the bracket the greater than bracket will Let me scroll up to make a bigger brush if that's what I'd like, God, I love doing this because it's so big and fat and beautiful, I'm clicking back on my brush and back again. That is just my way of doing it. You can click on the big one here now. This one needs some serious help. So you'll notice I missed a bunch of areas on the top and around here. So I'm just gonna make my brush bigger. I could check my opacity and flow like let's say I really wanted to be. Oh paic here and then I think I'm gonna bring the flow down and I'm just gonna click a little more around this hat. Now you have to remember what this function did. This was a darkening because I want to darken the corner so I'm just gonna paint over the face now. I'm gonna go back to the eraser and make my make my brush a little smaller by doing the less than and then I can go in and I can zoom in as close as I need to and I'm on my giant monitor on my desktop unit and what I like about this you guys is you can be out in the field and do some pretty fun quick edits. But then when you need some more precision you just come back to the studio and you can go back and you know, clean up your piece as much as you need to. I want to clean up that around the face just a little more here so just a little more, add a little more density. In fact, I might go around the phone a little bit. Um I want to reiterate, this is non destructive editing so I can come back and forth as needed. Oh, I love this. I love doing this so much. It's so relaxing. Okay, I'm gonna say, I think that looks pretty decent. Yeah, I'm pretty happy with that. So as you can see, I'm on the desktop version of light room. But if I come back to my phone, you'll see it pop up with all these changes right here.
Class Materials
Bonus Materials with Purchase
Ratings and Reviews
nancy brindisi
I was so excited to be able to take this last course in the Mobile Photography series and as usual Lisa Carney did not disappoint! I just love her teaching style. She is relaxed, friendly and down to earth. She relates her techniques and processes in plain non techy talk and demonstrates it so you can follow along and learn. I have been a user of Photoshop and Lightroom Classic and now LR Mobile is my go to for most of my post processing work. I also learned about some great new apps for my iPhone and who knew you can take pictures through LR Mobile! Thank you Lisa for putting together this mobile series!
Kenny Felix
Solid start to my Wednesday, Thank you for great job hosting Kate Dessa. Lisa Carney always gives everything she has in all her tutorials/webinars I have experienced. She continues to "give" and "share" her knowledge and true passion for her craft with everyone, thank you both for this mornings kickoff!
david gillespie
Love Lisa's energy and excitement. The course is well laid out and easy to follow. I recommend this course.
Student Work
Related Classes
Mobile Photography