Processing Black and White Part 5 - Effects
Lesson 8 from: Mobile Photography: Creating Black & White Images Using Lightroom MobileLisa Carney
Processing Black and White Part 5 - Effects
Lesson 8 from: Mobile Photography: Creating Black & White Images Using Lightroom MobileLisa Carney
Lesson Info
8. Processing Black and White Part 5 - Effects
Lessons
Introduction
02:44 2What Makes a Good Black and White Photo?
05:49 3Capturing in Black and White with Lightroom Mobile
06:49 4Processing Black and White Part 1 - Profiles
10:09 5Processing Black and White Part 2 - Color Filter Profiles
01:50 6Processing Black and White Part 3 - Processing Color
03:49 7Processing Black and White Part 4 - Processing Light
05:24 8Processing Black and White Part 5 - Effects
04:54Lesson Info
Processing Black and White Part 5 - Effects
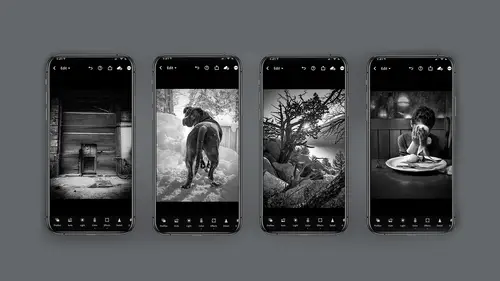
Let's take a look at effects the effects module. And here's where you're going to want to get your texture, your clarity, your edge vignette ng and your grain. It's all pretty cool. So again, the effects panel will get you texture and clarity, which will kind of increase your sharpness without using the sharpness panel de haze, which will clarify your image a bit. And the vignette. Oh, I love the vignette. It gives you that kind of rounded dark edges that DSLR lenses, or four by five lenses will give you and then green. So, look, you can get some pretty good, sharp looking effects added to your black and white conversion, and it just helps, like Look at this. The vignette helps put your I pull your eye to the center. It was kind of nice, and we're going to look at adding detail and the netting and grain, and I think this particular image really demonstrates this pretty well. So again, first order of business is you need to make your image black and white. Here's why I say this when you...
're doing texture and tone. It helps that the images, already black and white, then you can really see through the color. So again profile. You could use that. You can go to the color module and make it black and white. Or you can use presets we're gonna cover later on in the course. And then when we're in the texture panel or excuse me, the effects panel, I kind of think of it as a texture panel myself. We're gonna look at the texture slider. We're gonna look at Clarity and D. Hayes and one of the things I want to call attention to. Whenever you use the D Hey slider, it tends to block up your blacks. So more than likely, you're gonna need to pop on over to your light panel and pop your shadows a bit. This is just something to watch out for and again vignette and on the vignette controls there's been yet. And then there's three other items underneath that the midpoint feather and roundness, which controls your vignette. So don't forget that. And then, of course, down below, that is your grain. So let's get started. So let's take a look at the effects slider. So right now, I'd like to consider adding texture, But remember what I said before. It's kind of better if you start out with black and white image. So I'm gonna click on the color panel, click on black and white and then go back to effects. And now here are the effects slider I can. I usually start with clarity. I find that clarity is a little harder or more intense than texture. And then I can slide the texture slider. I'm gonna zoom in a little just you can see what's going on and then if I zoom out and if I do a little D. Hayes Now, I mentioned the haze is pretty awesome, but it often will make your blacks kind of block up a bit. So I will slide over to my light panel and just lighten up my shadows a little bit, maybe a lot of it, and then go back to my effects panel and see if I like the texture that I'm getting. And I frankly, I kind of do like the texture I have on here. So let me talk to you about the vignette ng I'm gonna slide up and vignette in You can either white vignette or dark vignette and I'm going to slide this dark vignette. And then there's the midpoint. You know what? Just to show you what the vignette does, I'm going to do it really hard and I'm gonna put the midpoint in or out. Do you see what it's doing there and then the feather in or out? So feather 100 is really soft. Feather hard is really, well, hard roundness You can make it rounder or more Ovaltine. In fact, do you guys know you can actually make a frame by doing this? You can make little black and white frames on your image. It's kind of kind of fun. Anyway, as a general rule, I tend to leave mine pretty soft Somewhere around there, I just wanted to show you what it was doing. So let's get to the grain because keep in mind, the effects handle sharpening in the sense of clarity and texture and then, um, the vignette ng around the outside and then, of course, grain. So to do the grain, I like to zoom up close and personal, and you can have a little bit of grain or a lot of grain. Now I'm gonna tell you on the phone for this demo. This is gonna be a little hard for you to see, but you may have to take my word for it. So I'm gonna slide the size of the grain down. This will make a finer grain. Remember? I talked about panics versus T. Max. This is the kind of thing you want to look at. There's a roughness, and again, I'm going to zoom up close and personal so you can see that Make it smaller. And I do want to be really clear on a mobile device. Look, y'all, this is hard to see, but if you take this in the light room ecosystem to your desktop, you can clearly see it. And the grain you very much can see when you print. So take a look at that effects panel and come up with some magic
Class Materials
Bonus Materials with Purchase
Ratings and Reviews
Gretchen Shepherd
This is one of the BEST classes on Creative Live, and I have a Creators Pass and have taken tons! As a retired teacher I really appreciated Lisa's teaching style and the clear use of tech aides (circle, highlights etc) to lead me through the steps used on LR mobile. Her clear descriptions make the class easy to follow. I have also used LR mobile for several years and learned at least 3 new things in the first few minutes! In addition Lisa's in-depth knowledge of BNW and how to apply the principles of BNW to color conversions was wonderful. I have shot BNW for years in film and digital and also taught darkroom at the college level (ages ago) and Lisa's teaching and skills rank up there with the best. I learned even more the second time through and will come back to this class frequently and grab any others that Lisa Carney teaches. Highly recommend!
nancy brindisi
I have always loved black and white photography and so many of the other courses I have taken on Creative Live touch on black and white but it is never as in-depth as I would like it so I was very excited to see this course offered in Lisa's mobile series. I love how explains the black and white presets you can shoot pictures through in the LR camera, the profiles and then the presets in post. Her knowledge of light and how color adjustments even on a B&W photo affect how that light is shown is very informative. This course finally gave me more detailed knowledge and inspiration to do so much more with my B&W pictures. Thank you for another great class!
Deanna Gordon
I loved the information, the tips and tricks and the delivery. I cant wait to do some more of her classes.
Student Work
Related Classes
Mobile Photography